 Mike
Mike
Much like Frankenstein's Monster, our little monster now needed a brain!
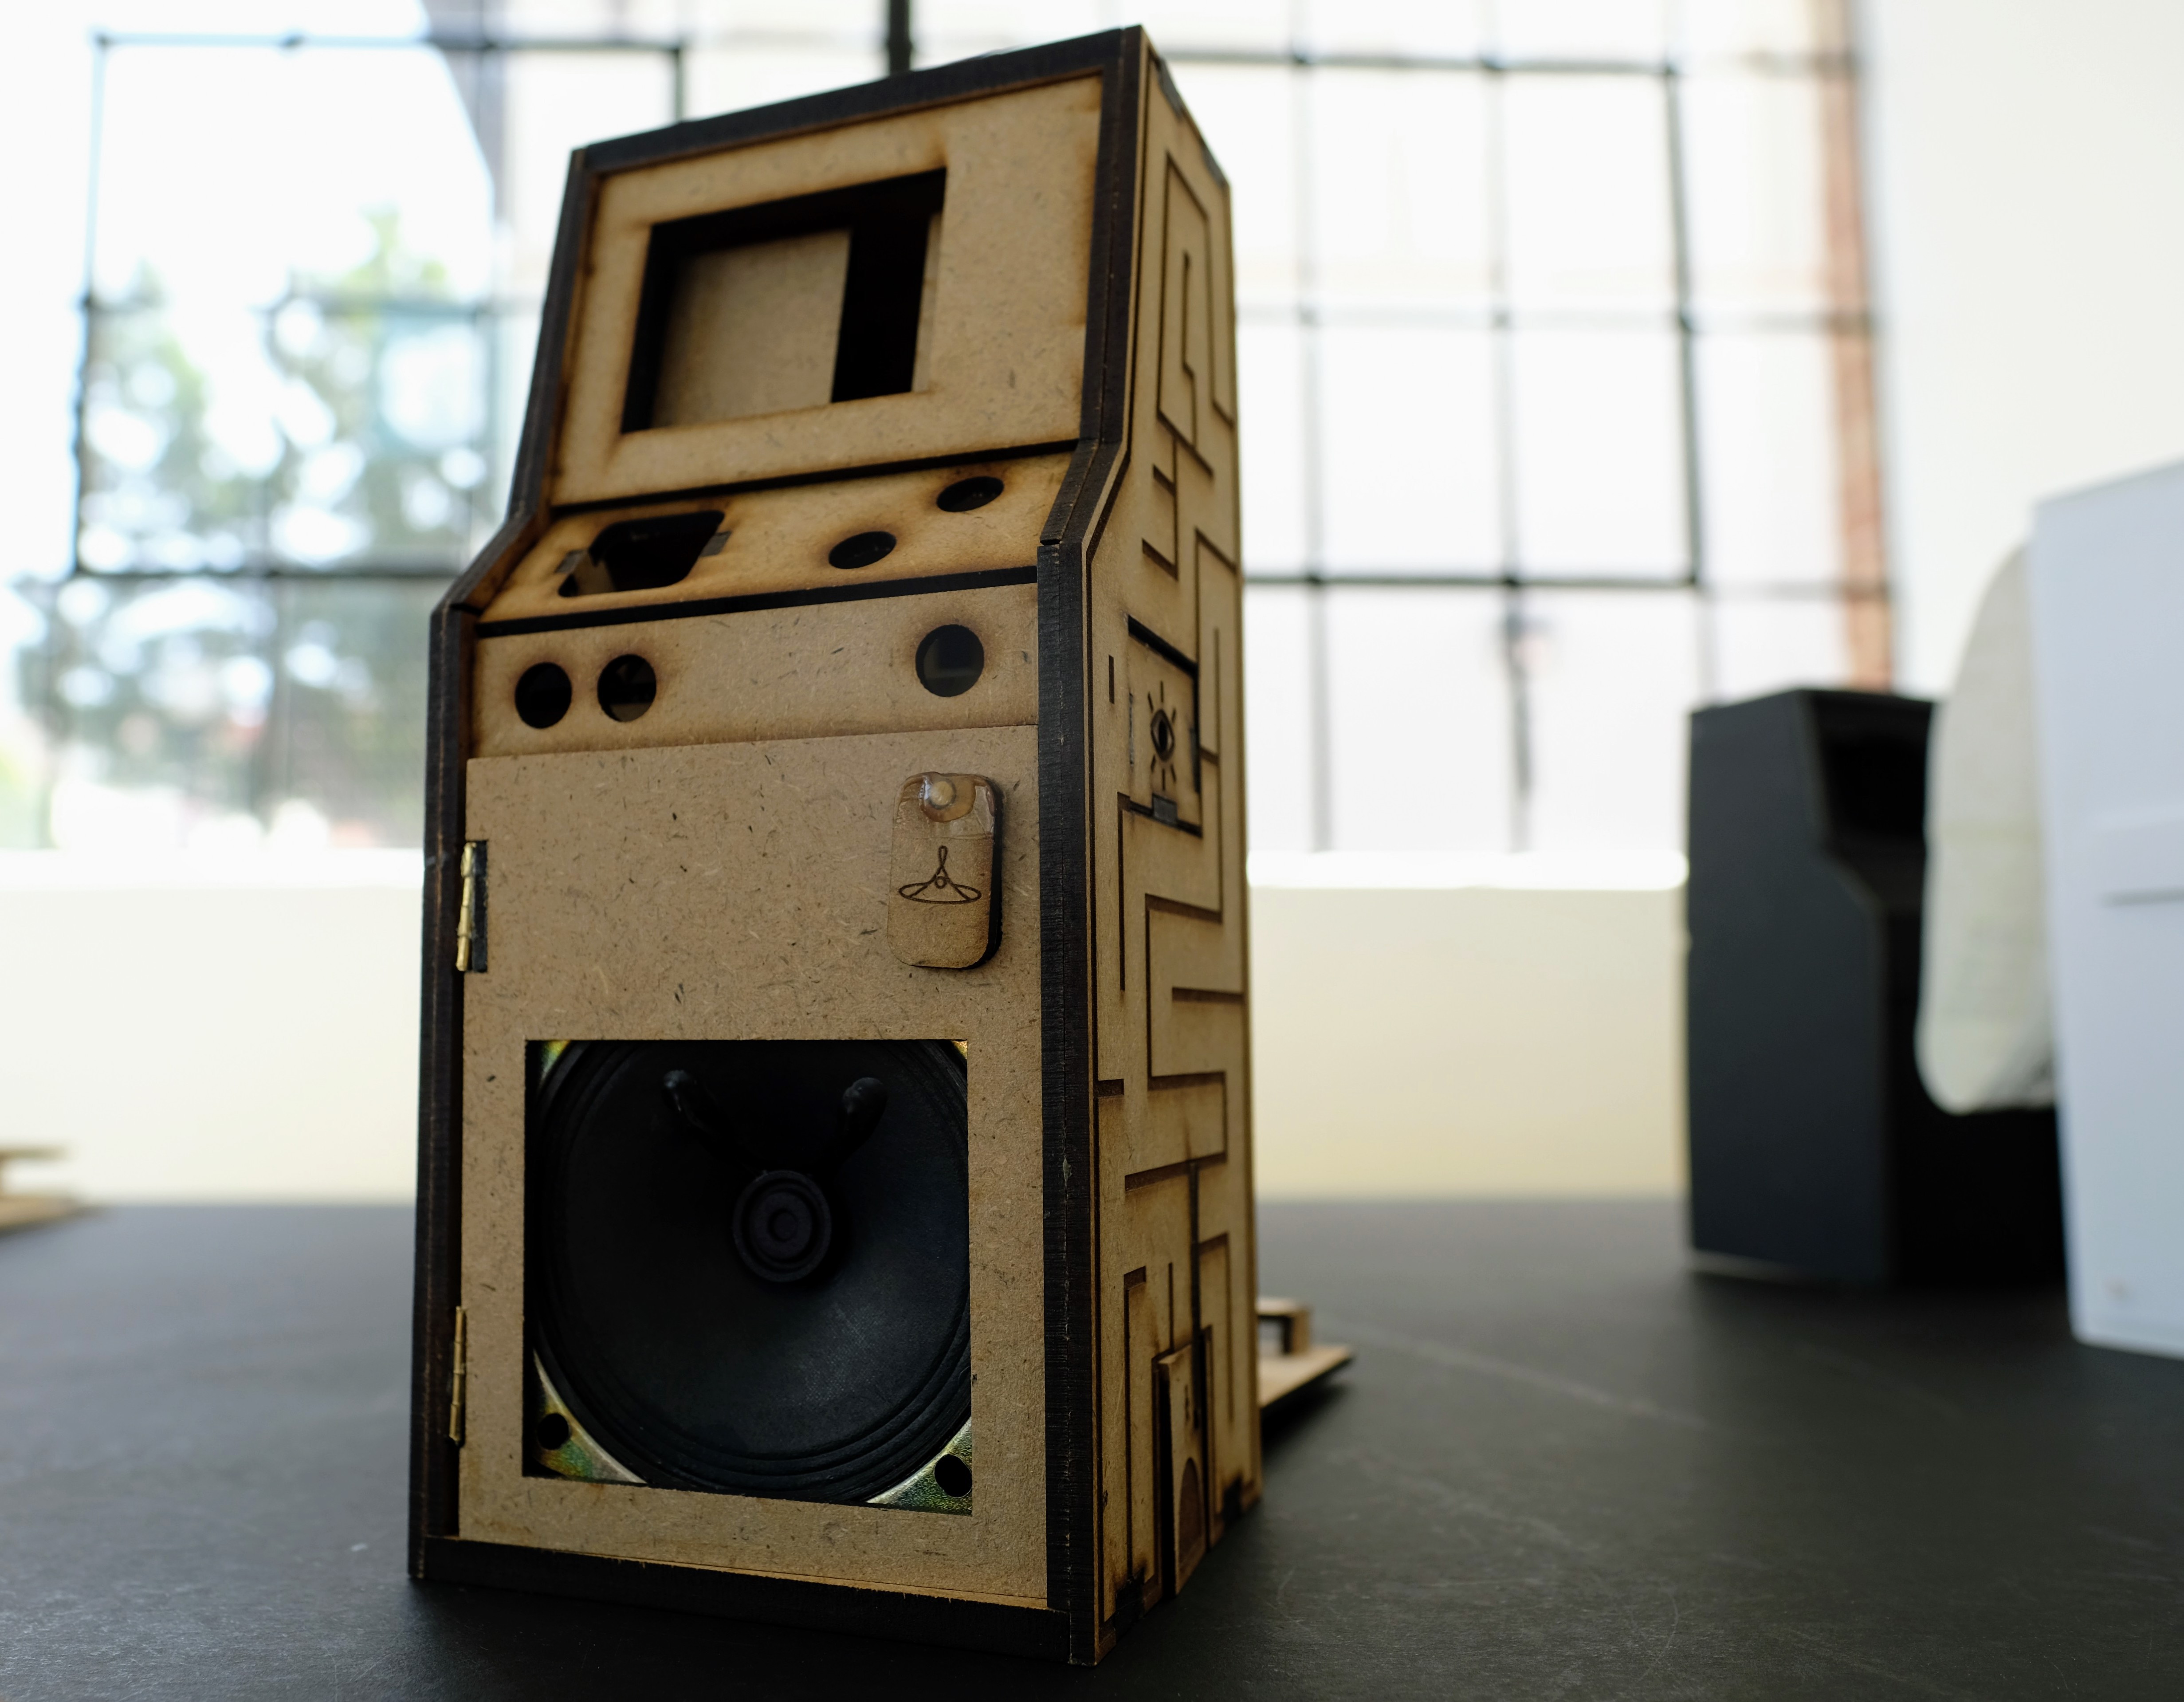
With the Mechanical systems more or less worked out and integrated into a near final cabinet prototype made out of MDF, I now needed to connect and put the cabinet's targeted electronic components together to ensure they all worked in unison as proposed to prove to Dan we deserved to stay in the DesignLab! Thankfully Bernie and Jean had been simultaneously working on this front while I continued to plug away at the cabinet's body! Using a RPi 3 and RPi Zero W as our test platforms the guys set about getting all of the components working together.
First things first we needed to get I/O working on a RPi running PICO-8. Using a Adafruit Arcade Bonnet and RPi 3, Bernie wired it all up and got it all working together.
Bernie then got the controls connected to the the RPi 3 to control the servo and LED using PICO-8's ability to write out to the RPi's I/O!
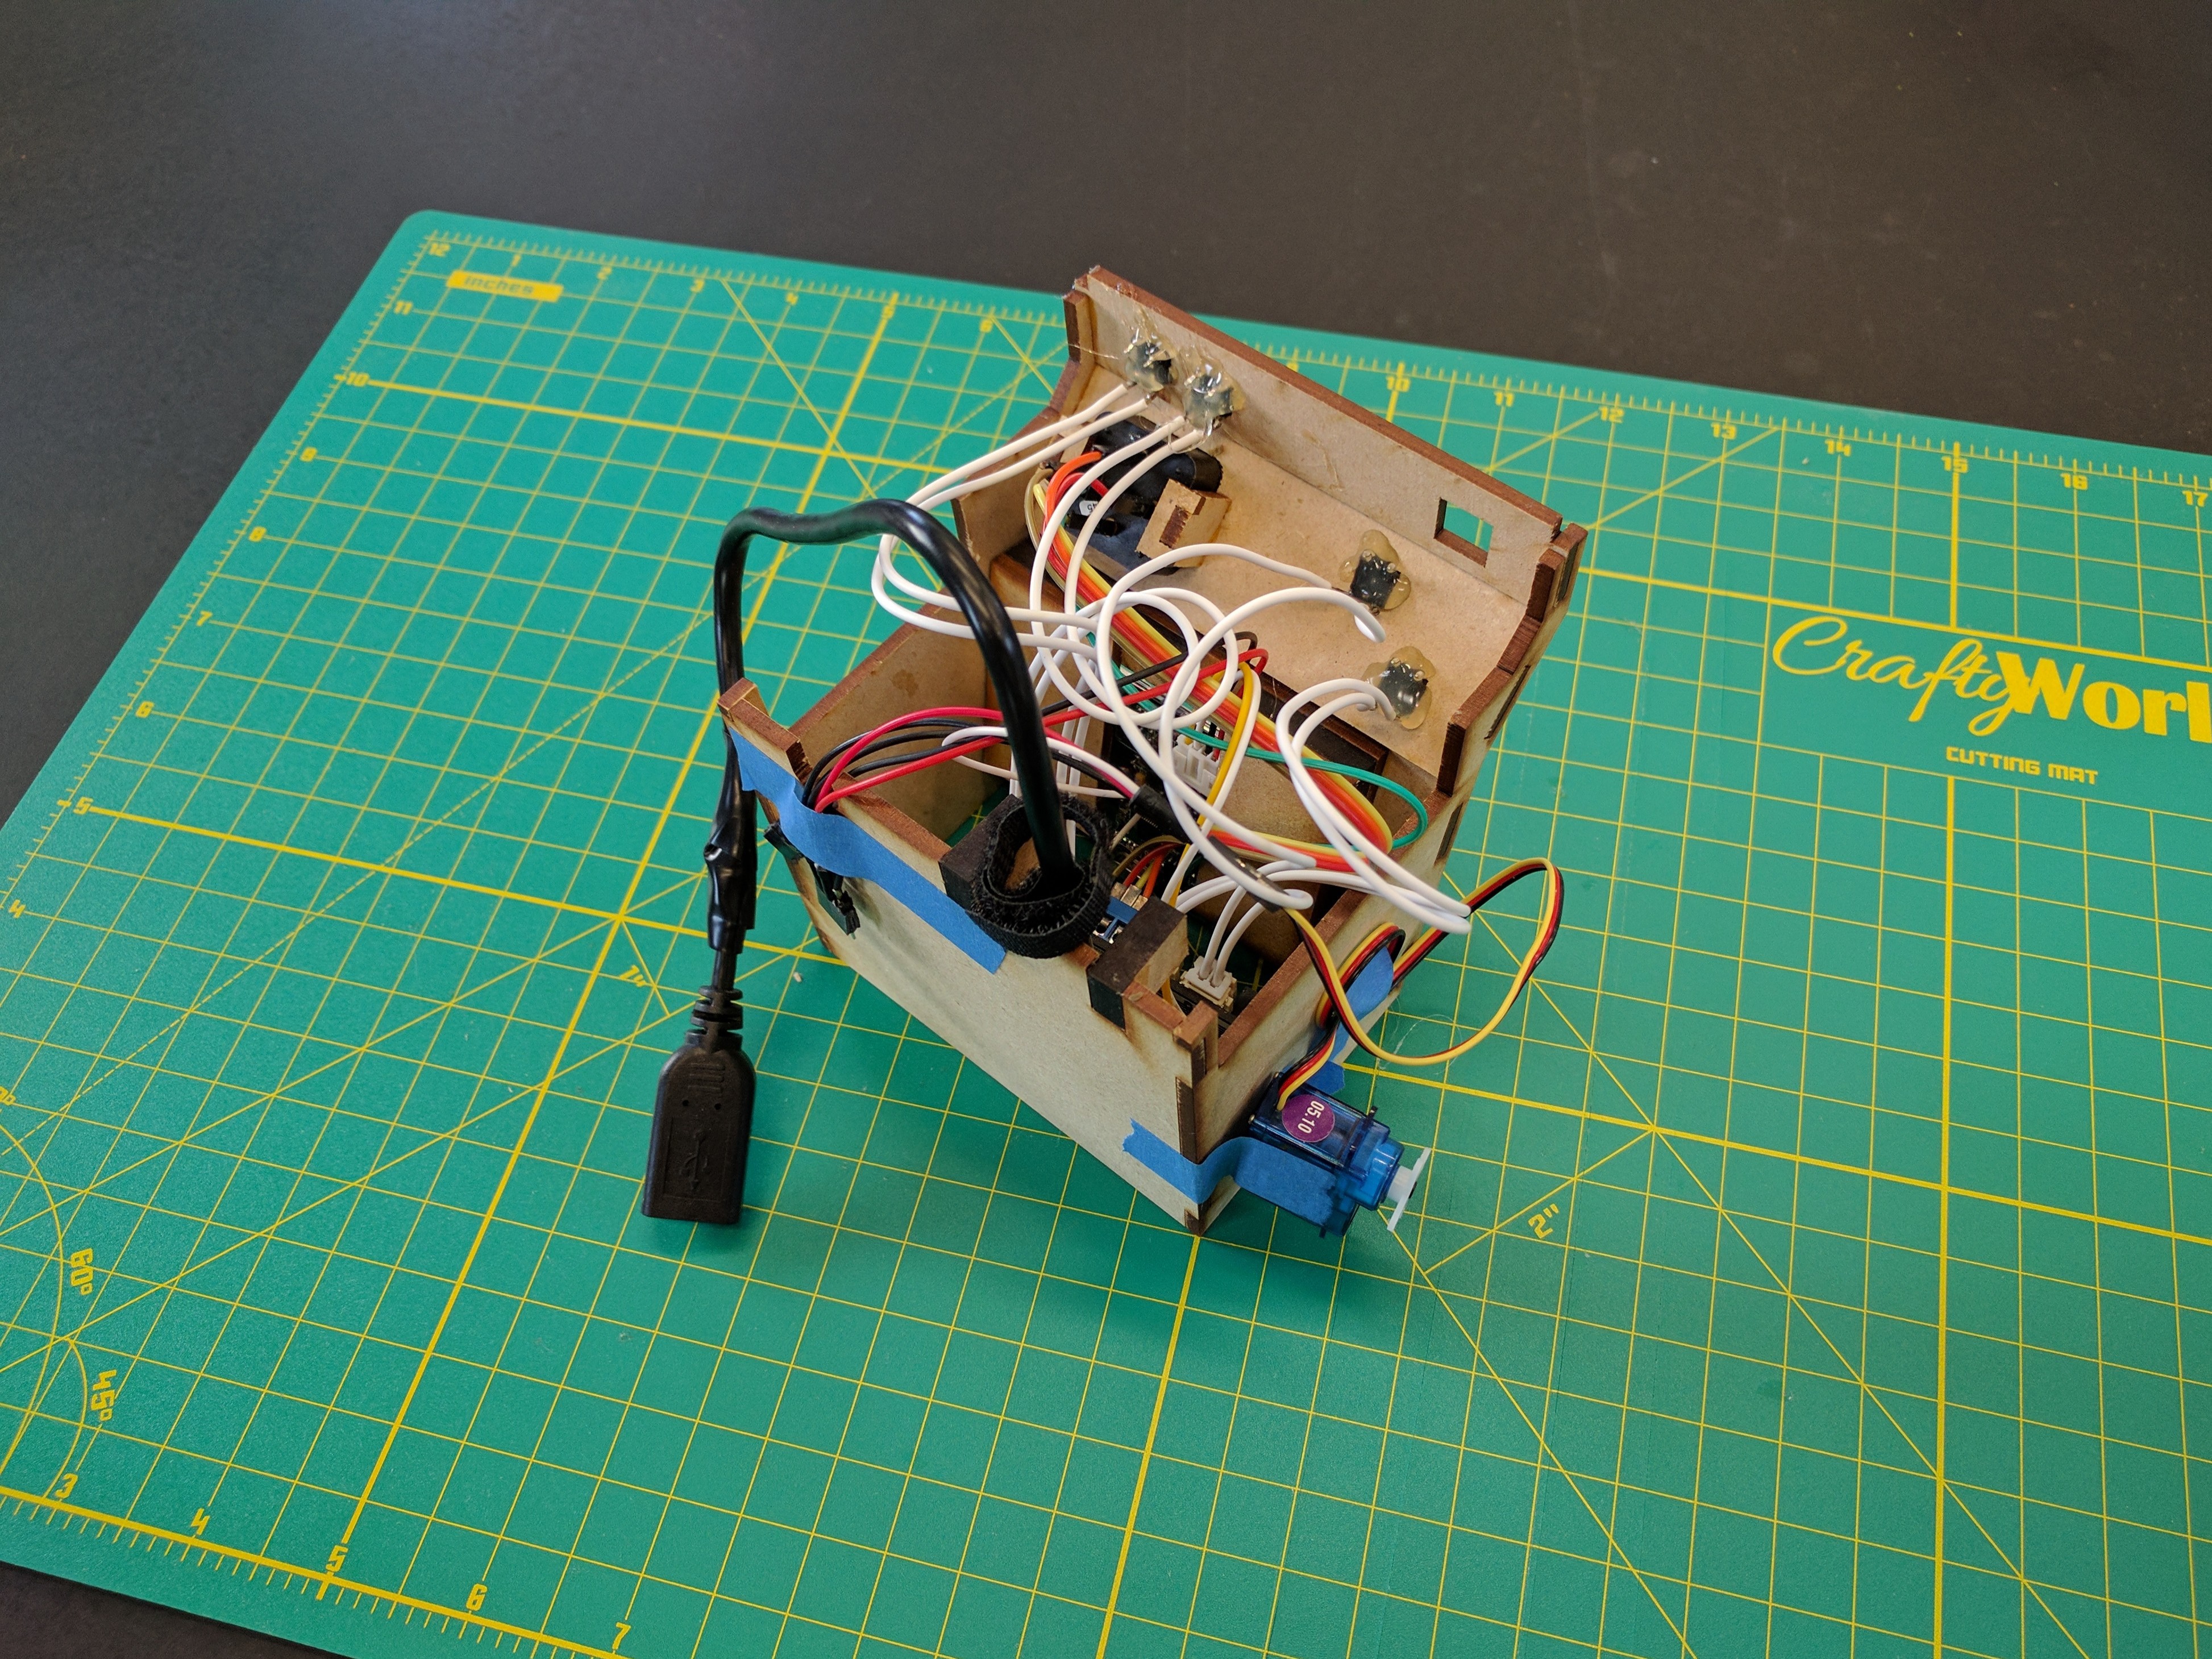
Next Jean took the components from the breadboarded RPi 3 Bernie had been working on (above), and migrated it all over to a Raspberry Pi Zero W, incorporating it all into the "hat" I'd made for the V7 MDF prototype (pictured below).

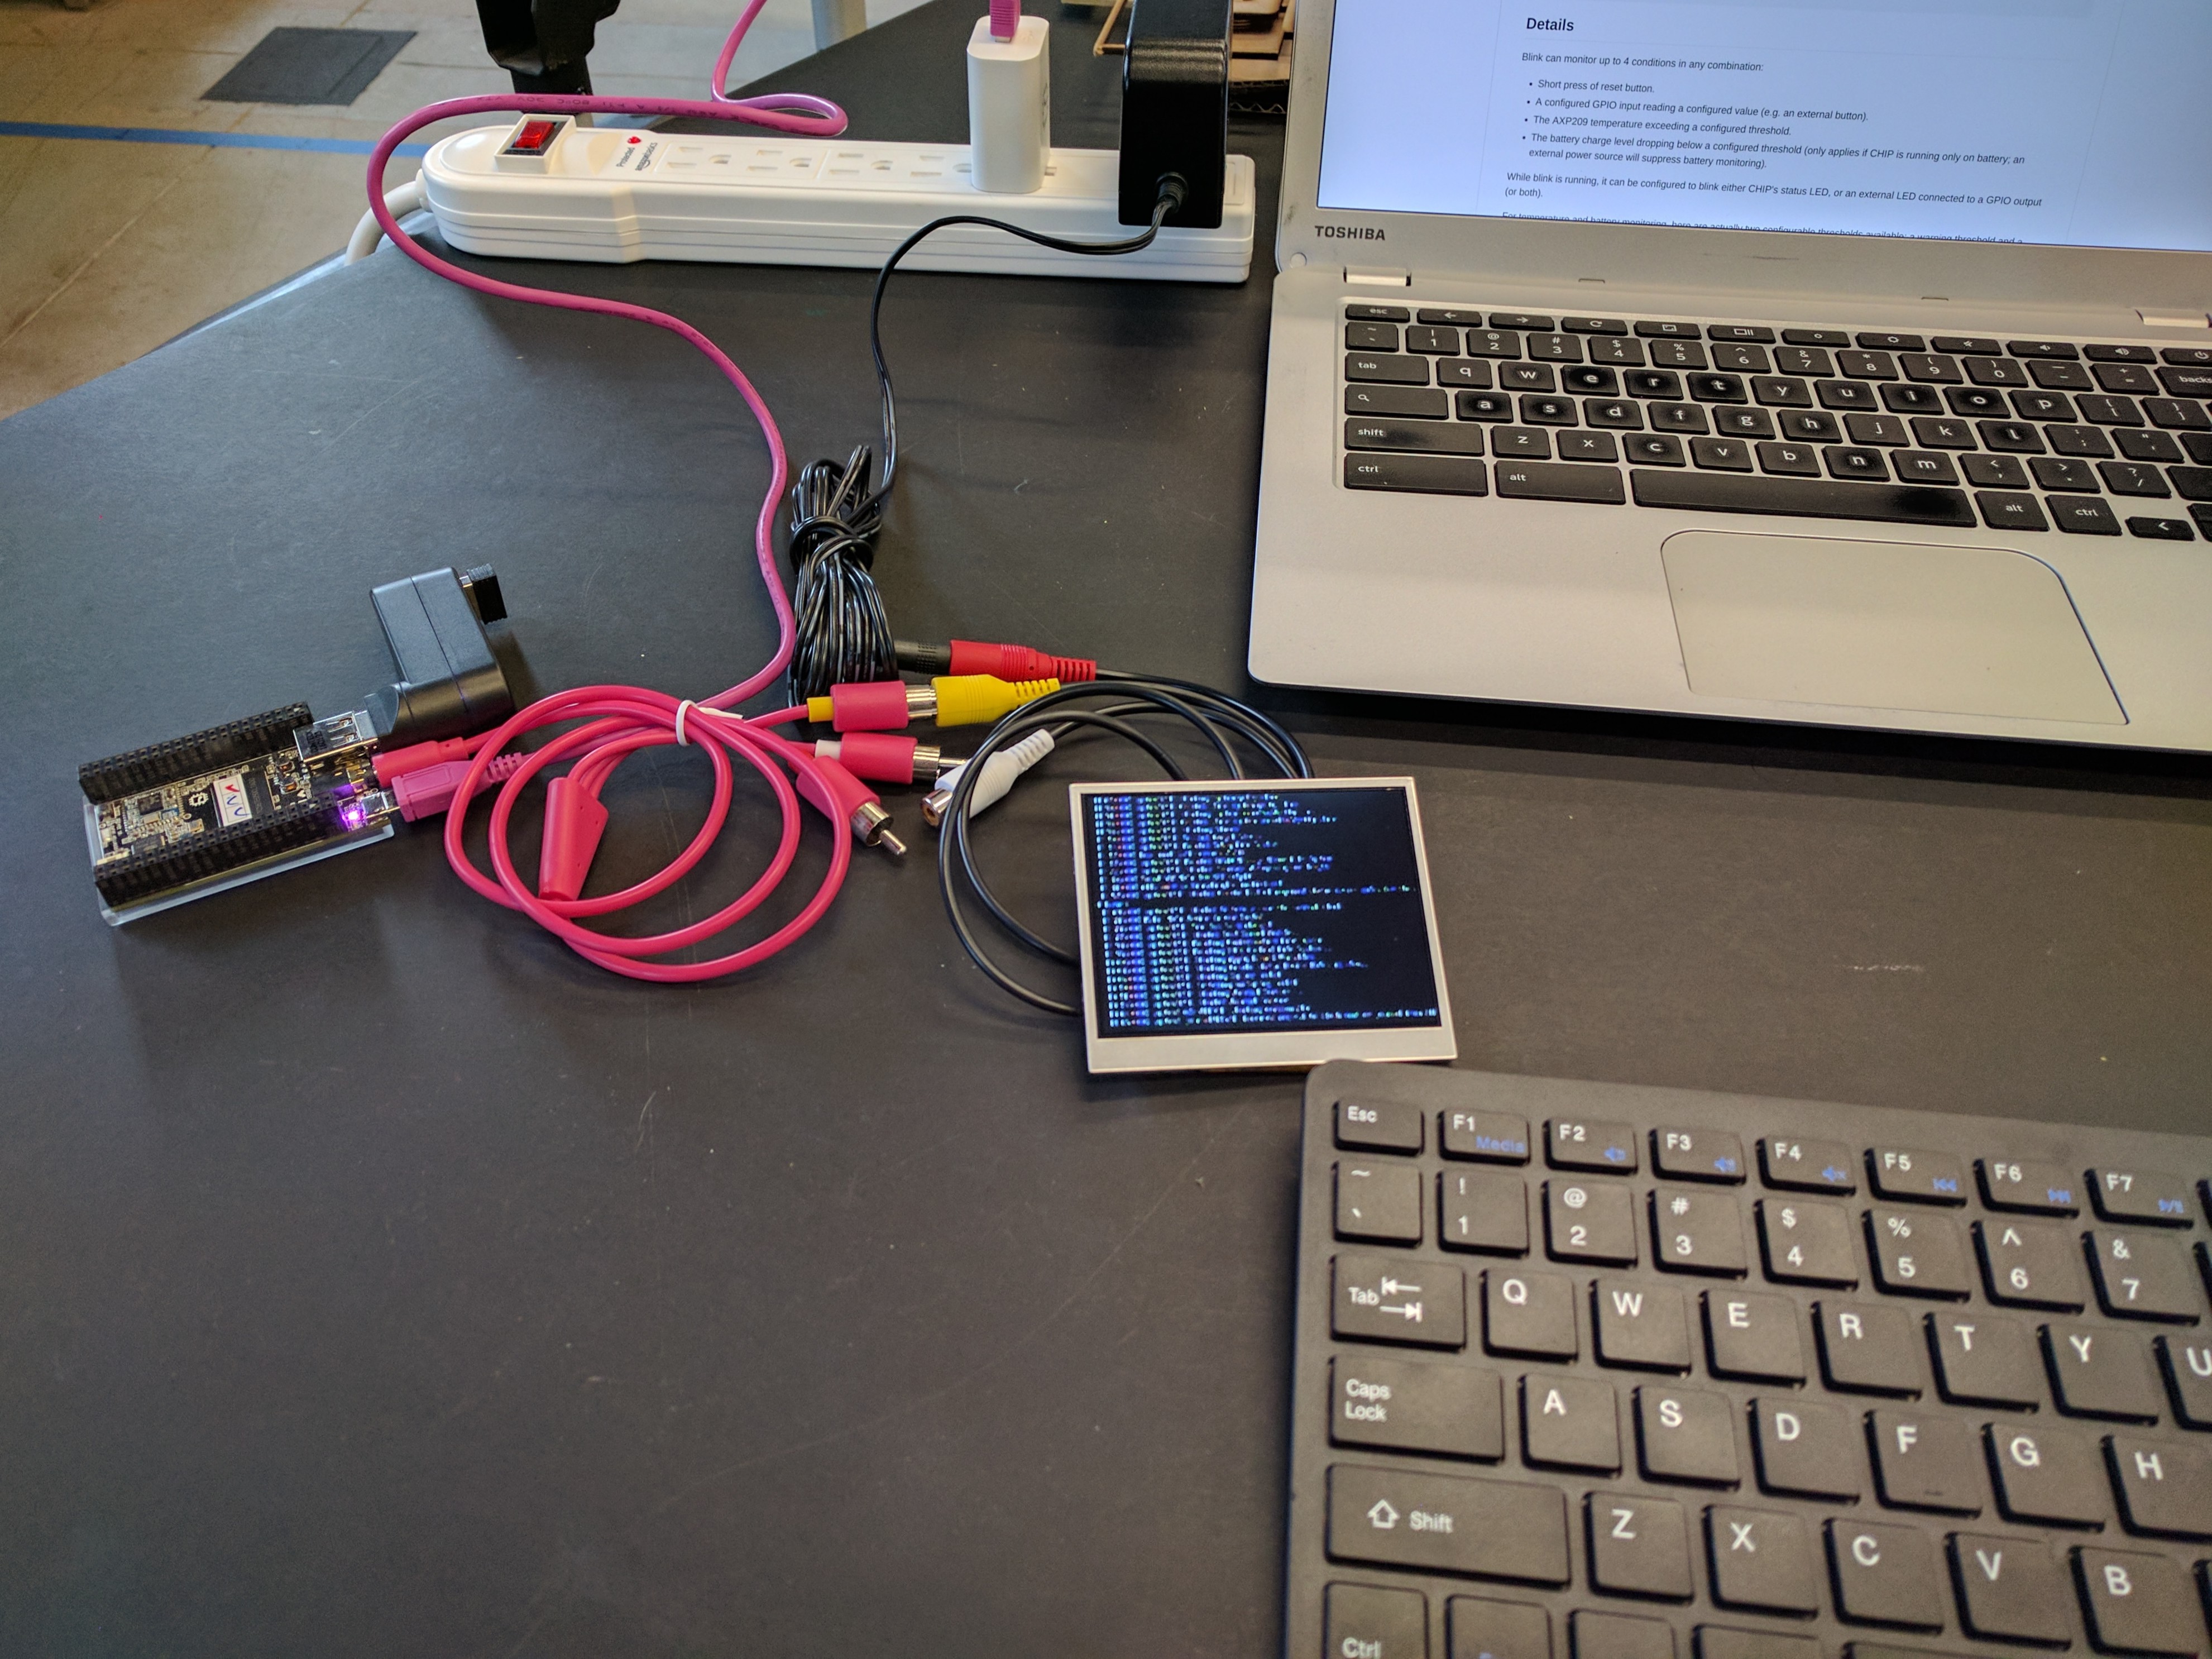
With all of the components now connected and working with a RPi, we then moved it all over to the Next Thing Co. C.H.I.P. (a $9 single-board computer like the RPi that runs Linux). We did all of this in this order because Bernie was more familiar with the RPi and wanted to make sure we could get PICO-8 to do what we wanted (mainly actuate a servo and blink an LED) , and because the C.H.I.P. has all of the things we need to make the cabinet function as intended at a lower price point than a RPi Zero (BTW, for the record, we formally started developing this project before the announcement and launch of the Zero W). As a backer of Next Thing Co's PocketC.H.I.P. Kickstarter at this point I was personally more familiar with it, and knew it had everything I needed to make the experience I wanted to make, In all honesty I specifically backed this campaign because I wanted to:
- Buy an inexpensive single-board computer running Linux I could use to familiarize myself with Linux and the command line
- Teach myself to code
- Use the C.H.I.P. to make this project!
Side bar and quick note on the surprise announcement by Next Thing Co to include Lexaloffle's PICO-8 on all PocketC.H.I.P.s just before its launch!...
About a month before Kickstarter backer perks fulfillment started, Next Thing Co. announced their partnership with Lexaloffle to include PICO-8 on all of their PocketC.H.I.P.s. At the time I was already looking at PICO-8 as a solution to make my interface/game for the experience on this project. Talk about a killer app for the C.H.I.P.! For those of you not in the know let me just take this moment to tell you all about PICO-8.
PICO-8 is a virtual console for making, sharing and playing tiny games and computer programs (think of it as a game console that runs on Windows, OSX, Linux, Raspberry Pi's, and in the browser with the equivocal graphical power of the classic NES). PICO-8 also has inbuilt tools for editing code, music, sound, sprites, maps built right into its virtual console (meaning a novice like me can learn to code and make games by just tweaking other's premade games!). PICO-8 cartridges can also be saved in a special .png format and sent directly to other users, shared via an online cart player, or exported to stand-alone HTML5 (again AWESOME, essentially 'carts', what the community affectionately calls their games, can be directly sent to anyone with a modern browser and played using only HTML5)! There are literally hundreds of 'carts' currently available on the Lexaloffle BBS [a vibrant online community that has popped up around PICO-8 since it's release], all made by a diverse group of hobbyist, tinkerers, and developers who are making every type of game imaginable, from classic game reproductions to their own new original games and experiments! Further driving the activity on the PICO-8 community is the program's developer, ZEP, who can often be found hosting online 'Jams' [what the community colloquially calls week long hackathons]. During a 'Jam' community members are asked to create new games based on a theme or gameplay mechanic. If you couldn't tell at this point, I'm a HUGE fan of both the C.H.I.P. and PICO-8, as they both fall into the "open, inexpensive/free, easily accessible/low entry point and available for everyone to use technology" category I'm super fond of and mentioned in this project's detail section!
Unlike the RPi Zero, the C.H.I.P. has inbuilt bluetooth+WiFi, an integrated power management package+JST port that can connect to and charge a battery (which we planned on using to prevent software corrupting shutdowns caused by power disconnects), inbuilt storage, and a included software license to Lexaloffle's Pico-8 software. Taken together all of these inclusions quickly add up when buying them separately with the intention of adding them to a RPi Zero, bringing their equivalent price way over the cost of a C.H.I.P. alone. With all of that said Jean and I then switched our focus to the C.H.I.P., and quickly integrated it into the a newer version of the cabinet's hat we'd designed and built.
After the 5th MDF model I decided needed to get a cheaper larger screen I could use in this project, as the average $30-$40 price being charged online was too much. Starting on Amazon, I started looking for the perfect screen (cheap+compatible). While looking on Amazon I found this BW 3.5 Inch TFT LCD Monitor for Cars on Amazon that another buyer had successfully gotten to work with a RPi, and documented in his Amazon product review. With an average cost under $18 you knose I had to buy one!
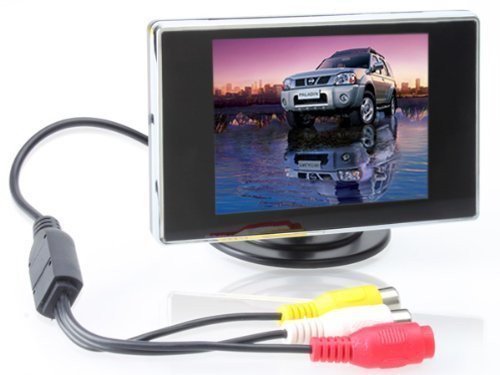
Shortly after receiving the screen I realized that it was set up for 12v DC Automobile voltage (critical reading for the win)! Luckily after a little Googling around I found this tutorial done by another plucky tinkerer with the same idea documenting a hack he'd made to the screen's PWM control circuit that allowed it to run on 5v DC power! Long story short this screen uses a xl1509-5.0 voltage regulator, and its #2 pin can take 5v in, and power the screen!
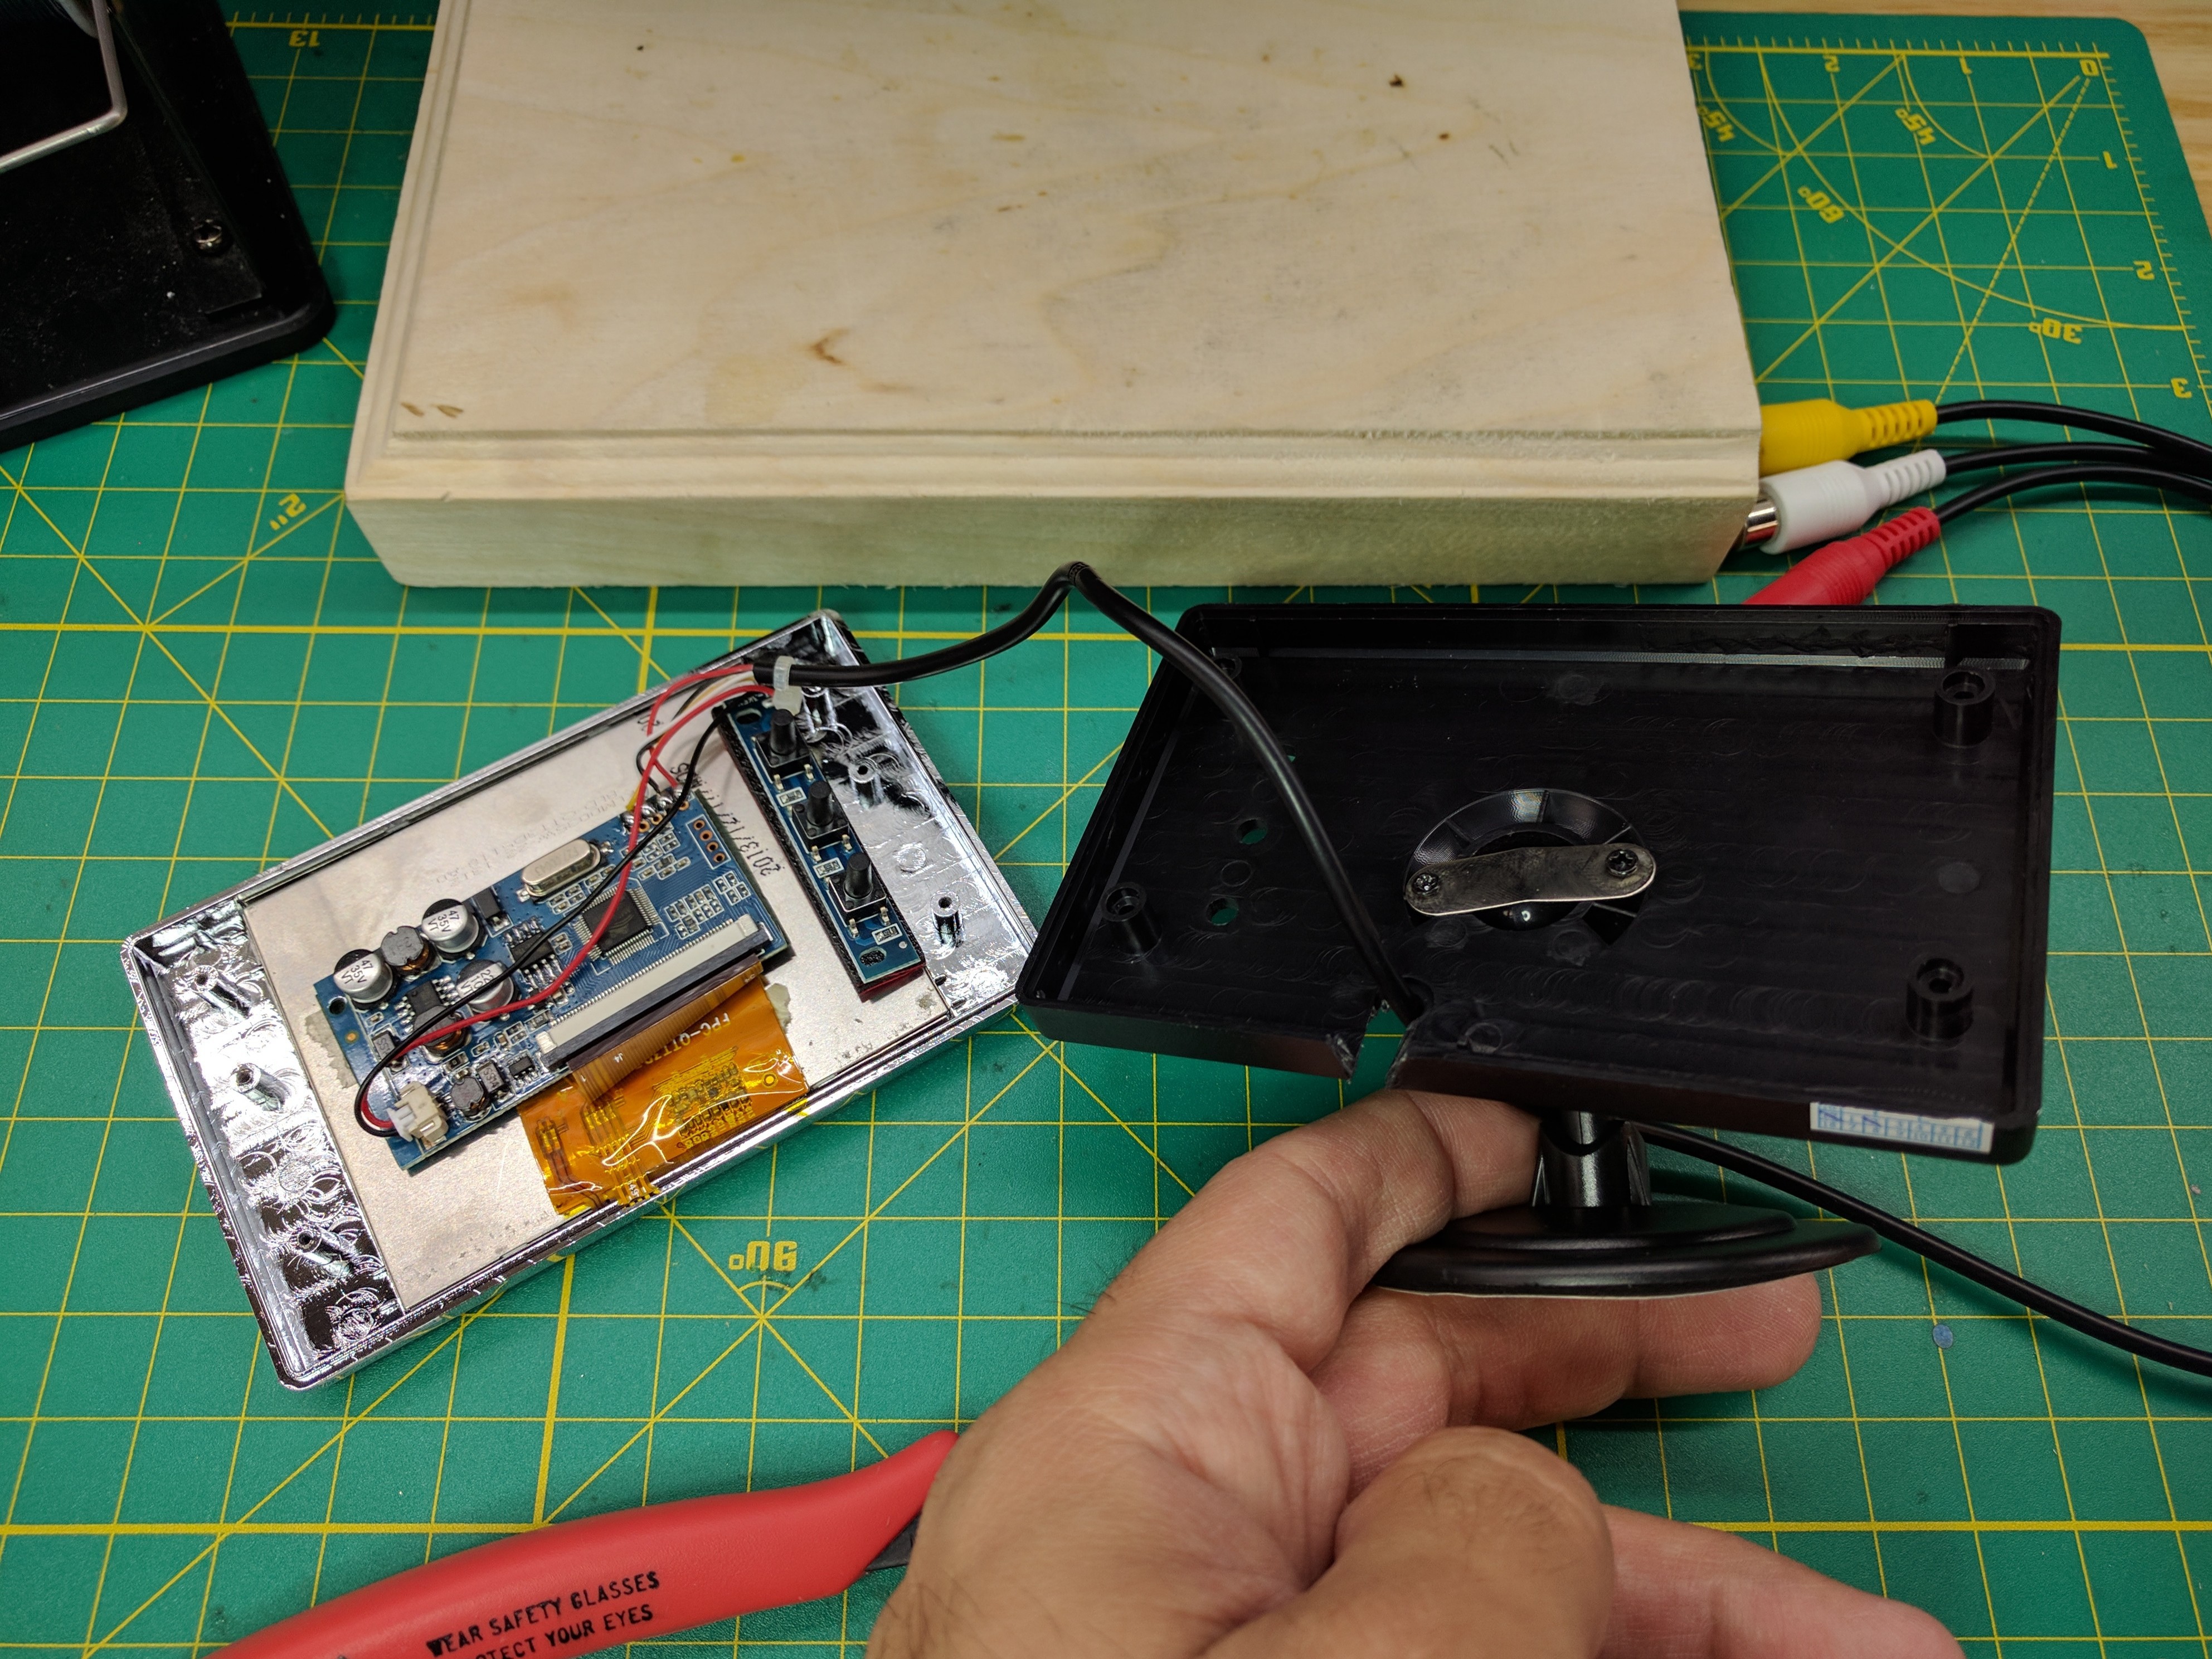 IT LIVES!!! Quick unmodified LCD test (powered by a 12v wall wart) plugged into a C.H.I.P. (powered by a separate 5v wall wart) plugged in via the C.H.I.P.'s TRRS jack and a composite cable! With all of this done we quickly changed our focus over to getting our controls working with the C.H.I.P...
Below is a video of the V7 MDF prototype of the CotC cabinet in the new 'hat' running off of a NTC C.H.I.P. connected to a Pimoroni Picade PCB and the larger modified 3.5" TFT LCD!
Incase you're wondering, the game Hunter and Giovanni (both fellow DesignLab Residents, check out their awesome projects) are playing is Benjamin Soulés excellent Hug Arena! You should try it out in your browser sometime!
Next steps?... Getting the power and the assorted cables sorted, all fit into the MDF prototype, and all of the cabinet's tolerances surrounding the maze, drawers, and doors tightened up!
Discussions
Become a Hackaday.io Member
Create an account to leave a comment. Already have an account? Log In.