Close
0%
0%

Knowledge lock

Answer the questions correctly and gain access what dwell within the box

Similar projects worth following
175 views
This is a box which can be unlocked by answering questions correctly.
The A,B,C and D buttons are what's used to select an answer and with the right combination (answers) the box open itself up.
Up and Down buttons are for selecting the questions and there's one last button to validate the answers

We're adressing the problem of knowledge acquirement.

To do so, we're creating a game which ask you questions and display 4 possible answers, with the option of customizing these questions and answers at will.

When all the questions are anwsered correctly, the box open itself, revealing a reward.

Depending on the type of question asked, the purpose of this game can be educational, making the knowledge more accessible and less frustrating to learn.

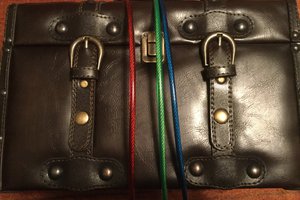
The box itself belong to an escape game, but can be used as a standalone game.

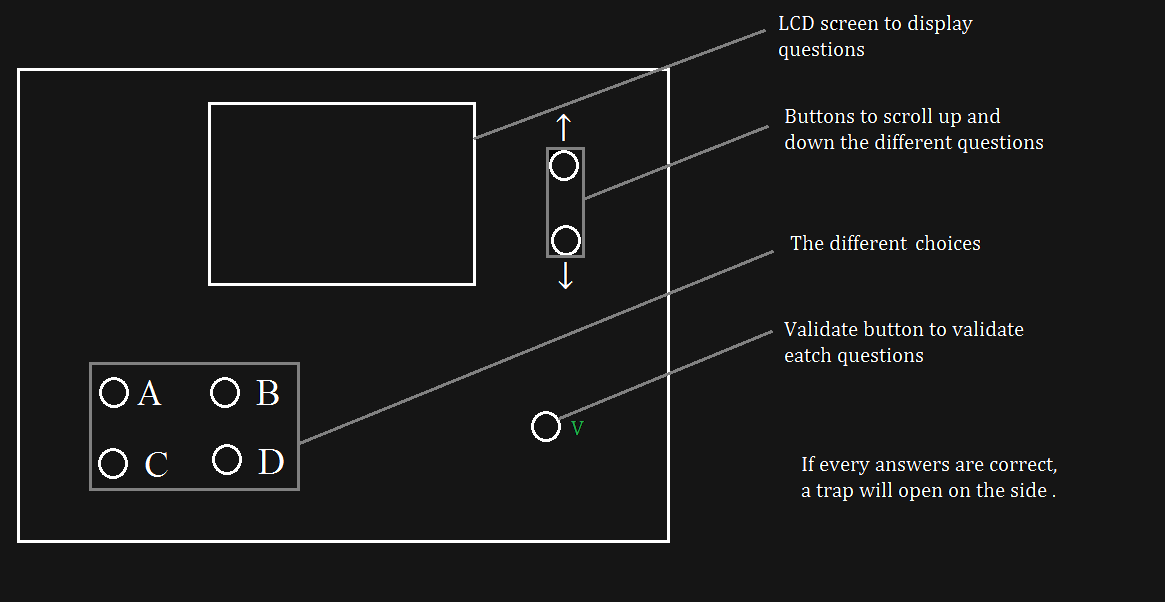
The main functions of this box should be :

  • Clearly displaying the questions and the answers on a LCD screen
  • Answering these questions using A to D buttons, and a way to clearly see which answers are currently chosen.
  • The possibility to navigate back and forth through the questions in order to make corrections easier to do
  • The possibility to plug in a computer using a USB port in order to change the questions, thus the subject that users should learn about

SOURCES:

postscript - 2.50 kB - 06/01/2017 at 10:52

Download

postscript - 2.64 kB - 06/01/2017 at 10:52

Download

postscript - 2.08 kB - 06/01/2017 at 10:52

Download

postscript - 2.52 kB - 06/01/2017 at 10:52

Download

postscript - 5.36 kB - 06/01/2017 at 10:52

Download

View all 6 files

  • Initial thoughts

    Knowledge Lock03/10/2017 at 15:56 0 comments

    We switched direction as of how the questions are answered : we're going to have the user answer using buttons instead of levers.

    This way we can add more answers for the questions and also break the maximum and the minimum of how many questions are asked.

    We finished the project time management schedule and we're working on the design right now.

View project log

  • 1
    Step 1

    INSTRUCTIONS :

    1. You need to shape the box, we personally used a laser cutter to cut in plexiglass (you can find the files we used to cut the box out in the files section). You can adjust the size of the edges but we recommend you leave the kerf as it is (0.025).
    2. You can also change the size and the number of holes you want, based on what size your components are.
    3. At the end you should have two layers of "ceiling". The arduino components will be located here.
    4. Using a jigsaw, we sawed a hole in the first layer of ceiling in order for the servomotor to block the door
    5. We then created a little box of plexiglas using glue and little pieces of plexiglas and glued it right below the hole we just sawed.
    6. We placed the servomotor above the hole with the rotating part in the hole.
    7. We sawed two holes on the side of the box, one for the arduino/pc connection and one for an on and off button, linked to a 9V battery. The size and placement of each hole till now only depends on how big your components are and where you want to place them. It's really up to you, just be realistic on the proportions.
    8. We chose to use a shield but it's optionnal, so if you don't use one, you don't go through the hassle to weld the cable but your system is more floppy and is more breakable.
    9. Place the arduino and the power switch button at the designated holes and then proceed to link all of your components through cables to your aduino. You can find the schematics we used ourselves in the files section and adapt it to your good will.
    10. Then when everything is in place, close the box by putting the real ceiling on top.
    11. You can then plug a computer and run your code. You can find the code we used in the file section too, but it uses a library called u8glib. In order to install it you need to download it on https://github.com/olikraus/u8glib and extract to your Arduino install location, in the folder libraries\u8glib. If this folder doesn't exist create it. Arduino core files default location is C:\Program Files (x86)\Arduino, so you would need to extract the u8glib files to C:\Program Files (x86)\Arduino\libraries\u8glib

View all instructions

Enjoy this project?

Share

Discussions

Similar Projects

Does this project spark your interest?

Become a member to follow this project and never miss any updates