 Robin Hartley
Demo Video:
Contents:
1) How It works
+ The Keypad
+ The Desktop Software
2) My dream of sharable automation
3) The story so far
-------------------------------------------------------------------------------------------------------------------------------
1) How it works:
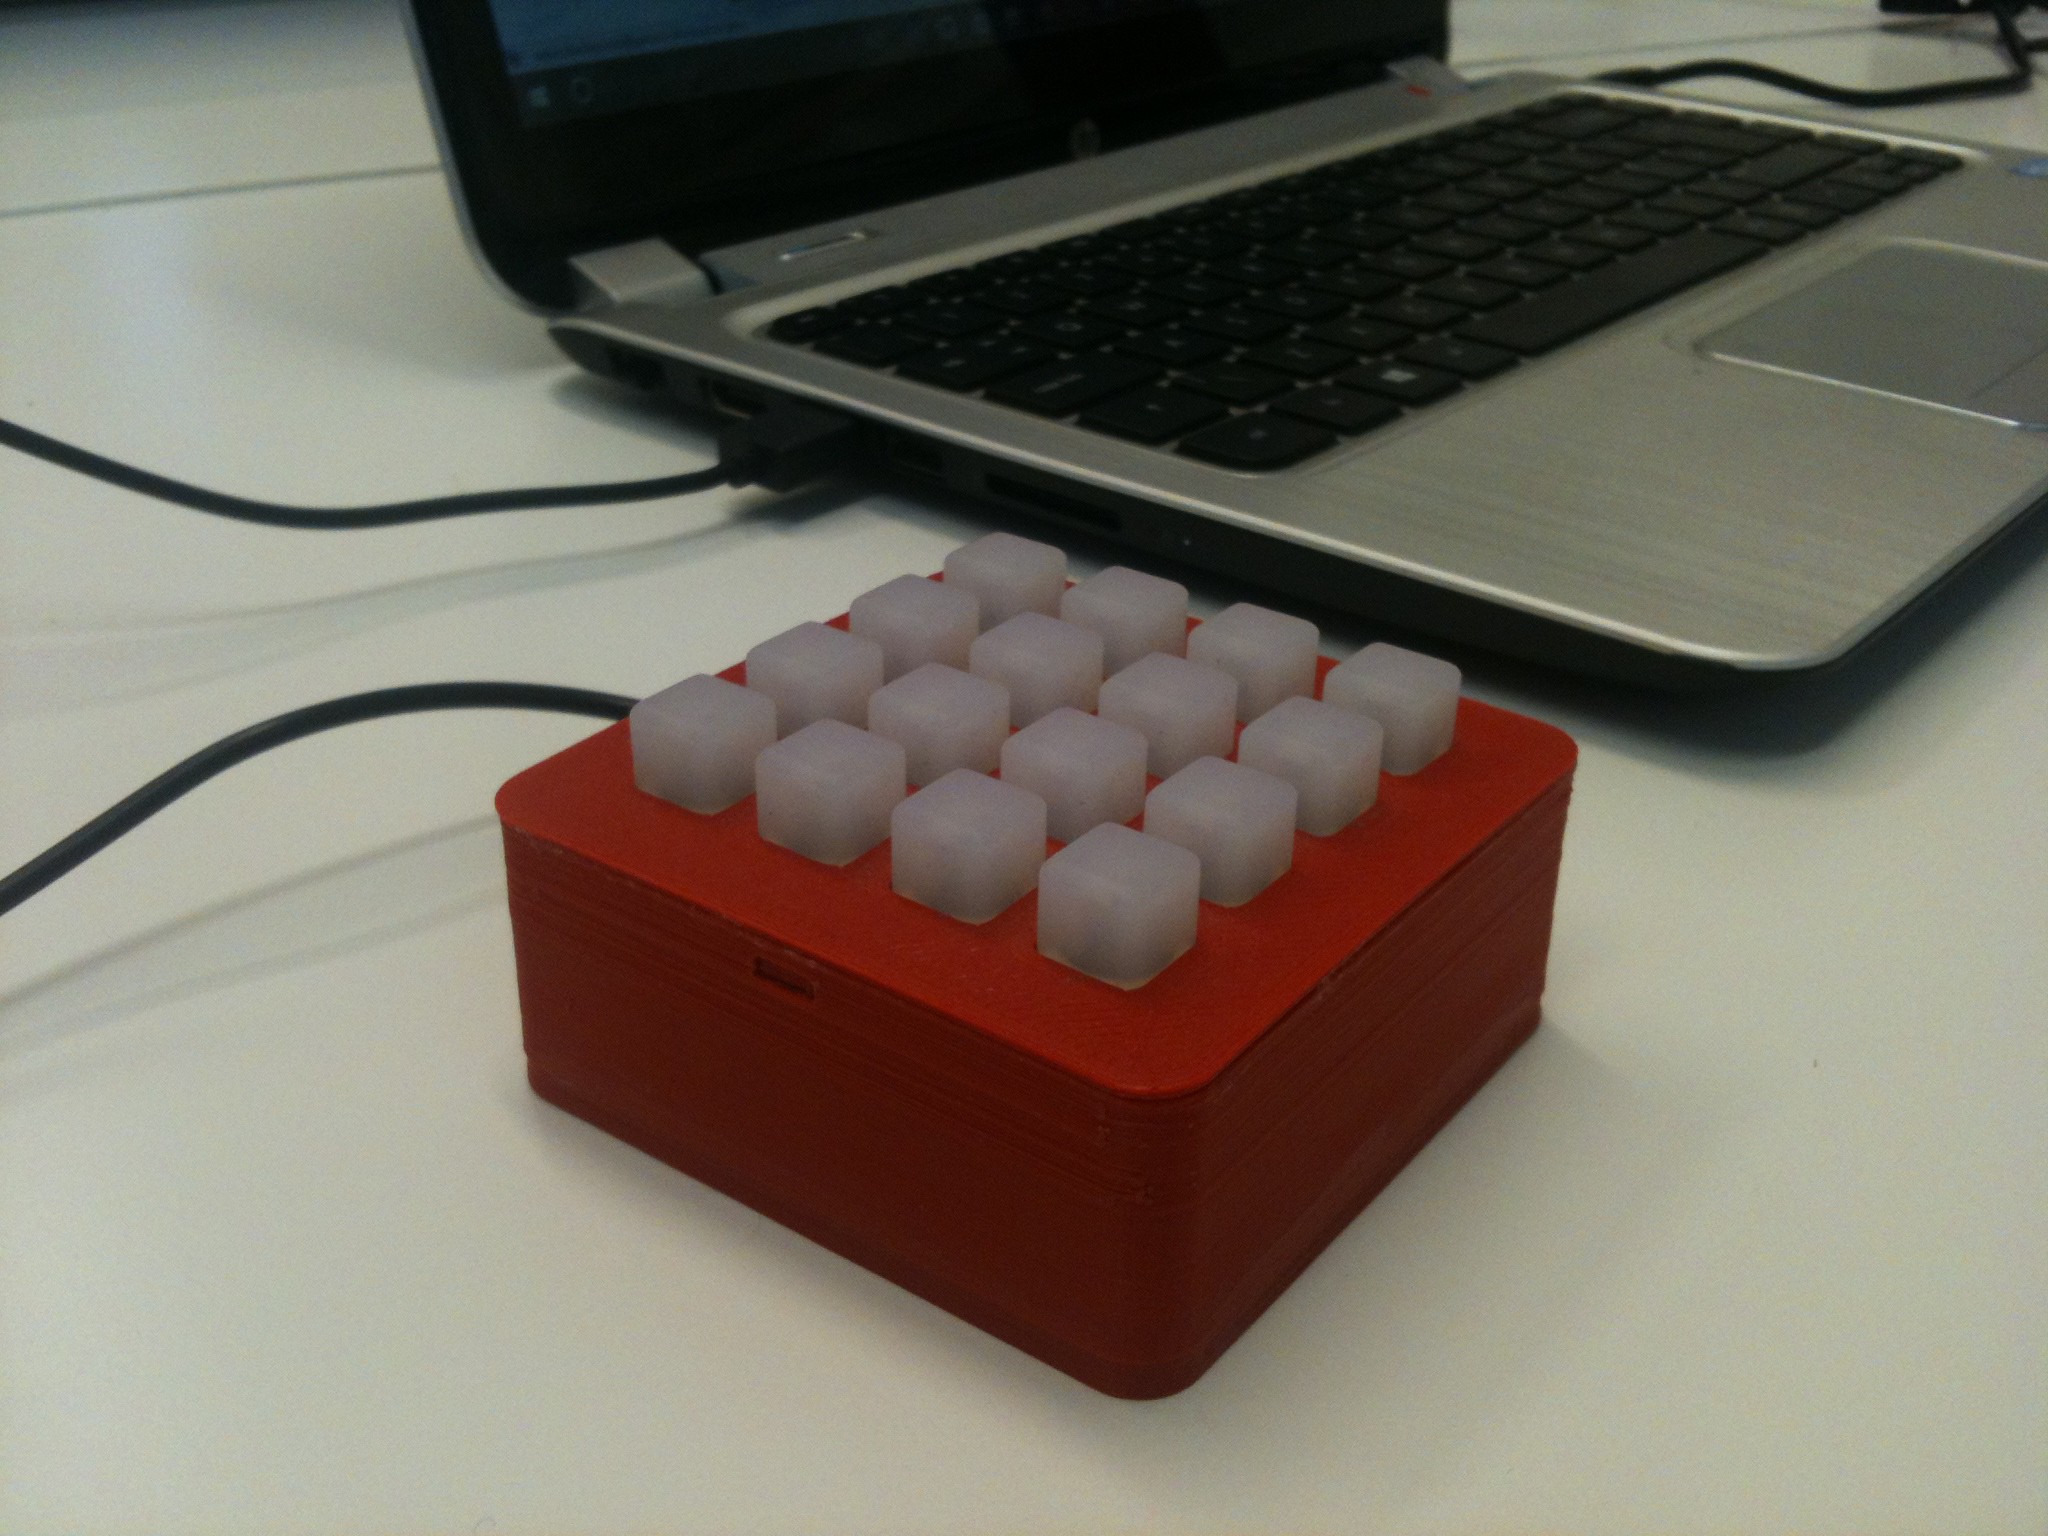
The Keypad
The keypad contains an Arduino Pro Micro which can act as a keyboard or a mouse to control your computer. The Arduino receives strings of commands from the desktop software and stores them in its EEPROM memory.
When you press one of the keypad buttons, it retrieves from memory the automation commands assigned to that button and then turns it into keyboard or mouse actions which result in something happening on your computer.
The string of commands looks like this:
75013*8*911*4Hello Hackaday Readers!*5|2~73~74~`
For example, the above command string (when interpreted by the keypad) will type "Hello Hackaday Readers!", just as if you had typed it yourself.
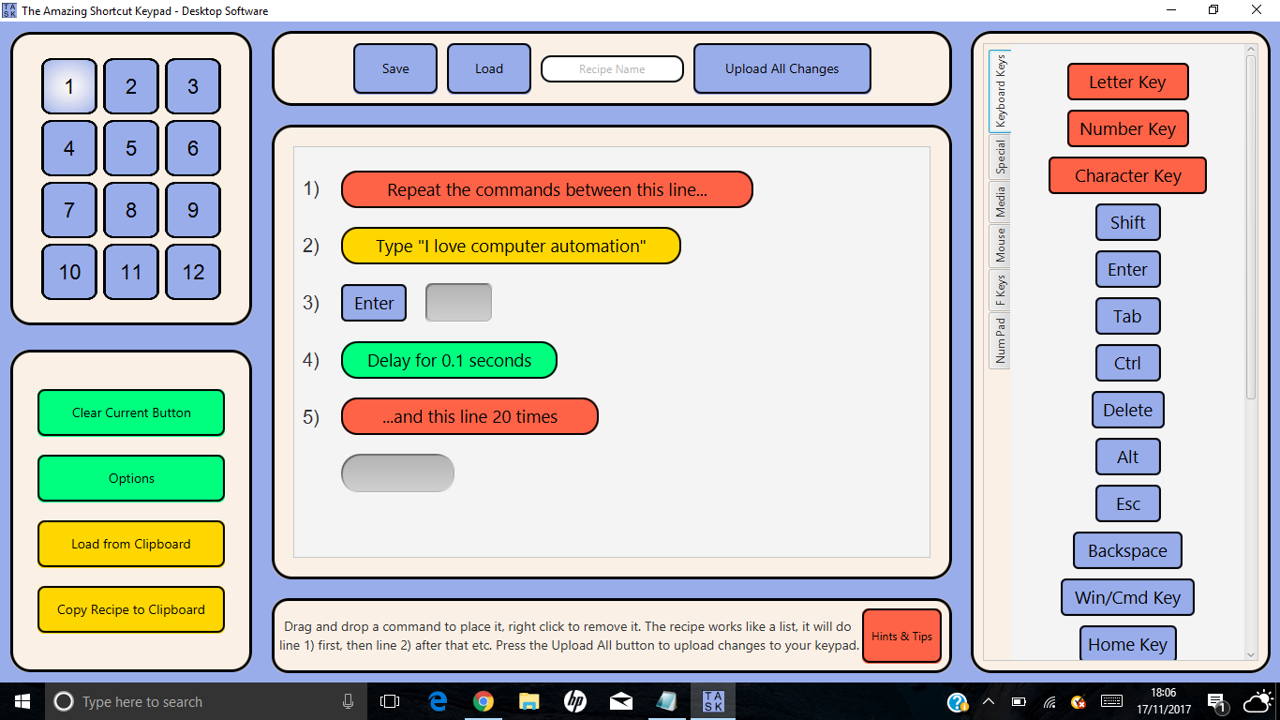
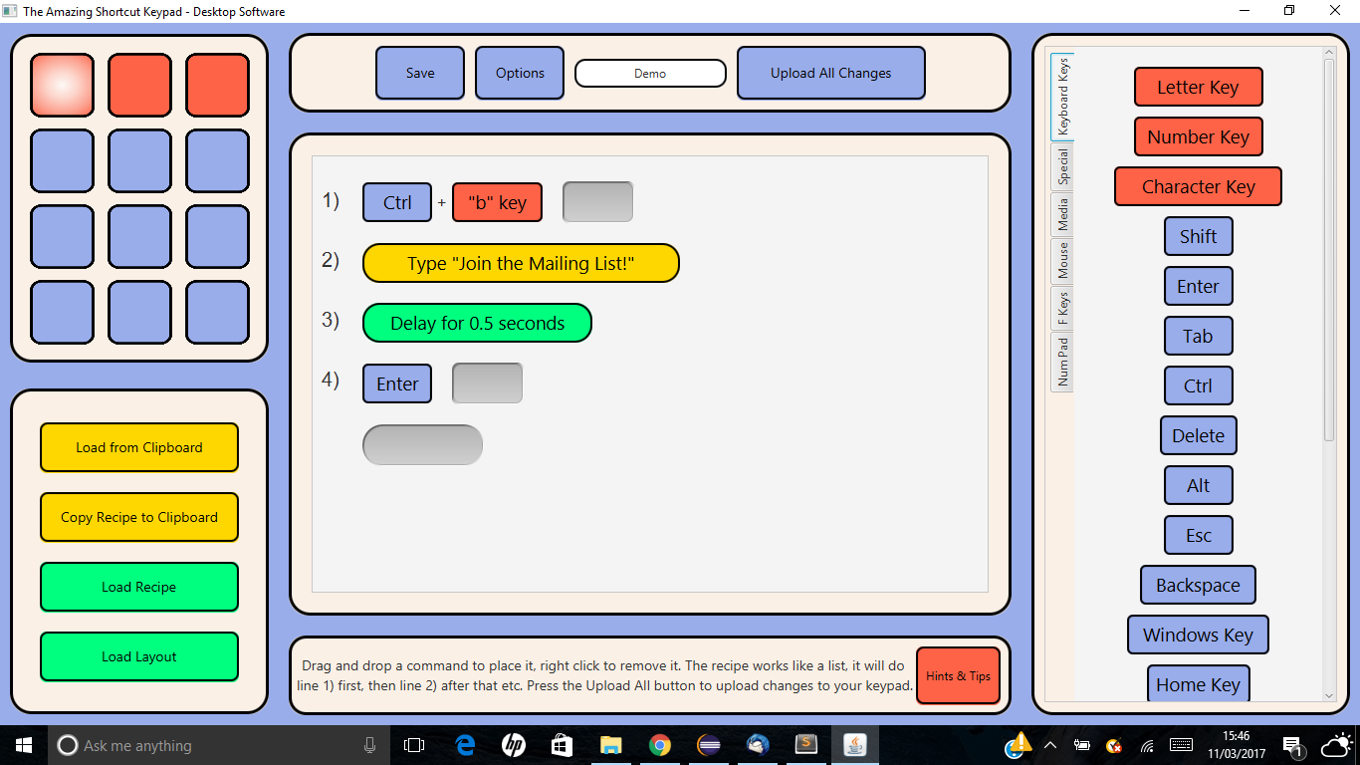
The Desktop Software
The commands are generated by some desktop Java software. However, all you have to do is drag and drop little boxes and the software does the rest for you! You can automate stuff in seconds and upload it straight to your keypad, without ever having to worry about how it actually works.
Here's what it looks like:
2) My Dream of Sharable Automation
You know those strings of automation which I talked about? Well, they can be copied and pasted into emails, internet forums and websites. That means an automation recipe you create can be sent to your friend and uploaded onto their keypad in seconds.
But it doesn't stop there, I could approach software professionals (e.g. a Photoshop expert) and pay them to create a package of automation recipes which contains the best and most efficient ways to automate Photoshop. I then put all of those recipes online and then suddenly anyone with one of these shortcut keypads can access professional-level automation within seconds.
Now extend that to every piece of software that ever existed and make it work on every single keyboard ever made and you have my dream!
3) The story of how it came to be:
This first started out when I didn't know how to design 3D prints, circuit boards or anything like that. So, I downloaded a 3D print file off Thingiverse and bought an Adafruit Trellis matrix keypad to make this:
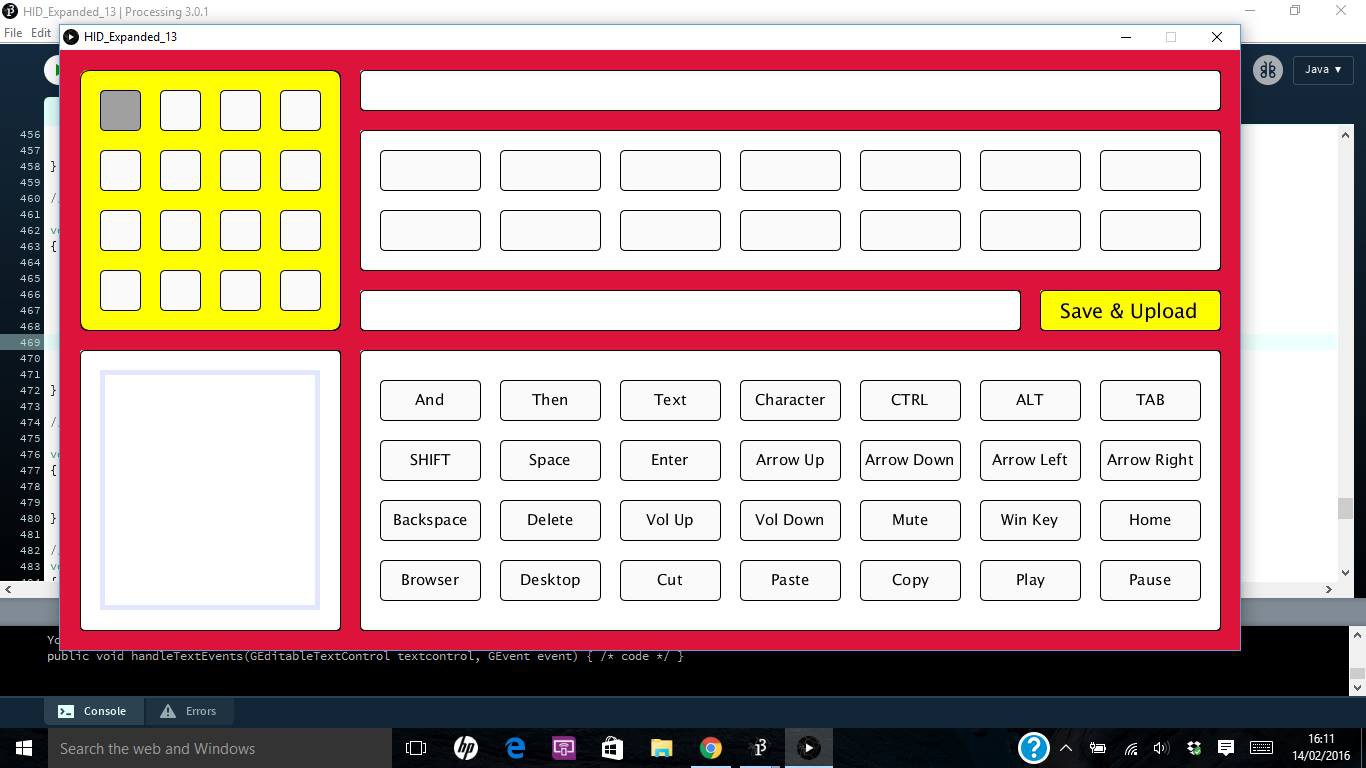
I also put together some software using Processing. It was really buggy but it did the job... kinda! Here's what it looked like:
After a while, I taught myself JavaFX and started towards a slightly better version using little drag and drop boxes. Here's how it looked halfway through...
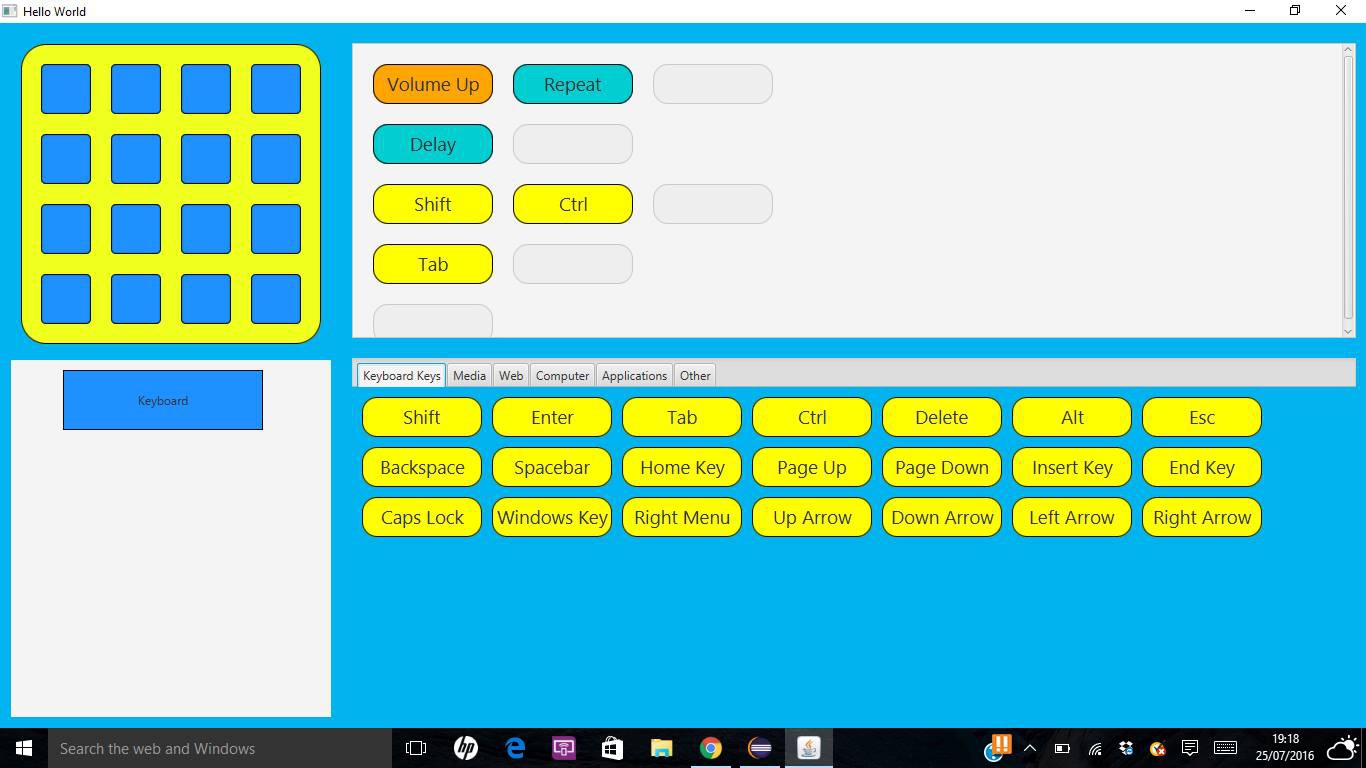
It looks pretty dodgy (and it was!) but I was just learning how to code Java at the time.
Meanwhile, I was prototyping different versions of the keypad hardware using folded aluminium.
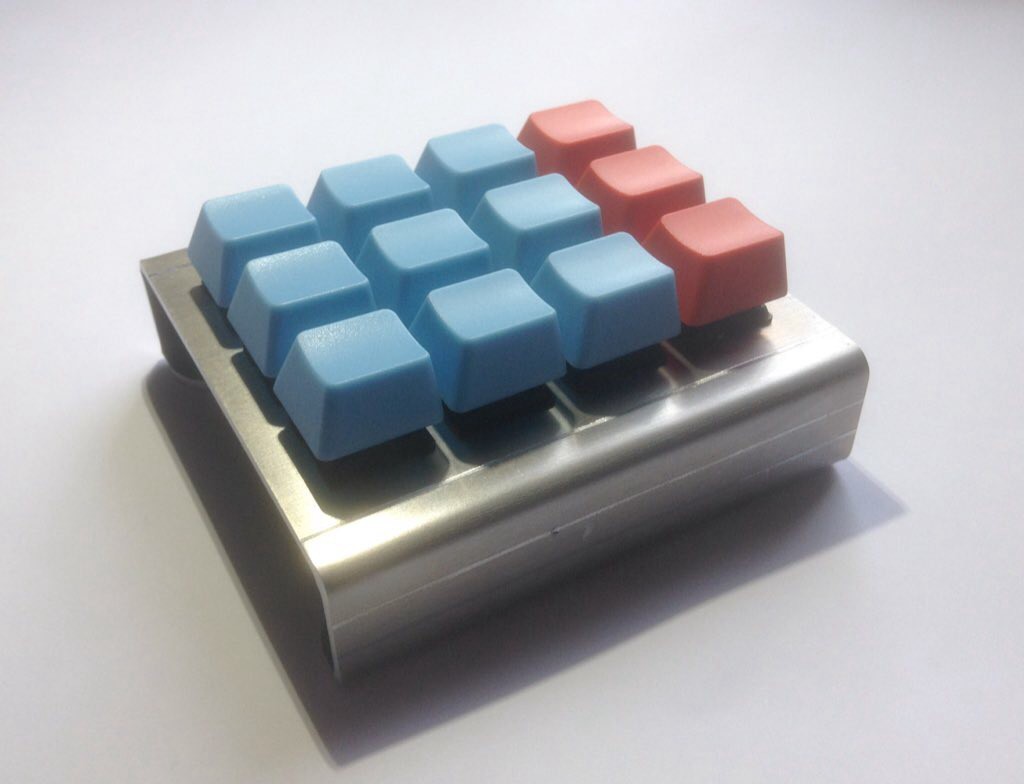
I was a bit disappointed with all the fold marks on the casing and the proportions just didn't work. Luckily, by that point, the software was pretty much finished and here's how it looks:
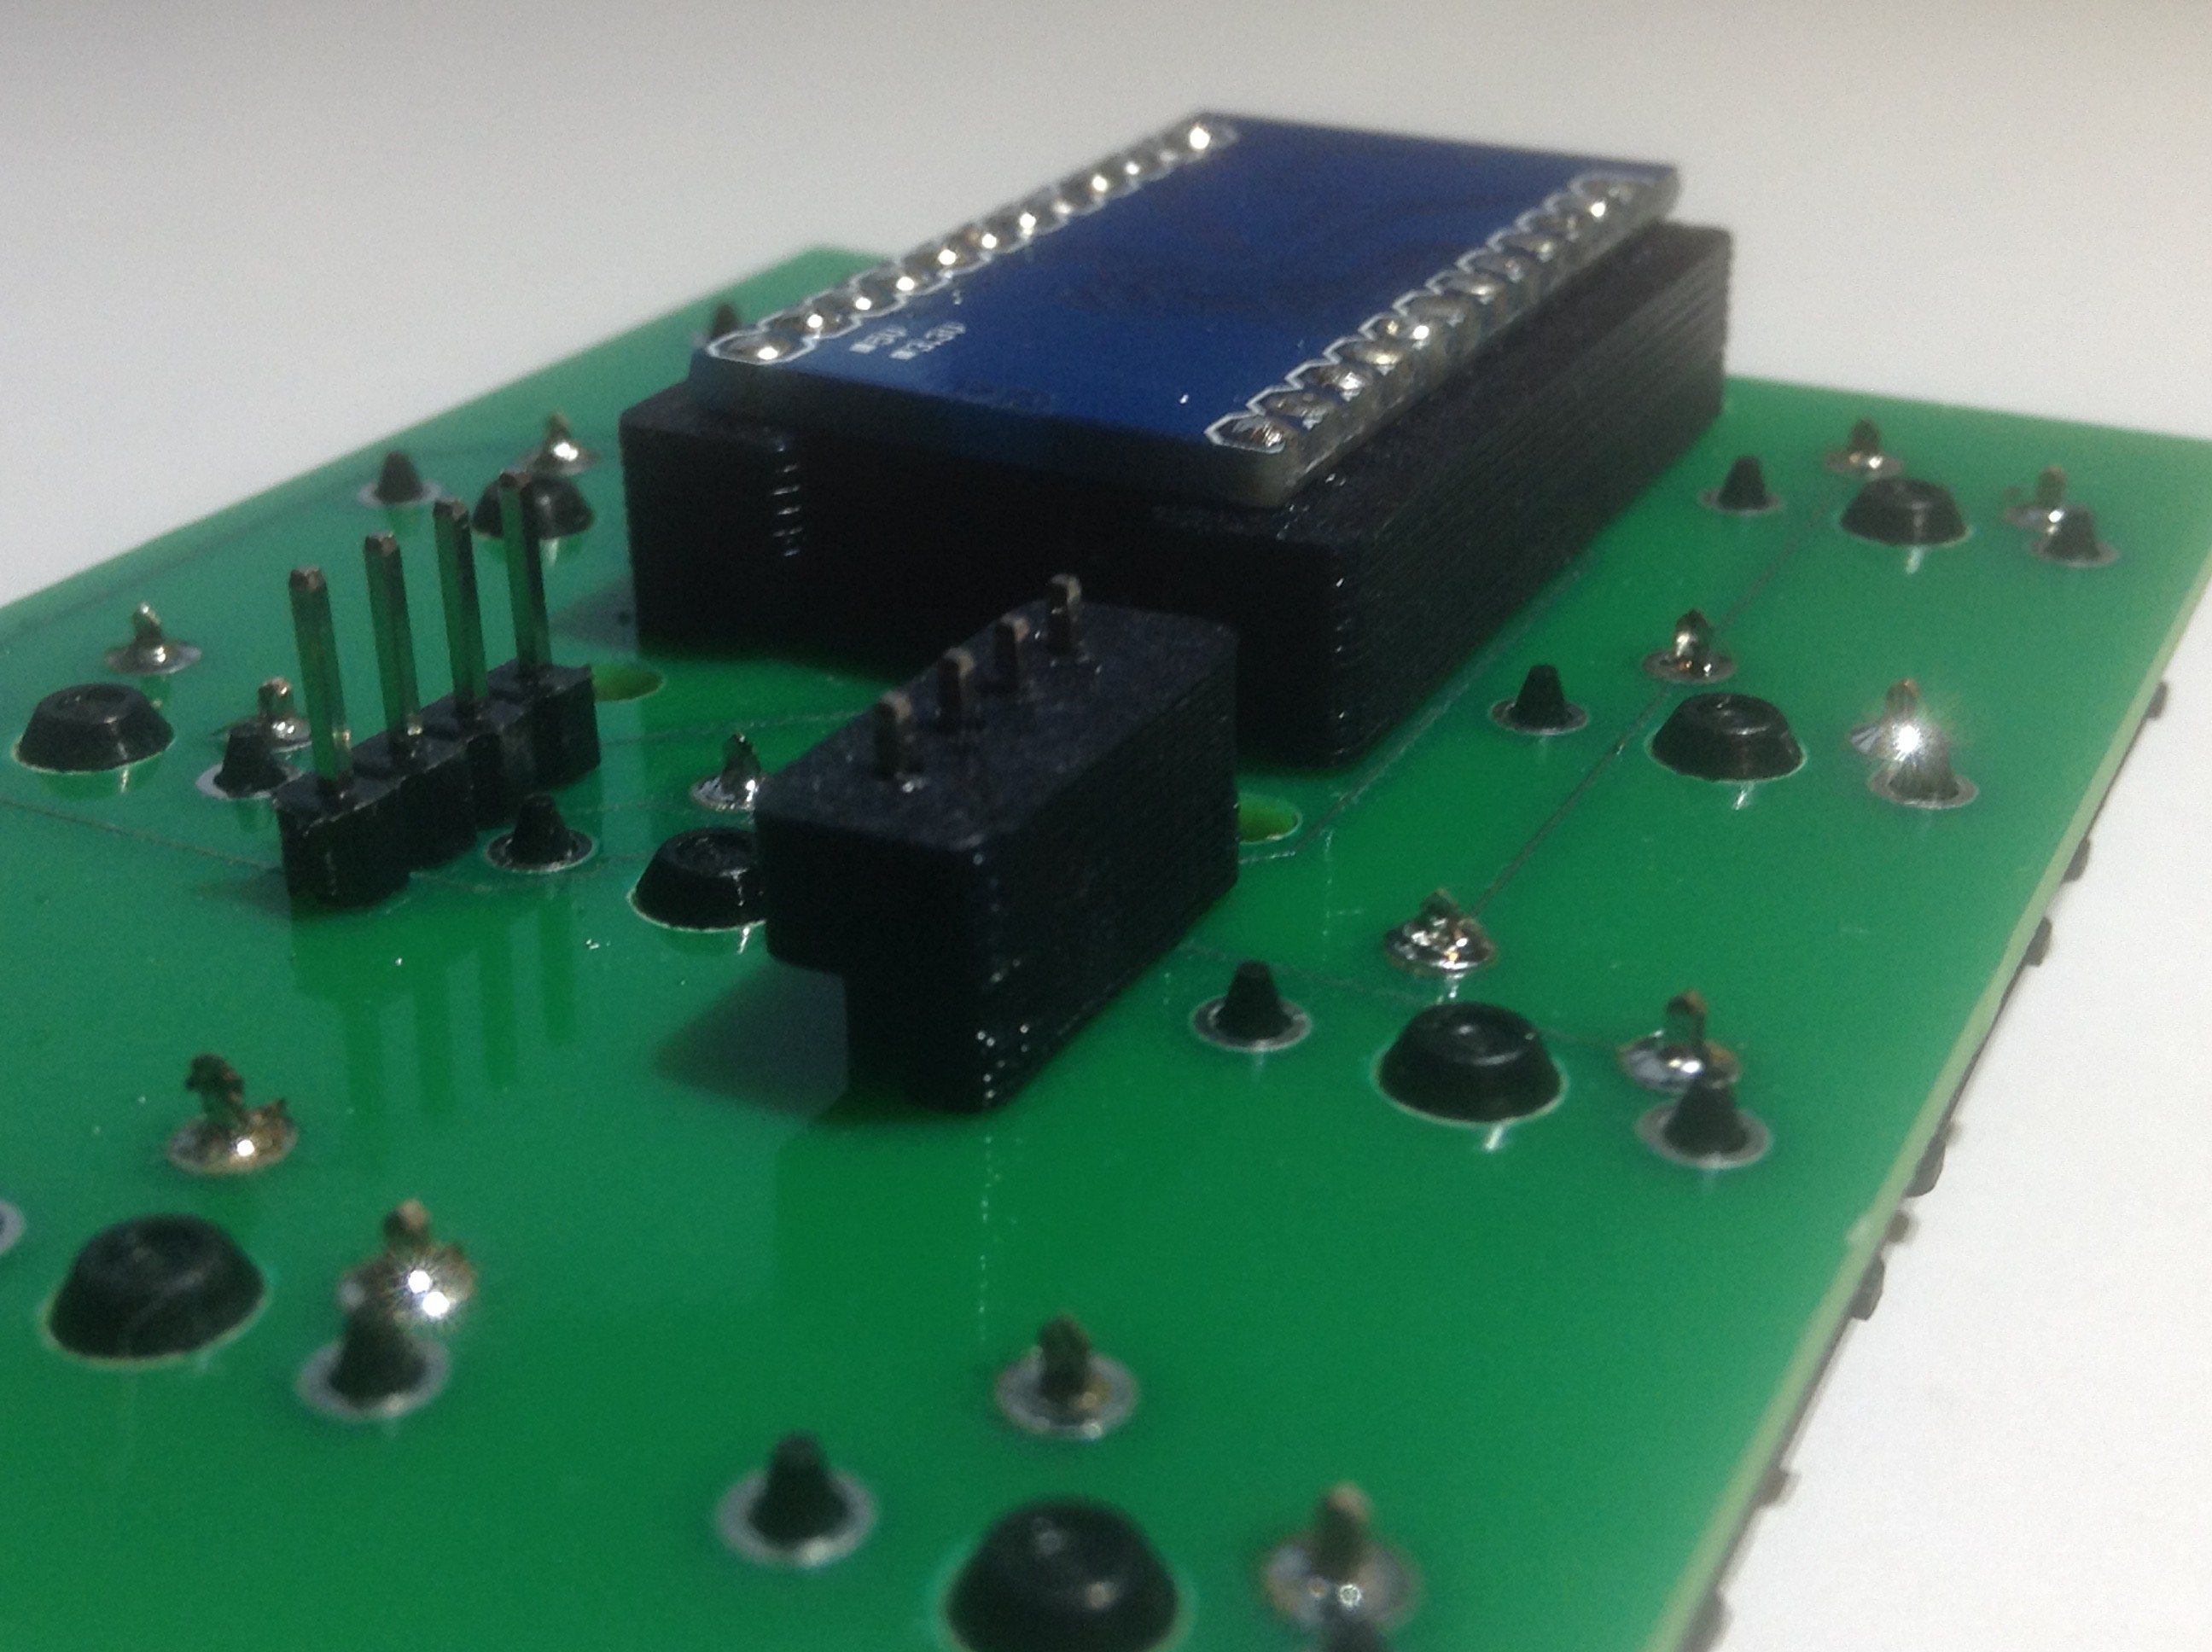
The next piece of the puzzle was to get a circuit board designed and I taught myself how to do this using the Sparkfun EAGLE tutorials which are super helpful. I added a few small 3D printed parts to space the components correctly. I think it turned out really well!
Finally, I mastered (ish) 3D AutoCAD and designed a nice snug case to fit it all. Here is the end result!
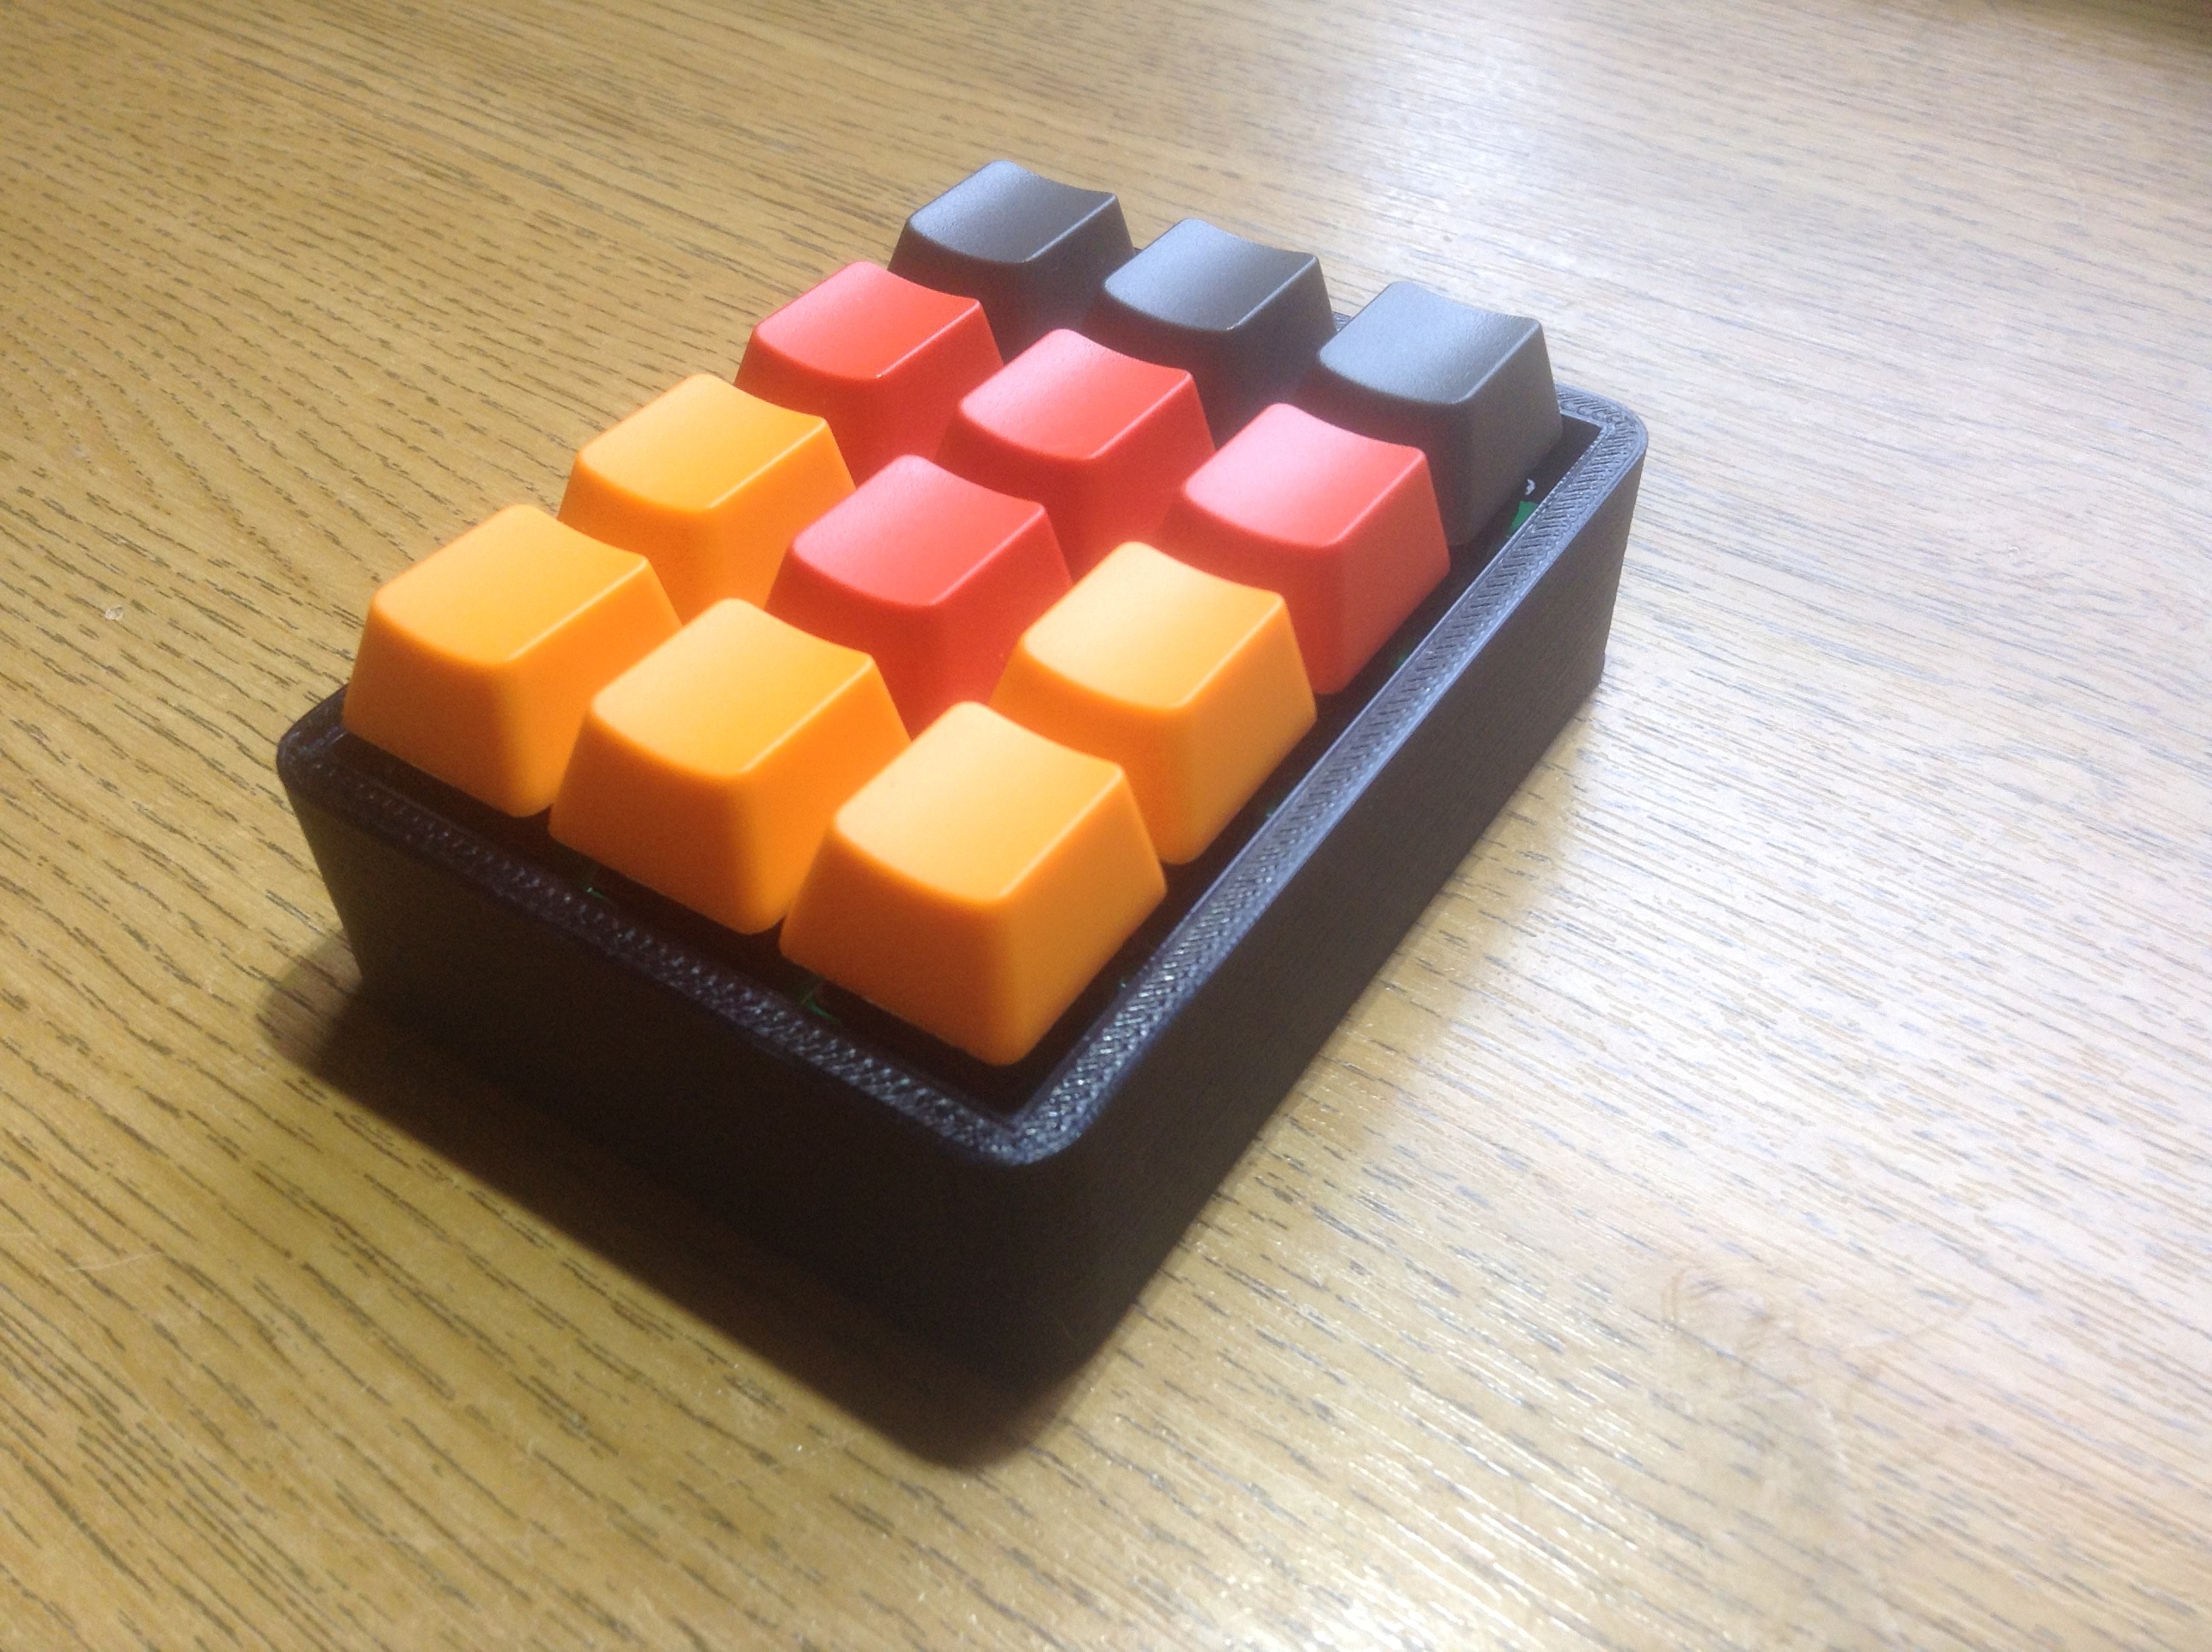
I'm really happy with how this turned out. It took over a year from start to finish and there was lots of learning along the way. I've really enjoyed making it and am thinking of crowdfunding/selling on Tindie so if you might be interested in a kit in the future, you can put your name on my mailing list at www.theamazingshortcutkeypad.com
Thanks for reading and I'd be delighted to hear your comments!