 G.Vignesh
In the previous log I had mentioned about the hardware setup. Now let's place these in a compact box for taking perfect images by providing good lighting conditions.
I have designed a box of dimensions 13x9x9 cm of inner thickness 2mm to accommodate all the components and is made up of non-reflective material. I have literally used a cardboard box but I would prefer a 3D printed box because of its ruggedness and spacing of the components without damage. To 3D print the box design the box according to the given specifications using a CAD software(I have used Fusion 360) and convert the file into a gcode file then print the material. The filament that can preferably used will be wood as it is a non-reflective and hard material to house the components.
LED Strips
The inner surface of the box is surrounded by LED strips upto 6cm from base. The light emitted by the LED strips must not affect the lens and hence the strips are placed 1cm above the lens of the module.
The strip is made of flexible PCB material, and comes with a weatherproof sheathing. You can cut this stuff pretty easily with wire cutters, there are cut-lines every 1.3"/3.4cm (1 LED each). Solder to the 0.1" copper pads and you're good to go. Of course, you can also connect strips together to make them longer, just watch how much current you need! We have a 5V/2A supply that should be able to drive 1 meter and a 5V/10A supply that can drive up to 10 meters (depending on use) You must use a 5V DC power supply to power these strips, do not use higher than 6V or you can destroy the entire strip.
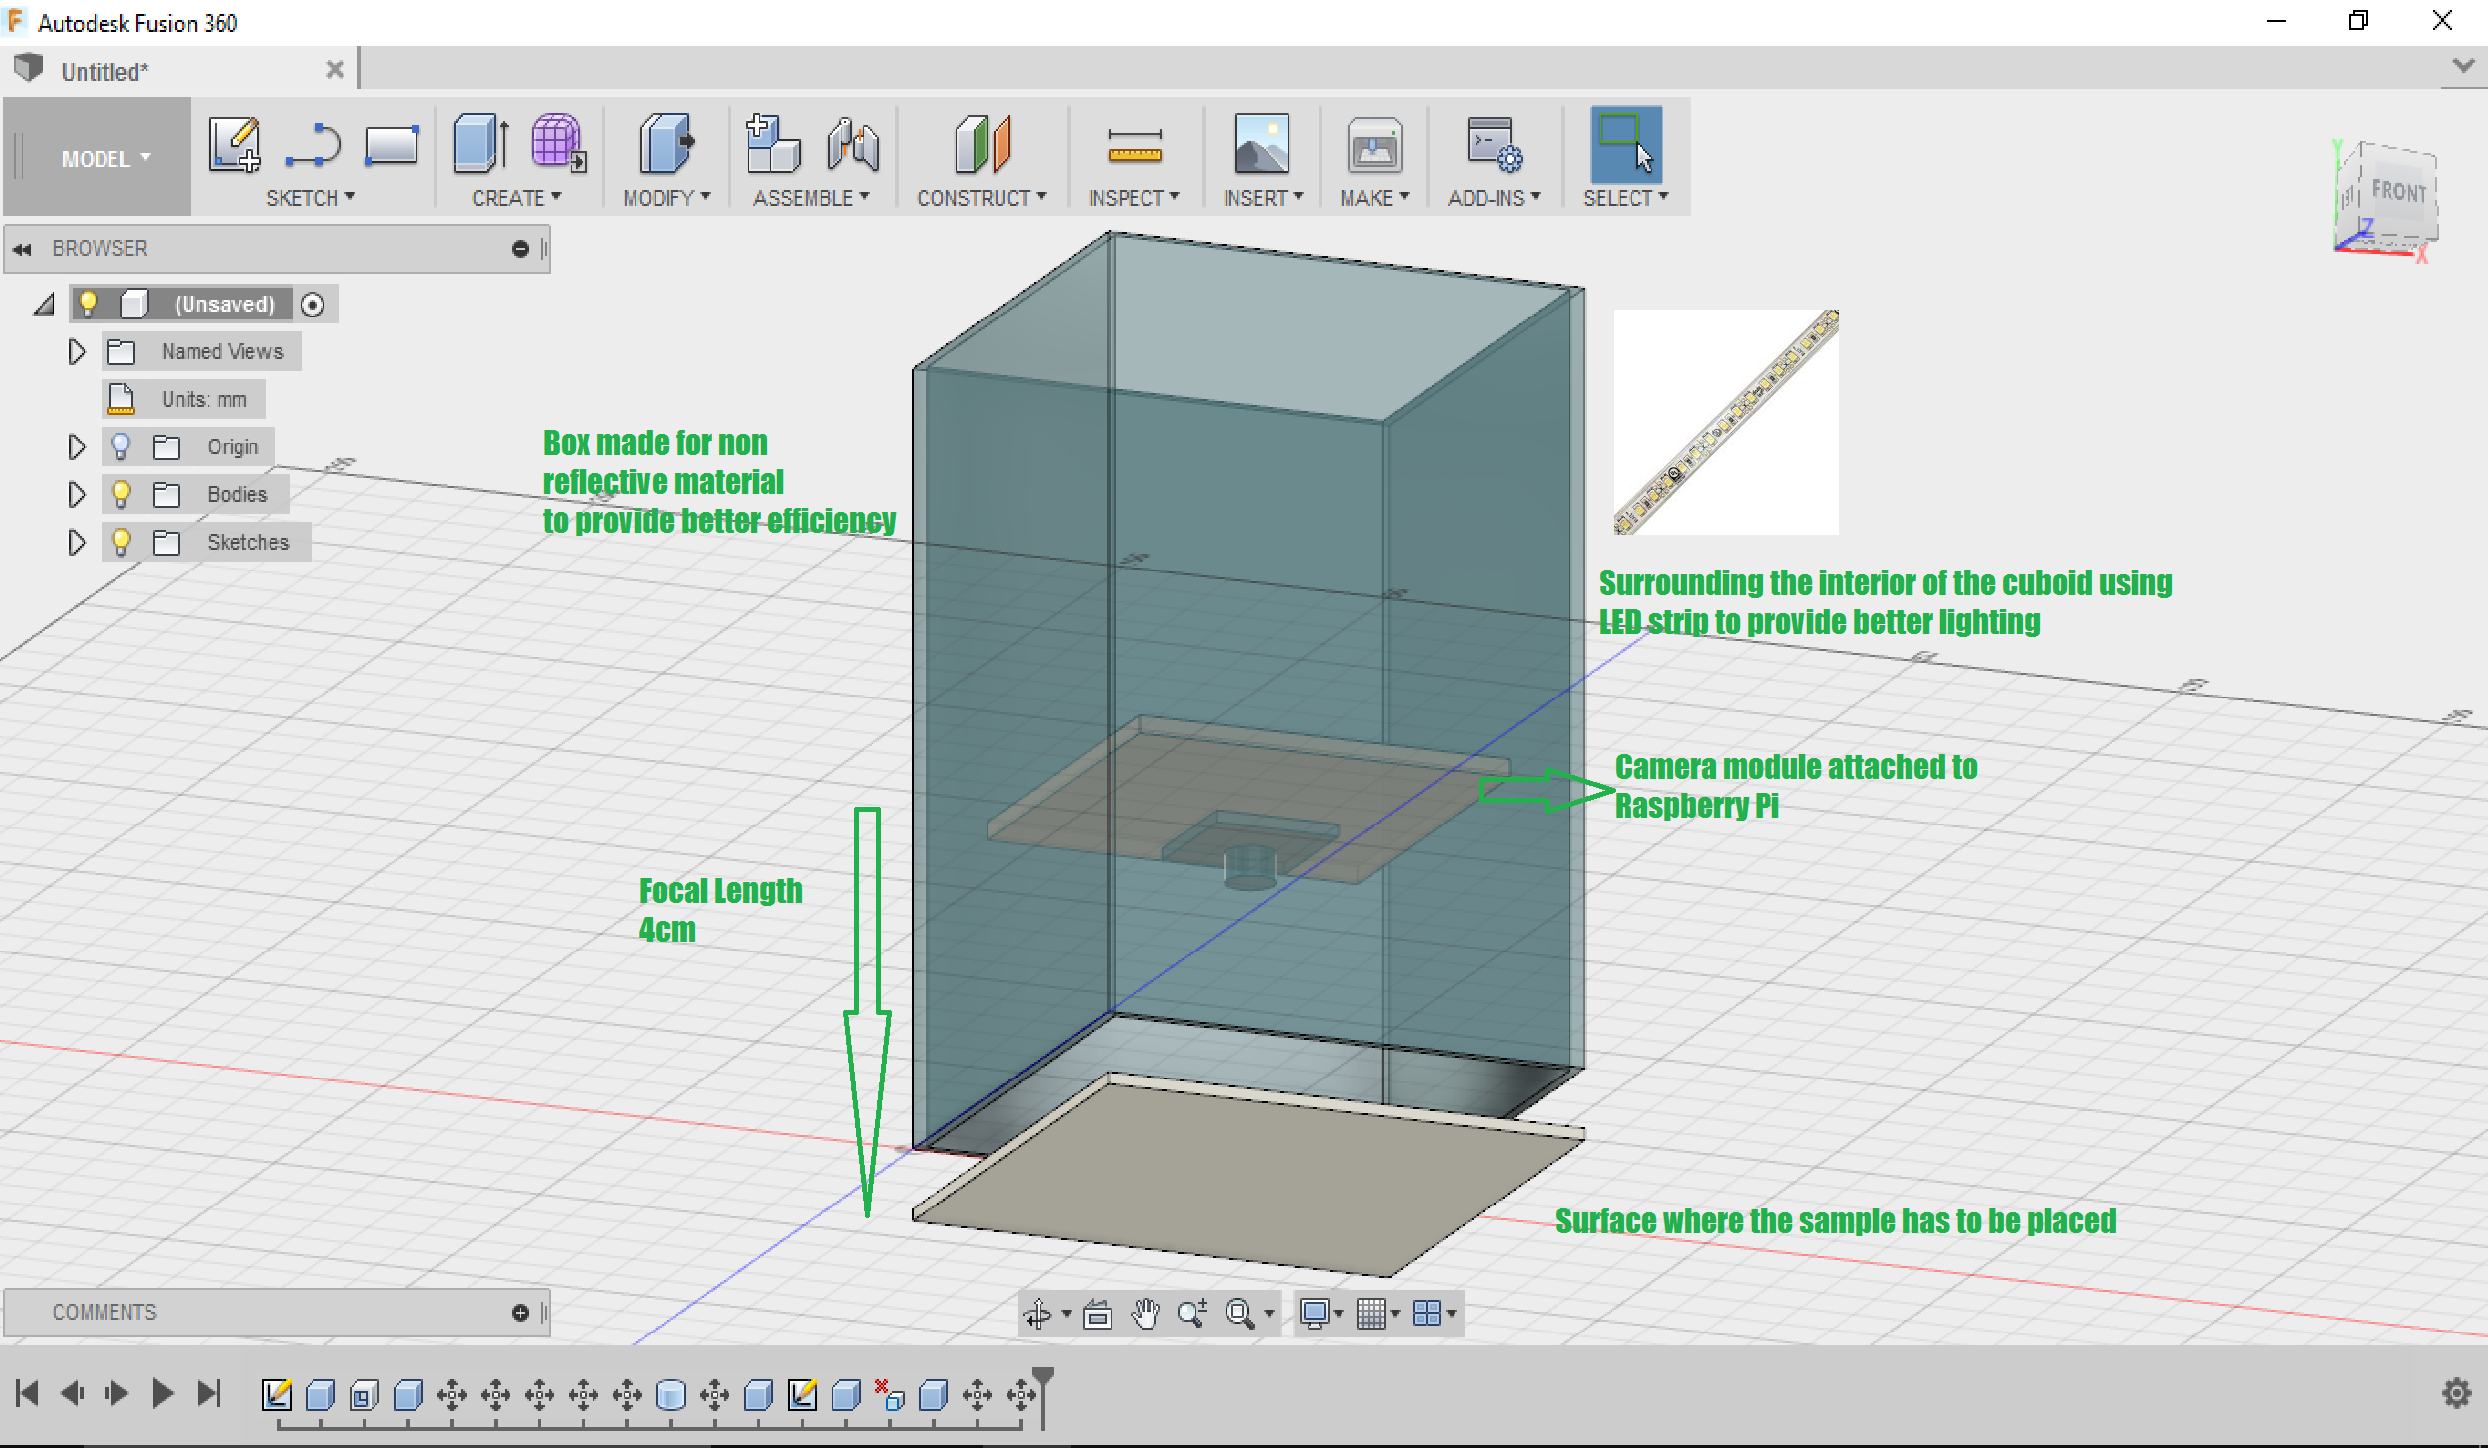
The lens of the camera module is placed inside the box in such a way that it is 4cm from the base. A small opaque plate of thickness 2mm is placed as a base such that it does not reflect the light back to the camera.
Discussions
Become a Hackaday.io Member
Create an account to leave a comment. Already have an account? Log In.