 Joan Horvath
Calculus is a set of math techniques that allow us to analyze how
things are changing. A lot of the explanations in Newton's original work
are about how he thought about calculating relationships among a moving
object's distance, speed and time.
Each of our modules will have an open-source electronics and/or 3D printing project which will help the user to learn a calculus concept, either in the build itself or by playing with the resulting object. Our first project is intended to help you get some intuition about the difference between moving at a constant speed and acceleration (speeding up, slowing down, or being affected by gravity). This first module is built around an Adafruit Circuit Playground (an Arduino-based processor with onboard sensors and programmable LEDs) to visualize interactions between gravity and a moving object.
From here, we will build up more
complicated ideas from module to module. will create
different Arduino sketches to run on the hardware components described
in this module.
The Concept
Calculus was invented by Newton to help him think about the motion of the planets relative to each other. One of the key things to realize if you want to understand the intuition behind calculus is that it is predominantly a way of encoding physics.
If you are standing on a planet, the force of gravity is pulling down on you. If suddenly there is no floor below you, that force opposing gravity is gone. You will start to accelerate (on earth, anyway) at 9.8 meters per second per second - so after 1 second you are going 9.8 meters per second, after two, 19.9, and so on.
These forces are what are called vectors - they have a direction. So if I am accelerating downward and also trying to speed up forward and back, I treat those separately. A device that measures that is called an accelerometer, which usually measures up and down, right and left, and front and back separately.
We wanted to design a little device that would let you play with the difference between moving at a constant speed (which does not require you to exert force) or accelerating (which does.)
The Build
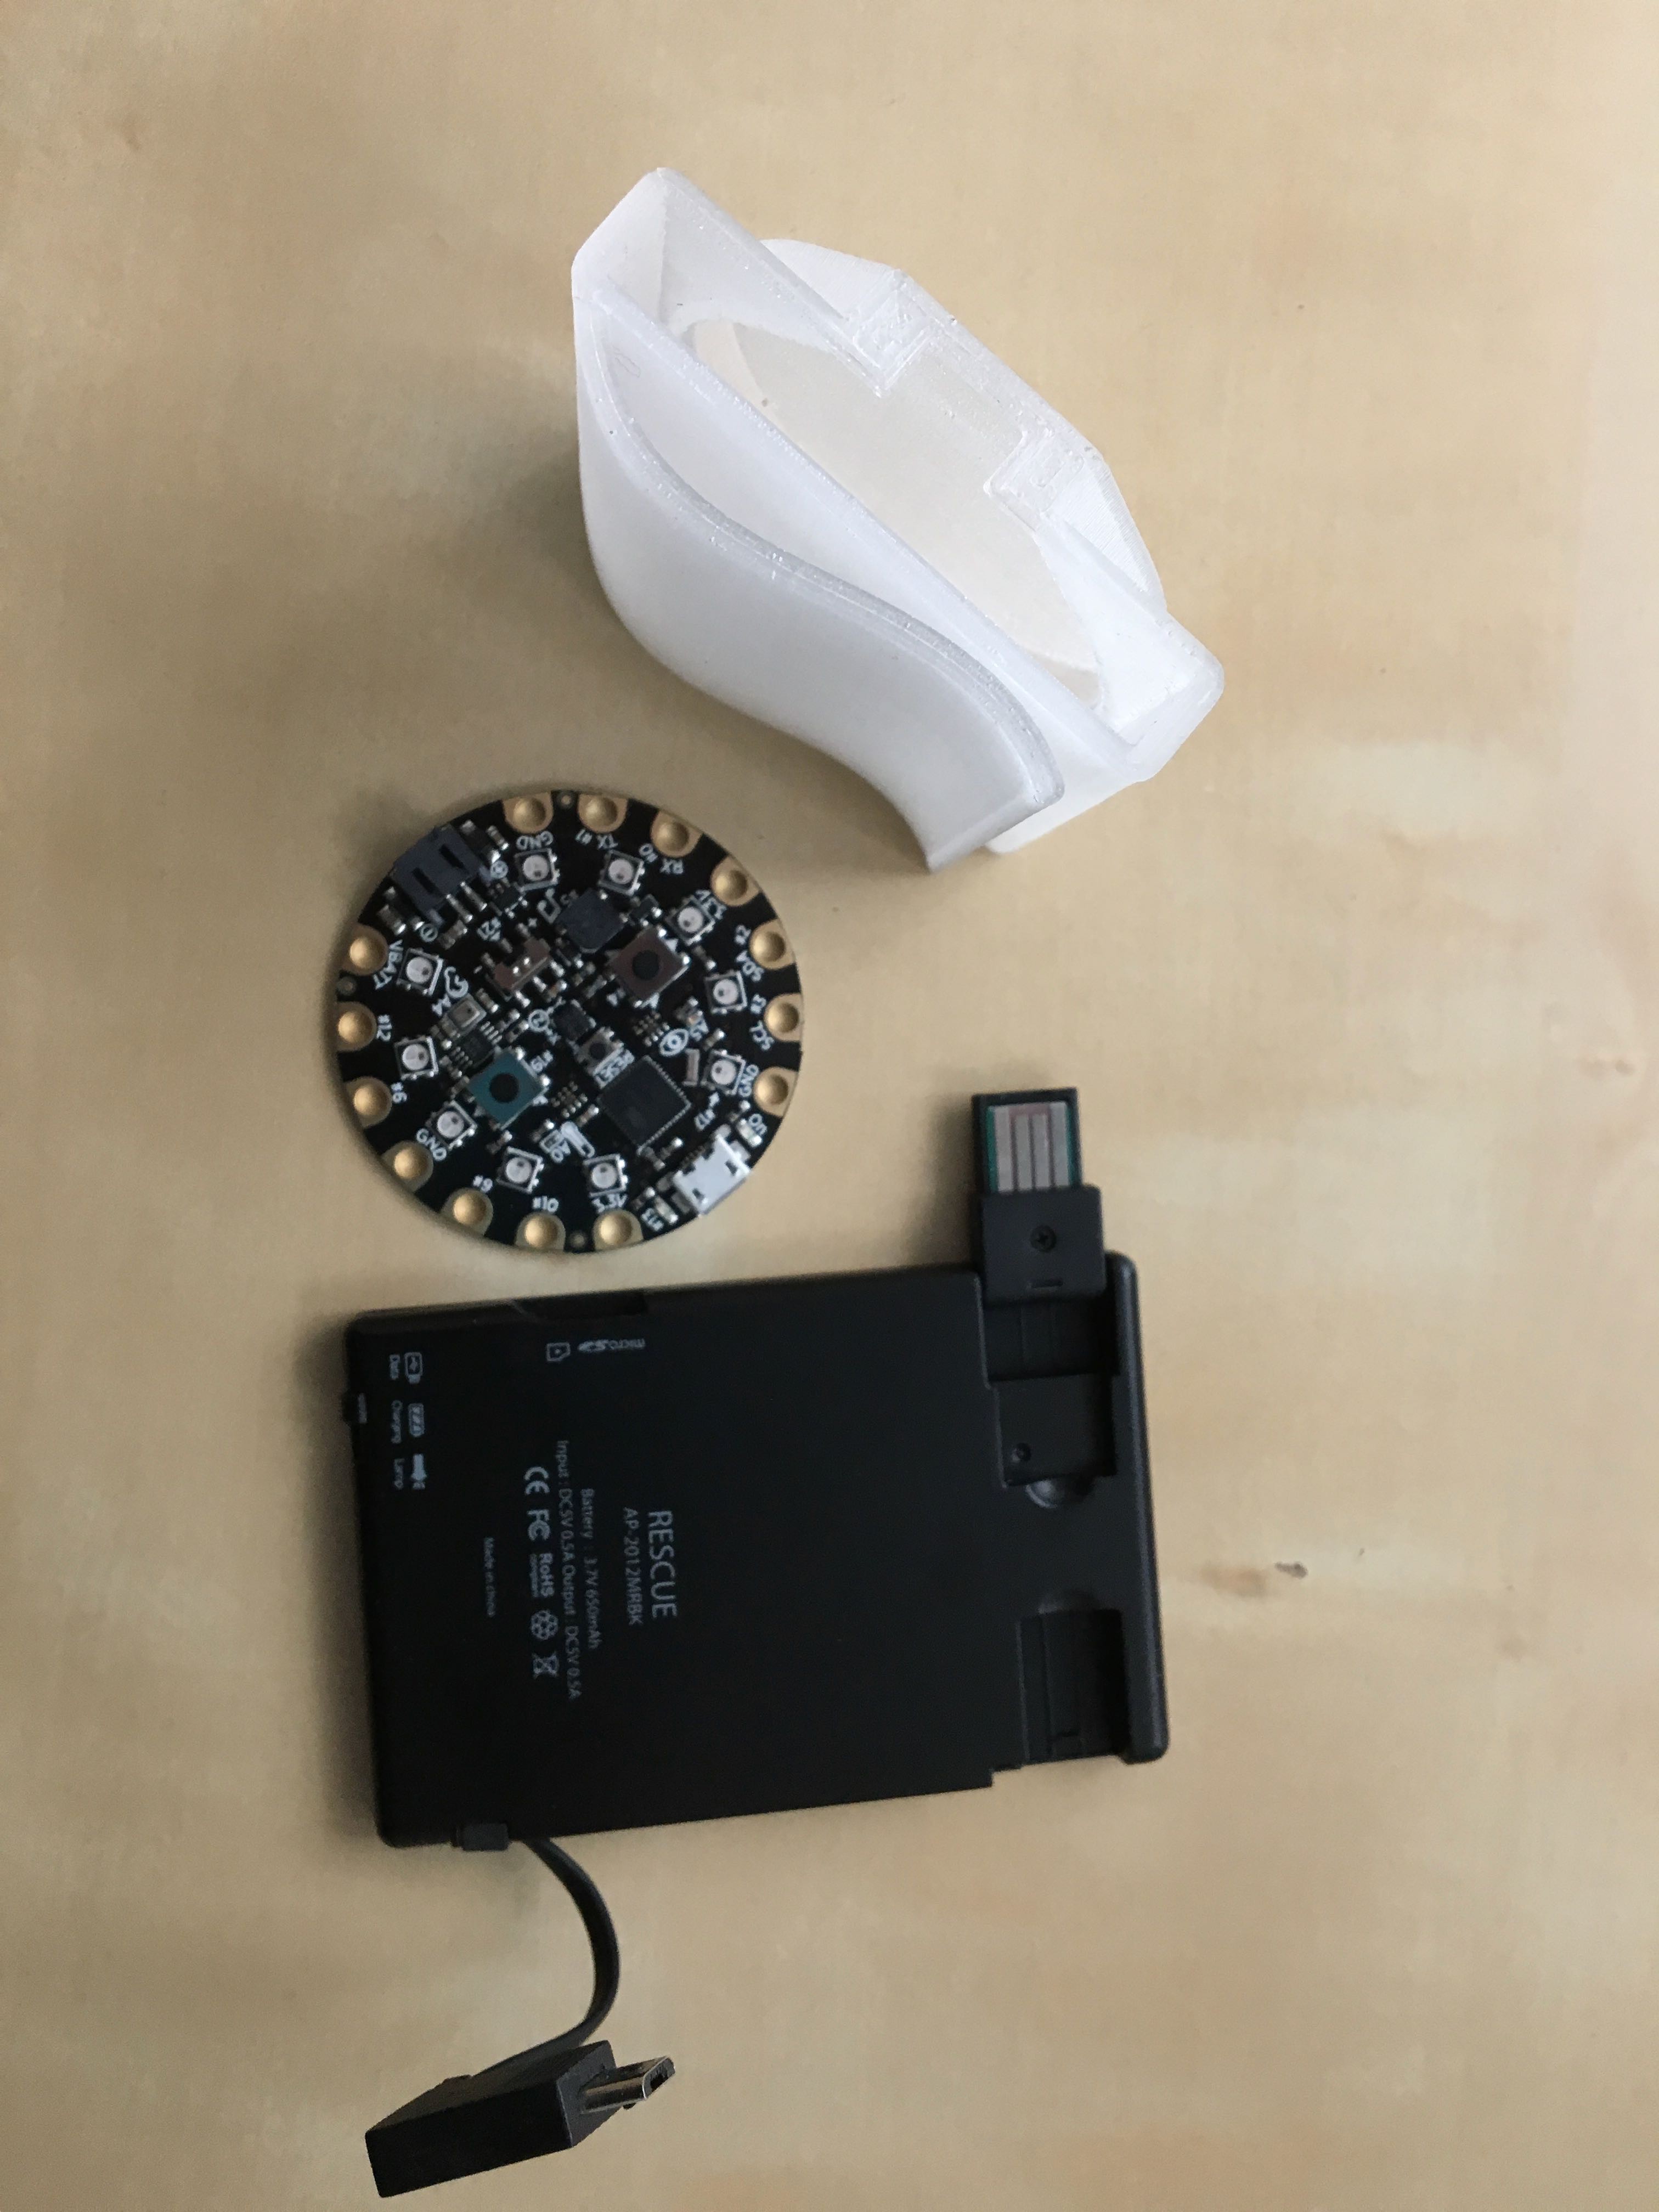
We took an Adafruit Circuit Playground, an Ares Rescue Charge Card battery, and a 3D printed case (developed by Rich, available under a CC-BY-SA license) to hold them together to create our acceleration visualizer. (Case printed in PETG for translucency). The Arduino sketch (microcontroller program) is available, also CC-BY-SA, in Rich's Github repository.
If you are new to this type of build,see the Instructions page.
The Circuit Playground has (among other things) a three-axis accelerometer, a buzzer, and programmable LEDs. Here is a picture of the 3D printed case, the Circuit Playground, and the battery.
Assembly
The Circuit Playground fits snugly into the round part of the case, lights pointing out. The battery slides in after and locks the Playground in place.
The Arduino sketch is designed so that if the lights are pointed upward, the program will ignore gravity and only measure acceleration and deceleration in the forward-and-back and left-and-right directions. It will stay lit up green as long as you have it perfectly level. You can even (cautiously) spin it around its vertical axis and it will stay green.
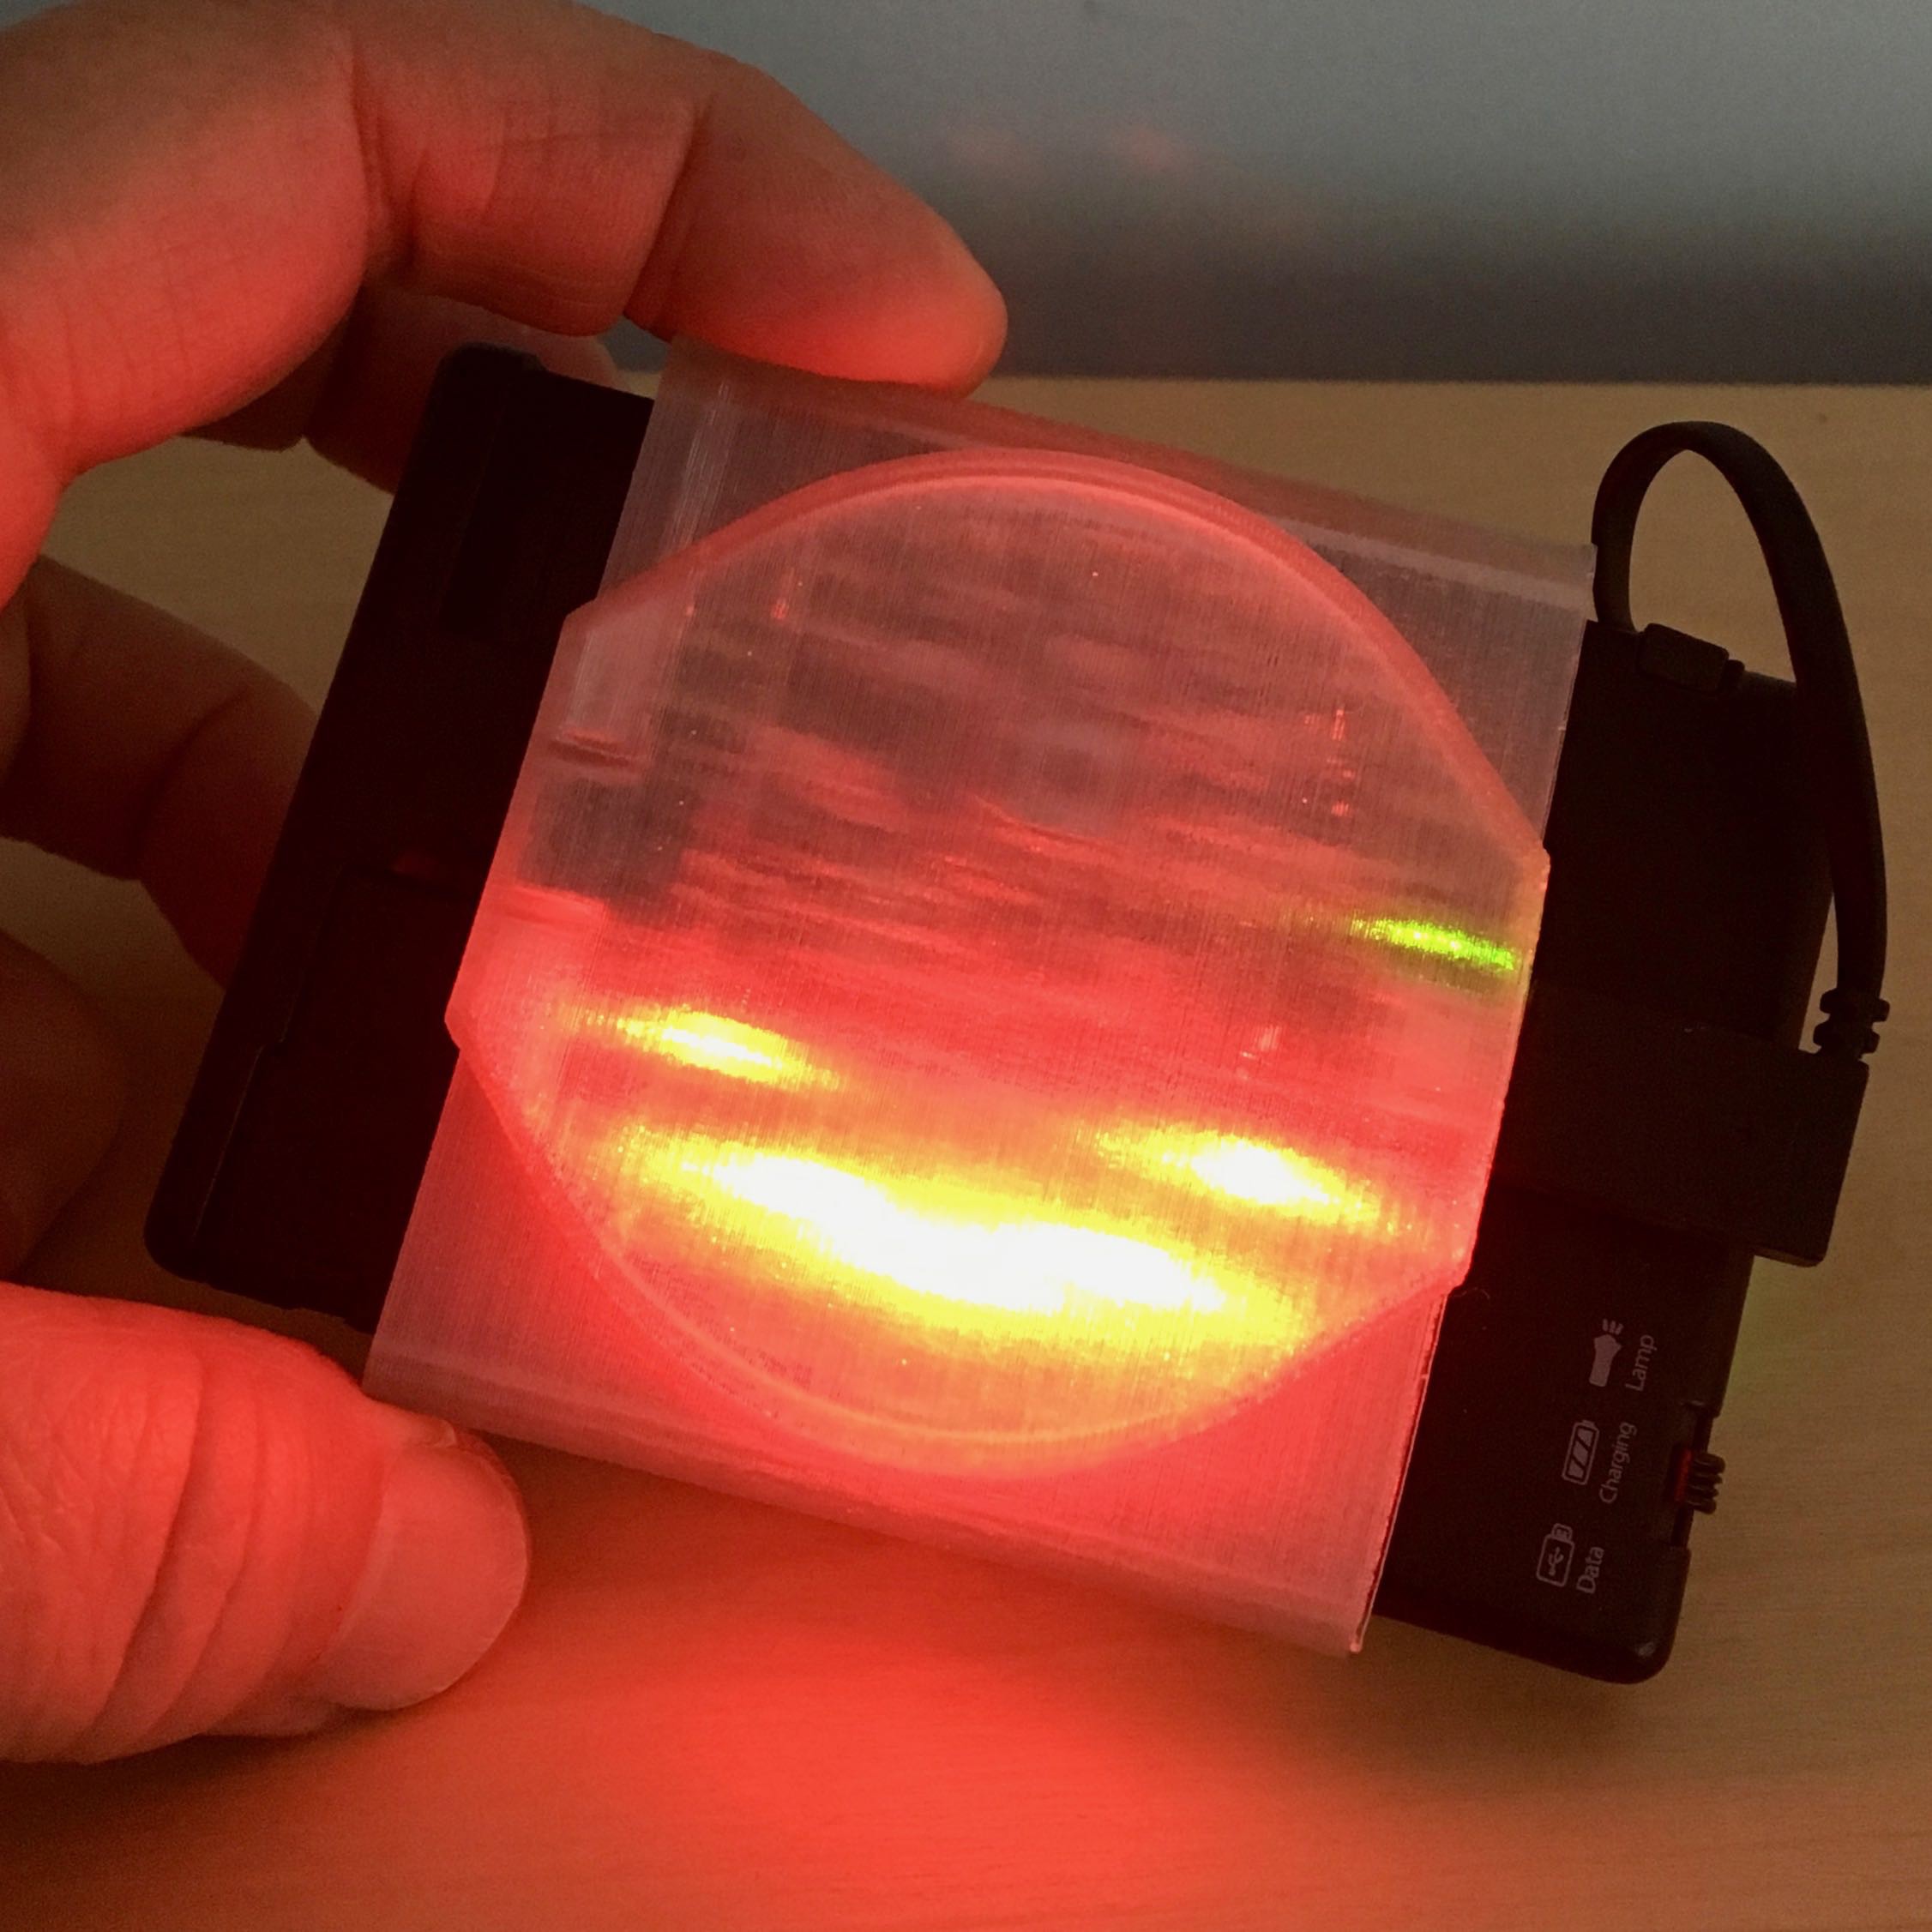
Playing with Acceleration
The device will light up red and beep as soon as you turn away from level. The red lights will "fall" to the bottom of the device when it turns away from level, and small deviations from level are shown by dimming of the lights on one end. (The tolerance is a parameter in the Arduino sketch.) You can use this to anticipate that you are off-level and/or accelerating other than in the up and down direction. The device ignores vertical acceleration (that is, accelerations perpendicular to the Circuit Playground board.) This means you can accelerate and fake it out - think about how to carefully dynamically angle it to get away with that. The videos that follow show the device being moved side to side with the light appearing to slosh around.
We brought this out to World Create Day at the Pasadena SupplyFrame DesignLab and let people try to move and walk with it. Suffice it to say that there was a lot of beeping (although a few people were really good!)
We intend this version as a simple demonstration that we can build on going forward by uploading new capabilities. If you were teaching a group of people, you can use this as an icebreaker to start talking about gravity, constant velocity, and acceleration. If you are learning calculus by yourself, try out the Things To Try below. The next log will start talking about a bit more abstract stuff.
It is meant to be bright and high-contrast so that visually-impaired users will be able to see the color change unless they are completely blind. In that case, the beep will give an auditory cue, and the shape will help a user keep track of which axis is which. Suggestions on more tactile cues for the visually impaired are welcome!
Things to Try
Moving at a constant velocity and perfectly level is hard to do. Get it level (green) first and then accelerate slowly to stay under the threshold that turns it red.
Can you think of a way to accelerate slowly while walking and keeping it "level" relative to your velocity vector?
If you were an astronaut, how could you move it without beeping?
Up Next
In log #2 we will talk about distance, velocity, acceleration, and using them to understand the core concepts of calculus.
Discussions
Become a Hackaday.io Member
Create an account to leave a comment. Already have an account? Log In.