 timonsku
I haven't yet talked in detail about the power injection board, which adds the smartness to the project.
Before I start, here are two photos of the latest version of the prototype:
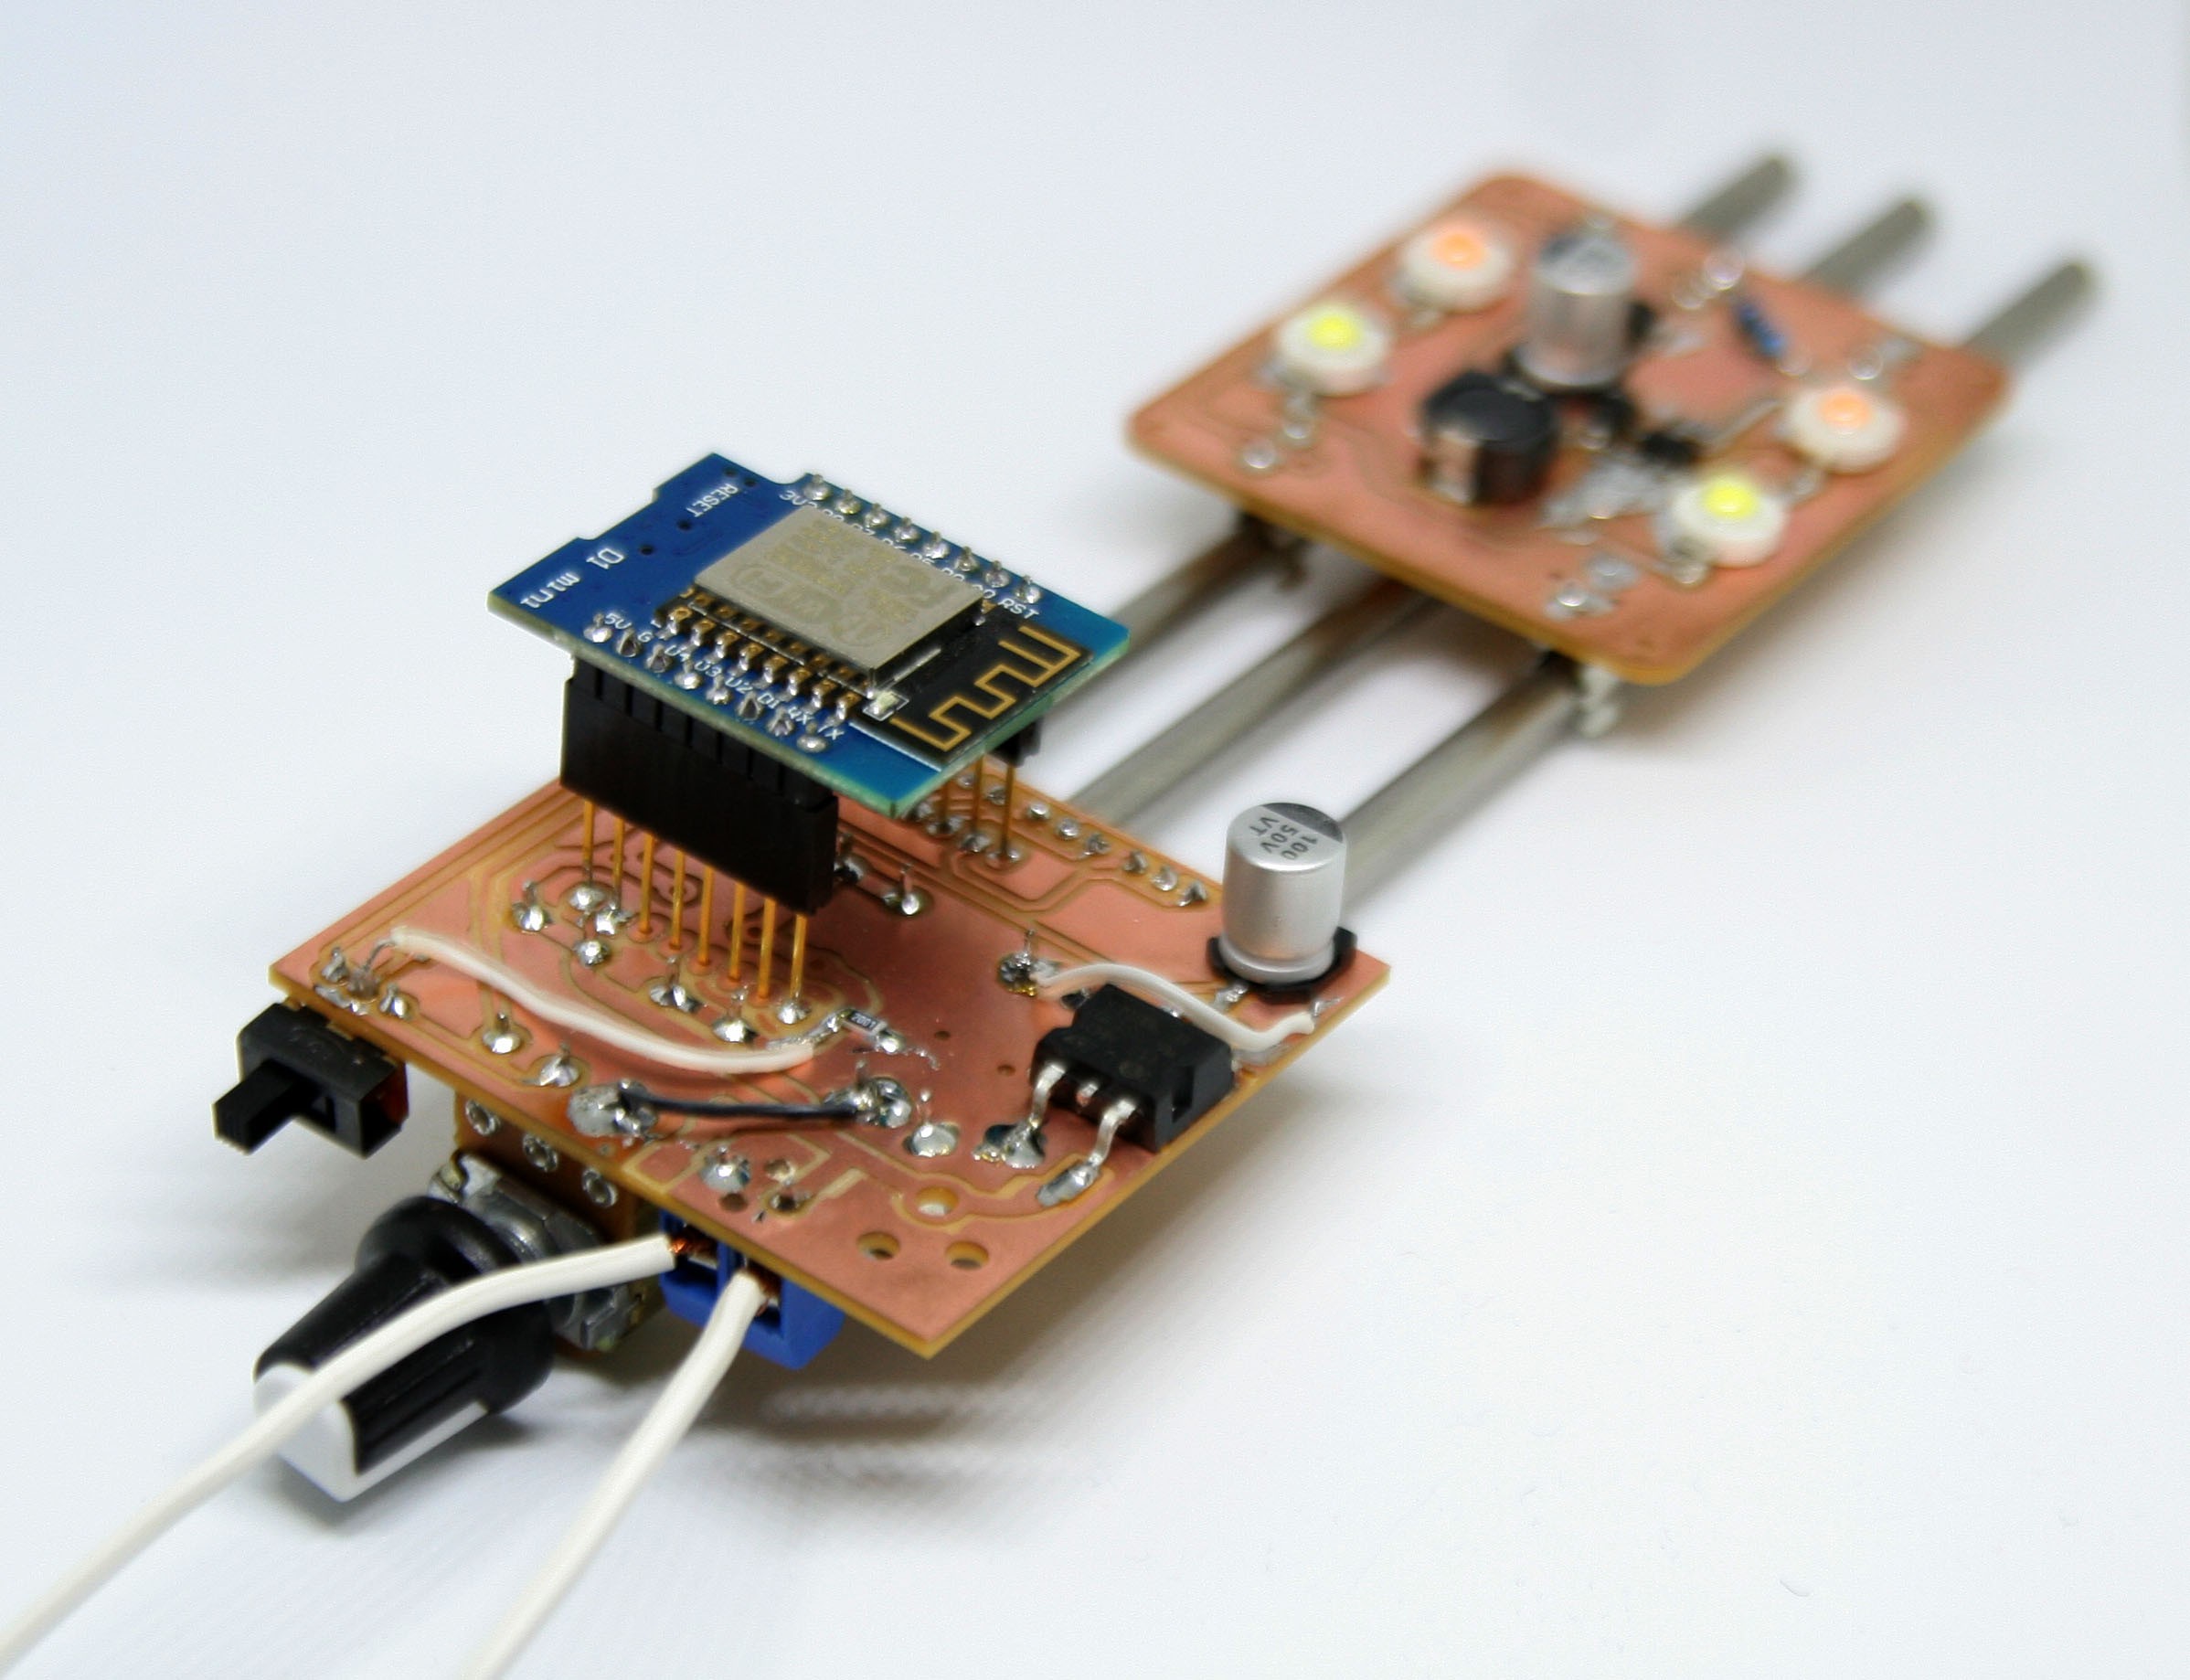
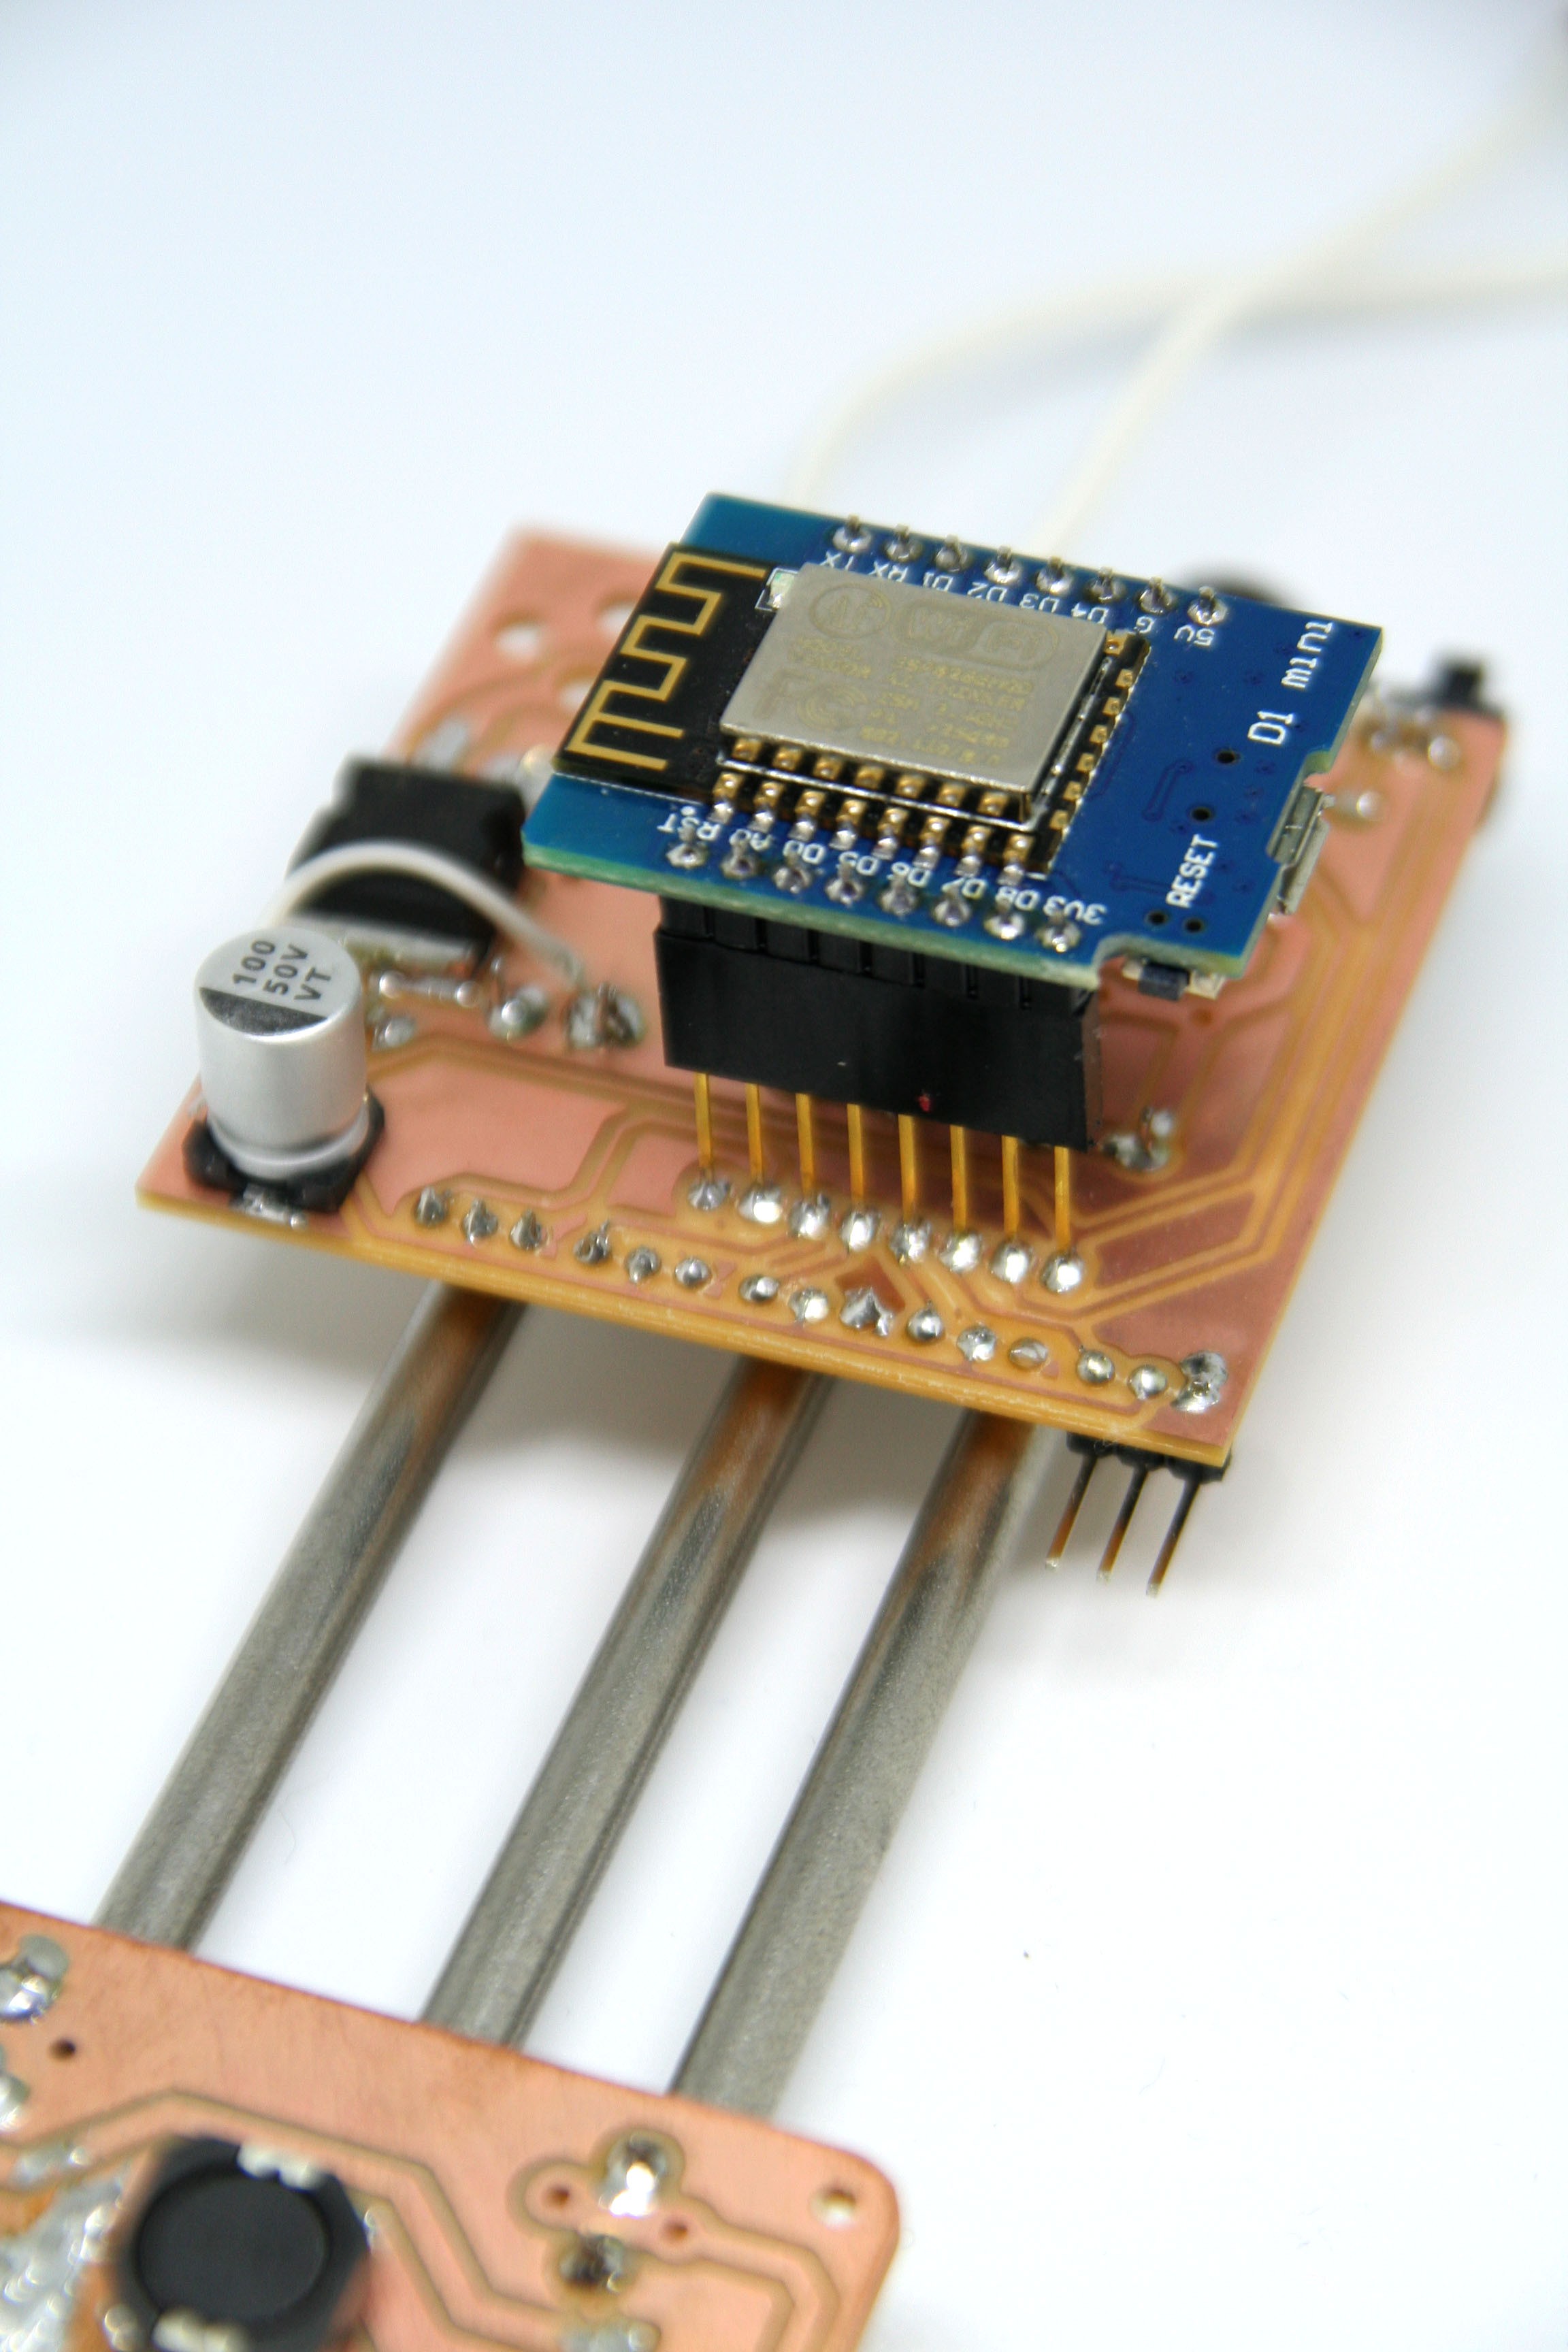
The board
You may wonder why it looks so awkward right now. This is purely a functional prototype, using these long headers for the WeMos D1 makes it easy to solder it to the component side as this is a milled PCB with only a single layer.
So I have to come up with some awkward ways to get this working while having components on both sides. In the final version you would directly solder the WeMos in without any headers to make it as flat as possible (or use headers if you like, thats up to you).
On the second picture you can see a single right angle header mounted. Usually the whole row would consist of 5 of these headers. 4 GPIO headers and 1 ADC header.
Each header also delivers 3v3 and GND. Unfortunately with my milled PCB I have to solder these headers on the bottom where they collide with the metal rods. Normally they mount on the top side. That is also the reason why you only see one header, I had to remove the others when I discovered that it wont fit this way.
I chose the WeMos because it has a fairly small footprint, is available for around 2.3€ from AliExpress/eBay which is not much more than a ESP-12E module and it has a programmer circuit built-in which in my opinion increases usability a lot. All you need for programming is a Micro-USB cable. I didn't see the big benefit of using a plain ESP8266 module other than making the module a bit smaller.
Functionality
So the main reason we have an ESP on there is controlling the brightness of the lamp rail and turning the lamp on and off over WiFi (though that is not all, more on that later). This all happens through the middle rod which carries the PWM signal to all the boards.
If you happen to install the lamp in an accessible place you can also use the potentiometer for manual dimming control. You can switch between both methods using the small sliding switch, left to the pot.
I added the potentiometer because I made the experience that its tedious if an appliance is only controllable via a smartphone or a computer. Sometimes you are just walking by and want to turn it off for the moment or dim it down a little, without accessing another device first.
For the ESP I have a very specific workflow in mind, that is supposed to make things very easy in terms of customizing behaviour and extending the system beyond of what its offering.
The central part here is node-red. For those of you who never heard of node-red. Its basically a Javascript based visual flow programming tool with a web based UI that runs on any platform. Read more about it here: https://nodered.org/
Node-red is really powerful if you simply want to define behaviour using complex inputs and outputs like a calender for example but don't want to actually have very complex logic in between the two and mostly just route between these inputs and outputs. In order to utilize the power of node-red the firmware for the ESP will use MQTT and break out the PWM output to a MQTT topic. So you can just send a bunch of numbers to the PWM pin and that's all you need in order to dim or turn on/off your lamp.
Not only the PWM pin will be broken out over MQTT, the GPIO pins and the ADC will also be broken out as a MQTT topic. So this enables you to define behaviour for the ESP without re-programming it physically. That way you can do some really complex stuff within seconds. Here is a video showing a mobile UI with a slider for dimming and a toggle button that switches between off and 20% on. Unfortunately the slider only updates when touch ends which makes this a bit sloppy looking but in theory you can have really smooth fades.
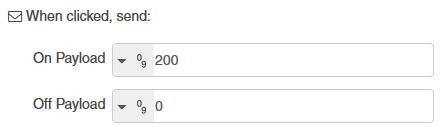
And all it need to get this functionality was adding the dashboard addon to node-red and this flow:
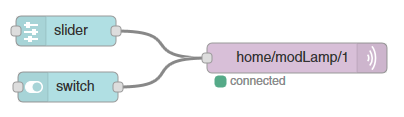
Dead easy. All I defined within the switch and slider node was what numbers they should output.
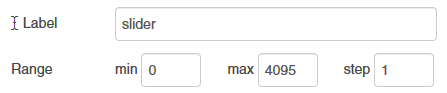
Slider:
Switch:
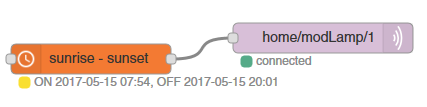
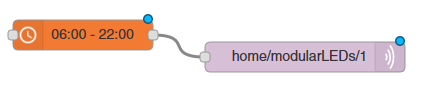
If you want automated control like f.e. having the lights follow the natural rise and dawn of the sun or turn on and off at a specific time everyday. You can simply do this:
That are just some examples for defining behaviour for the lights. It starts to get really powerful if you think about the fact that you also have IOs and an ADC, accessible in the same way. Lets go through an example.
Maybe you want to include a simple warning for when your plants need watering. You get yourself one of these really cheap sensors that you can just stick into your plant medium or maybe a photo interrupt sensor to detect if a floater goes below a specific threshold.
You attach the sensor to one of the headers, no need to run extra power as you get it from the header.
You go into node-red and setup a flow the other way around, listening to an MQTT topic instead of writing to one (in the case of GPIOs you will be able to configure them as in our output over a persistent configuration topic). You then determine what should happen when you read a specific value on that topic. Maybe you want to be notified via e-mail or push notifications through a service like Pushbullet.
This simple flow will do this for you:

You can easily push this further and instead of notifying yourself you can make a closed loop watering system that depending on the sensor status write to another GPIO which controls a water valve, watering your plants. As soon as the sensor reads that there is enough water again, the valve will be closed. It can be as easy as:

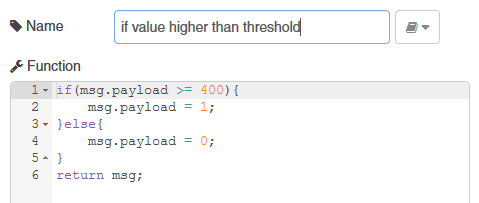
Node-red is always evaluating, so this is not a one shot thing but more
like an infinite while loop, reading the ADC value over MQTT, checking
if a threshold is reached and if it is, sending a 1 and if not a
0.
This is using a very powerful feature of node-red, which is that you can write small code snippets in Javascript to extend node-reds functionality on the fly. It reads the adc value and changes the payload variable to a binary value that the GPIO can understand.
You can see how by combining the right technologies, a simple hardware system like this can become very powerful and extendible without being complicated.
Extending the hardware
In terms of extending the functionality of the modules themselves you also have more than a few possibilities. You want to use a single 10W LED instead of 4 1W LEDs? No problem, the only thing you need to change in the circuit is this resistor determining the constant current limit for your LEDs.

By default it is set to be a 0.3 Ohm resistor. Setting the current to 0.1/0.3 = 0.333A.
Maybe you want addressable LEDs on a 3m long track? Just add a small microcontroller to the board like the ATtiny85 and some solder pads to set an address for each module. Now you can have addressable communication over the middle rod (lets call it signal rod) instead of a PWM signal.
No matter where you place a module on the rod, it will always be configured the same. Maybe you have one set of modules configured for warm white dimmed to a certain brightness and the rest to be cold white, also dimmed to a certain brightness.
Now you can go ahead and place modules on your long rail and mix the two colors by sliding modules and placing them in different positions, creating different lighting conditions as you please and being able to tweak them in software all at once. Or have a different address for every module and go crazy in node-red.
Maybe you don't want a lamp at all in there but modules with a small speaker utilizing the rail system for power and using the signal rod for volume control. Maybe mix lamp modules and sound modules and set the volume of your music according to the brightness of your lighting, if that's something you desire...
The point is that you are not limited to having LED modules, the system can be used for pretty much anything else that needs power, a fixture and some way of communication.
Discussions
Become a Hackaday.io Member
Create an account to leave a comment. Already have an account? Log In.