Close
0%
0%

Microwave Distiller / Reactor

Microwave mod: High efficiency still for ethanol, h2o, etc.
Also melts metal, hosts supercritical microwave reactions, etc.

Similar projects worth following
Microwave repurposed into a multifunctional piece of laboratory equipment. Will be capable of distilling solvents at ambient pressure as well as under vacuum conditions. Temperature is precisely controllable using PID technique with Arduino and infrared sensors.

With this temperature control, the unit will also be capable of high temperature reactions, and will be capable of maintaining refractory temperature levels. Reaction vessels are interchangable depending on the reaction taking place.

The distillation unit will function as one of these interchangeable reaction vessels. Another reaction vessel will be for high temp / high pressure / super-critical reactions / extractions.

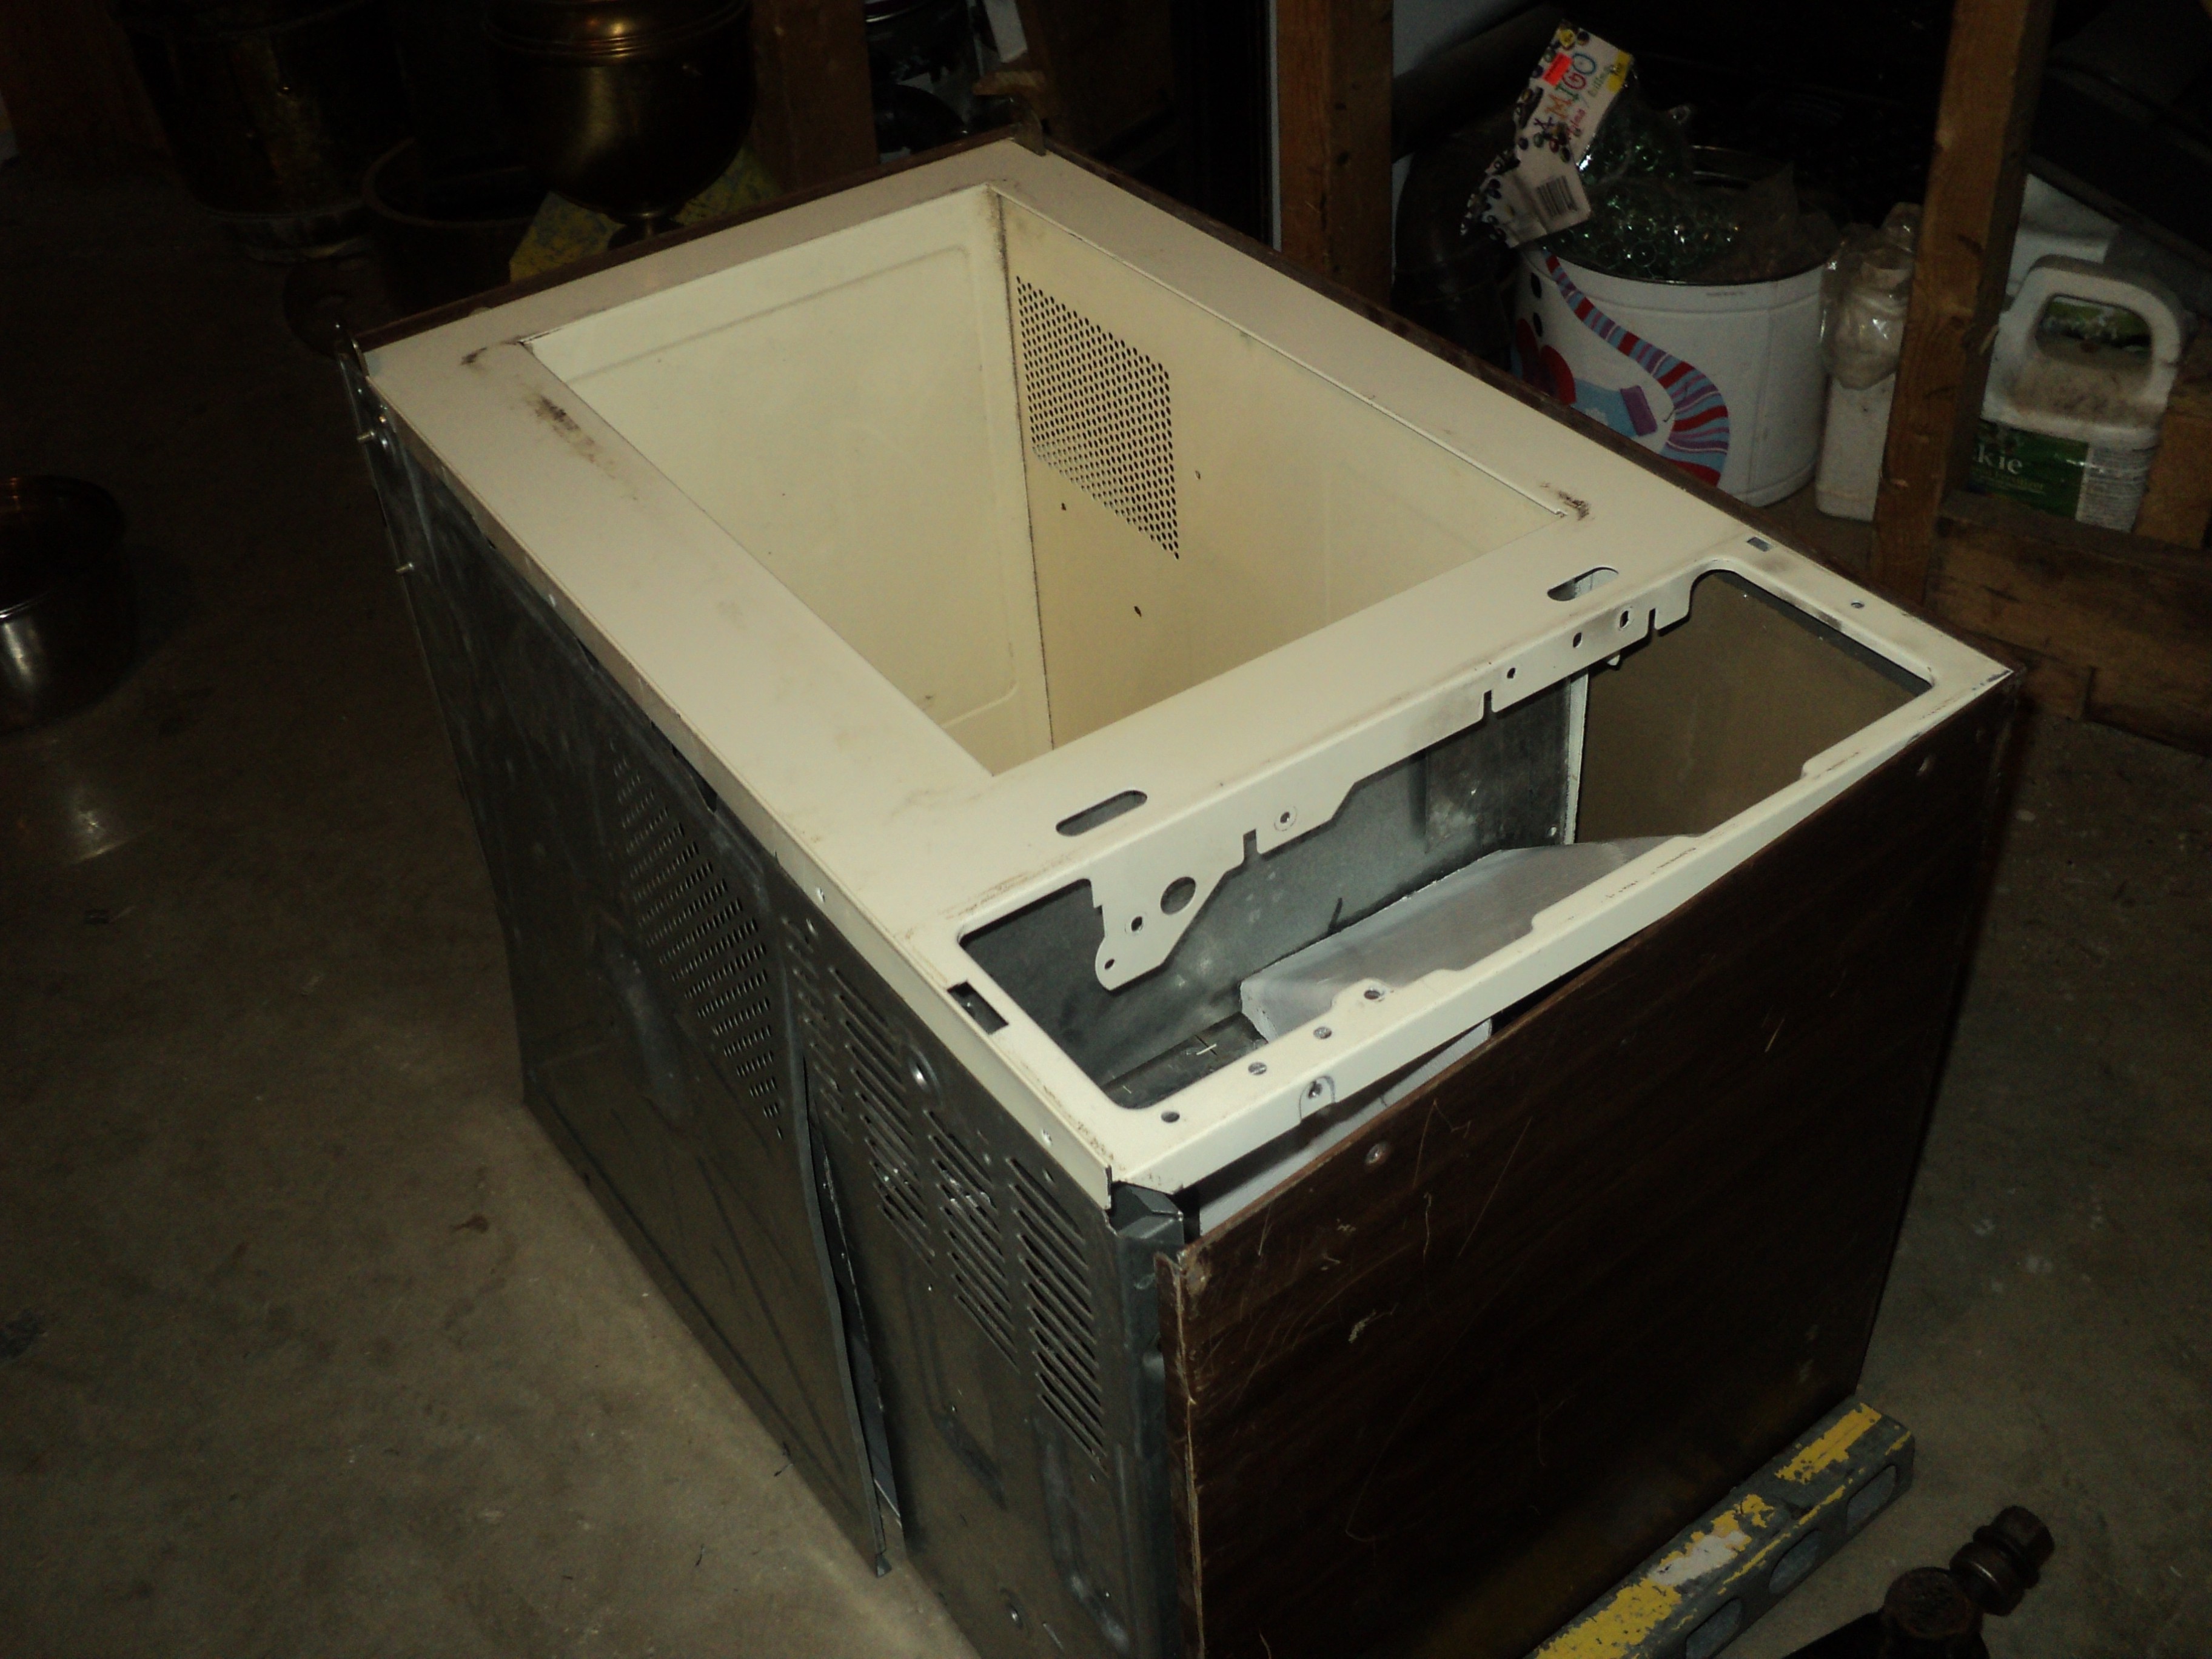
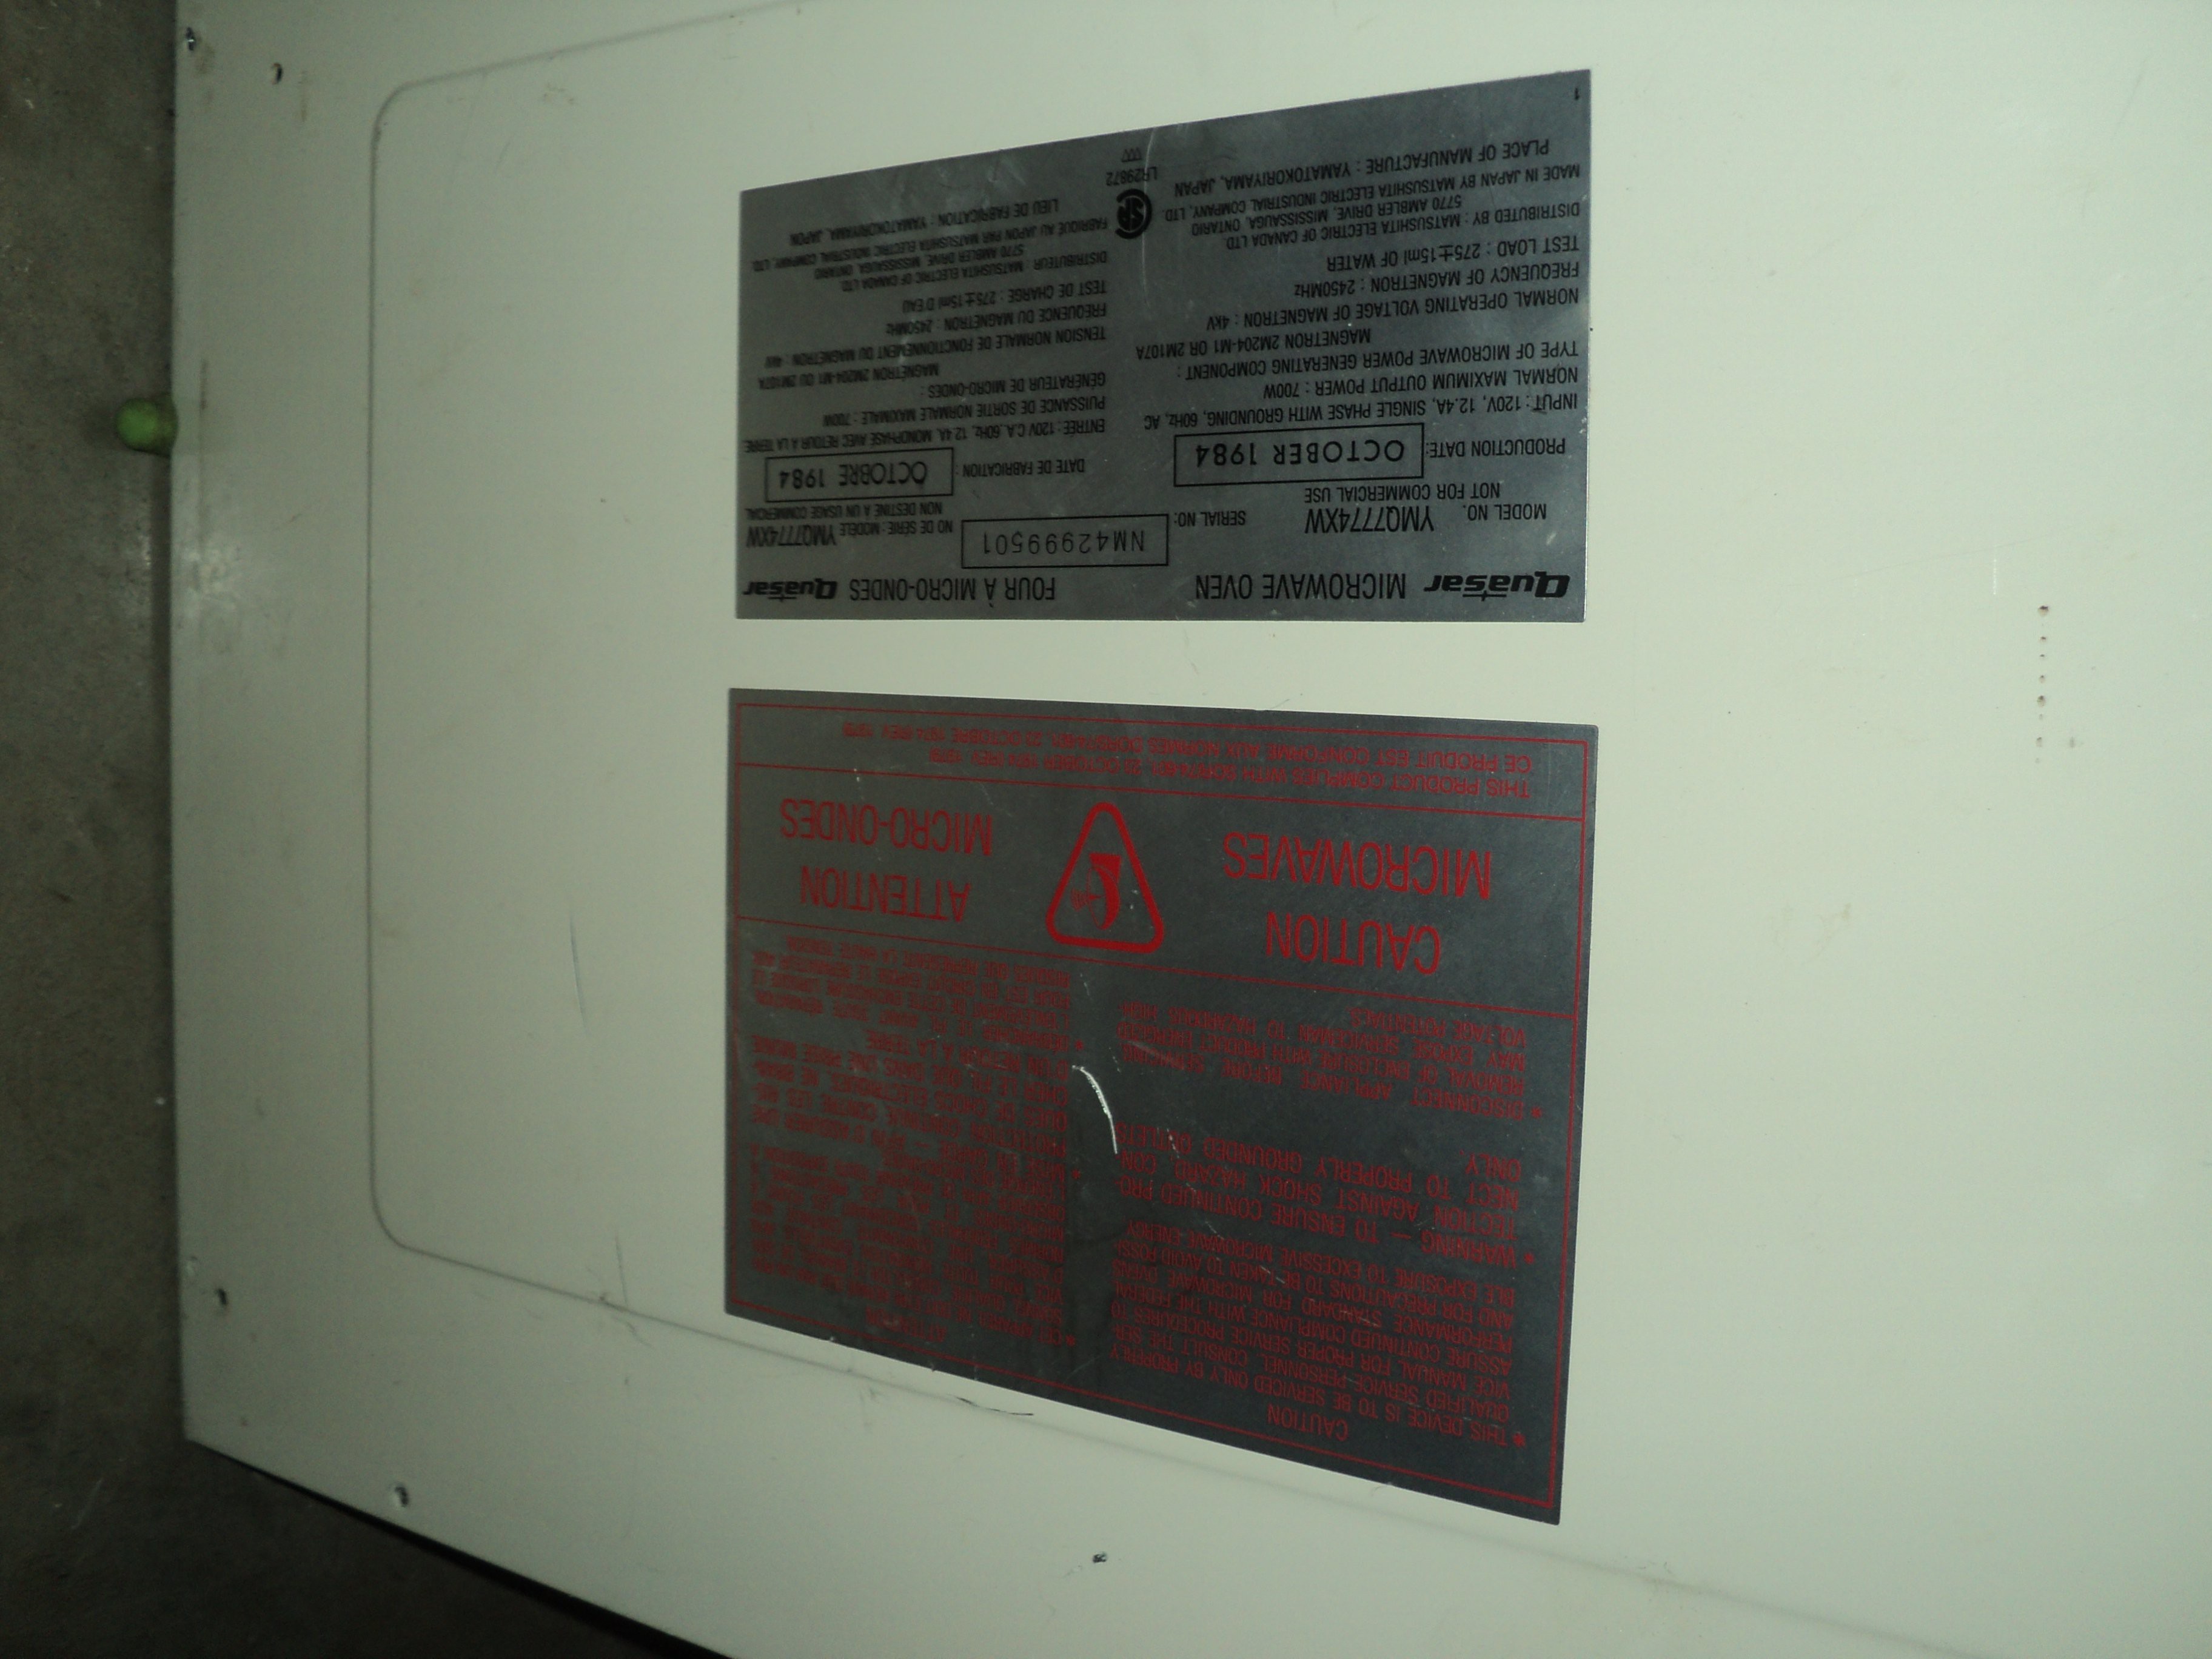
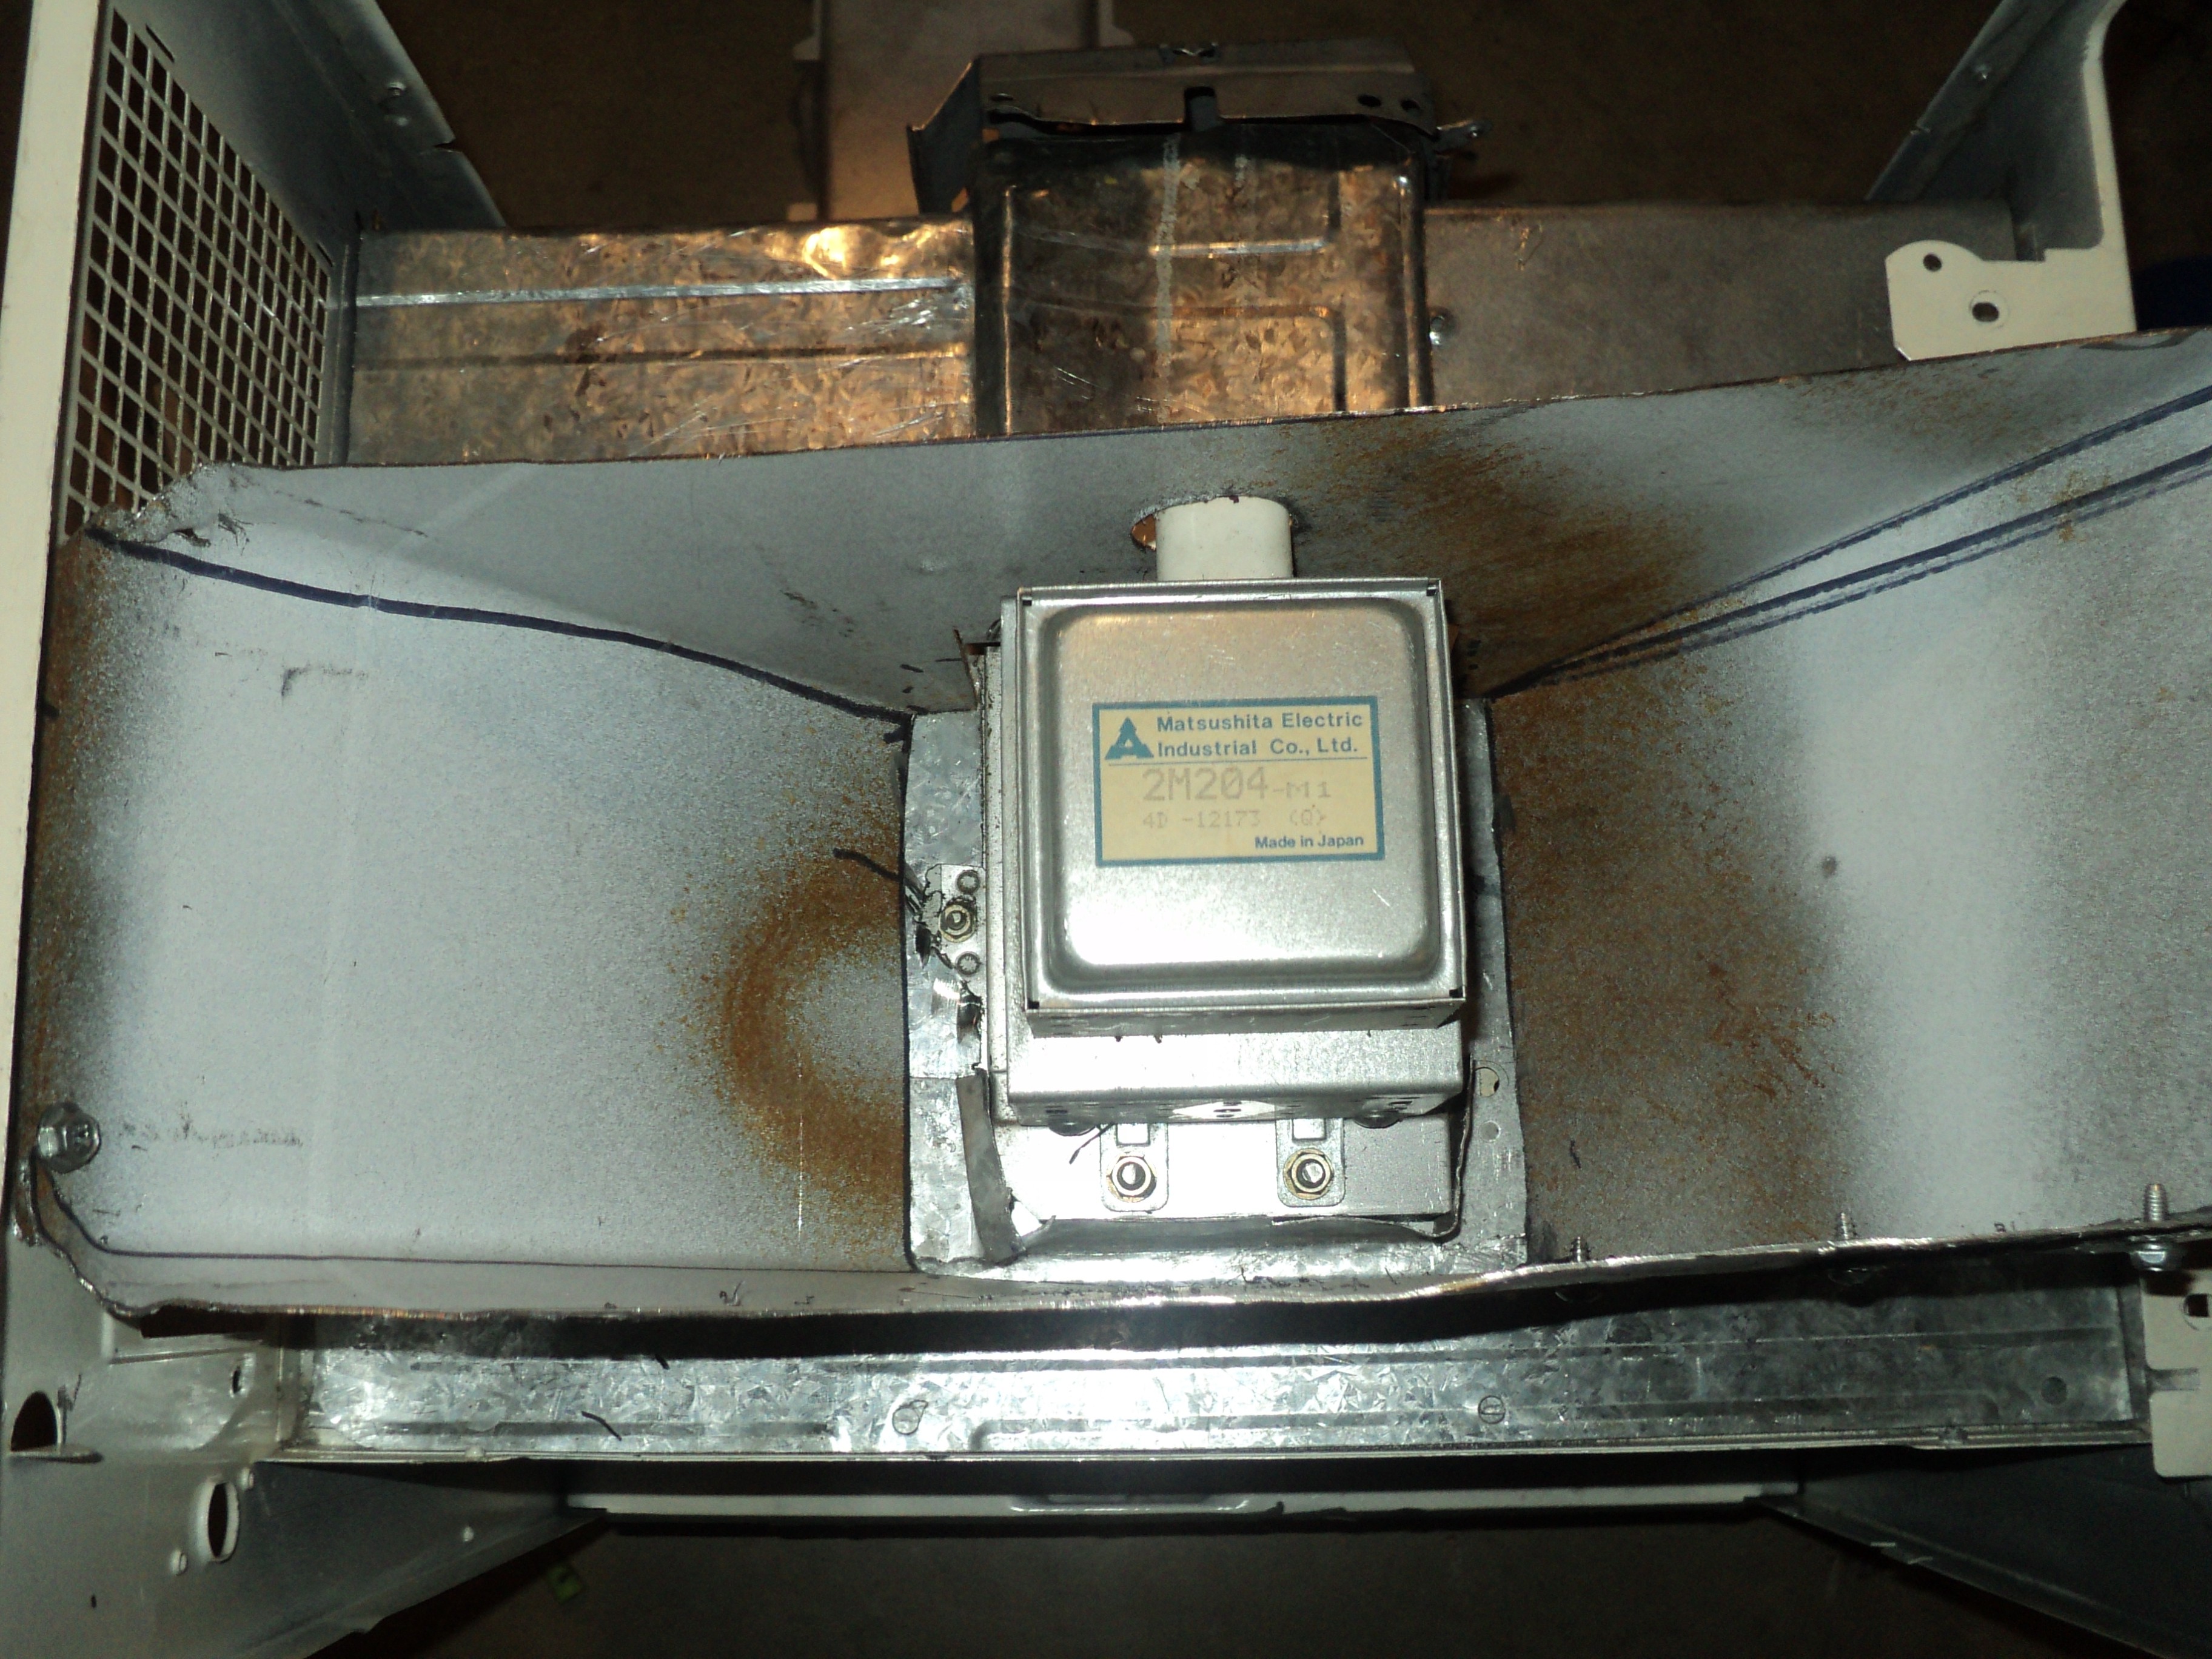
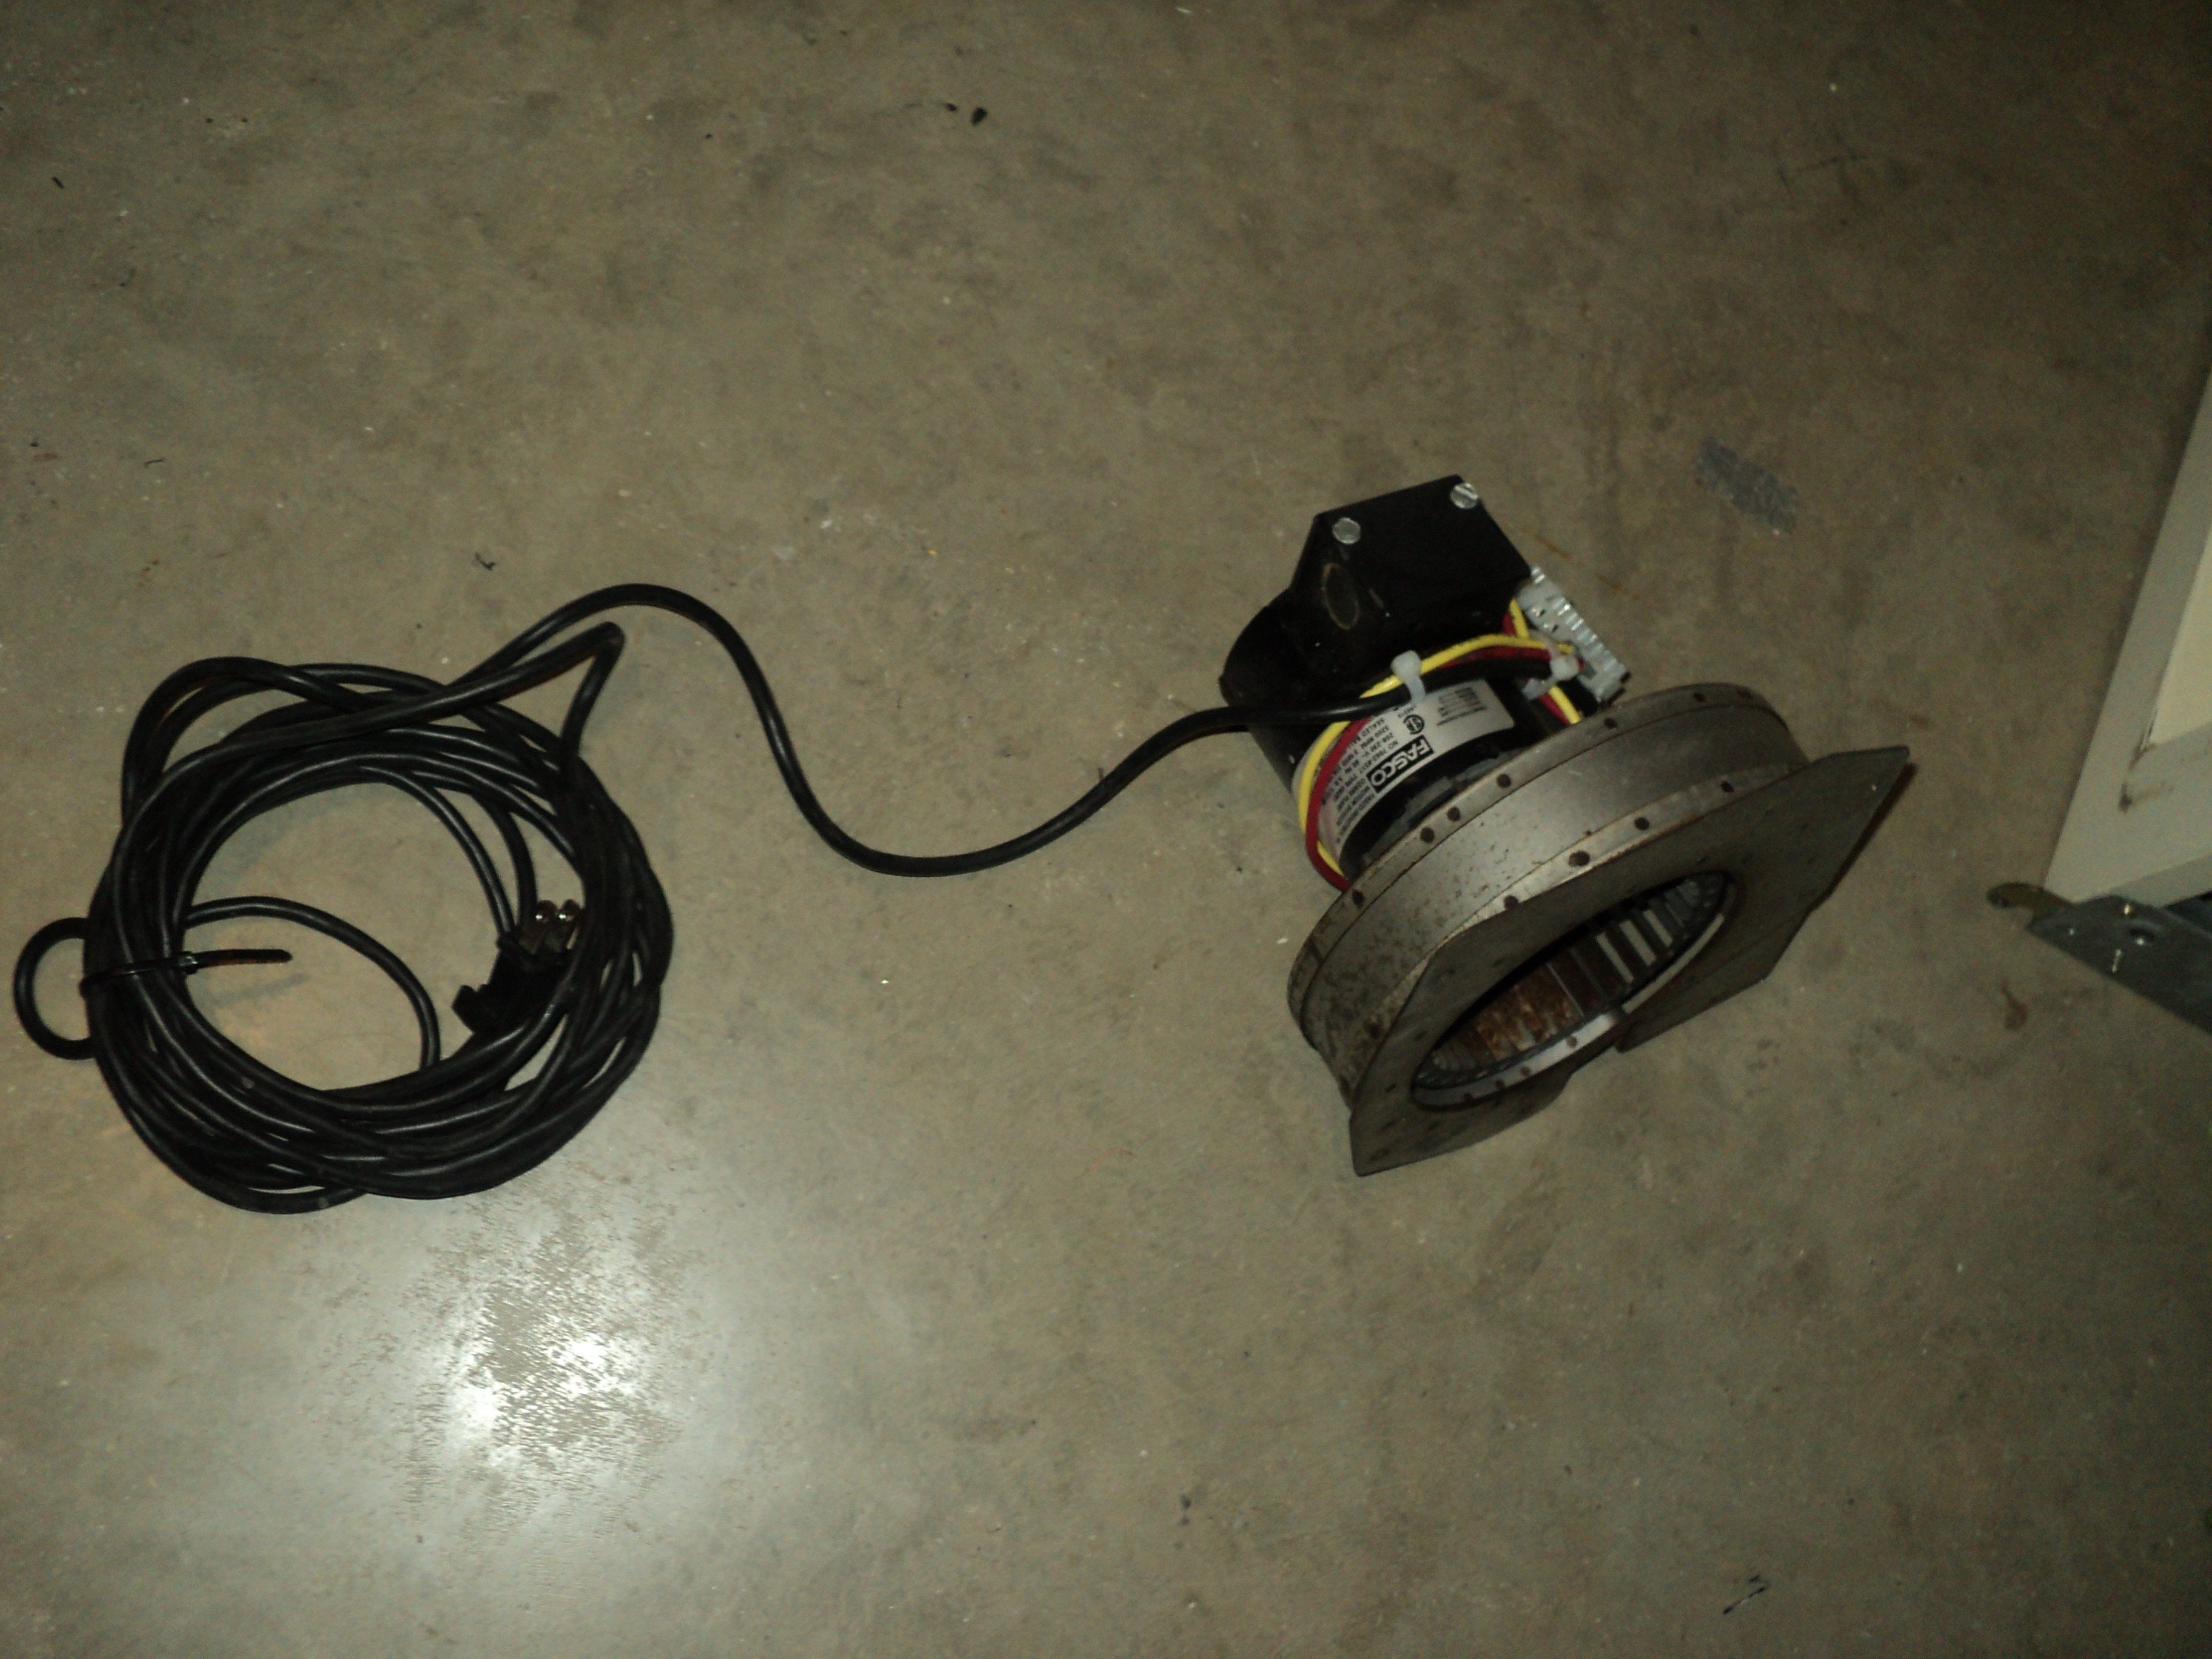
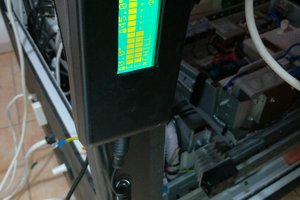
1984 MICROWAVE TRANSFORMED INTO LABORATORY HIGH TEMP. KILN / REACTOR

FEATURES:

- AUTOMATIC TEMPERATURE AND TIMER CONTROL

- CAPABLE OF REFRACTORY TEMPERATURES (1000 K - 2000 K GOAL)

- INTERCHANGEABLE REACTION VESSEL FOR DIFFERENT APPLICATIONS

- BLOWER COOLED MAGNETRON AND ELECTRONICS FOR CONTINUOUS OPERATION

- THERMALLY PROTECTED MAGNETRON

- EXHAUST DUCT CONNECTION FOR FUME EXTRACTION

- PORTAL AT TOP OF HEATING CHAMBER CAN BE OPENNED ALLOWING FOR ATTACHMENT OF CONDENSOR / REFLUX COLUMN FOR DISTILLATION AND OTHER RELATED EXPERIMENTS

- COMPRESSOR BASED COOLING SYSTEM FOR CONDENSOR / REFLUX

- 4W3S0M3N355 AND TOTALLY 7334

-ALL YOUR BASE

  • pics

    localbroadcast04/17/2017 at 01:59 0 comments

    T

    October 1984.. I was born in 1984, so I felt compelled to give this old girl a second chance at life. As for the danger warning, I have no concerns as I feel completely qualified.

    Magnetron with the added air duct around it. The empty voids in the case will all be filled with the waterglass perlite ceramic insulation, except for this duct area.

    The blower fan, salvaged from a future shop dumpster. I believe it would have functioned in a furnace originally.

    This picture shows the beefed up wave guide covering. As mentioned earlier, I hope this will add some level of protection from the wave guide being damaged or deformed. At the kind of temperatures I plan to reach with this machine, there are real possibilities of the original wave guide being completely destroyed, and in the event of such a malfunction, this added layer of metal will hopefully help to contain potentially harmful RF leakage. Obviously the dimensions of the added shielding don't match the actual wave guide within it, but that's alright. It's function is of safety and is not meant to propagate the signal in the event the actual wave guide fails in a catastrophic way. It will also act as a barrier to keep the insulation mixture from seeping into the waveguide during construction.

    Almost all of the modern microwaves have wave guides that don't stretch beyond 4 or 5 inches long. This microwave has the magnetron located at the side of the machine like the modern ones do, but then it guides the microwaves down the side, across the bottom, and out the center of the cooking chamber. I really have no idea if this will be a benefit or a hindrance, but I seem to think it will make it less likely that the magnetron tip will get burnt up or damaged, which is what seems to happen in a lot of cases when people overdrive their microwaves. I'm making sure to leave access to the magnetrons mounting screws in the event it needs to be replaced at any time.

  • April 16, 2017 update

    localbroadcast04/17/2017 at 01:29 0 comments

    Just finished up the last of the sheet metal work. The sheet metal was added in an attempt to reinforce the microwave shell and wave guide already in place.

    Structurally, the additional sheet metal acts to protect the wave guide from being dented or damaged. The wave guides dimensions are important, and I didn't want to change it from how it was originally designed.

    I am using a microwave that was built in 1984. Microwaves as a consumer product was relatively new at this time, so I wasn't too sure they had all the kinks worked out of their design just yet. The added metal around the magnetron and waveguide hopefully will keep all the RF within the machine, and not astray throughout my laboratory.

    The sheet metal surrounding the magnetron will function as an air duct to keep the magnetron from overheating. A blower will be mounted on the outside of the case and directed through this duct.

    With all the sheet metal work out of the way, the next step is to add the insulation and the outer shell of the machine. I am using a combination of water glass, perlite, and broken up pieces of ceramic from things like old tiles and old coffee mugs.

    I made the water glass this afternoon by mixing sodium hydroxide, silica gel, and water. It's simple to prepare, and if done right, the sodium hydroxide provides ample heat and you won't even need to mess around with a hot plate. I've done it enough times that I simply premix the lye and silica in a pyrex bowl, quickly pour in the water and put a very loose fitting lid on it and make my escape. Return in an hour to a finished product! Done wrong and you come back to a rock hard mess, or an incomplete reaction. If anyone's interested I can elaborate but I'll leave it at that for now.

View all 2 project logs

Enjoy this project?

Share

Discussions

jeffc240 wrote 08/11/2019 at 10:54 point

I am very interested in learning about your set-up to use/repurpose the microwave as a distiller.  Do you have schematic you could share...jeffc240@optimum.net.

  Are you sure? yes | no

Similar Projects

Does this project spark your interest?

Become a member to follow this project and never miss any updates