 littleBits
Control - With this add-on, the littleBits servo is connected to adjuster arm on your thermostat. Use Cloud Control (on your phone or computer) to adjust the position of the servo arm, thus moving the little adjuster lever and changing the temperature.
Automate - Use IFTTT to automatically adjust your thermostat in response to conditions that you set (i.e. time of day or forecasted weather conditions). IFTTT (If This Then That) is a service that lets you connect to different web apps through simple conditional statements. Use the Date & Time channel to turn your thermostat down at 1pm and up at 6pm. The littleBits trigger allows you to adjust the percentage of output voltage sent to the servo, giving you more control over the temperature of your home.
Monitor - The temperature sensor transmits data through the cloudBit to Cloud Control, which can be viewed under the “receive signal” tab. This way, you can always know temperature in your apartment/house.
 USB power + temperature sensor + cloudBit + servo.


 Coders' Cafe
 Christian Rangel
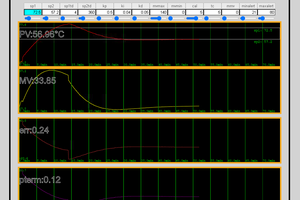
 justin.richards
 Emach00