 Dane Gardner
-
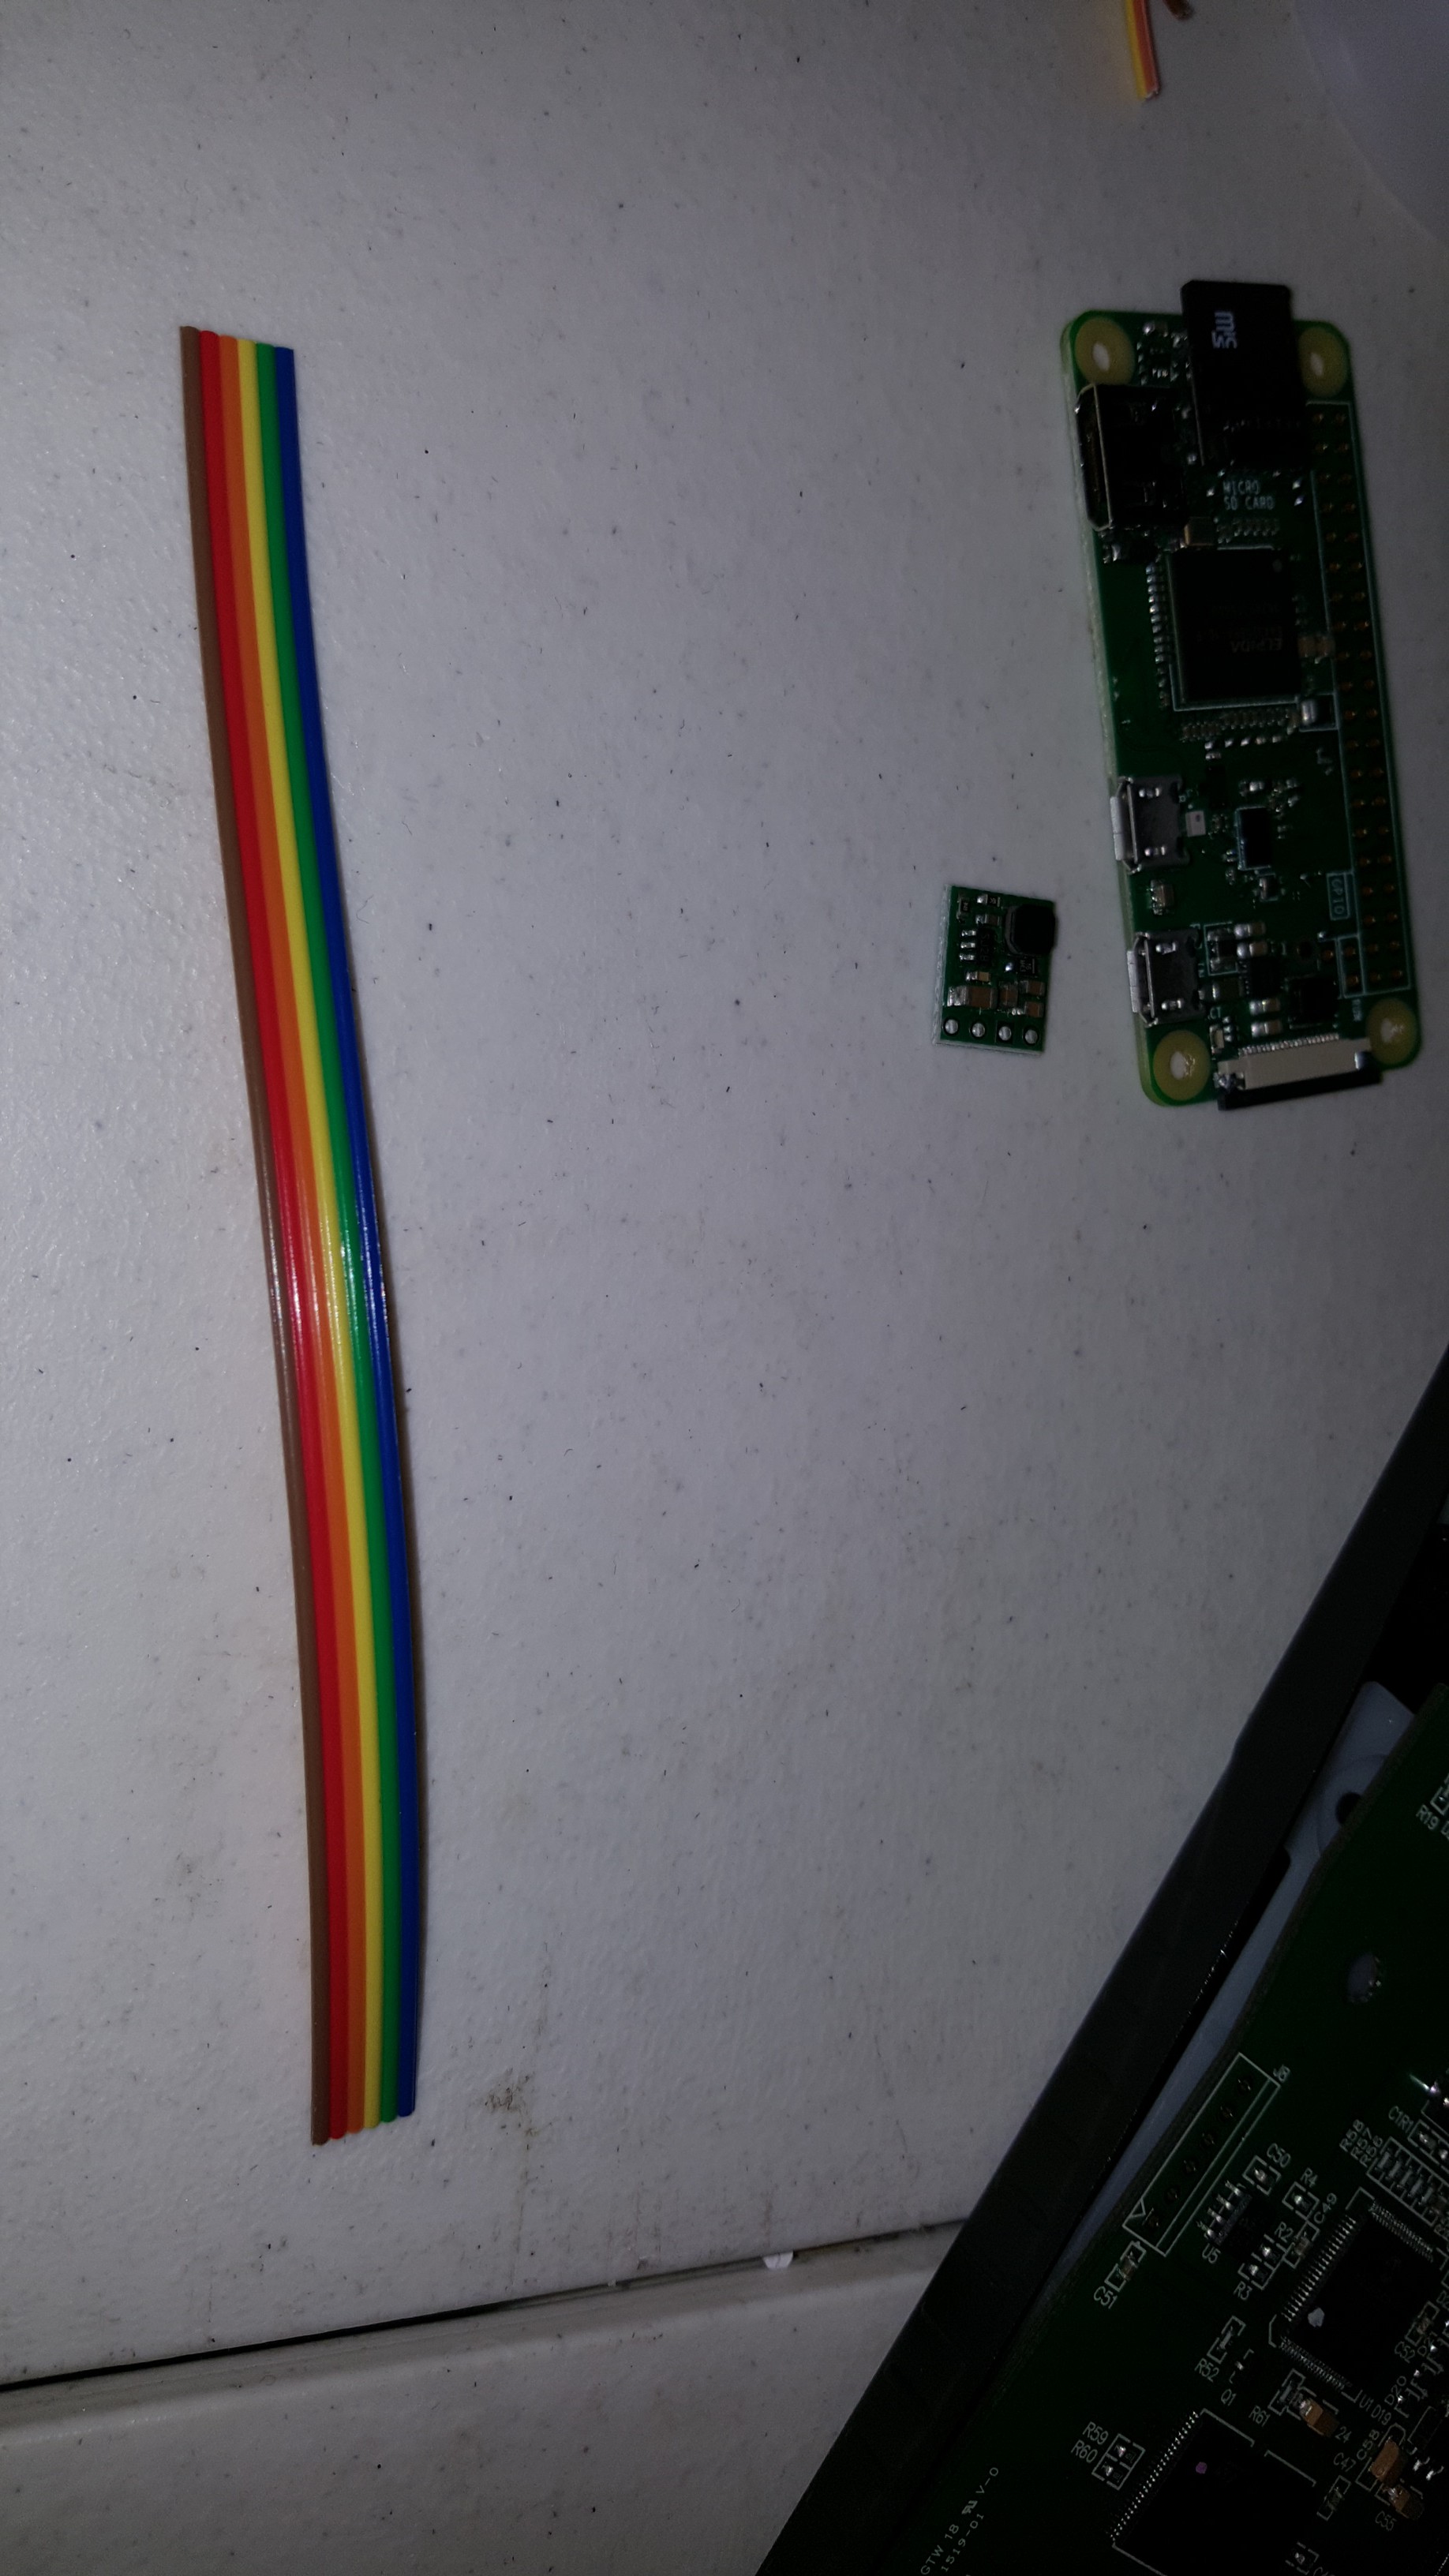
1Step 1
Configure your Raspberry Pi running Raspbian to connect to your WiFi network, and enable SSH so you can go back later and install the things you need once you install it in the hand controller (HC).
-
2Step 2
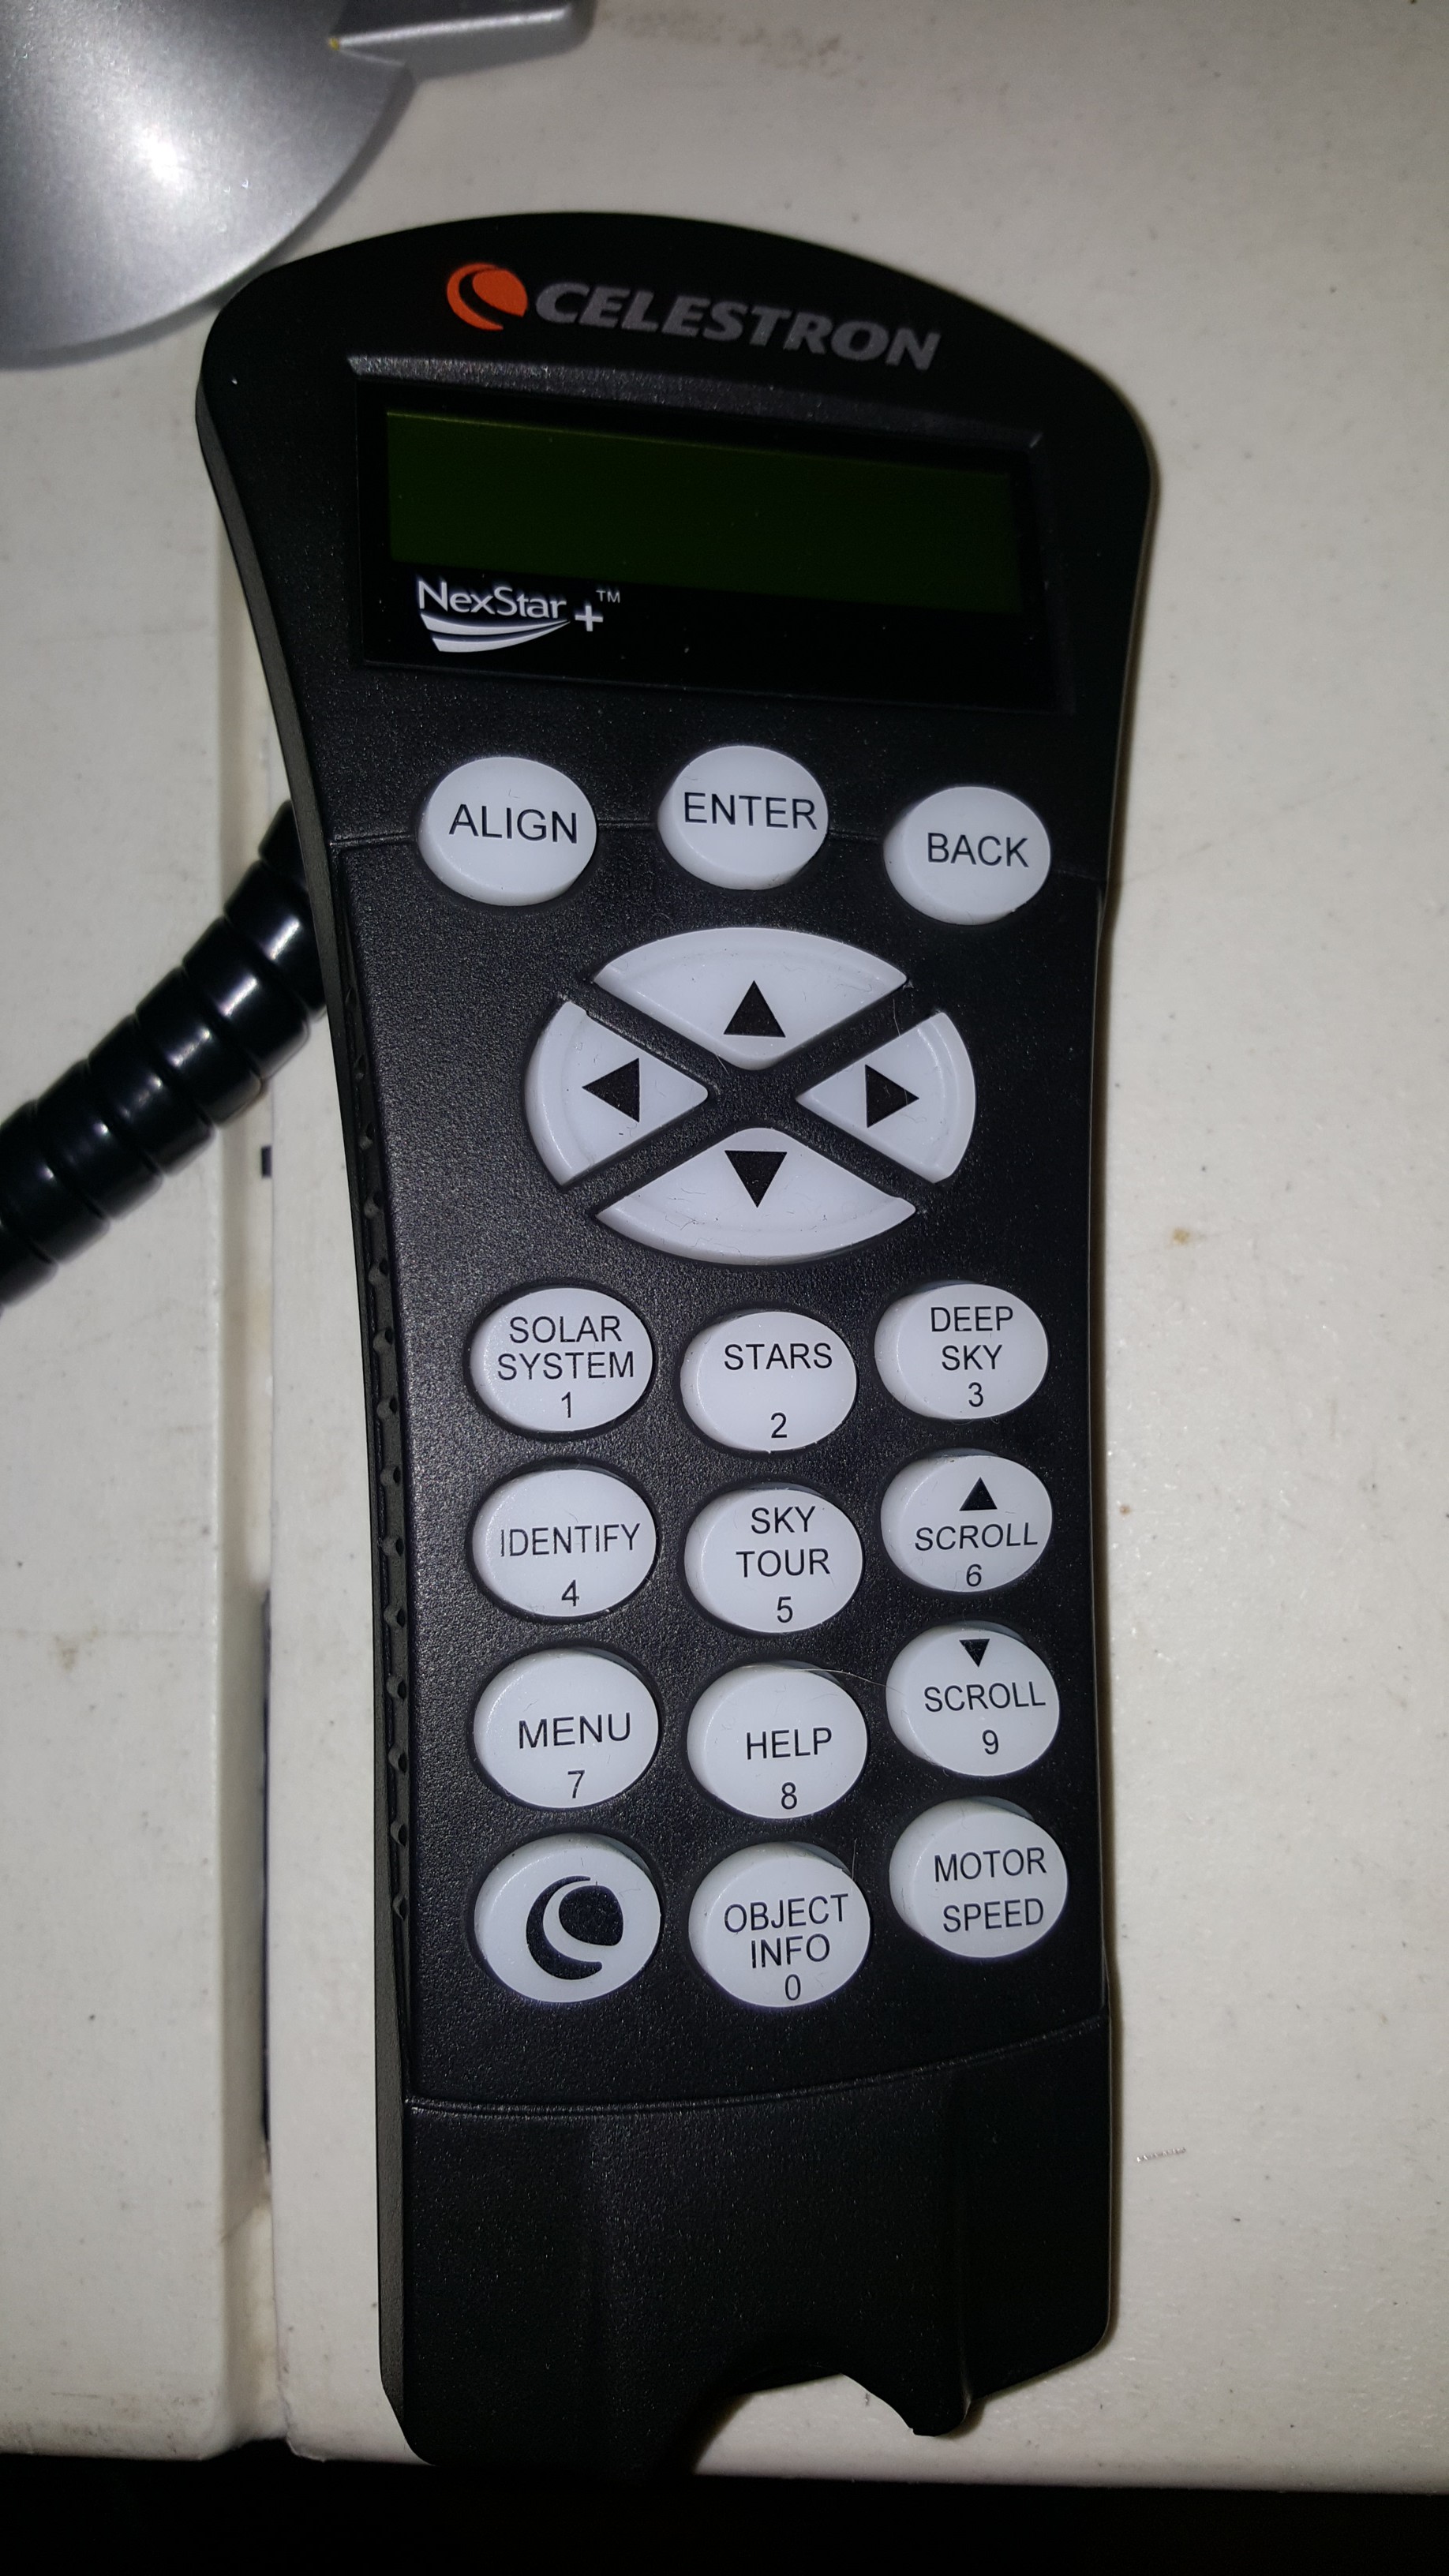
Gather your components, and open the case on your Celestron Nexstar HC.
![]()
![]()
-
3Step 3
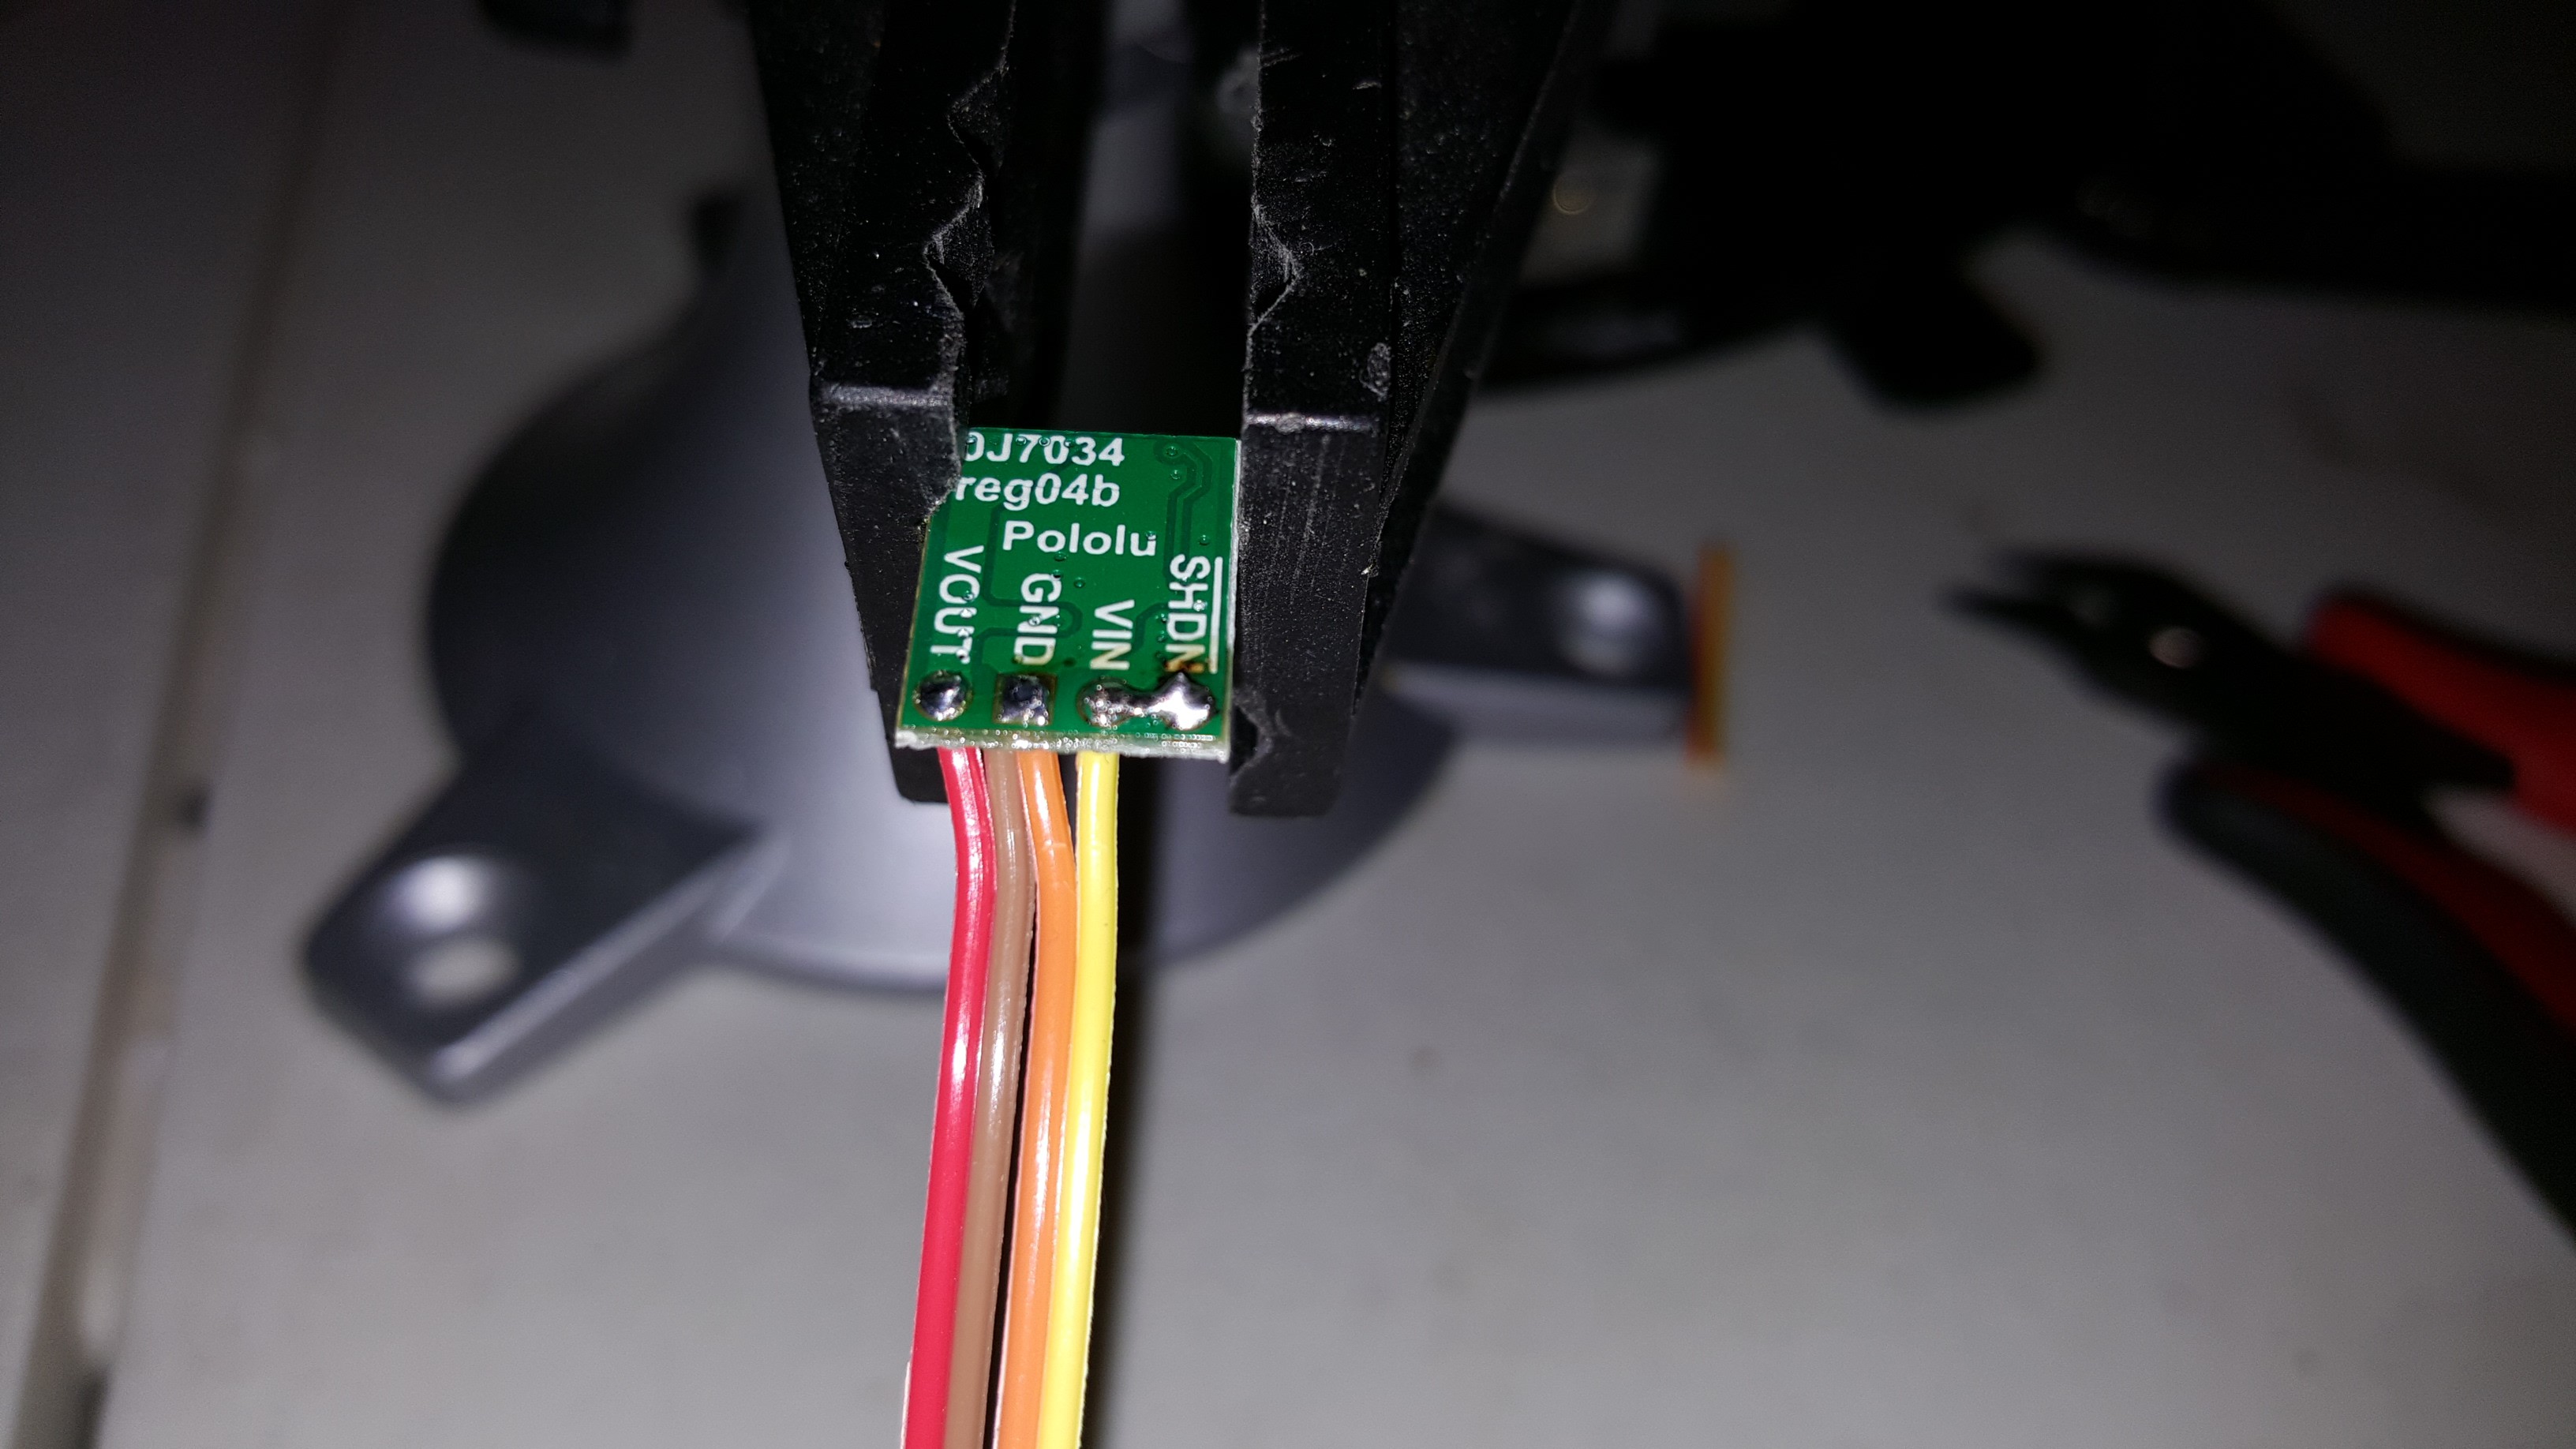
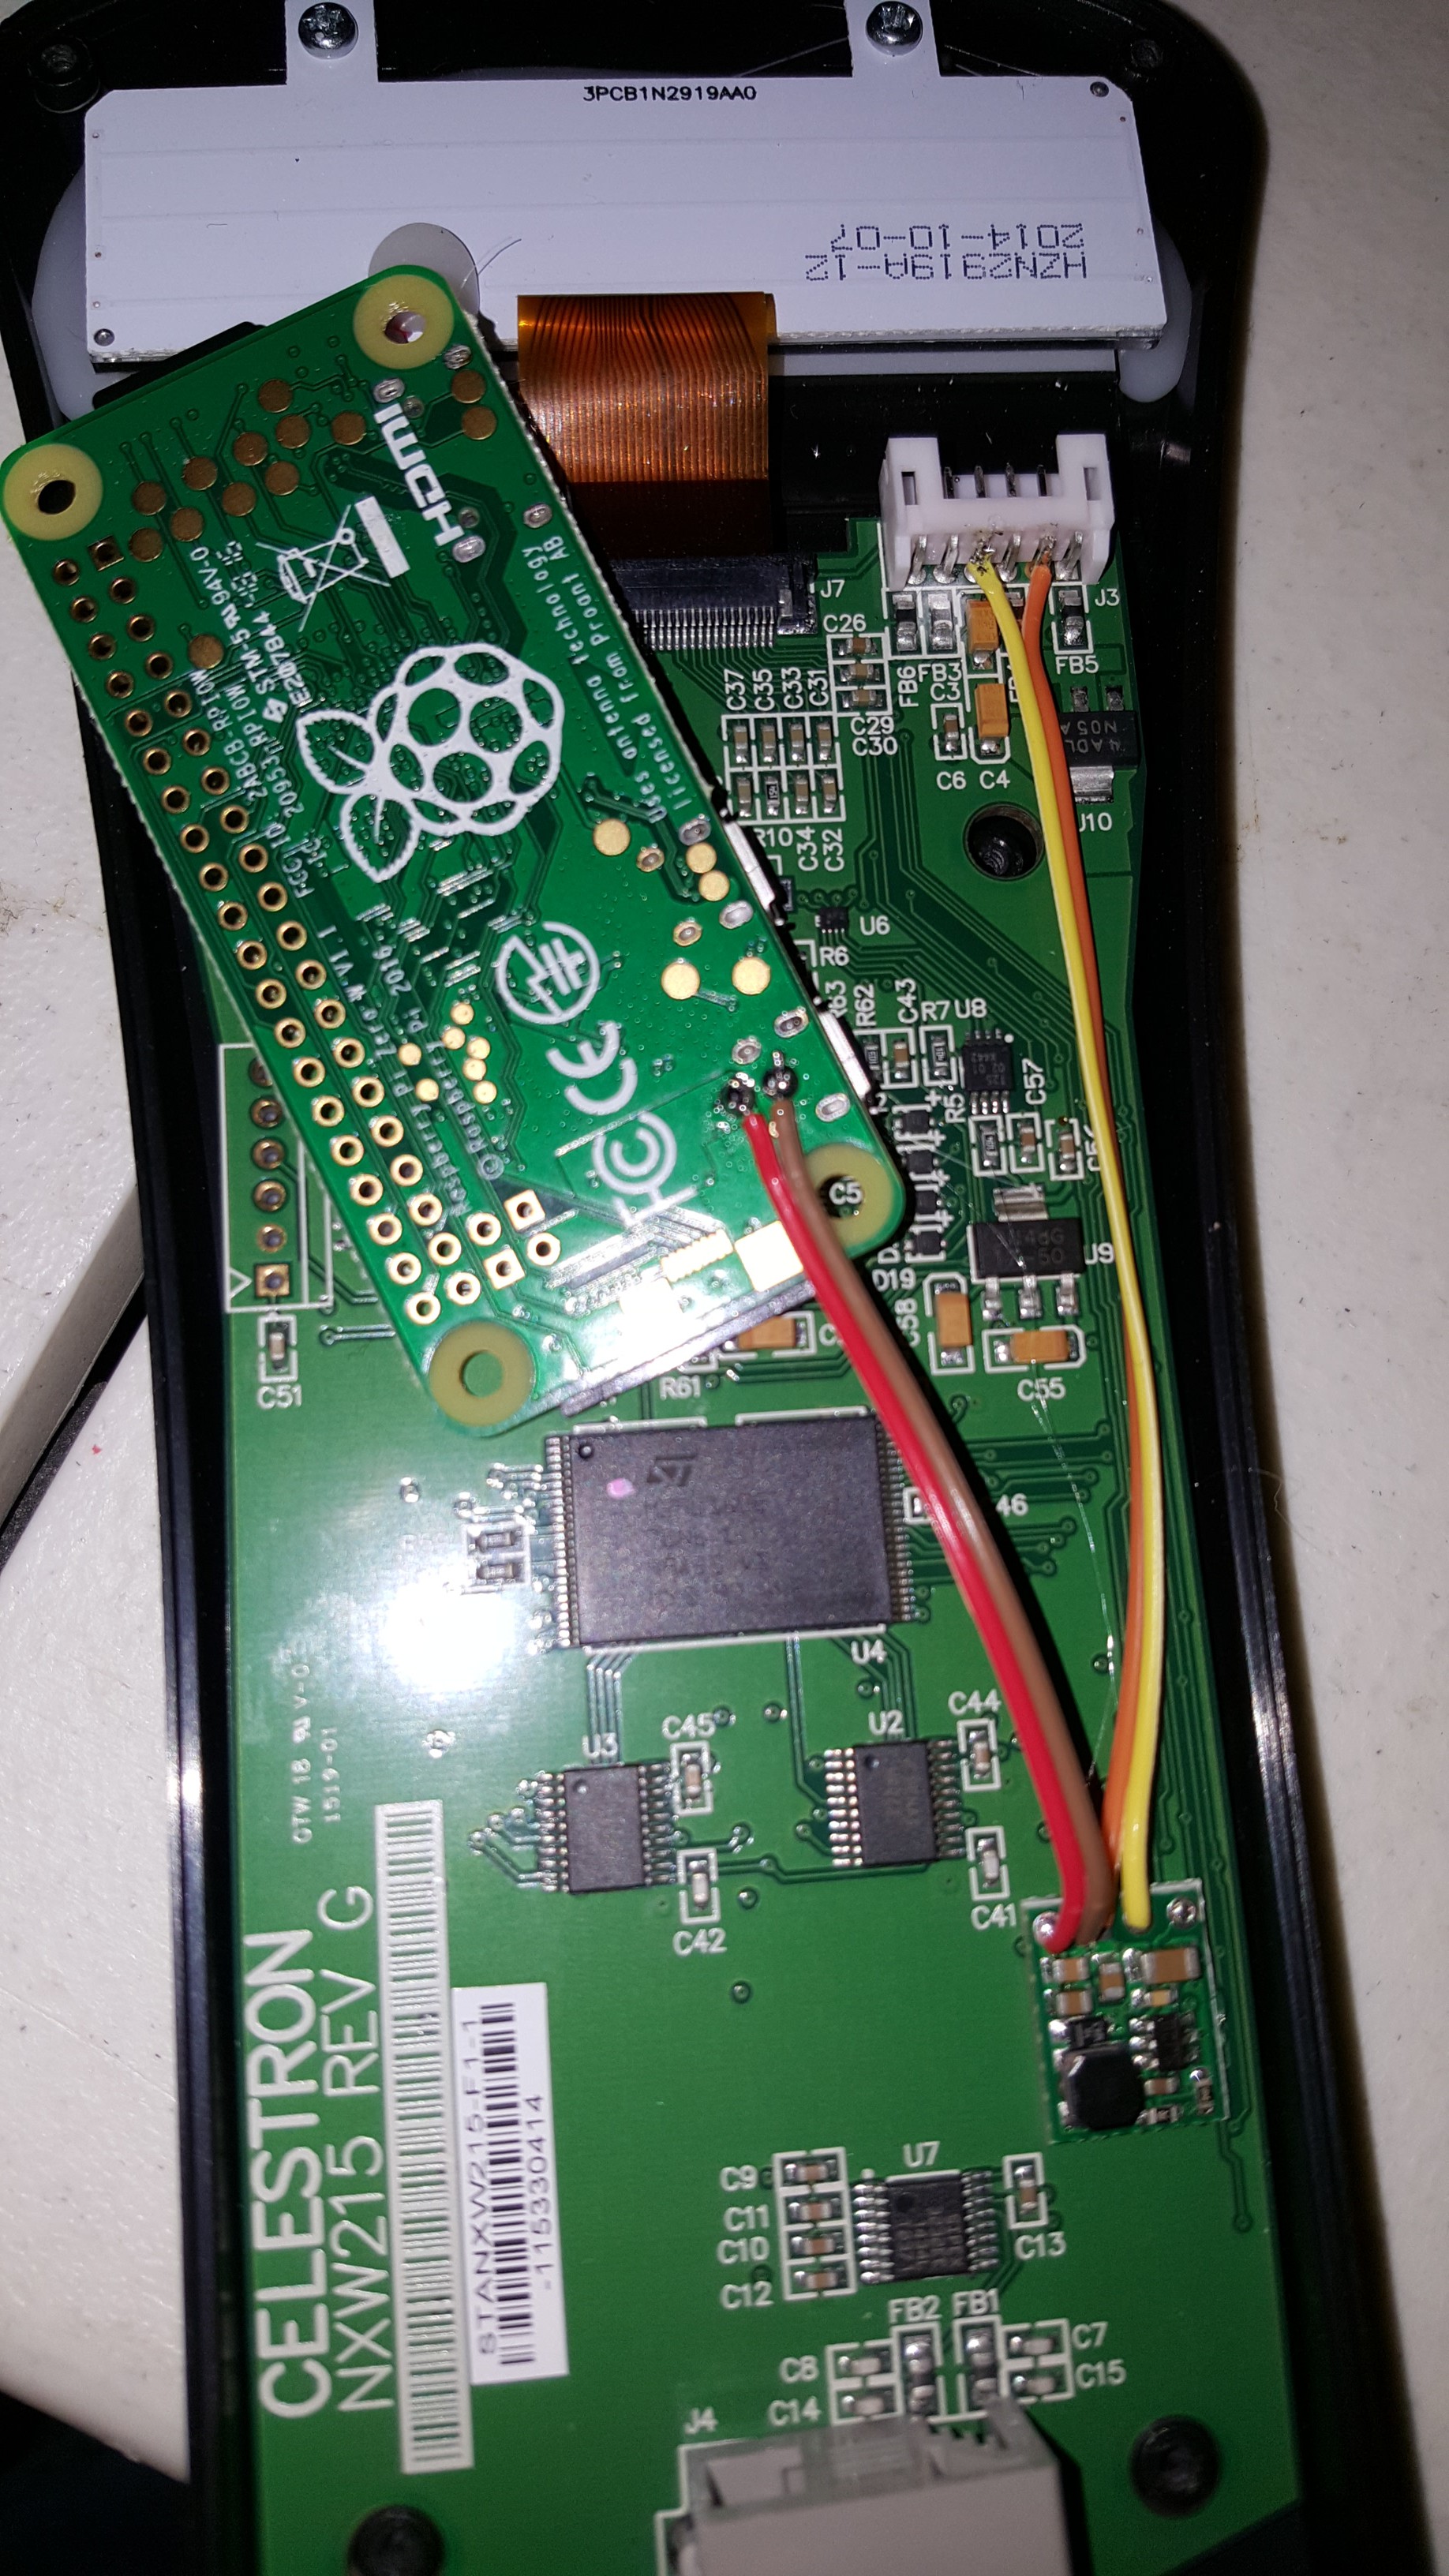
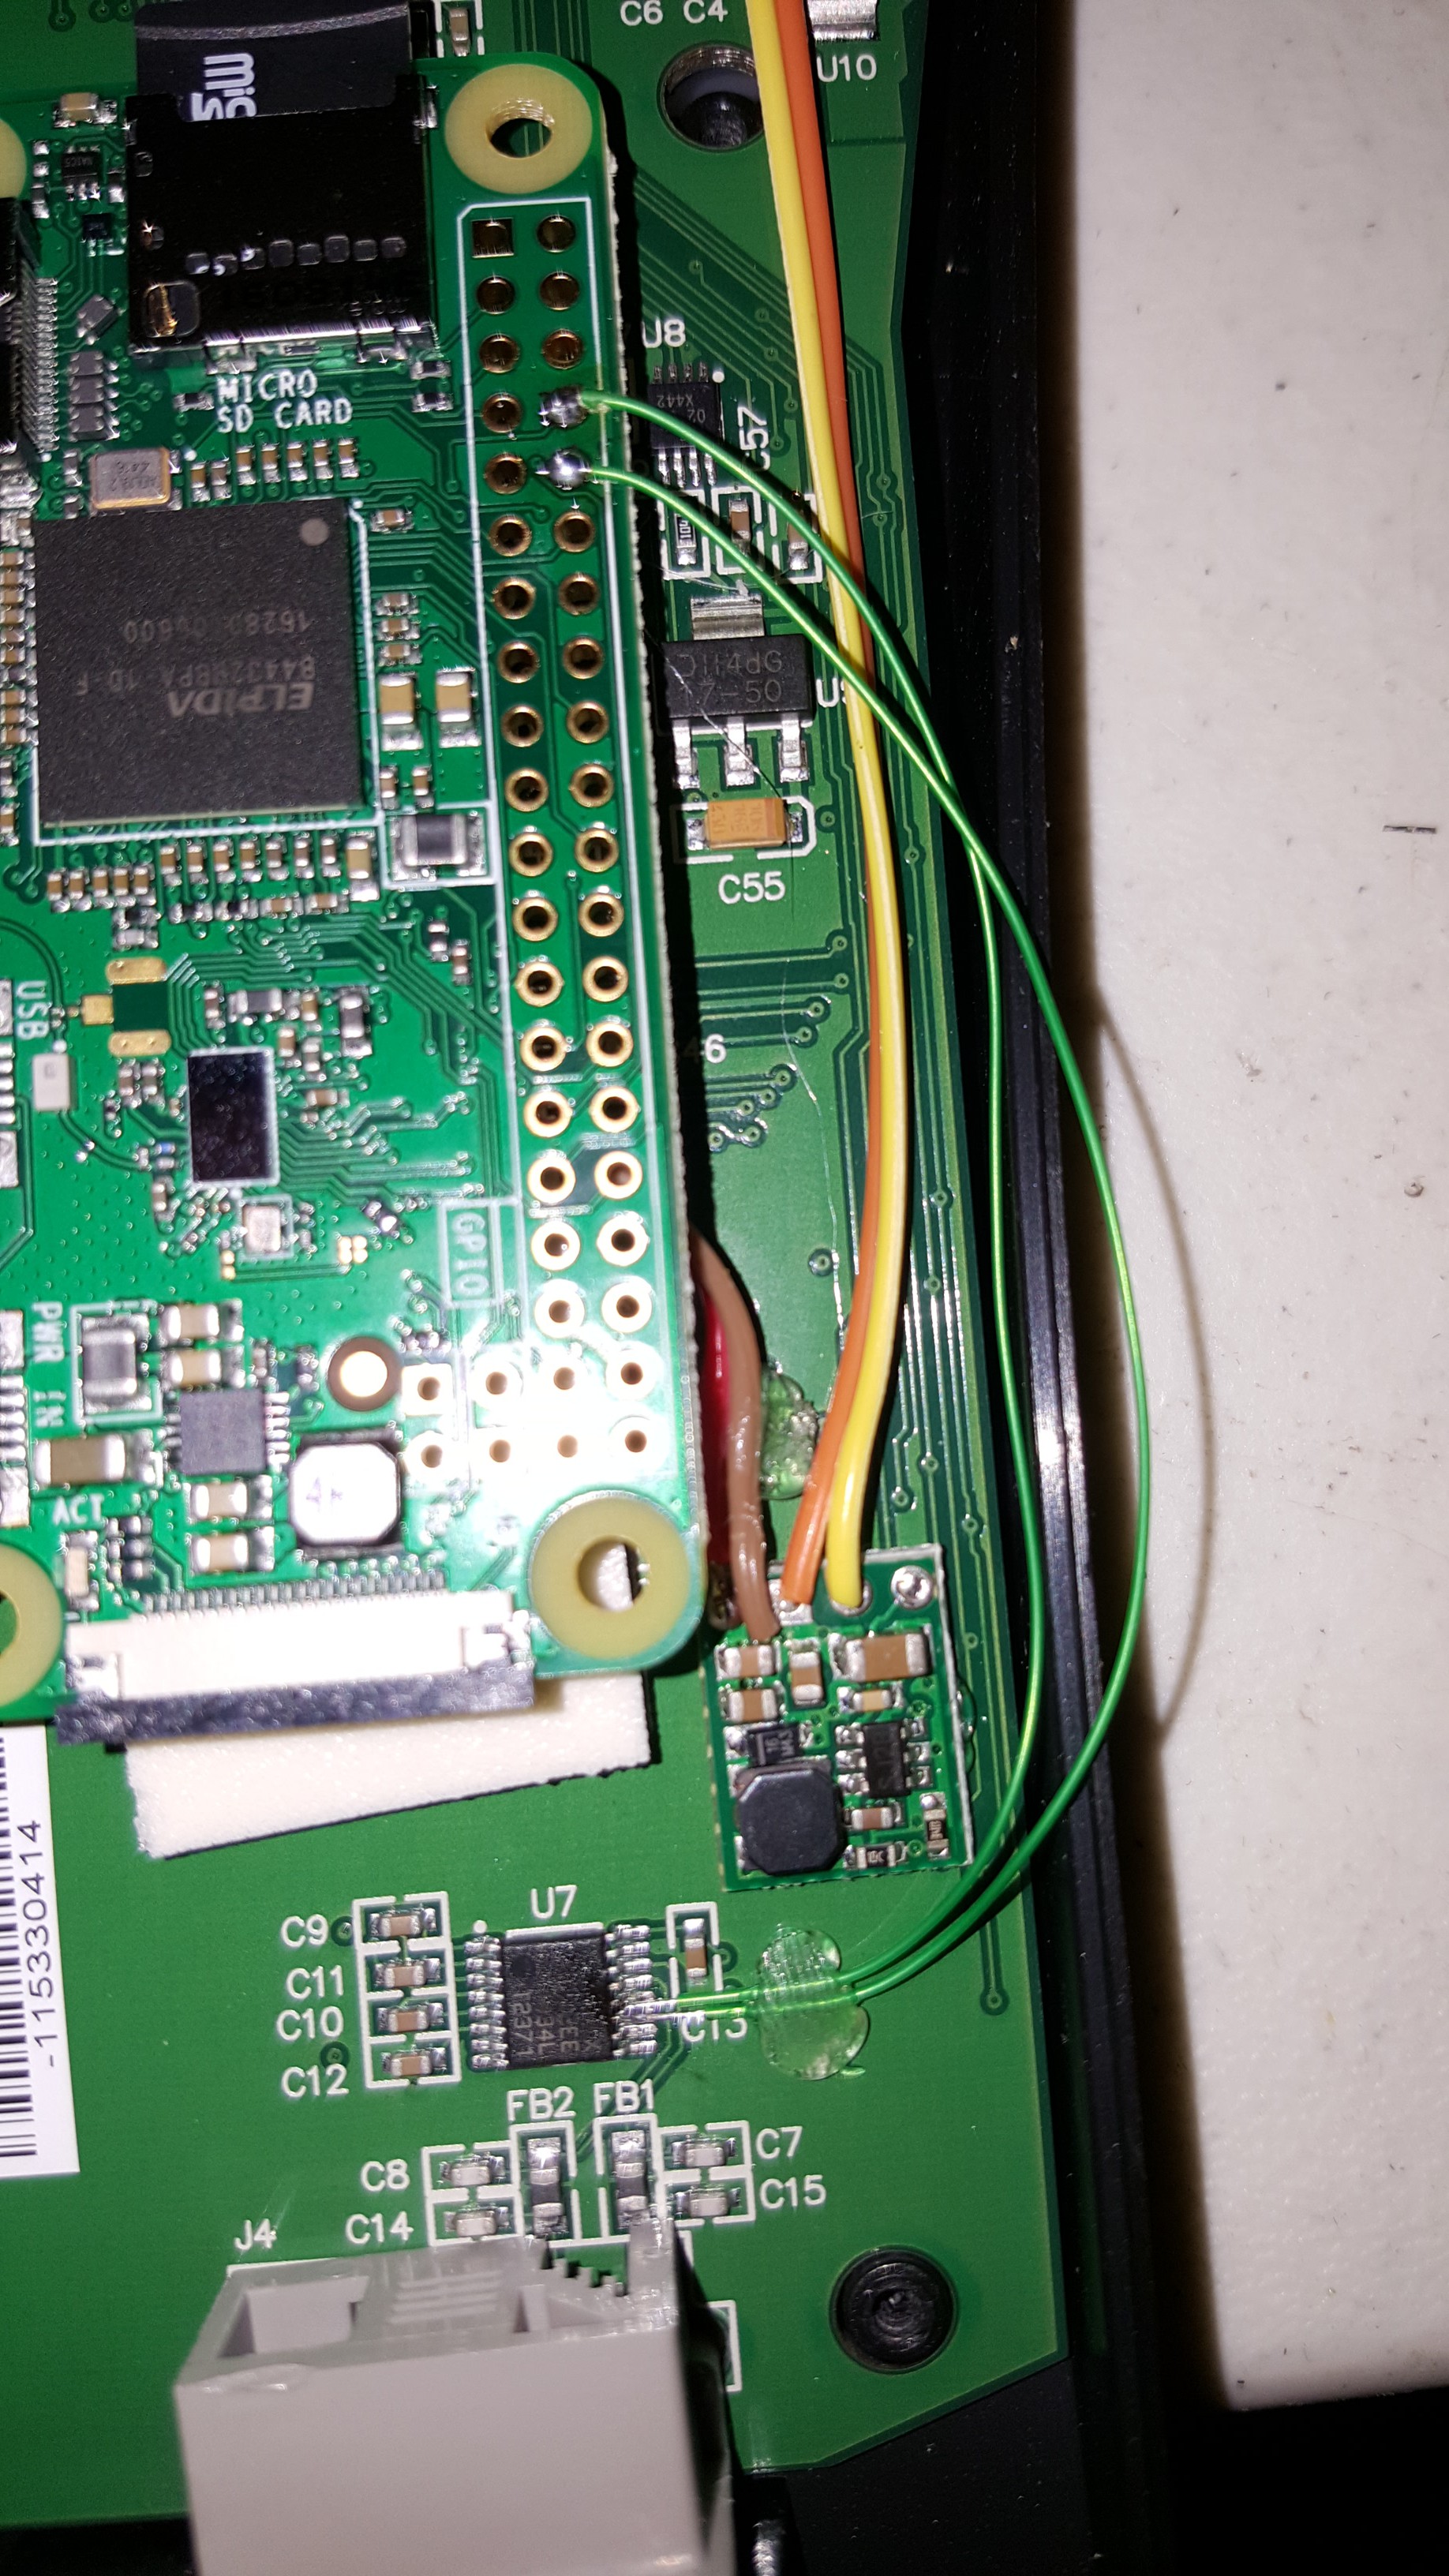
Open the case on the HC and using a multimeter identify the incoming 12V power line and ground. Wire up your 5V power regulator and prepare it for mounting.
![]()
After soldering the power regulator to the incoming power, and the Raspberry Pi, I secured it to the HC's main board using a hot glue gun.
![]()
-
4Step 4
Now that your Raspberry Pi Zero W has 5V power, you can connect the serial port directly to the HC. Unfortunately, the HC expects 12V RS232 on it's external port, whereas the RPi expects 3.3V on it's GPIO pins. Luckily, we can bypass the RS232 chip entirely, and talk directly with the the HC's microcontroller!
Using the datasheet for the Sipex 3232EE (page 5), we find that we can connect to the 11th and 12th pins on that chip to bypass it entirely.
![]()
Admittedly, there was some trial and error on my part to find which pins it actually was, since there is more than one combination that could be used here. Compounding this, it's hard to guarantee that you didn't mess up the soldering job on the tiny pins, instead of simply guessing the wrong ones. I should have used my Bus Pirate or oscope to determine what was the actual port before even soldering.
-
5Step 5
Seal things back up. I used a piece of non-conducting foam to pad the RPi to keep it from rattling in the HC.
![]()
-
6Step 6
Log into your Raspberry Pi via SSH, and configure it for UART GPIO output:
sed -ri 's/console=serial\S+ //' /boot/cmdline.txt echo "enable_uart=1" >> /boot/config.txt -
7Step 7
Install libindi for Raspbian (you may need to do this as root):
apt-get install cdbs libcfitsio3-dev libnova-dev libusb-1.0-0-dev libjpeg-dev \ libusb-dev libtiff5-dev libftdi-dev fxload libkrb5-dev libcurl4-gnutls-dev \ libraw-dev libgphoto2-dev libgsl0-dev dkms libboost-regex-dev libgps-dev \ libdc1394-22-dev mkdir /opt/libindi pushd /opt/libindi curl -o libindi_rpi.tgz -L http://indilib.org/download/raspberry-pi/send/6-raspberry-pi/9-indi-library-for-raspberry-pi.html tar -xzf libindi_rpi.tgz --strip 1 dpkg -i *.deb apt-get -f install popd -
8Step 8
Install the indi server web manager (you may need to do this as root):
apt-get install python-requests python-psutil python-bottle apt-get install git git clone http://github.com/knro/indiwebmanager /opt/indiwebmanager cp /opt/indiwebmanager/indiwebmanager.service /lib/systemd/system/ sed -i 's|/home/pi|/opt/indiwebmanager|g' /lib/systemd/system/indiwebmanager.service sed -i 's/User=pi/User=root/g' /lib/systemd/system/indiwebmanager.service chmod 644 /lib/systemd/system/indiwebmanager.service ln -s /lib/systemd/system/indiwebmanager.service /etc/systemd/system/multi-user.target.wants/indiwebmanager.service -
9Step 9
- reboot your RPi
- wait for it to come back up
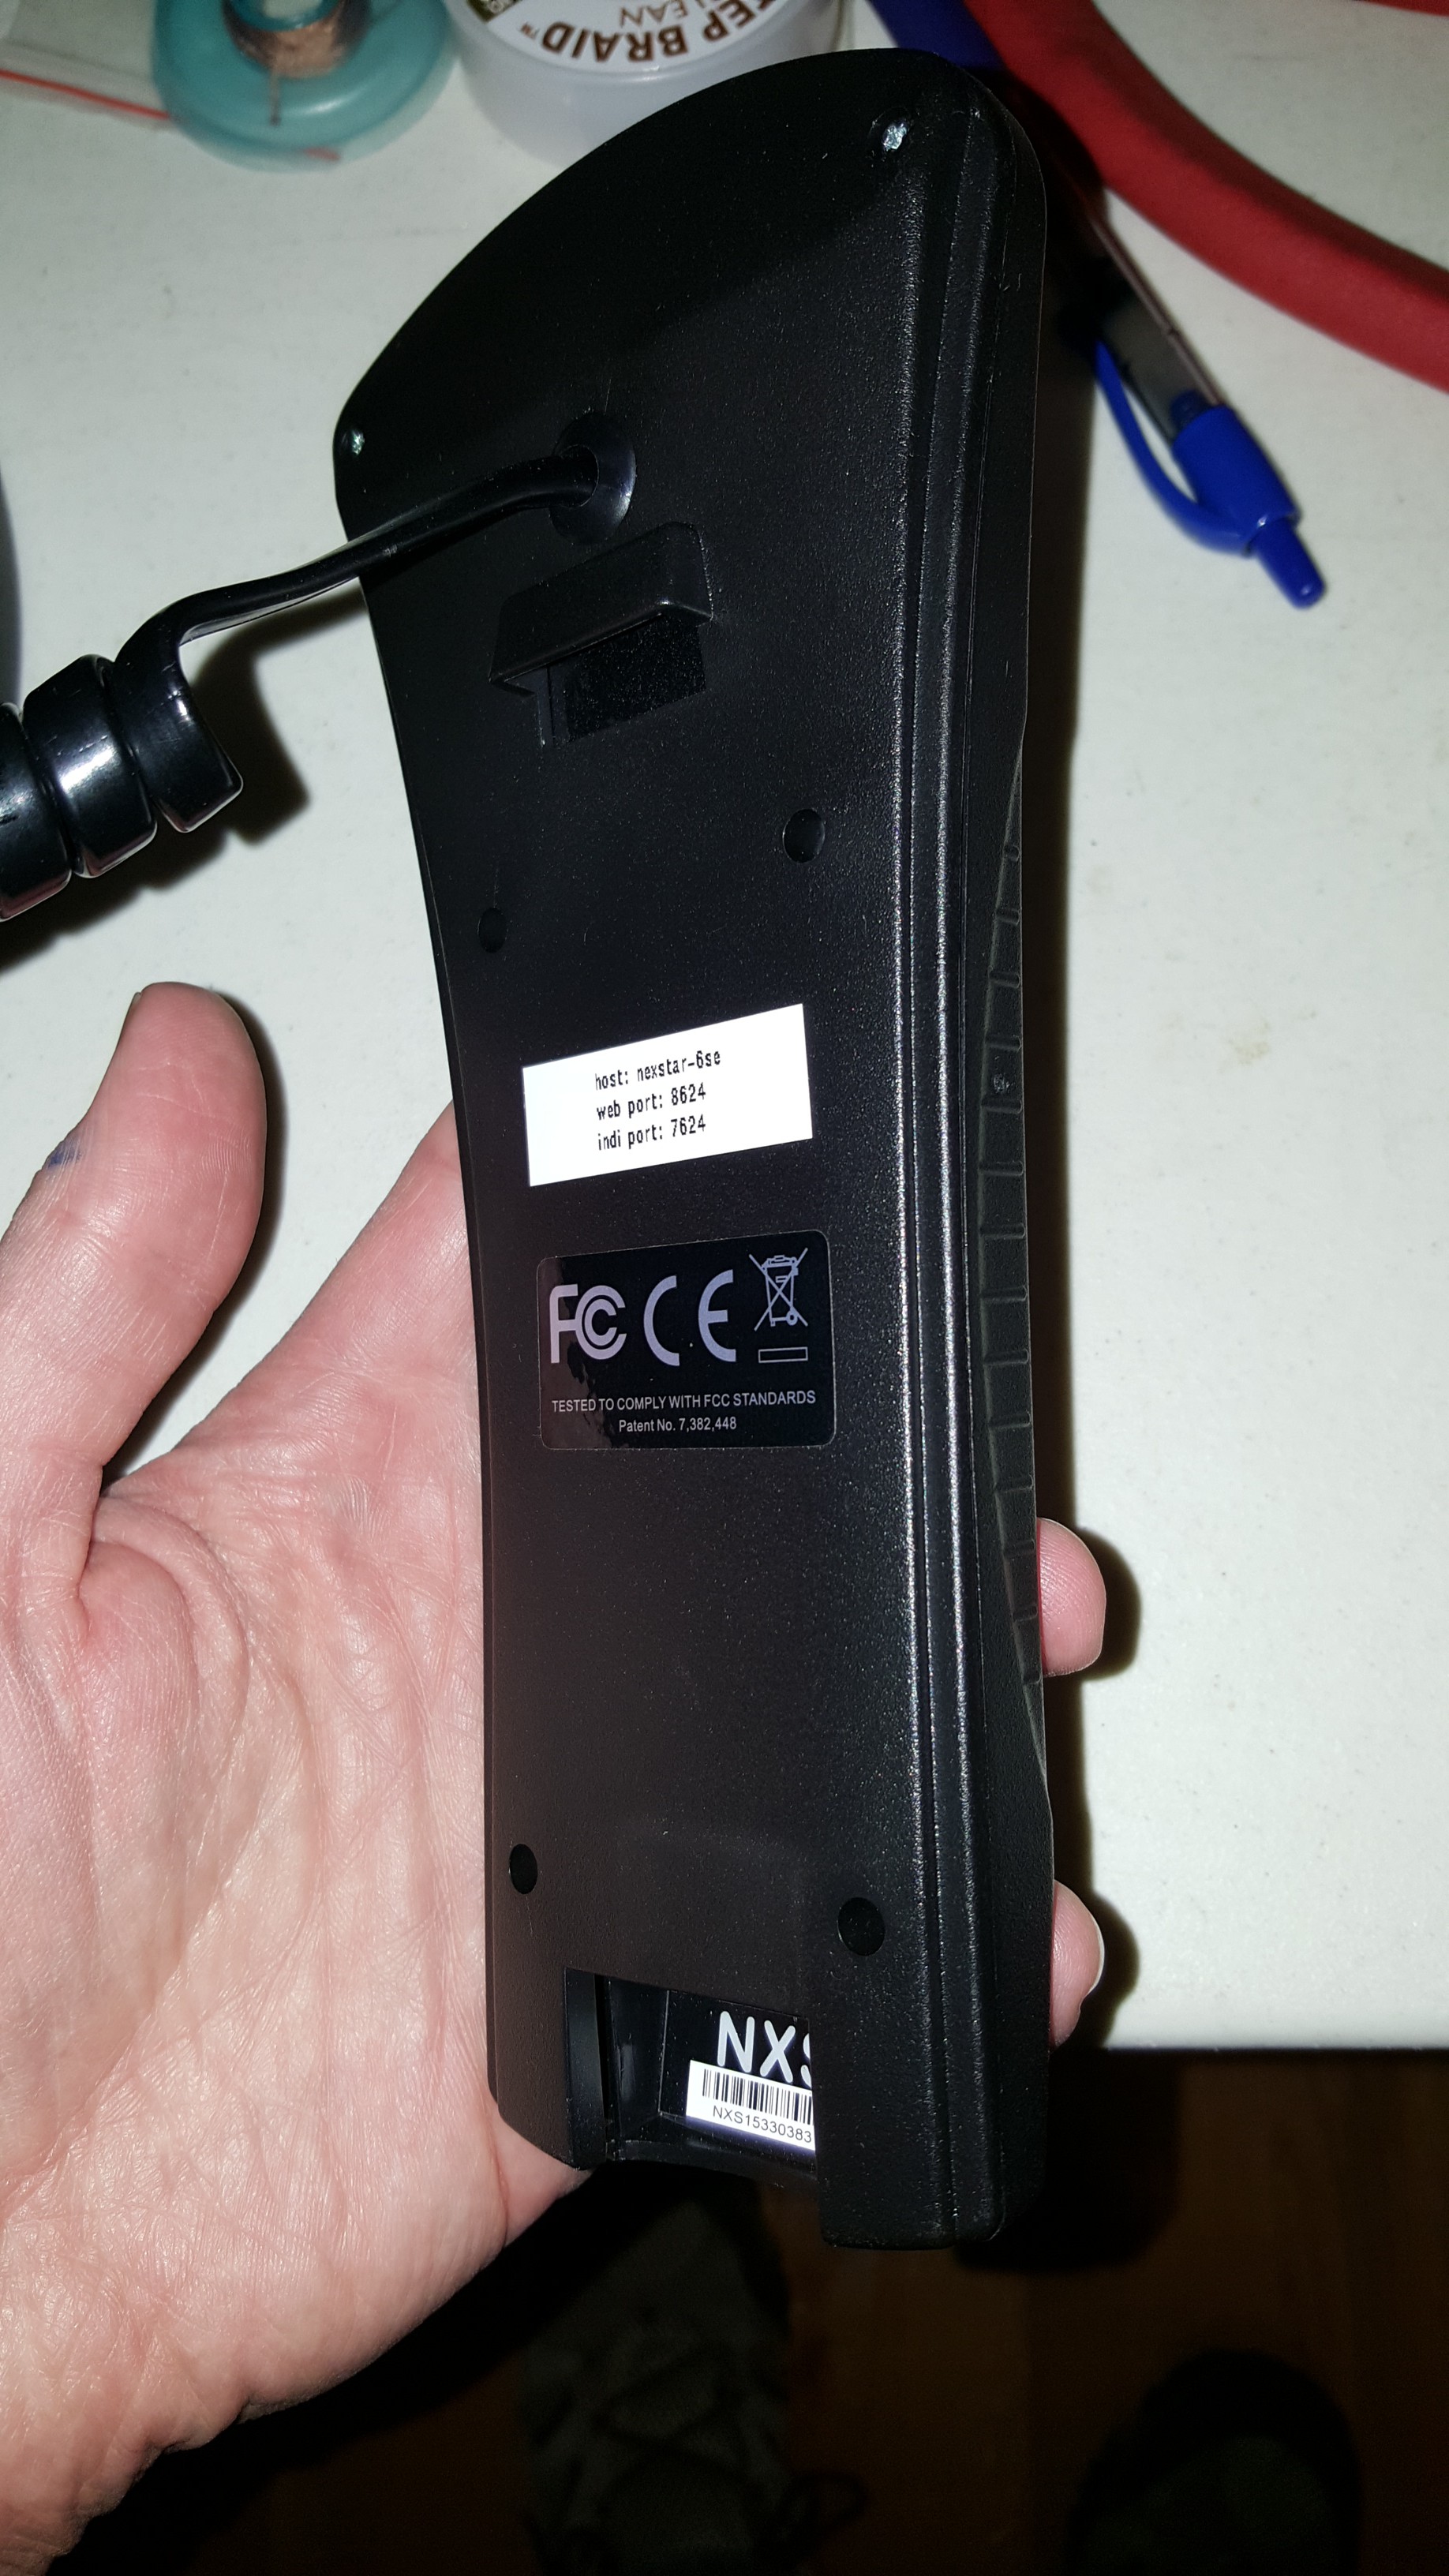
- use a browser to open the server manager at port 8624 (with my config, it's as simple as http://nexstar-6se:8624/)
- create a new profile that includes the "Celestron NexStar" driver
- save the profile
- start the server
![]()
-
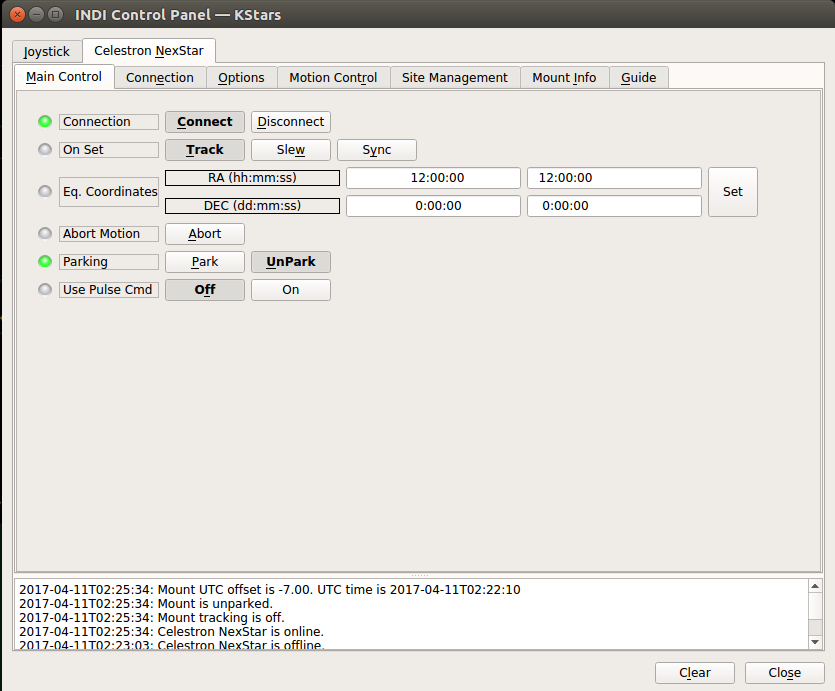
10Step 10
- install and run KStars
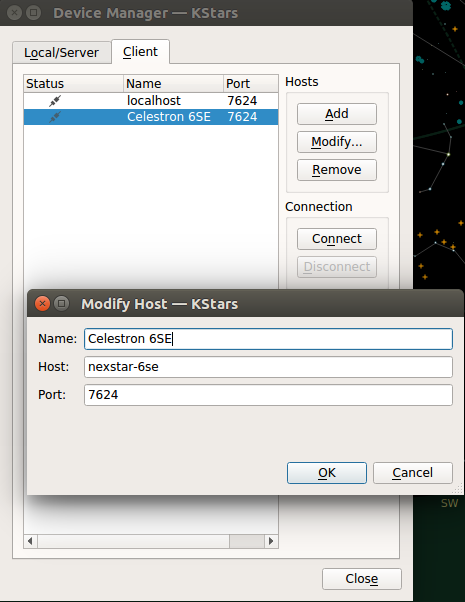
- in KStars, open the device manager,
- select "Client" >> "Hosts" >> "Add"
- enter the info for your mount and click "OK"
- connect to the remote server
![]()
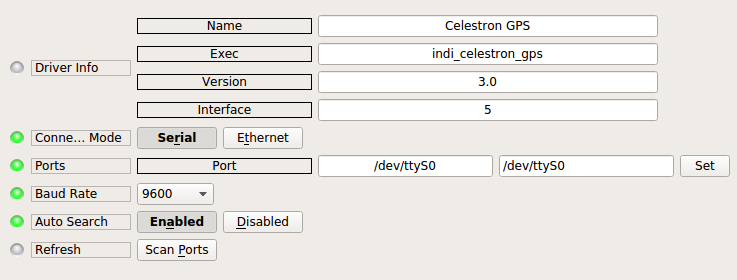
- set the Connection port for your telescope mount to `/dev/ttyS0`
- connect to your mount
![]()
If all went well, you're all done!
![]()
Raspberry Pi Driven Telescope Mount
full telescope control over WiFi using INDI on a RPi Zero W

Discussions
Become a Hackaday.io Member
Create an account to leave a comment. Already have an account? Log In.
Can you figure out a way to allow joystick control for accelerated slew function? As in, the harder I push on the joystick, the faster it goes? Hoping this could be adapted to a Nintendo Wii nunchuck controller. Also wondering if this can work as as secondary plug into the telescope (using those old phone jacks) rather than soldered directly into the hand control pad.
Are you sure? yes | no
NOTE: To all those reading through these instructions, they were written a when Raspbian Jesse was the latest OS for the Raspberry Pi Zero W. I've since upgraded to the latest version, Stretch, and made my notes available here in a build log: https://hackaday.io/project/21088-raspberry-pi-driven-telescope-mount/log/155510-upgrading-raspbian-jesse-to-stretch
Are you sure? yes | no
I am working on this, but having a really hard time getting the solder onto the HC controller on just those two pins. Do you have any recommendations on how you did that?
Are you sure? yes | no
I'll let you in on my dirty secret: when I'm working with something this small, I always use lead solder. Kester 60/40 @ ~350°C. The softer solder is much easier to work with, and wets both sides well.
Lay down some liquid flux, reflow the pins with your solder, then remove excess solder with some wick. Check for accidental bridging, and remove more solder if there is any. You're just trying to replace the hard original solder with the softer. Also, try not to overheat the chip by minimizing the time under the iron.
Using 30 gauge or smaller repair wire, straighten the end well, flux it, then coat lightly with solder at specified temp.
Lay the wire on top of the pin you want to join to, and heat with your soldering iron. Don't add any new solder, you already have enough on the two halves, you're just welding them together at this point.
Inspect it to make sure you didn't bridge anything. If you did, heat things up, pull it apart, and use some solder wick to clean it up again. And retry.
When you're satisfied, clean up your flux mess with an appropriate cleaner.
If I recall correctly, it took me a couple tries on this one. It is not an easy soldering job.
Are you sure? yes | no
Doing this project on an older Celestron Nexstar and an DS275 RS-232 chip in the HC. I think I have found the right pins. But am having challenges with loading the software onto a Rpi 0W. Is it ok to use Raspbian Lite? Too many changes on INDI software since Dane wrote this up a year ago, so I am going to use the instructions at this web address: http://indilib.org/support/tutorials/139-indi-library-on-raspberry-pi.html . pushd doesn't work, is there another option to get things in the right directory (sudo something...)? Thanks for your write up on Hackaday. I hope to do a Hackaday too with the older HC and a raspberry pi camera on the eyepiece (from pi 0W) all solar PV power; telescope tracking the sun with a solar filter, live web-based webpage.
INDI showed these messages:
Note, selecting 'libgsl-dev' instead of 'libgsl0-dev'
libcfitsio3-dev is not available
However the following packages replace it:
libcfitsio-dev
E: Package 'libcfitsio3-dev' has no installation candidate
Are you sure? yes | no
@energyideas Unfortunately, I live where the weather has been horrible for viewing for months, so I haven't tried updating to the latest versions of anything. `pushd` is specifically a Bash command. You can simply use `cd` in place of `pushd` when using a standard shell. For `popd` in my sequence above, you can ignore it.
Are you sure? yes | no
Thanks again Dane.
Are you sure? yes | no
We just salvaged an older celestron with the DS275 and are hoping you had success with your attempt. Any update?
Are you sure? yes | no
I used a voltage level shifter, using the +ve of the hand set port to power the Hi side, and the Rpi for the low side - worked a treat.
Are you sure? yes | no
Sorry, I meant StarSense accessory, it has its own Nextstar handset you use in place of the one that comes with the mount. It is largely compatible with CPC, CGE etc, so I expect you are right thinking its the same UART chip set. :). But its a bit pricy to find out that I wrong!
I've now adapted your approach to use the external RJ11 socket, and box it up with a LiPO cell - works fine on my standard Nextstar handset. I might be brave and try it on my starsense handset next!
Are you sure? yes | no
Awesome! Really cool to hear that someone else has done this!
I think the big thing is to verify the microcontroller is operating UART at 3.3V levels. If that's the case, you should be set. Otherwise, you will have to use a level converter between the Pi and your highjack point. Should still be doable, nonetheless. Let me know how it goes. Good luck!
Are you sure? yes | no
@jones3r I don't know what a "StarAlign-nextstar" HC is. Googling didn't return anything obvious. I've only encountered the newer Nexstar+ controllers. Do you have a photo of the inside with the version number on the PCB?
You're likely still looking at a serial interface chip that has UART at 3.3V to the main microcontroller. You should be able to highjack it the same way I have in these instructions, but may have to investigate which pins using a datasheet.
Are you sure? yes | no
have you tried this modification on the StarAlign-nextstar handcontroller?
Are you sure? yes | no