 Shawn Chen
As the first step of training is to review all necessary equipment, Little Sergei will double-check his equipment and diet regimen to make sure he's prepared.
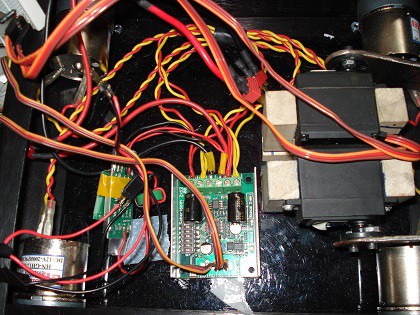
While I'm able to piggyback off existing circuitry of the battle-bot, I still need to go through and make sure everything is connected properly. This will also be useful information if anything breaks. Below is a diagram of the device layout for this project.
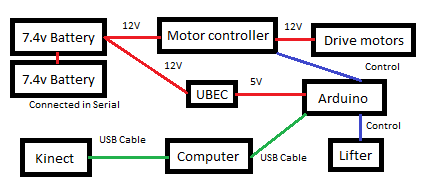
The layout begins with two Lithium Polymer batteries in serial, providing 14.8 volts to the robot. After going through an on/off switch, the power splits into a motor controller and a "Universal Battery Elimination Circuit" (UBEC). The DC motors are powered by the motor controller. The UBEC regulates the voltage to a stable 5 volts, so the Arduino won't be damaged from electrical spikes. This is a common setup so that a single power source can be used for both motors and electronics.
For the robot control components, the Arduino pins are connected to the control pins for the lifters and controllers. A serial USB cable connects the Arduino with a laptop, while the Kinect sensor is hooked to the laptop.
Discussions
Become a Hackaday.io Member
Create an account to leave a comment. Already have an account? Log In.