 Capt. Flatus O'Flaherty ☠
-
1Step 1
![]() A full schematic for the control panel is available in the 'files' section.
A full schematic for the control panel is available in the 'files' section. -
2Step 2
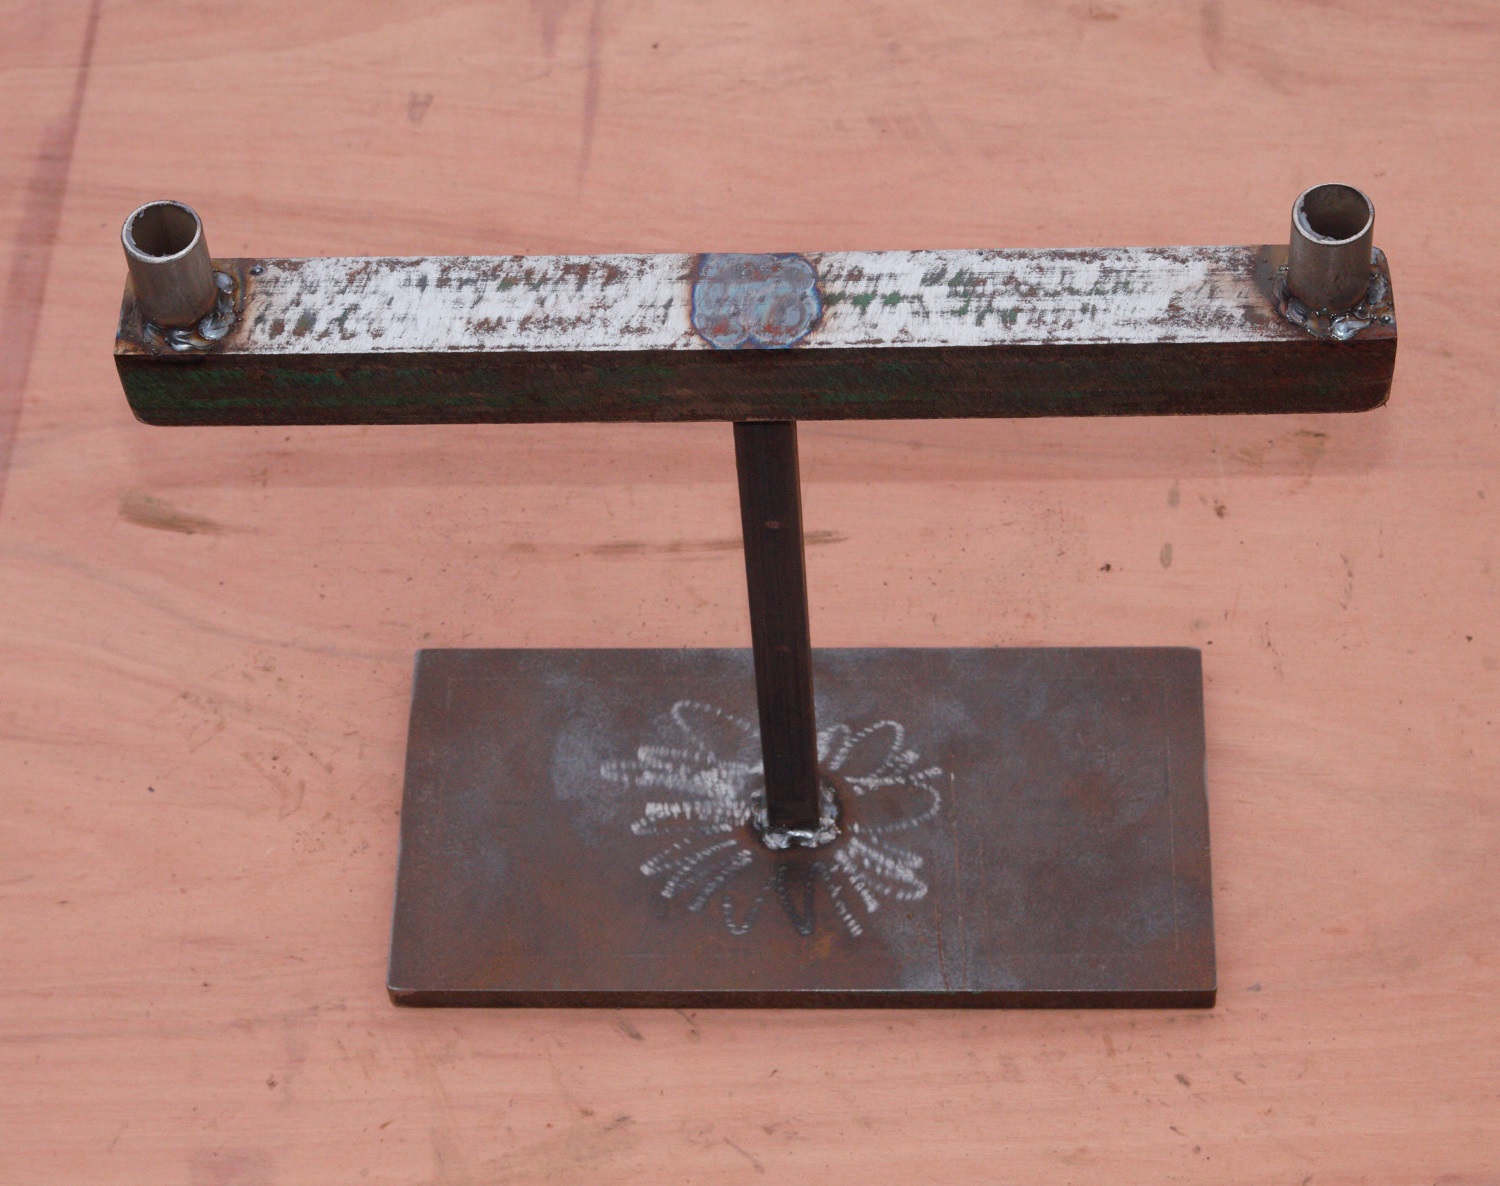
Metal Work
![]()
![]()
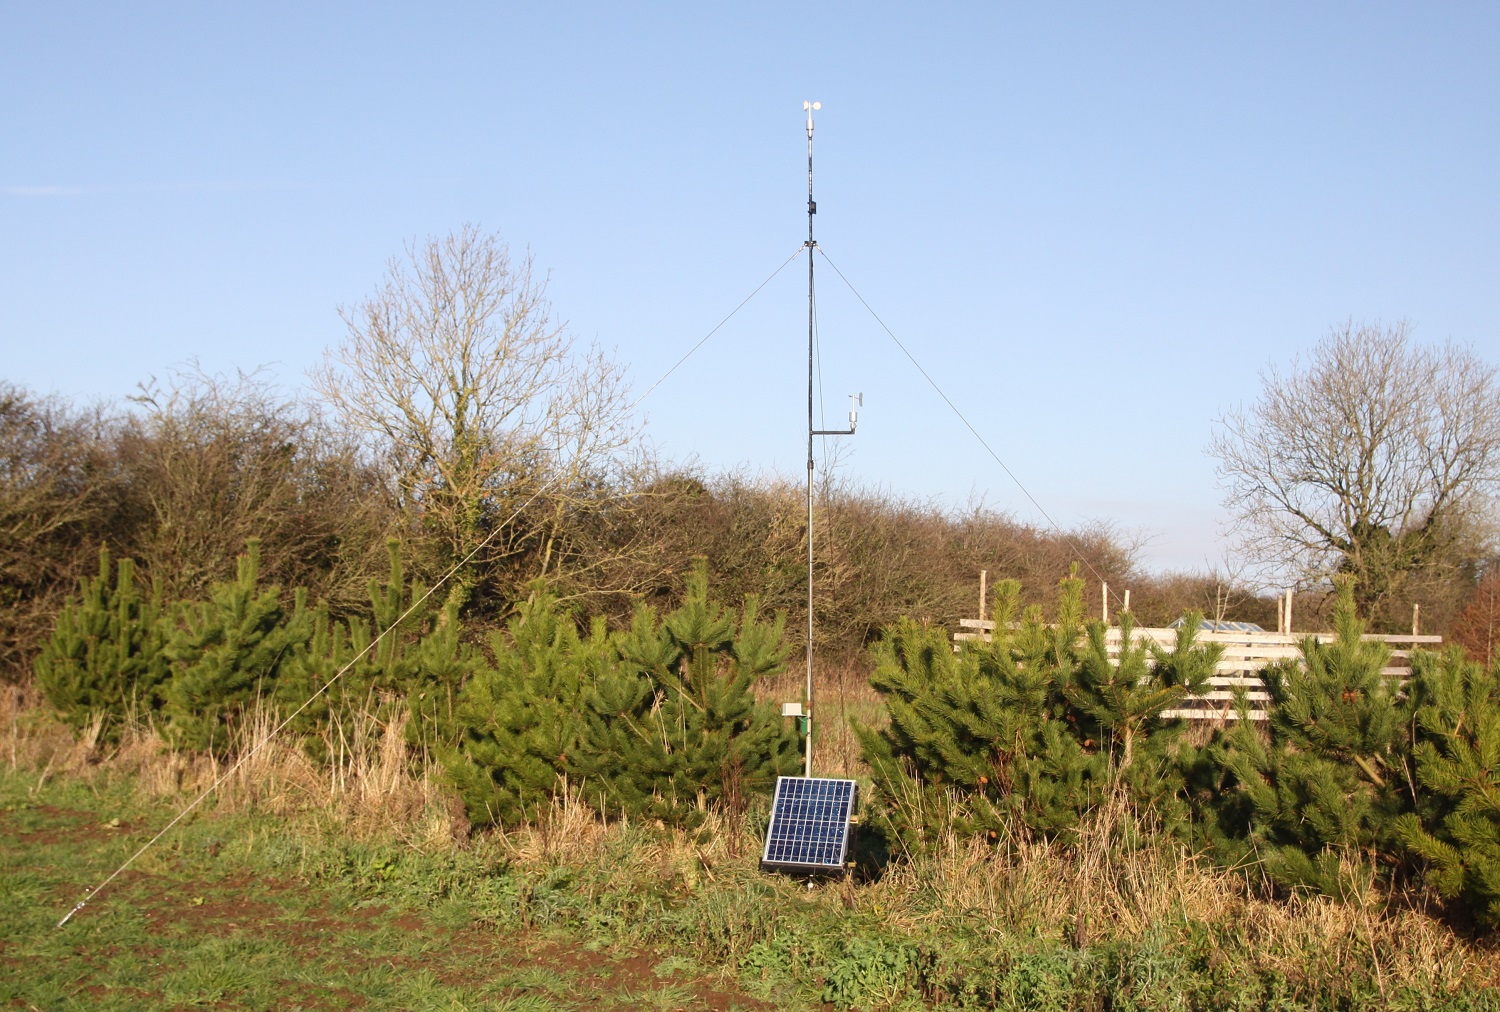
A heavy steel frame was made for the wind sensors so that the whole system can be bench tested outside over a period of several months to make sure that there are no long term errors lurking in dark corners.
Eventually the sensors were mounted on a tall pole to get maximum exposure to the elements.
-
3Step 3
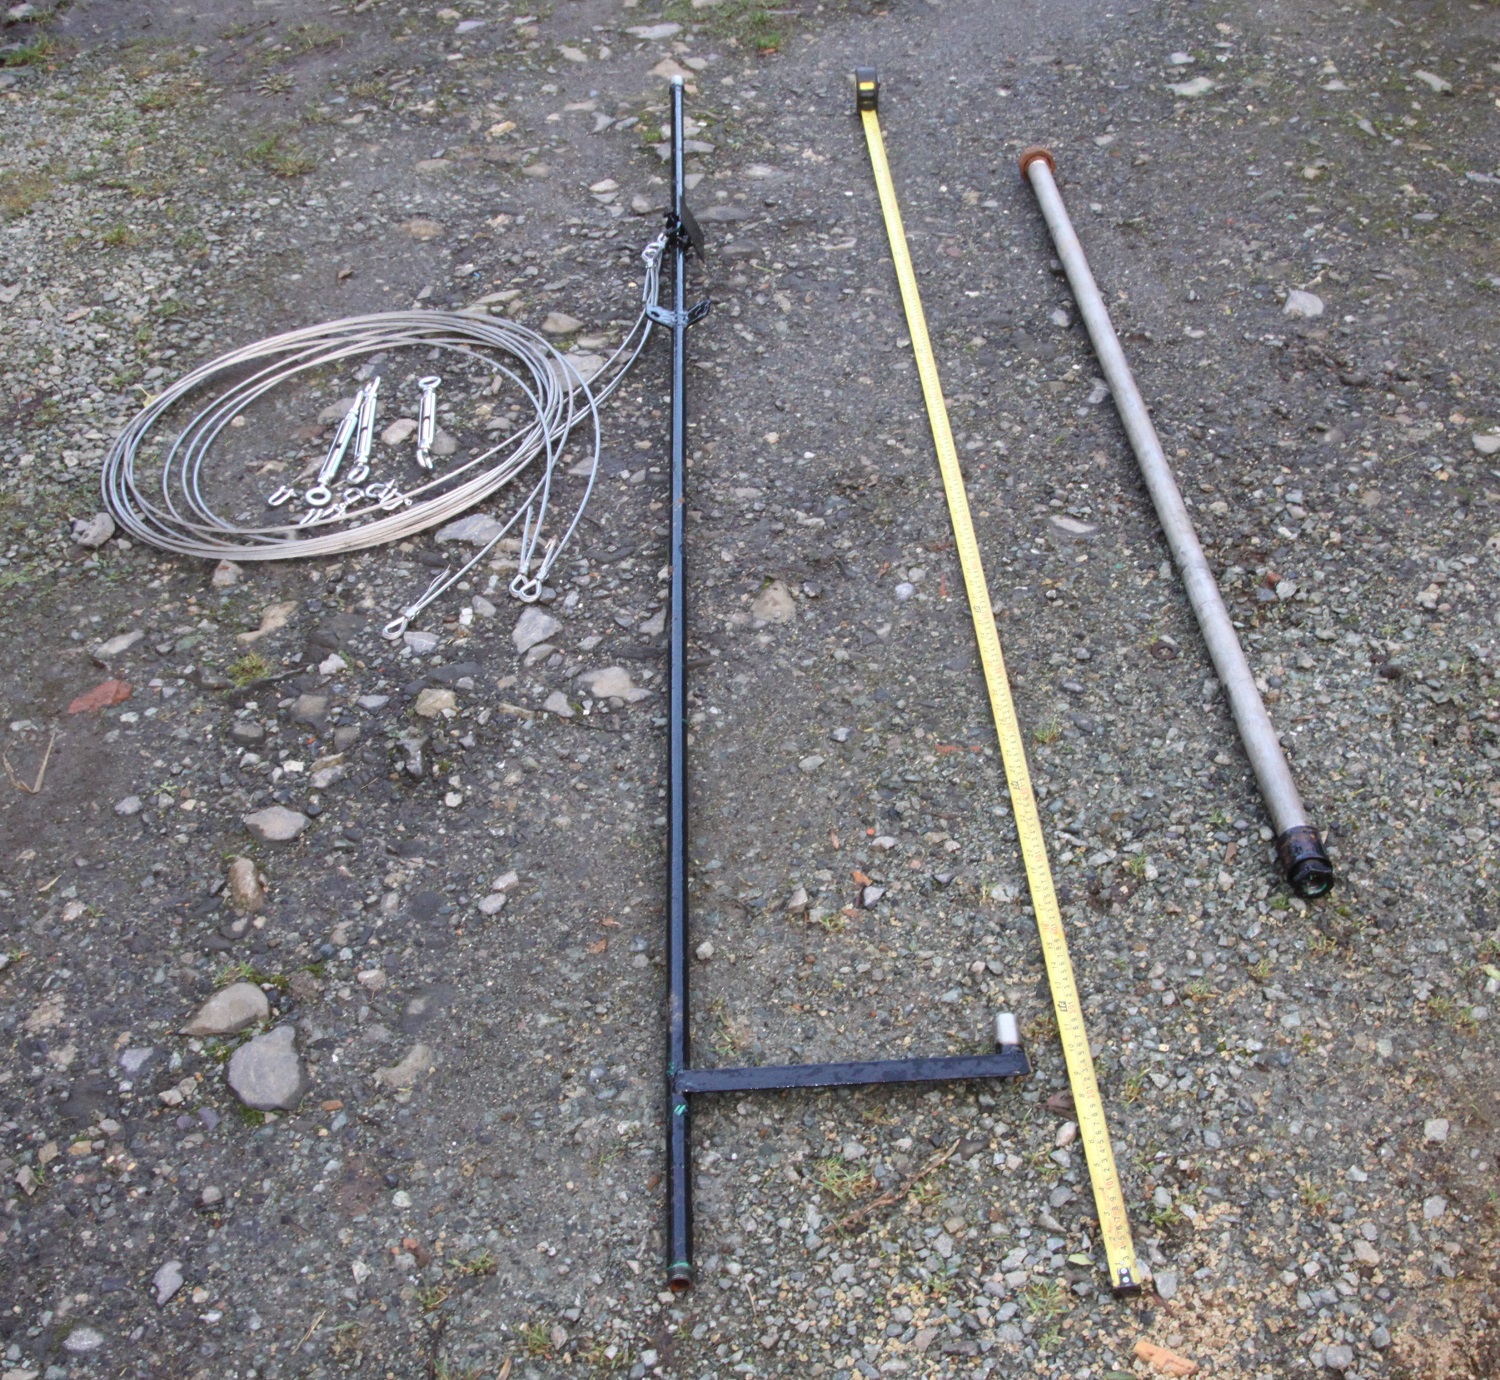
Pole Construction
![]()
![]()
After getting some advice from Vector Instruments, who supplied the wind sensors, I realised that these sensors needed to be much higher up in the air and further away from the low lying hedge underneath. With this in mind, the main pole was extended to 20 feet and guy lines were attached to stop the top of the pole moving around in the wind.
Here's a run down of the main considerations:
- The pole needs to be taller than the hedge and away from any trees or buildings.
- The pole must not wobble in the wind or it will give false wind gust readings.
- The wind vane must be aligned to north.
- The GPRS antenna must be facing the nearest compatible cell phone mast.
- The structure must be easy to take down for maintenance.
The pole itself is composed of three main sections: One stainless 1" section concreted in the ground, another 1" section attached to the first via a cone seated coupling and the third, a 1/2" pipe attached via a standard reducing fitting.
-
4Step 4
Pole Parts:
![]()
![]()
1x19 Stainless Steel Wire Rope x 19m
- 5mm Stainless Steel Wire Rope Thimble Eye x6
- 5mm Stainless Steel Wire Rope Ferrule x6
- 6mm Stainless Steel D Shackle x6
- 10mm Stainless Steel Turnbuckle Eye/Eye x3
- 1" threadable steel pipe x 5m
- 1/2" threadable pipe x 3m
- 1" female female pipe parallel cone seated connector
- 1" to 1/2" reducer
- 1" female female socket
- 1/2" malleable steel ring clips / munsen ring x2
- stainless tube to fit inside of wind sensor mounts.
-
5Step 5
Cable Ends:
![]()
![]() Best option is to go to a professional rigging shop and get this done for you - it's not easy to DIY. The cable needs to be extremely tight around the thimble and the ferrules MUST be crimped using the right tool - not with a hammer!
Best option is to go to a professional rigging shop and get this done for you - it's not easy to DIY. The cable needs to be extremely tight around the thimble and the ferrules MUST be crimped using the right tool - not with a hammer! -
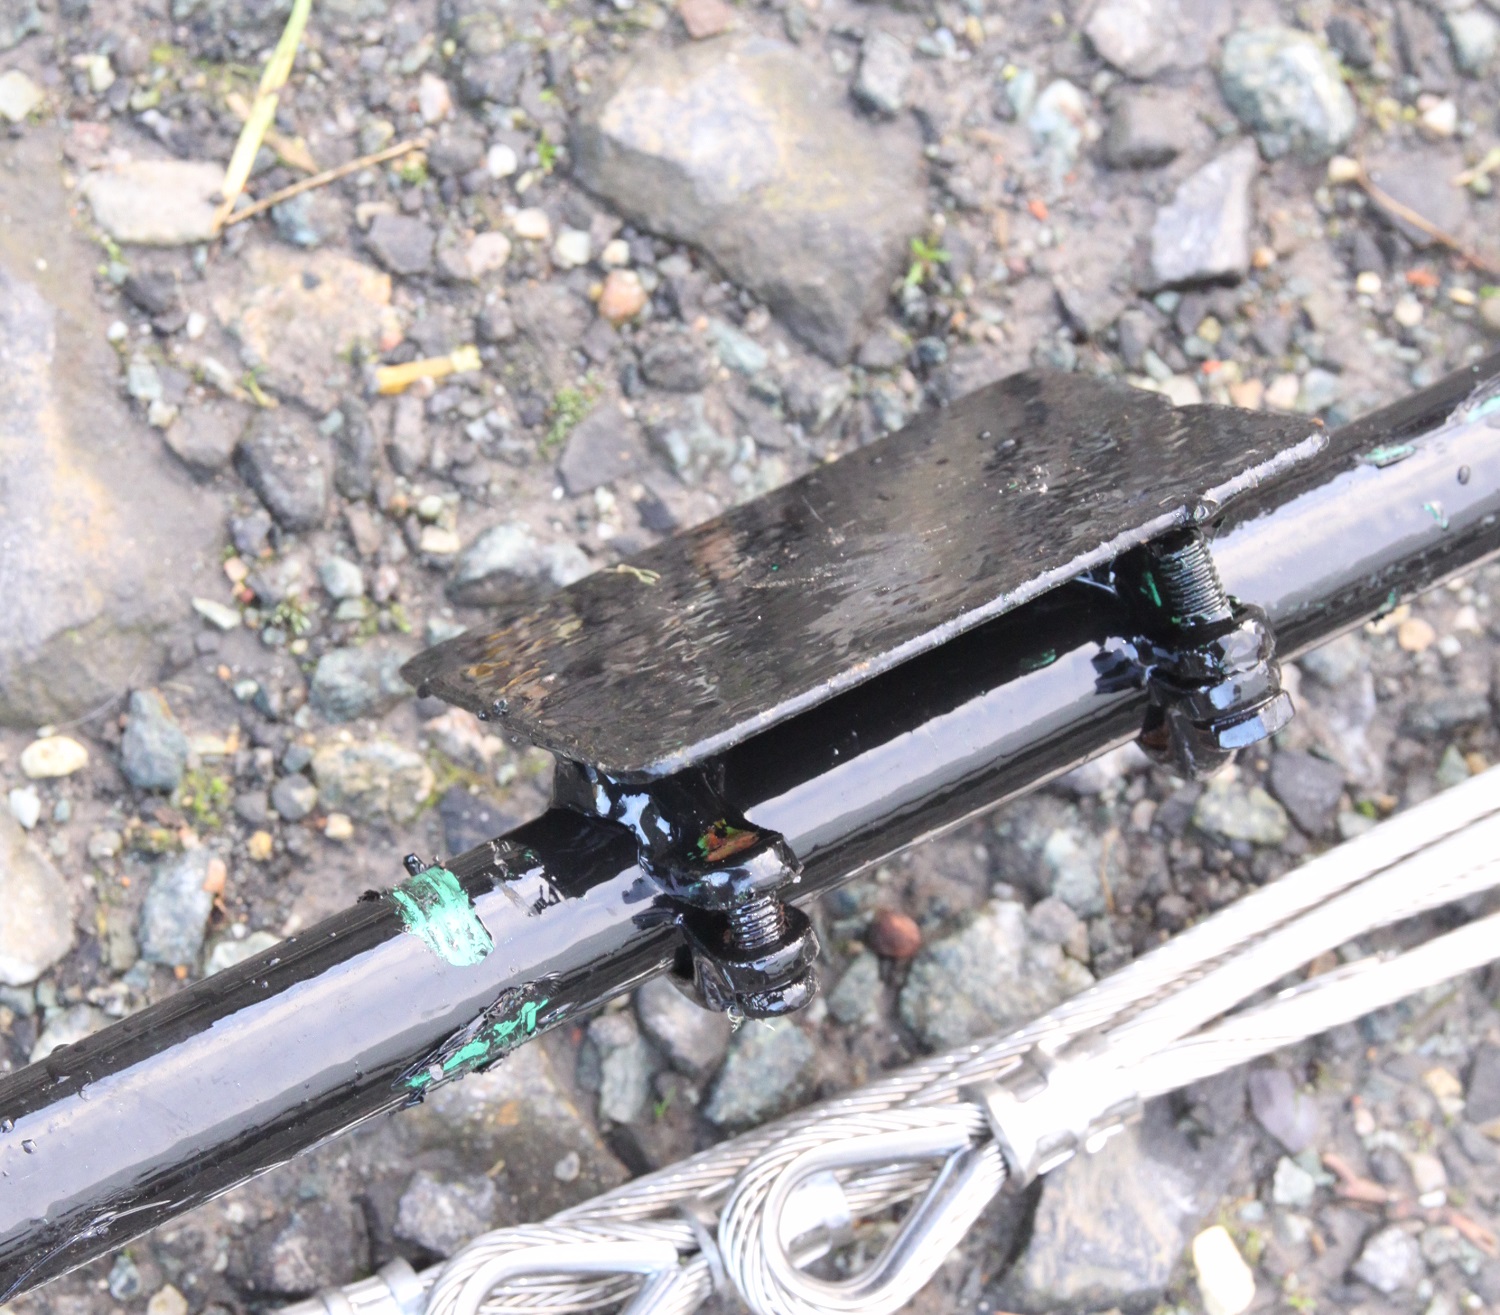
6Step 6
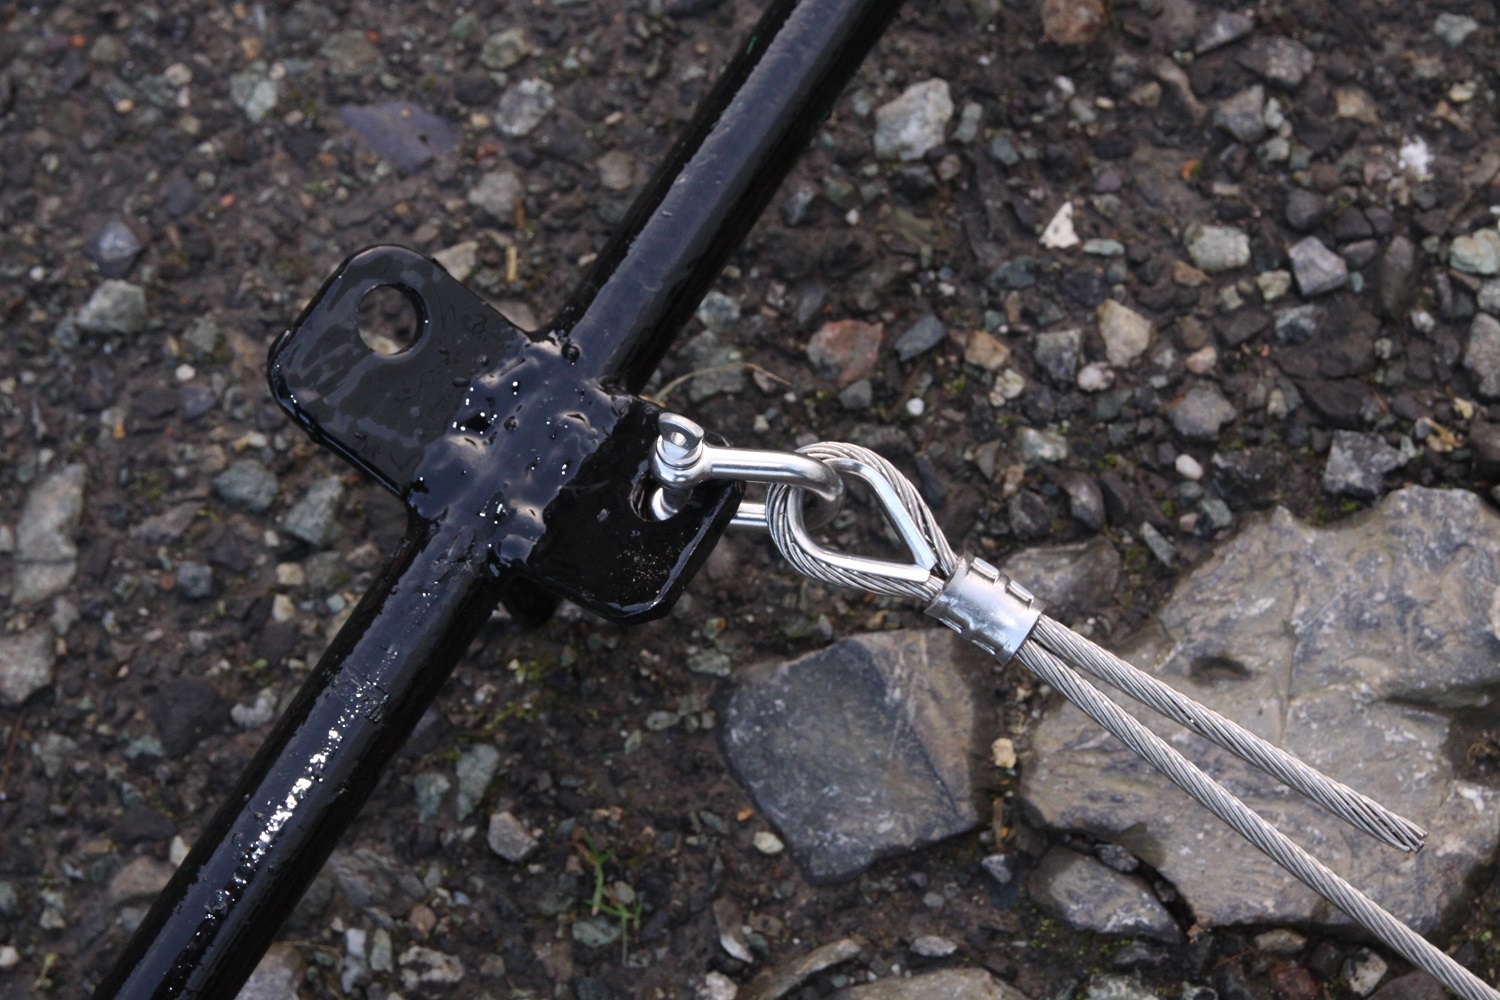
Top Pole Cable Connection:
![]()
![]() There are three poles joined together by threaded connections and the top 1/2" pole has steel lugs welded onto it to accept the cable end as shown.
There are three poles joined together by threaded connections and the top 1/2" pole has steel lugs welded onto it to accept the cable end as shown. -
7Step 7
Wind Vane Mount
:
![]()
![]()
![]()
![]()
The wind vane is lower down the pole on a piece of steel angle. Keeping it low down makes it easier to point to north during setting up and prevents it obstructing the anemometer at the top.
There's a special technique for getting the wind vane aligned to north which involves pointing a compass towards it from about 10 metres away on the ground. The instrument used here has a large black square printed on it which allows us to 'sight' it. It's really handy if the wind vane can be accessed via a step ladder as the adjustment itself is done in a series of stages by repeatedly adjusting on the step ladder and then checking from the ground. Some binoculars mounted on a tripod would have been really useful!
-
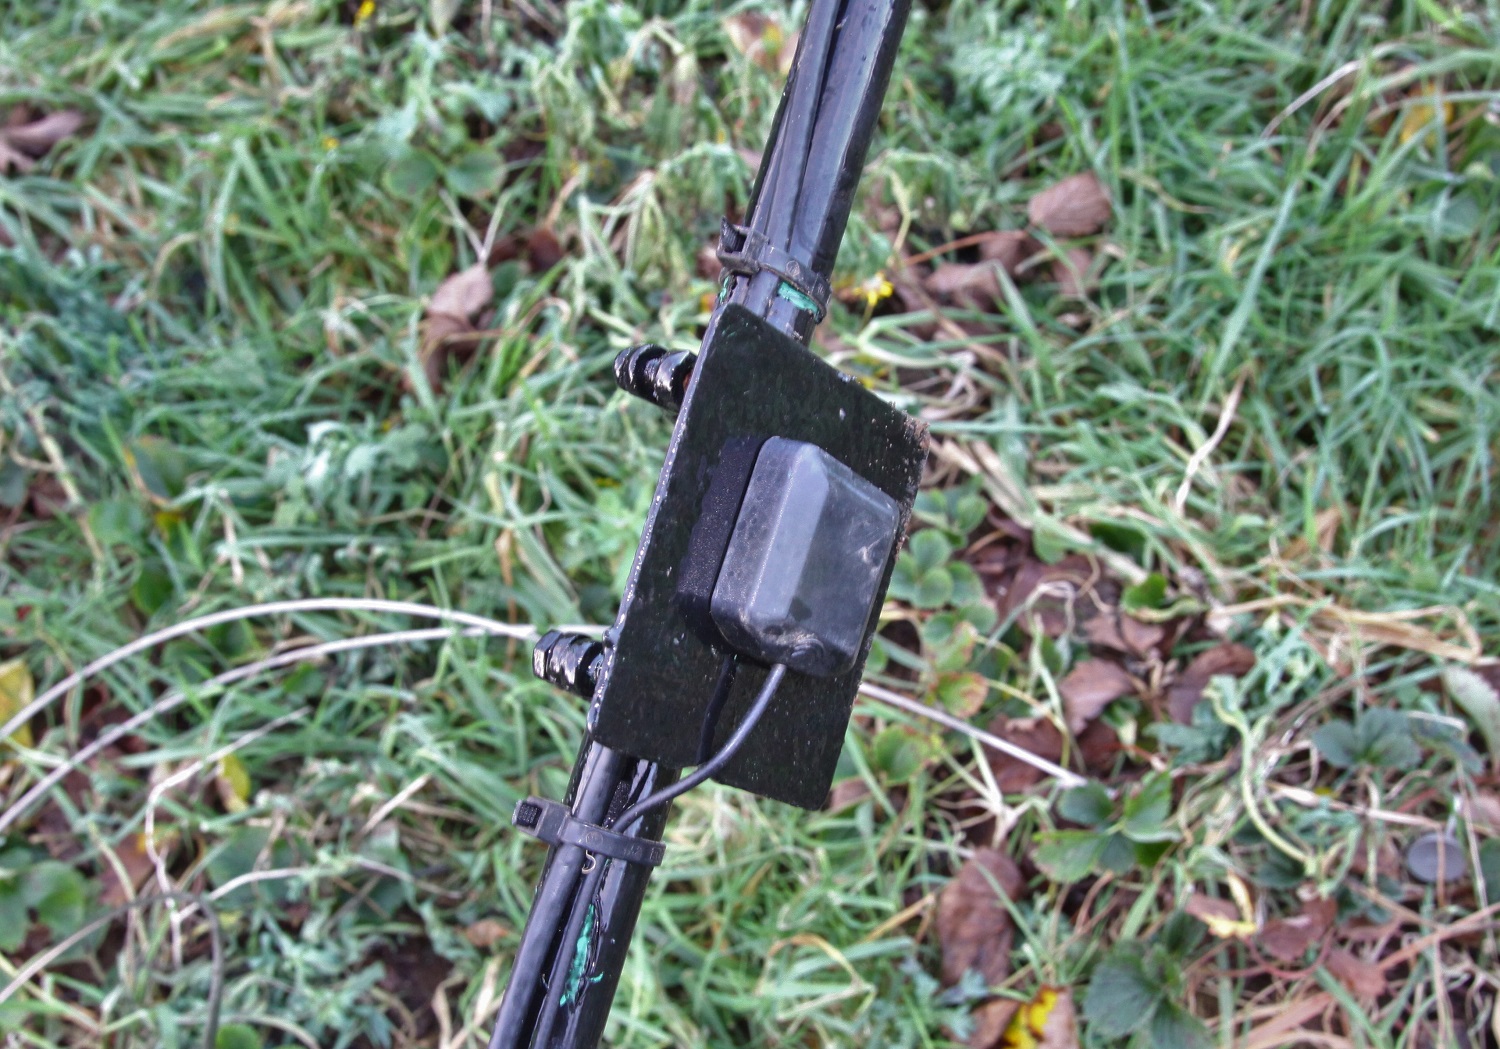
8Step 8
GPRS Antenna:
![]()
![]() The antenna used here is magnetic and attaches to a small piece of steel plate with munsen rings to attach to the 1/2" pipe. The antenna MUST point in the right direction!
The antenna used here is magnetic and attaches to a small piece of steel plate with munsen rings to attach to the 1/2" pipe. The antenna MUST point in the right direction! -
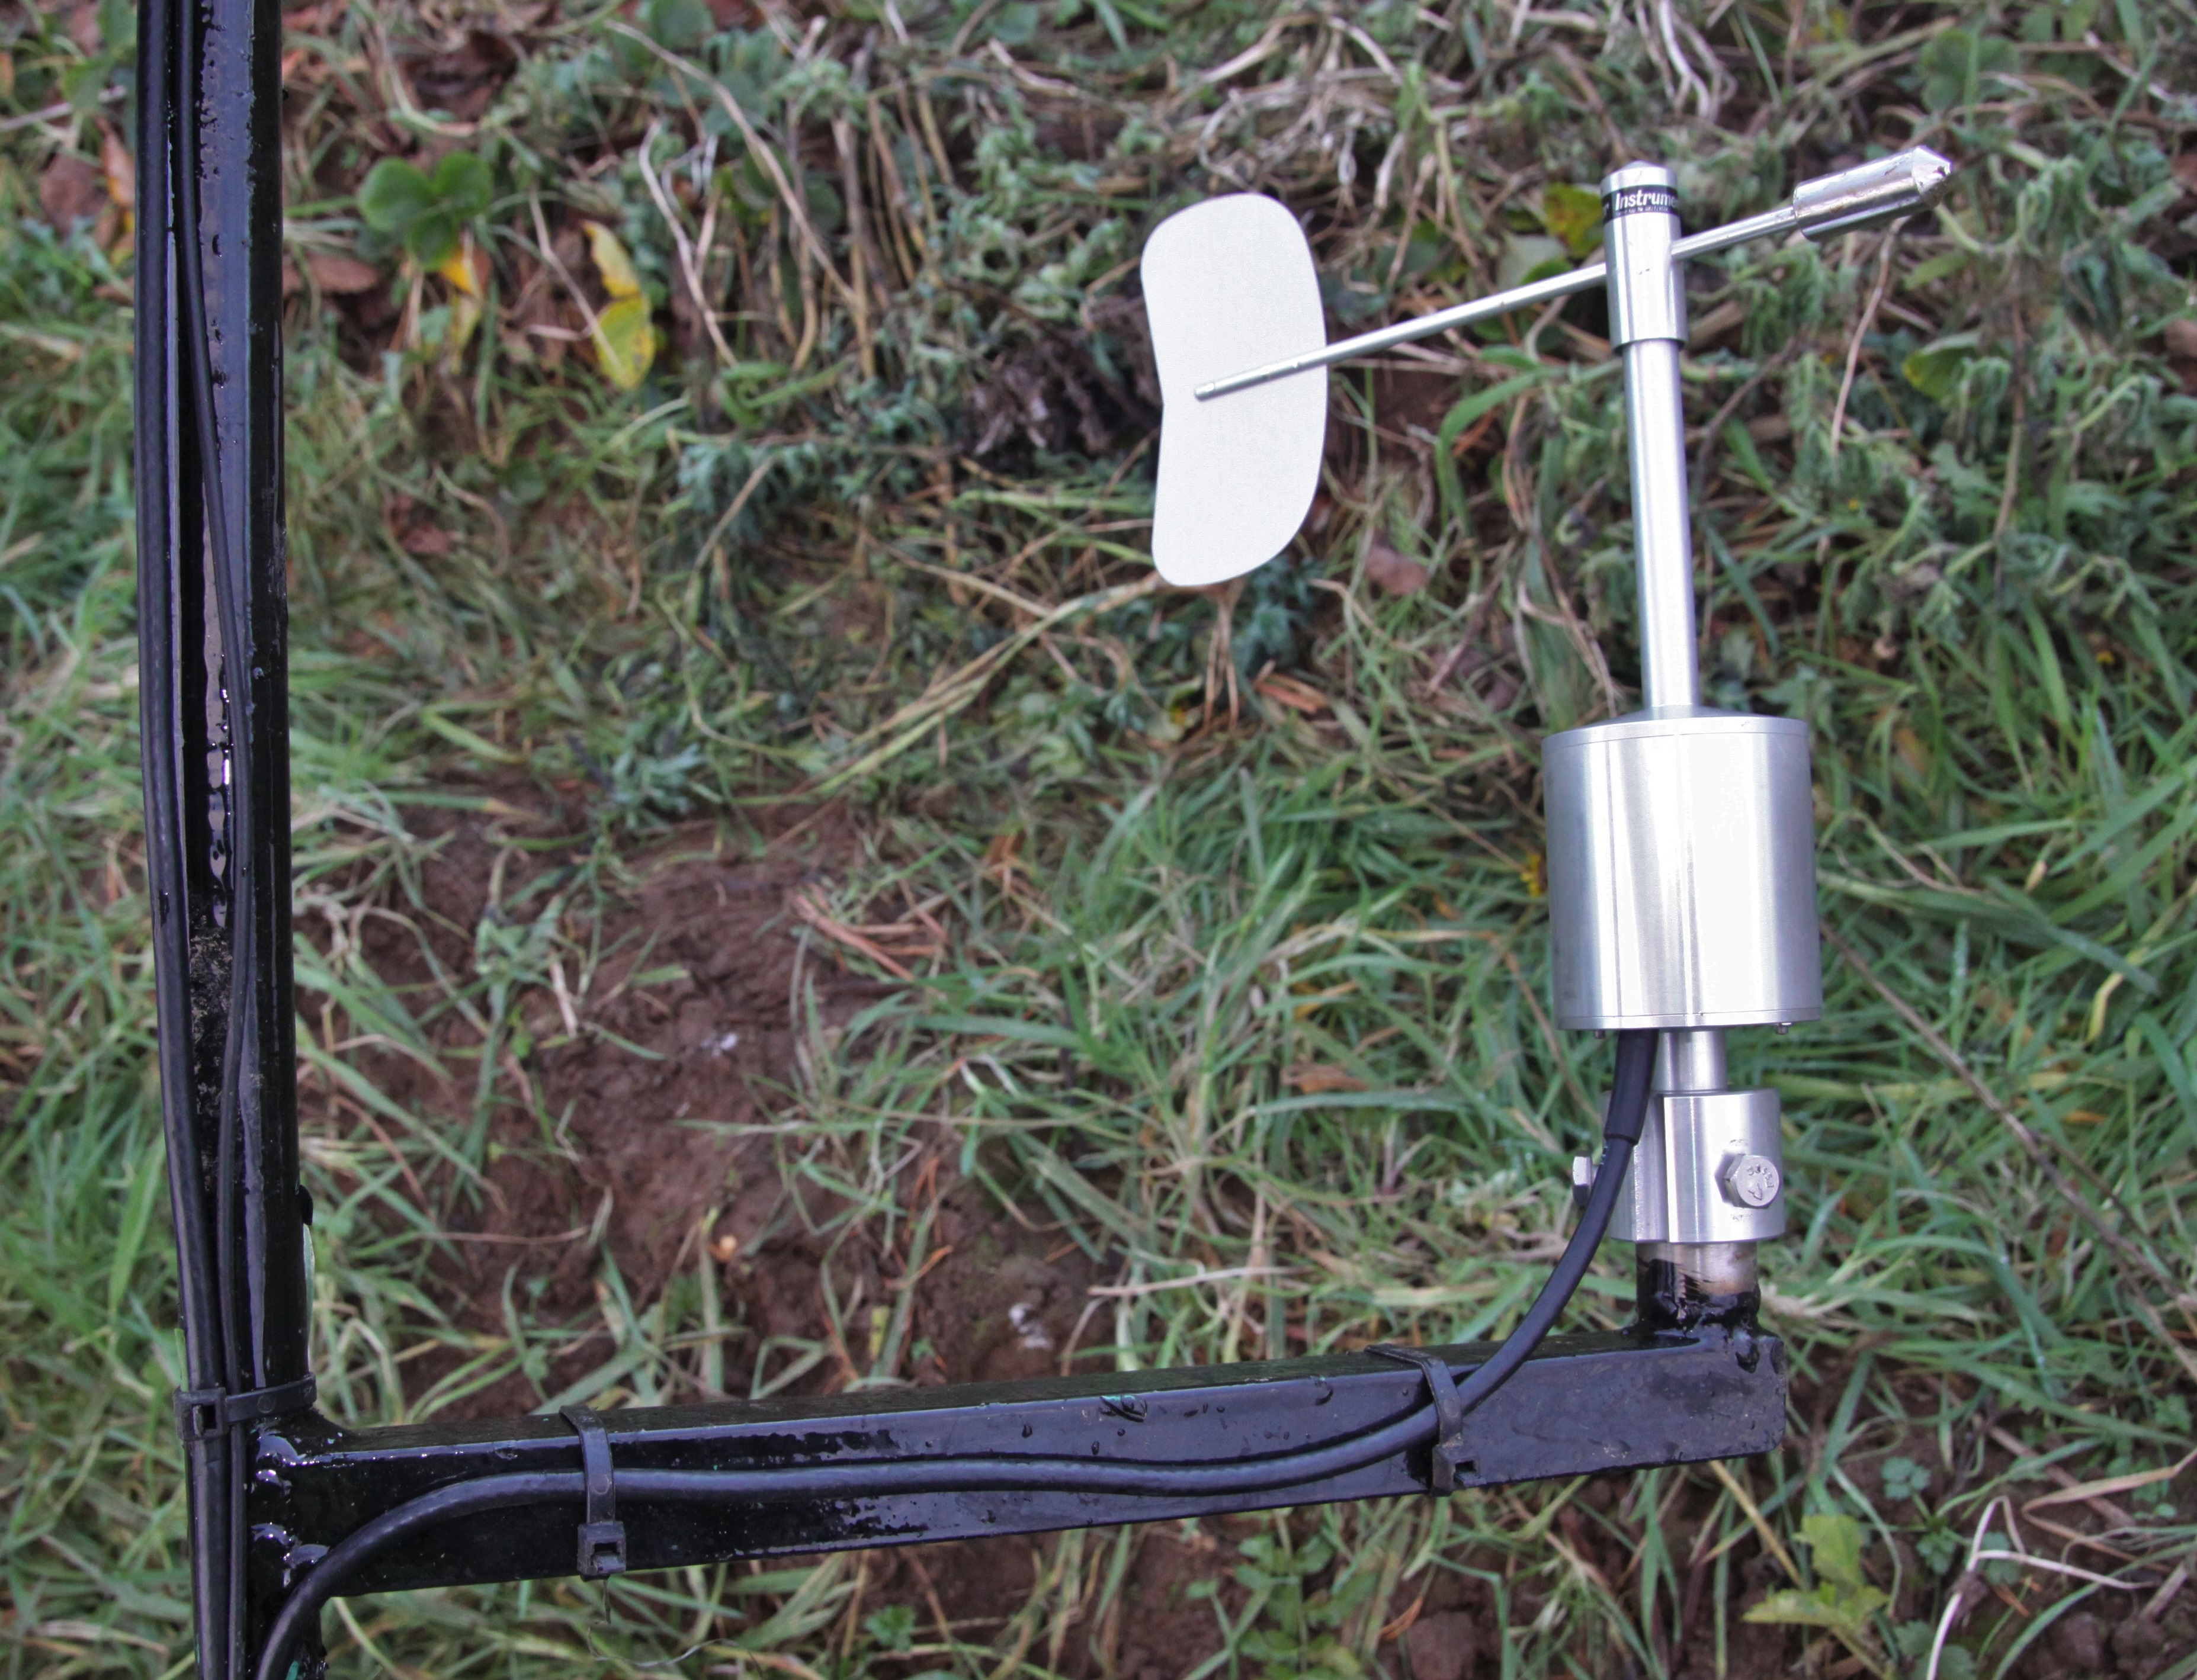
9Step 9
Anemometer:
![]()
![]() The anemometer is bolted onto a piece of stainless tube welded onto the 1/2" pipe right at the very top.
The anemometer is bolted onto a piece of stainless tube welded onto the 1/2" pipe right at the very top. -
10Step 10
Pole Ready for Assembly:
![]() Here's the complete pole rig, except for the 1" stainless tube already concreted in the ground.
Here's the complete pole rig, except for the 1" stainless tube already concreted in the ground.
Arduino GPRS IOT Weather Station
Internet enabled (IOT) weather station using the GPRS network
 A full schematic for the control panel is available in the 'files' section.


 Best option is to go to a professional rigging shop and get this done for you - it's not easy to DIY. The cable needs to be extremely tight around the thimble and the ferrules MUST be crimped using the right tool - not with a hammer!
 There are three poles joined together by threaded connections and the top 1/2" pole has steel lugs welded onto it to accept the cable end as shown.
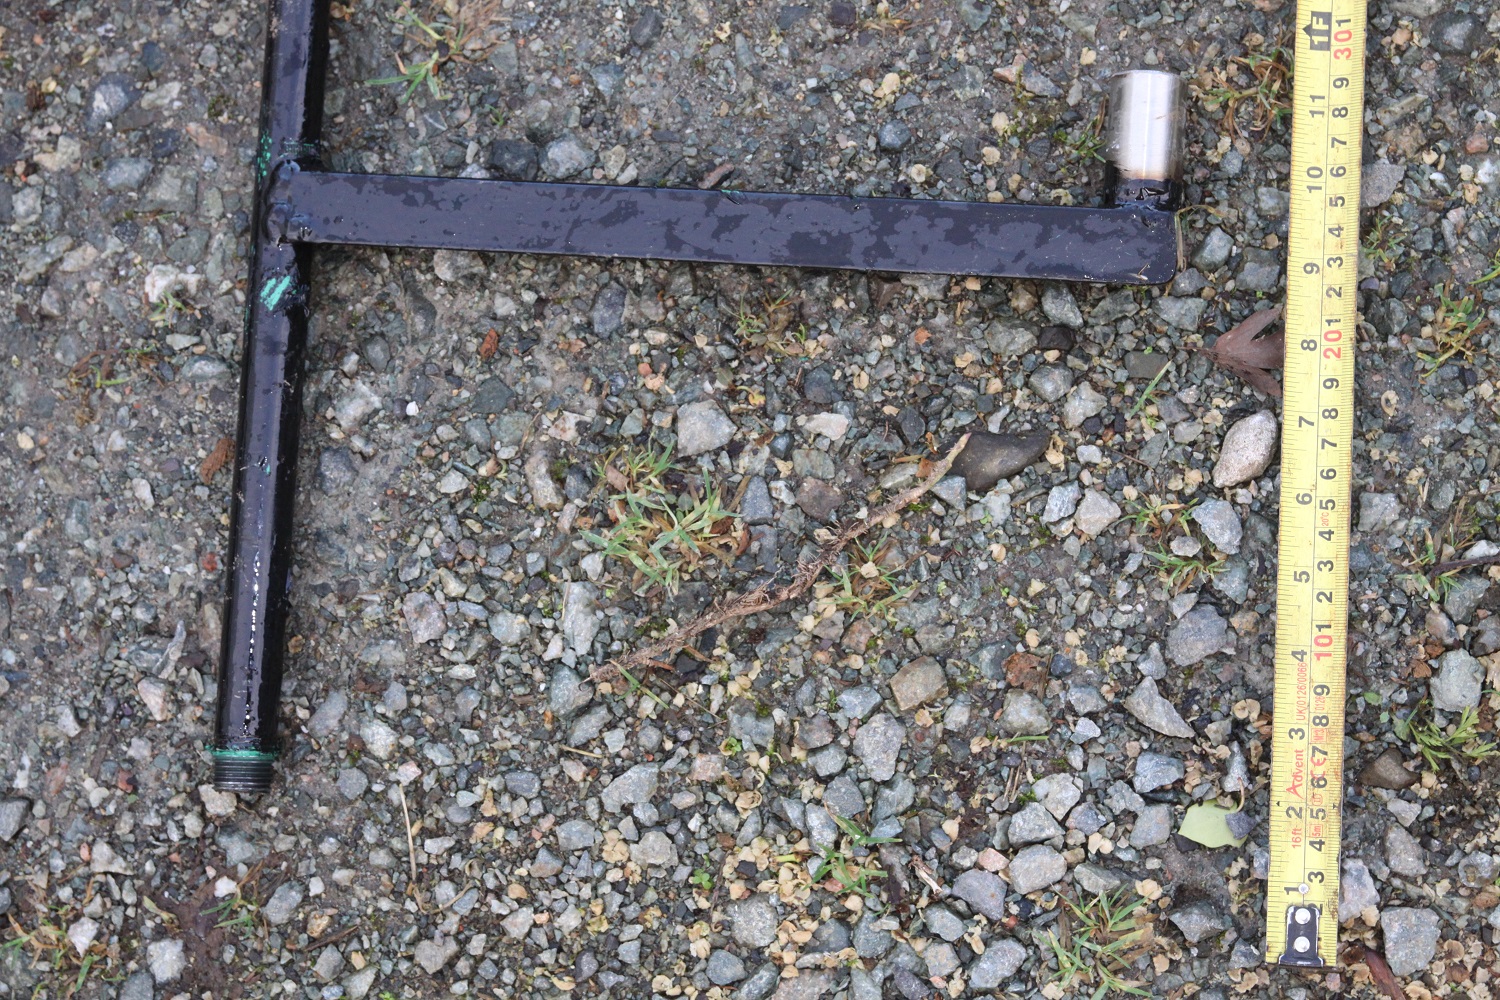


 The antenna used here is magnetic and attaches to a small piece of steel plate with munsen rings to attach to the 1/2" pipe. The antenna MUST point in the right direction!
 The anemometer is bolted onto a piece of stainless tube welded onto the 1/2" pipe right at the very top.
 Here's the complete pole rig, except for the 1" stainless tube already concreted in the ground.
Discussions
Become a Hackaday.io Member
Create an account to leave a comment. Already have an account? Log In.