 shamylmansoor
In this tutorial we will learn how to program the robot to run in a single direction continuously.
Step 1: Electrical Connections
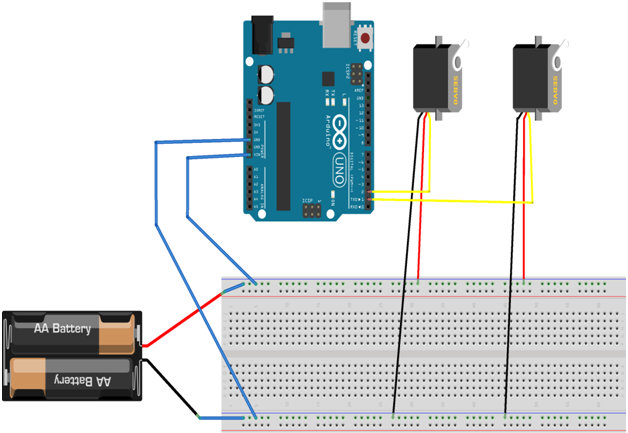
First make sure that the robot is assembled properly and all the electrical wires are connected properly. The Vin and GND should be connected to the battery and the servo motor’s two power wires should also be connected to the battery and the third wire which is the signal wire (yellow wire) can be connected to any digital pin of the Arduino. The wire connections can be seen on the diagram below:
Step 2: Opening ArduBlock Graphical Programming Tool
ArduBlock is software tool used for graphical programming. Graphical programming is a fast, fun and easy method of developing your programs without getting in too much hassle of writing long lines of code.
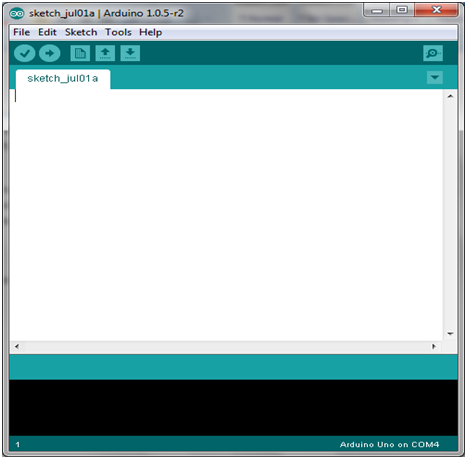
Using this tool you can directly implement your algorithms by just dragging and dropping the required blocks onto the screen and connecting them appropriately. Go to your desktop and open the Arduino IDE, the following window will appear
Now follow these steps:
1. Click the tools tab and click on ArduBlock.
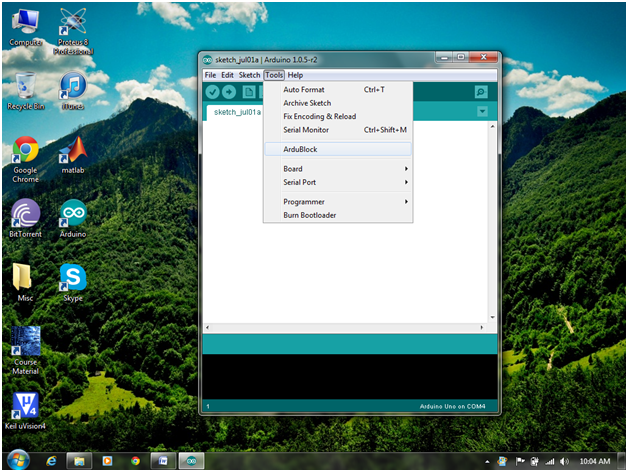
This will open the ArduBlock software.
After clicking, the following window will appear
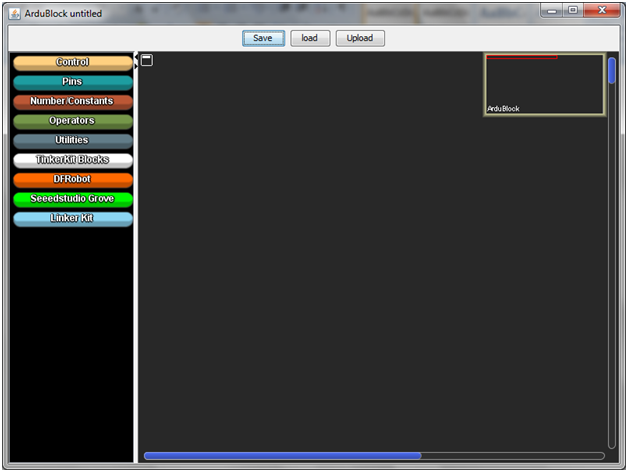
As you can see on the left there are many tabs like the Control, Pins, and Number Constants etc. which we will be using in order to program our robot.
Step 3: Programming
In this step we will learn how to use ArduBlock to program our robot.
First we will make a program for the robot to move in a straight direction but first we should see how the servo motor which drives the wheels of the robot operates.
The servo rotates at an angle specified by the programmer. So for turning a single direction we can give an angle of 360 degrees for it to turn. In the case of our robot in order to make both the servos (and so both the wheels) in the same direction we will need to give 360 degrees to one and the opposite ,-360 degrees to the other.
Now let’s see how we can do this in ArduBlock. Follow the given steps:
1. First click on the ‘Pins’ tab on the left of your screen the following options will appear
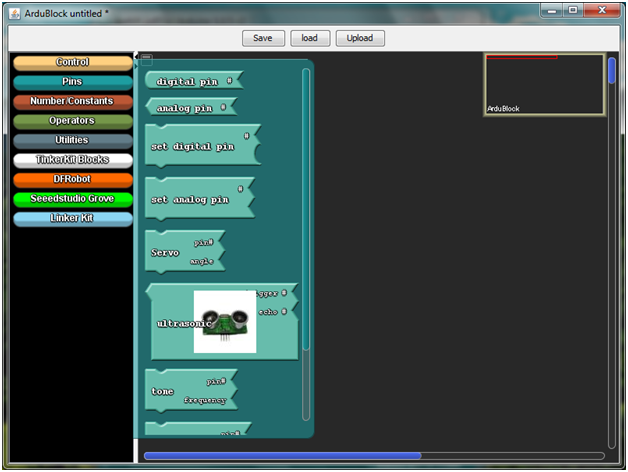
2. Now drag the servo block from the ‘Pins’ tab and place it on the programming window as shown below:
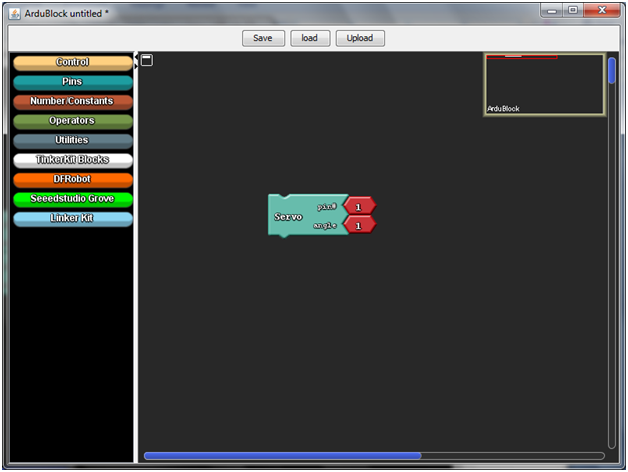
As you can see the servo block has two numeric inputs, one is the number of the pin on which the servo’s signal wire (yellow wire) is attached. Now repeat this step again so that both the servos have been added. Connect the second block below the first one as shown in the image in step 3.
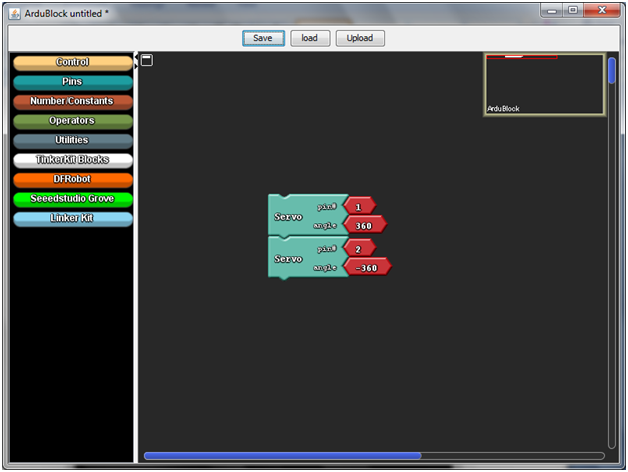
Make sure that the pin number given to the block for both servos is the same as the number of the digital pins of the Arduino to which the motors are connected. In this case let’s assume that they are connected to pins 1 and 2 respectively.
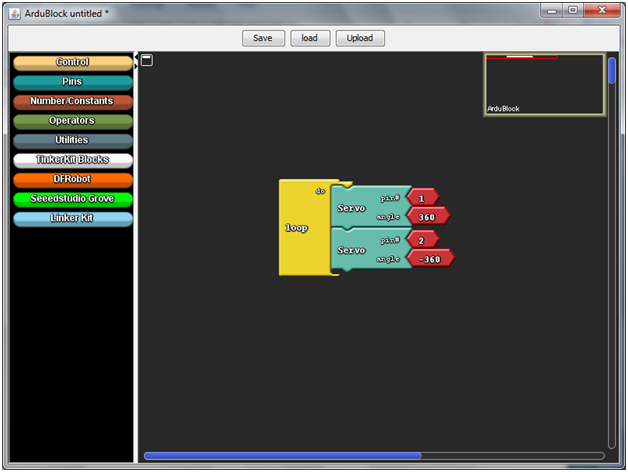
3. After adding both the servos give an angle of 360 degrees to the servo which drives the right wheel and -360 degrees to the left one. After this step the screen should look like this
Now if we run this program the wheels will rotate only once so in order to make them rotate continuously we need to run this program in a loop.
4. Go to the controls tab the following options will appear
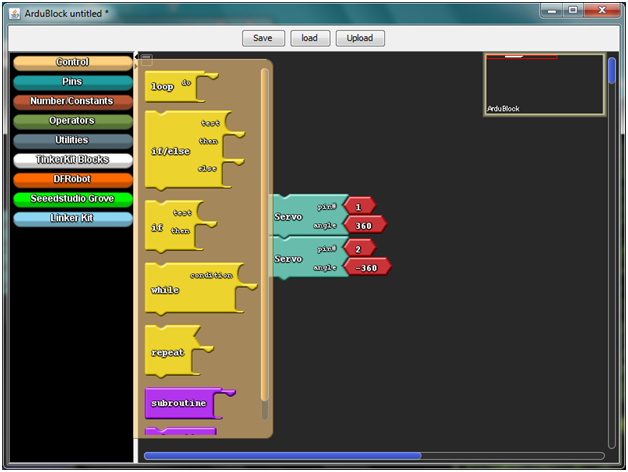
5.Now drag and drop the ‘loop’ block onto the screen and connect it to the top of the first servo block. The loop block will automatically extend and cover both the blocks like shown below:
Now our programming portion is complete. Save your program.
Step 4: Uploading
Connect the Arduino on the robot to the USB port of your computers via the USB cables but first remove the Vin wire connected to the battery before connecting to the computer. Once connected then click on the upload button. It will take a few seconds for your program to be uploaded onto the Arduino.
After the uploading is complete remove the Arduino from the computer and reconnect the Vin to the battery. Now you robot will keep on moving in a straight line indefinitely until its battery gets drained!
Note: If the right and left servo motor connections are interchanged the robot may start to spin on the spot to correct this problem if it arises correct the connections or change the angles in your program and give opposite angles to both the servos than the previous ones.
Discussions
Become a Hackaday.io Member
Create an account to leave a comment. Already have an account? Log In.