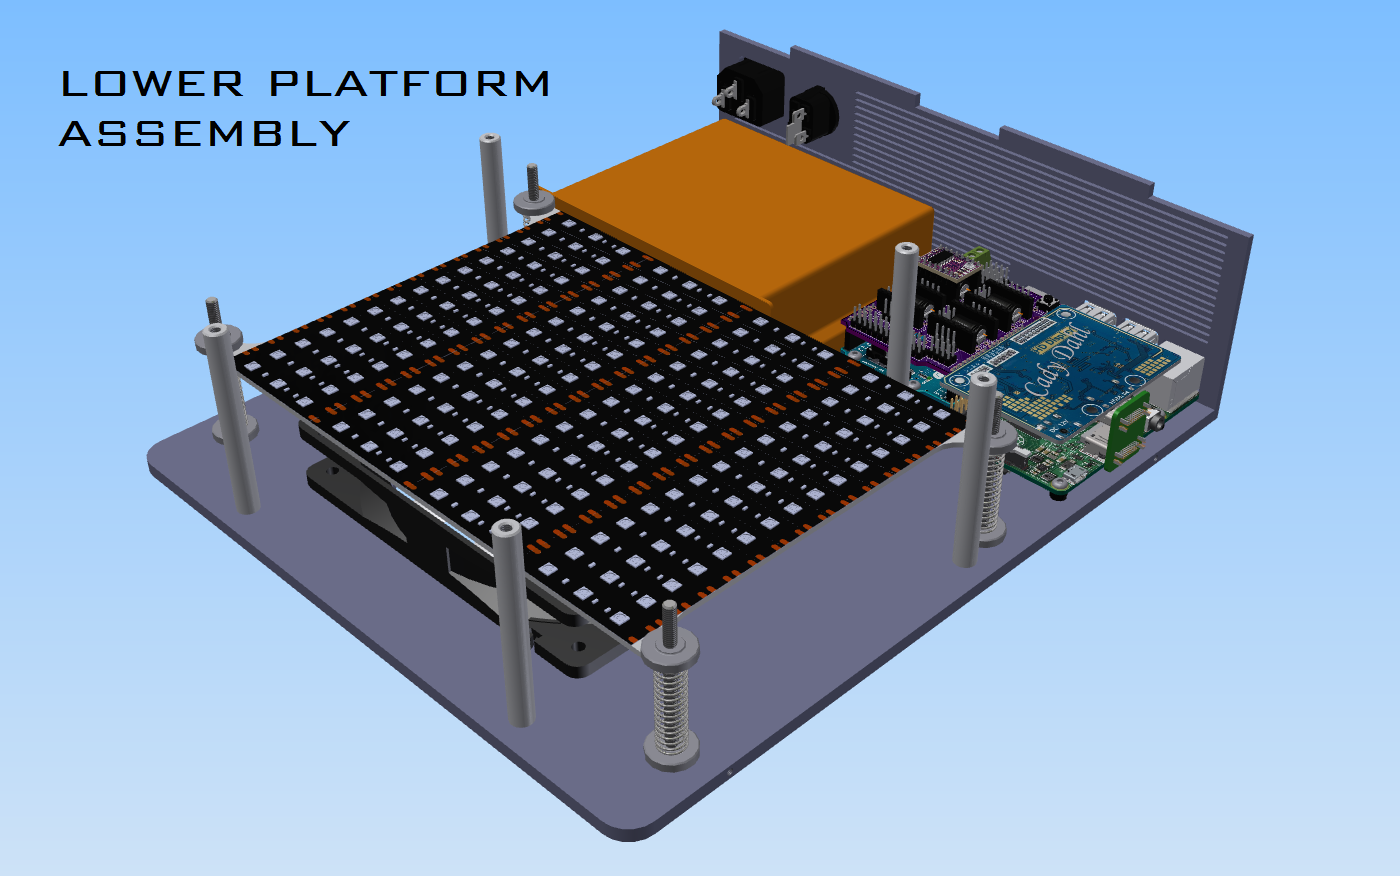
So I'll elaborate a bit more on what drives this project in this log. I have a little more hardware than required for an absolute minimum setup, but I will discuss why at the end of the log.
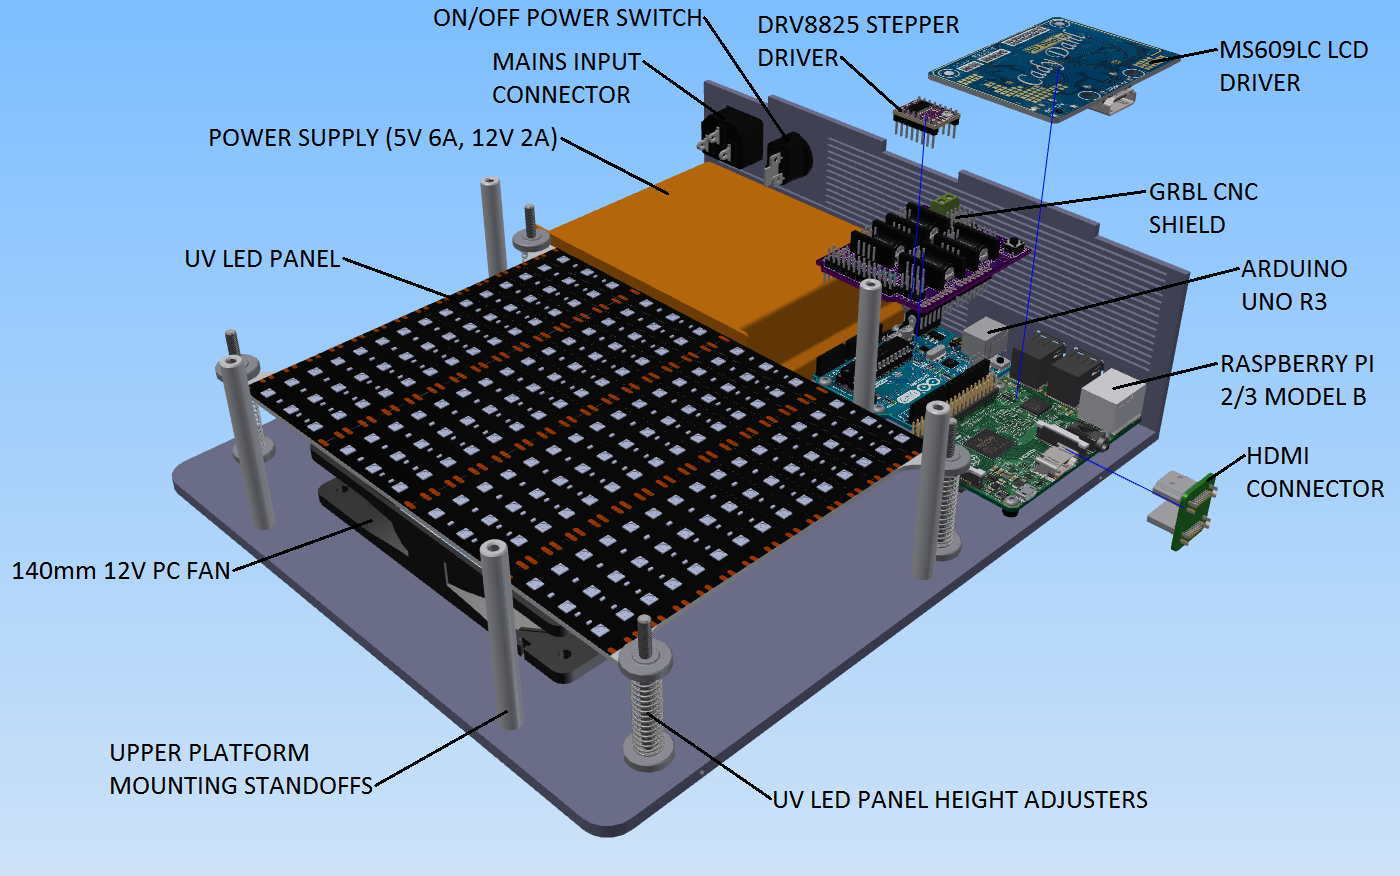
To start off, the project needs juice and for that I have chosen a dual output switch mode power supply giving 5V 6A and 12V 2A. 12V is required by the LCD driver, the LED strip, z-axis stepper motor and the 140mm PC fan, so 24W should be more than enough. The Arduino Uno R3 and the Raspberry Pi 2/3 Model B are powered by 5V.
The Raspberry Pi will act as the brain of the machine running Nano DLP allowing the machine to be networked. GRBL will be running on the Arduino handling the movement of the z-axis and keeping the limit switches in check. NanoDLP handles the slicing of the model and then the projection of each sectional layer. It also instructs GRBL when and how to move the build platform.
To connect the LCD driver to the Raspberry Pi an HDMI connector will be used that is commonly found in Raspberry Pi LCD display kits that mount atop the Raspberry Pi.
A Pololu DRV8825 stepper driver will be used to drive the stepper motor interfaced with the Arduino via a Protoneer GRBL V3.0 shield. This driver is capable of 1/32 stepping which means that the z-axis resolution will be 0.00016mm (0.9 deg/step stepper motor, 2mm pitch ACME thread).
The UV LED panel will be made up of UV LED strip that has a density of 60LEDs/m. The LED panel is height adjustable to get uniform light saturation through the LCD display.
Cooling of the electronics is achieved by the 140mm fan with the cooling path being from the rear of the machine through the vents towards the fan and out underneath the machine. Power is supplied to the machine via the mains input connector and then controlled via the on/off switch located on the back of the machine. The upper platform is fastened to the lower platform via standoffs.
As mentioned, there is some hardware in this setup that will become redundant, but I included it in the first iteration of the machine so as to give myself options and room to experiment. NanoDLP can handle the stepping of the motor etc, but I thought it would be nice to have a microcontroller in the machine so that if it is needed, it is there. It can handle extraction fans, tilting servos or anything else that I can't foresee at this point. If indeed only z-axis handling is required, then a simple stepper driver carrier board can be interfaced with the Raspberry Pi. I have also added in height adjusters for the LED panel as I need to experiment to find the optimal height for even light saturation projected onto the panel. Once I have established this I can replace them with simple standoffs.
Discussions
Become a Hackaday.io Member
Create an account to leave a comment. Already have an account? Log In.