muzi
muziToday we present the FlameWheel Robot assembly tutorial and quick-start guide! It is rather difficult to assemble this robot without guidance. Feel free to refer to my introductory tutorial today.
Flamewheel (A 2WD Remote Control Robot) is part of our Education Robot Series. It is an agile two-wheeled robot with unique and innovative movement. Have fun assembling the robot yourself, while learning about electronics and mechanical principles.AssemblyThe materials we need to prepare beforehand are:1. Models used for assembling the body~

2. Two DC motors
 3. Romeo BLE mini (Small Arduino Robot Control Board with Bluetooth 4.0) and a set of screws~
  4. A cross screwdriver
5. A battery box and four AAA batteries~

Now let’s start the assembling:
Step one: assemble the inner shellRemove four boards from the mould and assemble them as follows:
 (Here is what it looks like when it’s finished):
 Step two: assemble the back-up plate for the control board;As shown in the following picture:
 Step three: assemble the back-up plate for the battery box;As shown in the picture below:
 Beware not to confuse it with the bolt:
  Step four: assemble the electric motor and get it fixed;Put the two motors into the inner shell, fix the motor shafts onto appropriate positions, and plug them into the bolt as follows:
 Rotate the bolt to clamp the two motors until it’s completely fixated:


 Step seven: assemble the wheels;Assemble the two gaskets first:
 Install the wheels and clamp them with washer and screws:Attention: spin the wheels to make sure smooth rotation!
 After installing the wheels on both sides, the assembly is nearly done.
 DebuggingWe need the following materials in debugging:
 1. Mobile Terminal APP: ‘GoBLE’ Bluetooth 4.0 controller (the current version only supports iOS system and iPhone/iPad. Download for free in App Store)
Download link:https://itunes.apple.com/cn/app/ ... qi/id950937437?mt=8
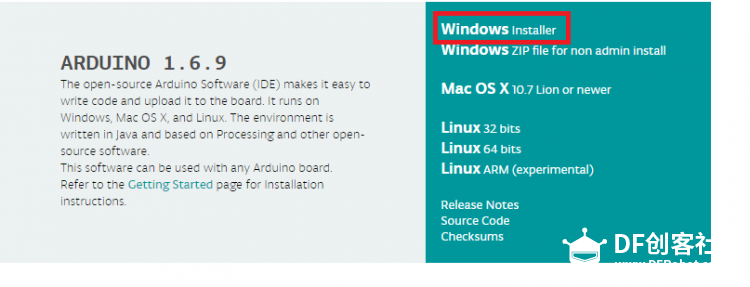
2. Arduino IDE
Official download link:https://www.arduino.cc/en/Main/Software/
Select Windows installer to download and install
 Step One: Install GoBLE and Romeo.m library files
As it’s necessary to call the existing library functions from the sample programs, you need to add GoBLE (mobile Bluetooth communications App) in the Arduino library, as well as the library file of Romeo BLE mini board.
Download link for the library files:GoBLE library functions;
Remeo library functions;Method of installation of GoBLE library file:First, open the downloaded file and unpack it, find the library file and open it, copy the following three files: 
Find the Arduino installation directory, find libraries file, and copy the three files listed above under this file:

 Until this stage, installation of the two library files are finished. Step two:download the sample programs, open it up with Arduino IDE as follows:
/* -----Bluetooth two-wheel car control program

	1	//------2016.6.29 by LL

	2	//------Applicable to Romeo BLE mini controller

	3	//http://www.dfrobot.com.cn/goods-1182.html

	4

	5	#include "GoBLE.h"

	6	#include <Romeo_m.h>

	7	#define LED 13

	8

	9	int joystickX, joystickY;

	10	int buttonState[7];

	11	unsigned int led_count;

	12

	13	void setup() {

	14	  Romeo_m.Initialise();

	15	  Goble.begin();

	16	  pinMode(LED,OUTPUT);

	17	}

	18

	19	void loop() {

	20

	21	if (Goble.available())

	22	{

	23	      readGoBle();

	24	      motorContrl();

	25	  }

	26	  delayLedBlink();//delay 10ms and led blink

	27

	28	}

	29	//read all the GoBle button stick axes values

	30	void readGoBle()
...
Read more »
 Sinclair Gurny
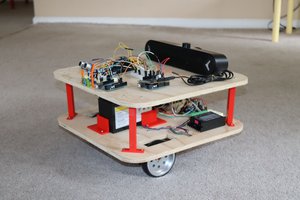
 Mike Rigsby