 deʃhipu
The PewPew Lite FeatherWing is released and on sale on Tindie, so time for the next steps. I'm still working on the documentation and games — I hope to actually publish something this weekend. In the mean time I also started working on the full — not "lite" — version of PewPew again. It will have the IS31FL3733 chip for driving the LED matrix, so there will be more colors available (but the library will be backwards-compatible), and it will have a microcontroller chip on it for handling the buttons and possibly sound. But what microcontroller?
So far I have built one prototype with the ATmega328p on it, working as an I2C slave, providing the button handling and some simple sound generation. The sound part is actually the main difficulty, and I'm not very happy with what I got there. So there is a possibility for using different chips.
Today I spent half a day experimenting with an ATSAMD21E18 chip — the same as on the Trinket M0. I ordered a bunch of them recently, and I decided to try and run CircuitPython on them. Why did I choose that one, and not the other chips that are used in the Feather M0 boards? Because Trinket M0 doesn't have an external oscillator, and the only part that is actually required on it is a tiny little capacitor. So I connected all it all up:
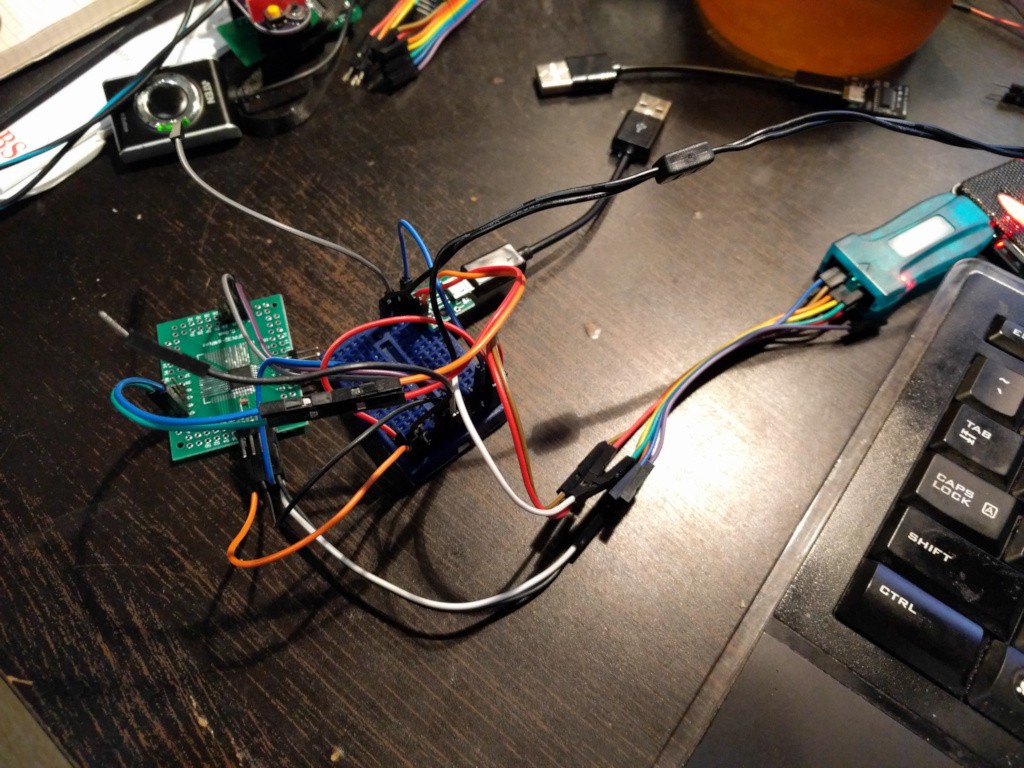
Two power pins, two grounds, D+, D- and GND for the USB, and SWD, SWC and GND for the STLink-v2. And some wires for the reset pin. There is also a small capacitor between the VCORE and GND pins there — it has to have short traces, so I added it directly to the pins with some wrapping wire.
Now, to burn the bootloader. You will need to compile the bootloader itself, the sources are at https://github.com/Microsoft/uf2-samd21, and you will need to flash it. The makefile in that repo has a "burn" target, but it requires a specific version of Arduino to be installed, and some hacking with the OpenOCD configuration, so instead I used https://github.com/adafruit/Adafruit_Adalink. The rest of the day was spent trying to get it all to work, not realizing that the step I'm missing is wiping the chip. So start with that:
adalink -v atsamd21g18 -p stlink -wThen edit the "uf2.h" file to disable some features for the bootloader (because they won't all fit), and compile it with:
make BOARD=trinketThen take the "bootloader.bin" file you find in the "build" directory, and do:
adalink -v atsamd21g18 -p stlink -b bootloader.bin 0This at least worked for me, though I did run the "make burn" script in that bootloader's directory previously, so it's possible that it set some fuses on the chip too, and may be required.
After doing that, I connected the USB port, shorted the reset wires, and had it appear as a USB disk. I then copied the "update_bootloader.uf2" file, to make sure all the fuses are set correctly, reset it again, and then copied the CircuitPython file to it. Voila, it works!
Next up will be some testing of the pins, and possibly figuring out how to add my own pin definitions to CircuitPython, so that I can use more GPIOs.
Discussions
Become a Hackaday.io Member
Create an account to leave a comment. Already have an account? Log In.
cool.
Are you sure? yes | no