 Frédéric Druppel
Because we wanted this project to be relatively cheap, we used an old office desk to make our frame. This didn't cost us a single penny ^^
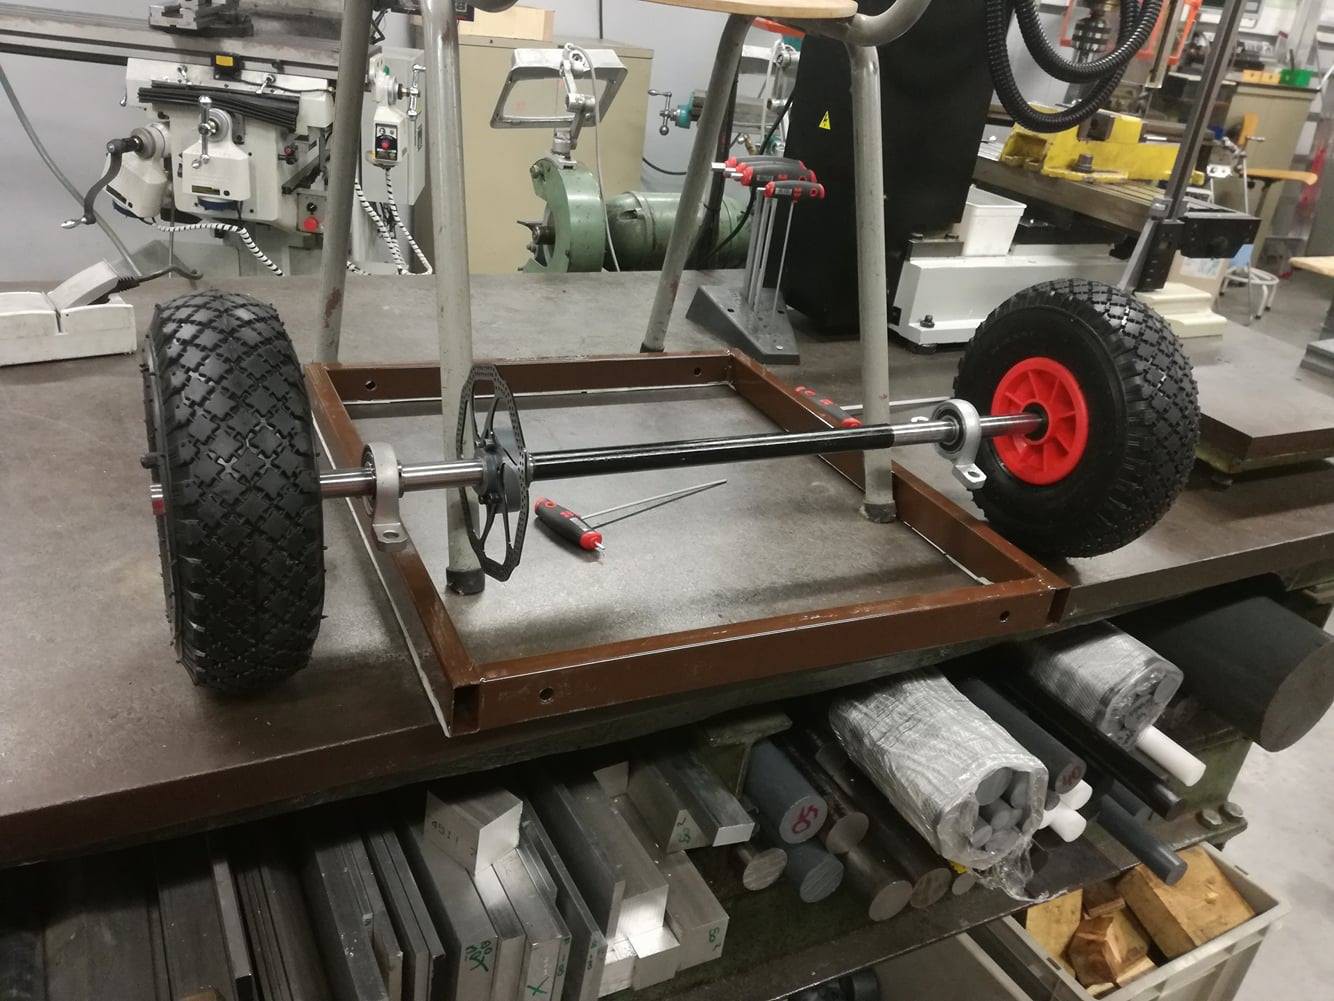
About the axle; we used an old steel tubing that we turned to the right dimensions so we could put the wheels and bearings on it. As you can see in the picture above, it fits !! At this point we've already made the mounting bracket for the disk brake disk (made from PVC stock).
•
Now that the axle is done, we can start working on the power transmission. We haven't added the motor and pinion gears yet, but we'll leave a link *here* for the future project log about that specific topic.
We decided to use only one driven wheel as the tricycle was kinda wide, and we didn't really want to use a differential transmission system.
Because the rear wheels we're using have an embedded bearing we have to make a sort of bracket to drive the wheel from the axle. The wheels themselves have a sort of "eight-armed-star-shape" casted in the plastic (as you can see in the first picture), probably for strength as these wheels are made for trolleys; so we had to engineer a part to accommodate for that. The picture below shows the milling of the notches in the PVC part.
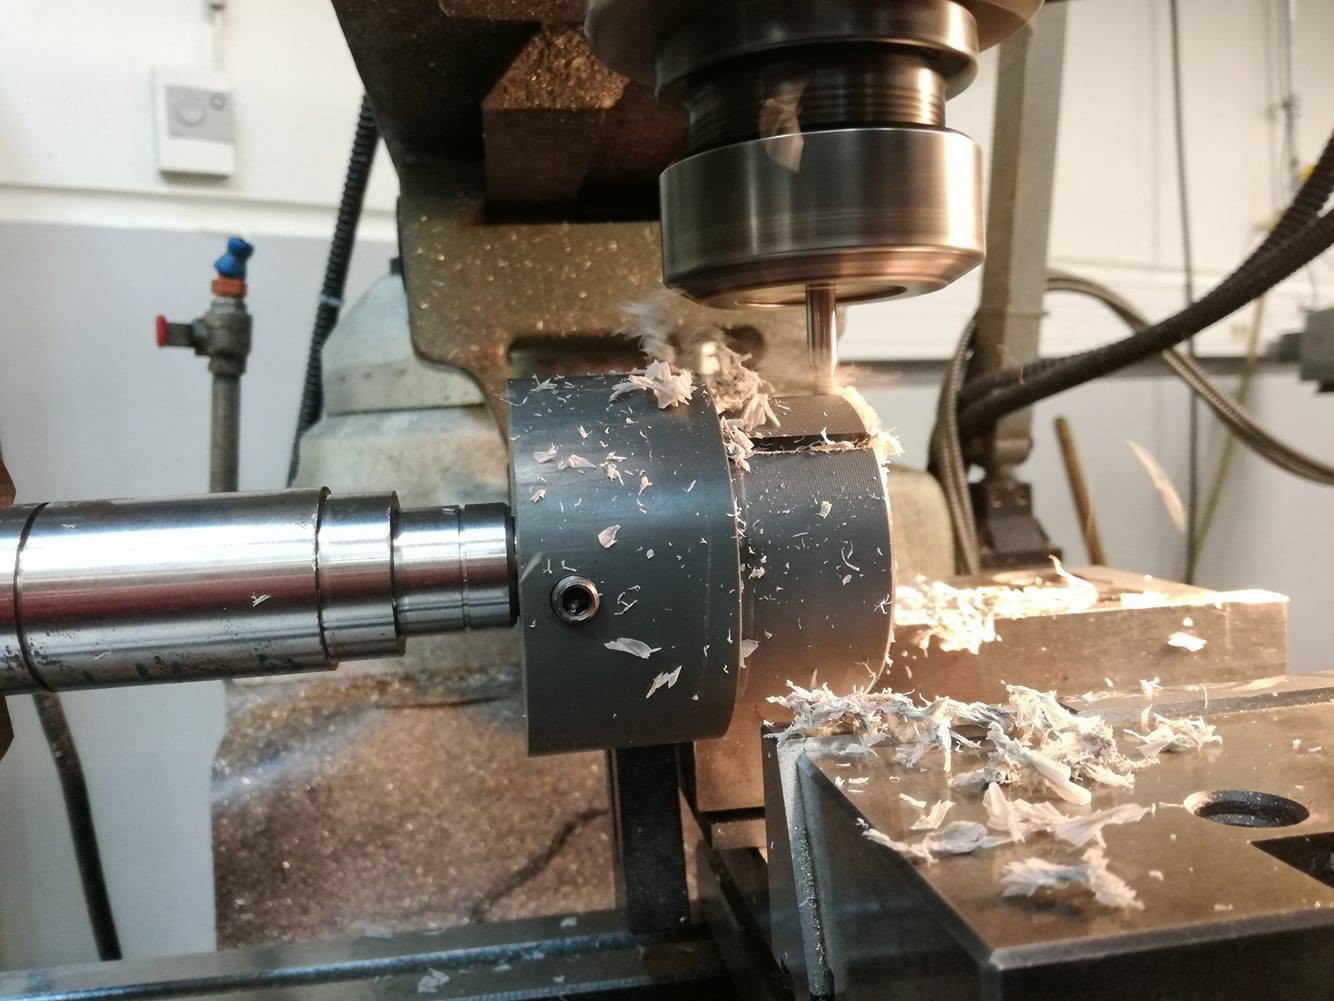
The principle is simple. The notches in the milled part fit inside and around the wheel's inner "arms", while the part itself is fixed on the transmission axle. It may be overkill, but hey, we had access to the tools for that, so why not use them ? :p
Speaking about overkill, to get a nearly-perfect alignment of the notches, we used a manual "fourth axis" dividing plate, just because we could :D
•
The piece of table we used was originally square, and one side was interfering with the main axle and axle parts (mainly the disk brake). To solve this problem we chopped one side of the square frame and moved the chopped piece to the front a little, so we could put the axle where we wanted and still keep the rigidity.
Here's a picture of the finished frame with everything we've made so far attached :

•
Now you may be wondering about the stiffness of rectangular metal tubing, and to be honest, we are too :3 After standing on the partly finished frame, we determined that the stiffness was nice and got the "Good enough" seal of approval.
        .---.         ________________
       /o   o\       | Good enough !! |
    __(=  "  =)__   <_________________|
     //\'-=-'/\\
        )   (_
       /      `"=-._
      /       \     ``"=.
     /  /   \  \         `=..--.
 ___/  /     \  \___      _,  , `\
`-----' `""""`'-----``"""`  \  \_/
                             `-`
Discussions
Become a Hackaday.io Member
Create an account to leave a comment. Already have an account? Log In.