-
1Step 1
For the finished product, I'm using a Pi Alamode GPIO shield to act as the interface between Pi and the ultrasonic sensor/LCD as well as some custom soldered boards to ensure placement in the case. In this example, I'm going to use a arduino-compatible connected via USB cable and leave out the LCD for ease of explanation. This how-to assumes you have a basic knowledge of installing using Raspbian and familiarity with the arduino platform/environment.
![]()
-
2Step 2
Install and setup Raspbian on your Raspberry Pi http://downloads.raspberrypi.org/raspbian_latest.t...
Insert your SD Card, plug in a monitor/keyboard, and boot up
-
3Step 3
Login using standard credentials (user:pi pass:raspberry) and upgrade/install the following packages:
sudo apt-get update && sudo apt-get dist-upgrade
sudo apt-get install mpd mpc python-serial python-mpd python-alsaaudio
reboot
(to force audio to go through HDMI or Analog, go to the Advanced Options in sudo raspi-config)
-
4Step 4
Setup mpd to suit your configuration:
http://www.musicpd.org/doc/user/
All I had to do was mount a network share to my mp3 collection using CIFS https://wiki.ubuntu.com/MountWindowsSharesPermanen...
Then point /etc/mpd.conf look for that folder. Look for the lines and modify them to where ever you mounted your music:
music_directory    "~/Music"
playlist_directory "~/.config/mpd/playlists"
Then update mpd (this could take a while depending on the size of your collection):
mpc update
You shouldn't need to make any other changes at this point.
-
5Step 5
Download lightouch.py and lightouch3.ino from this page
Place lightouch.py on your RaspberryPi in the /home/pi folder
Modify this line of the lightouch.py file:
ser = serial.Serial('/dev/ttyS0', 9600)(if you're using an FTDI cable, for instance it'll likely be /dev/ttyUSB0)
-
6Step 6
Upload lightouch.ino to your Arduino
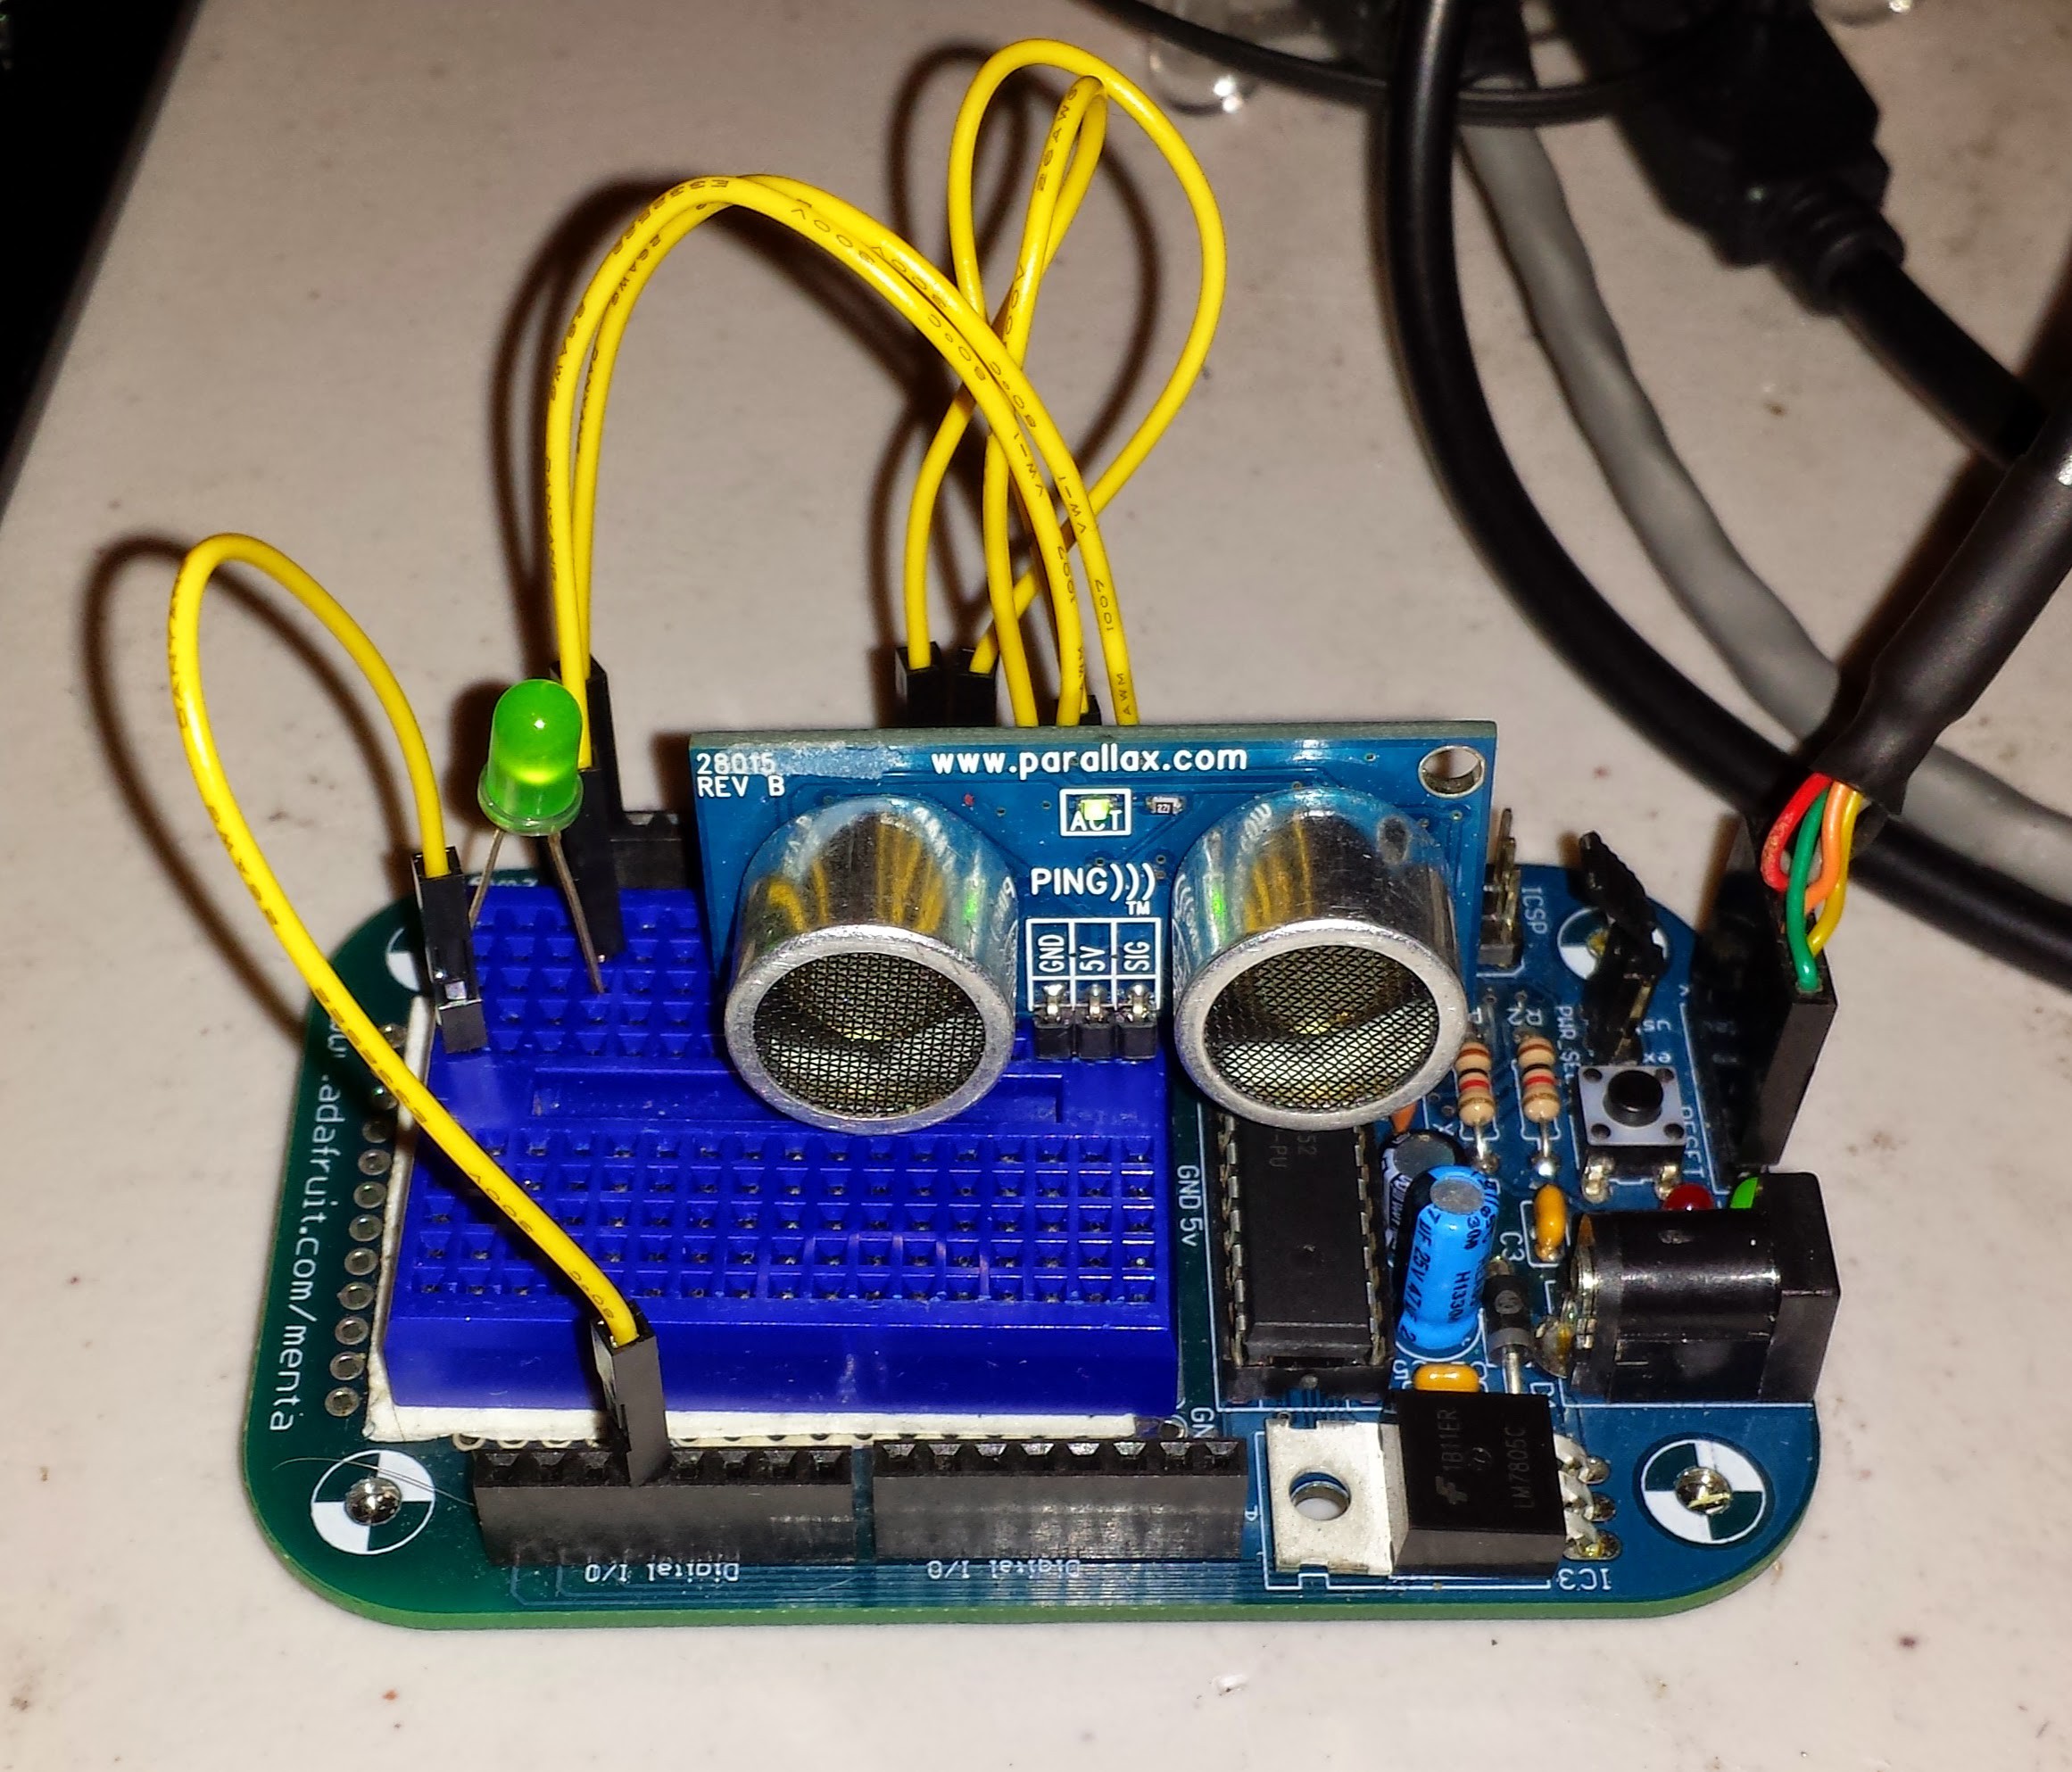
(In my finished product I used a Pi Alamode shield to save space and keep a USB port free. I did attempt just use the Raspi's GPIO directly to communicated with the ultrasonic sensor, but it proved less accurate and chewed up alot of CPU usage)
pingPinT = A4; //Ultrasonic Trigger Pin
pingPinR = A4; //Ultrasonic Echo Pin
(note: I'm using a parallax PING))) in this how-to with only 3 pins (ground, SIG, and 5v) most sensors have a unique Trigger and Echo pin)
ledPin = 3; //Fading LED pin
If you want to duplicate the picture shown, the Pinouts are as follows
------------------------
Pin 5v -> Ultrasonic 5v
Pin GND -> Ultrasonic GND -> LED GND
Pin A4 -> Ultrasonic SIG
Pin 3 -> LED+
(use a resistor on the LED if you're planning on make this a permanent build)
------------------------
-
7Step 7
Connect the Arduino to the RaspberryPi via USB, plug in some speakers (if using the analog output) and reboot
-
8Step 8
Ensure mpd is running by typing
mpc play
Position the arduino so the ultrasonic sensors are pointed towards the ceiling
Start lightouch.py
python /home/pi/lightouch.py
If all goes well you should see the Artist/Track display on the console screen. As you put your hand closer or farther away from the sensor you'll see the associated volume level/play state on the console screen as well
[Song]
[Artist]
90
86
73
66
66
100
Pause
-
9Step 9
If you're asking yourself "How do I setup/change a playlist?"
Well, there's only so much you can do with your hand. Luckily since you're using MPD there's a variety of different options for playlist control. I'll personally recommend MPDroid for android phones/tablets
https://play.google.com/store/apps/details?id=com....
Just install it and enter your raspi's IP address.
-
10Step 10
That's all there is to it! Setup lightouch.py to run on boot then throw away the keyboard/monitor and enjoy a headless/touchless radio!
Modify the distances in lightouch3.ino to change how the controls behave. By default they are as follows:
0-10cm - Pause (LED off)
10-45cm - Volume control 0%-100% (LED brightens/dims)
46-69cm - DEAD ZONE (to prevent accidentally skipping to the next track when raising the volume....LED fully on)
70cm-80cm - Next Track (led will blink 3 times)
>80cm - Ceiling (no action taken)
(I'll revise this tutorial to include the LCD and alarm clock functions)
LighTouch - Control music with the wave of a hand
A touch-less, streaming radio/alarm clock
Discussions
Become a Hackaday.io Member
Create an account to leave a comment. Already have an account? Log In.