 muzi
muziArduino IDE is simple!
There are many development platforms for ESP32 (ESP-WROOM-32). In some situations, using Linux or cygwin in Windows are quite intimidating for beginners. Using Arduino IDE is a more user-friendly approach.
1. Add The Board URL to Arduino IDE
Open Arduino IDE (I am using version 1.8.0).
An installation tutorial for Arduino IDE can be found here.
Navigate to File > Preferences and click the circled button as shown below:
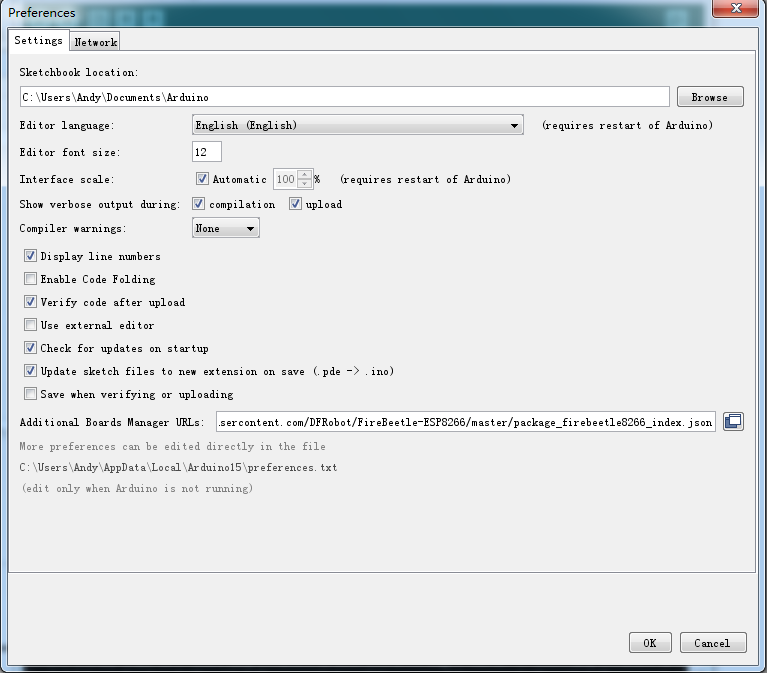
Enter the following URL in the new pop-up window.
https://git.oschina.net/dfrobot/FireBeetle-ESP32/raw/master/package_esp32_index.json
You should see this progress window:
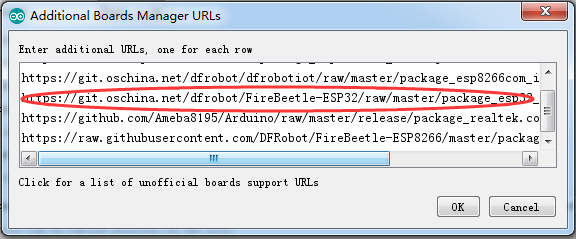
After the input is completed, click OK.
2. Update the Board List
After adding the mainboard URL of ESP32 (ESP-WROOM-32) to Arduino IDE, we need to update the board list, and use Arduino IDE to download ESP32 (ESP-WROOM-32) libraries.
Open Tools->Development board->Development board manager, as shown below:
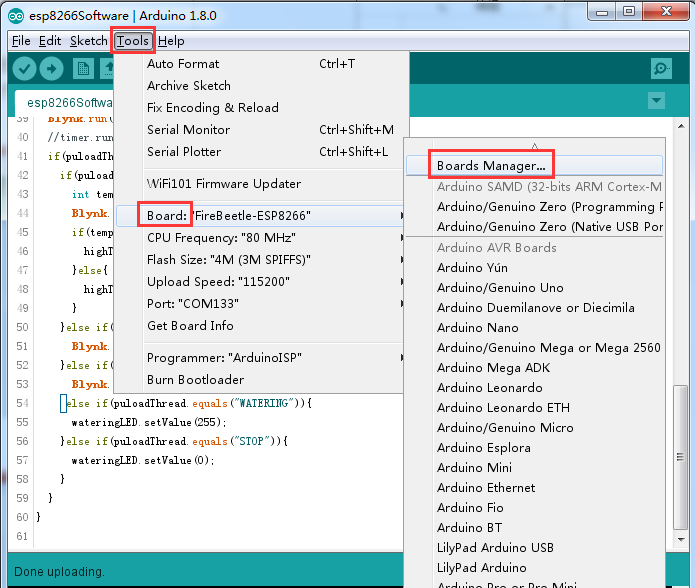
After opening the development board manager, the board list will automatically be updated, as can be seen below:

3. Install ESP32 (ESP-WROOM-32)
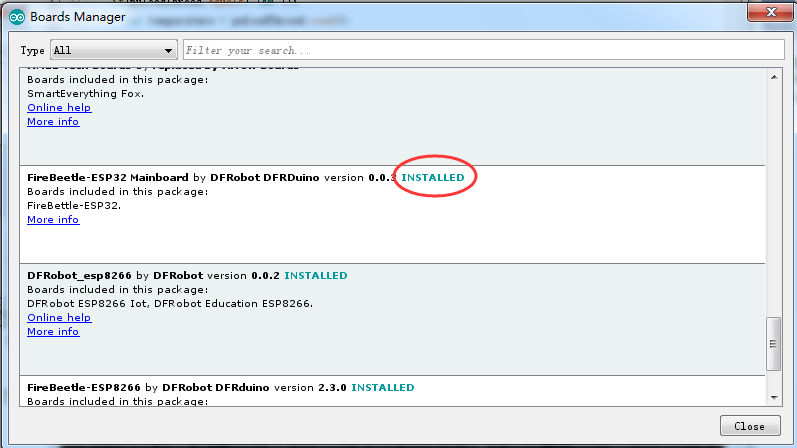
After completing the update, you should find FireFly-ESP32 Mainboard options which you can then edit.

Select “ESP32 (ESP-WROOM-32)” and click “Install”. The manager will automatically download the relevant libraries.

4. Compiling a Blink Program
Now that our compilation environment is set up, we can upload a test program.
Open tools->development board,select Firefly-ESP32 mainboard, as shown in the following:

Navigate to Tools > Board and Select Firefly-ESP32 from the list.
Please Note: If you haven’t installed ESP32 (ESP-WROOM-32) mainboard you will not see the board in the list, so be sure you follow the steps above to install it first.
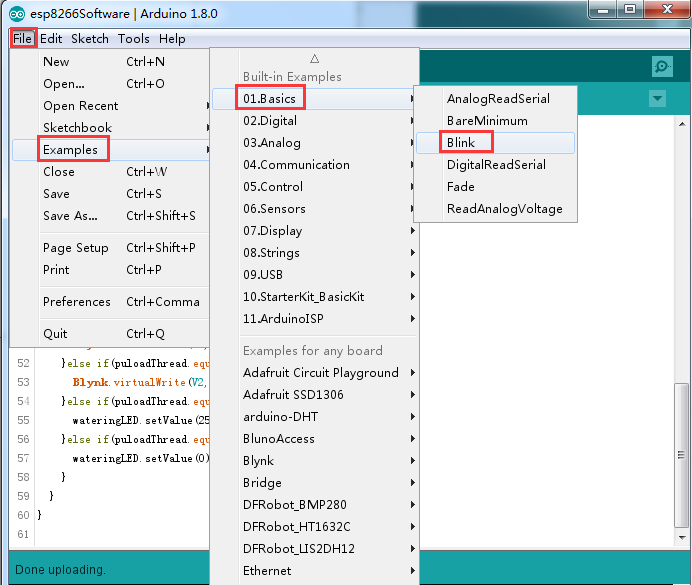
Open File->Example->Basics->Blink, as shown in the following:
Click the button to start compiling.
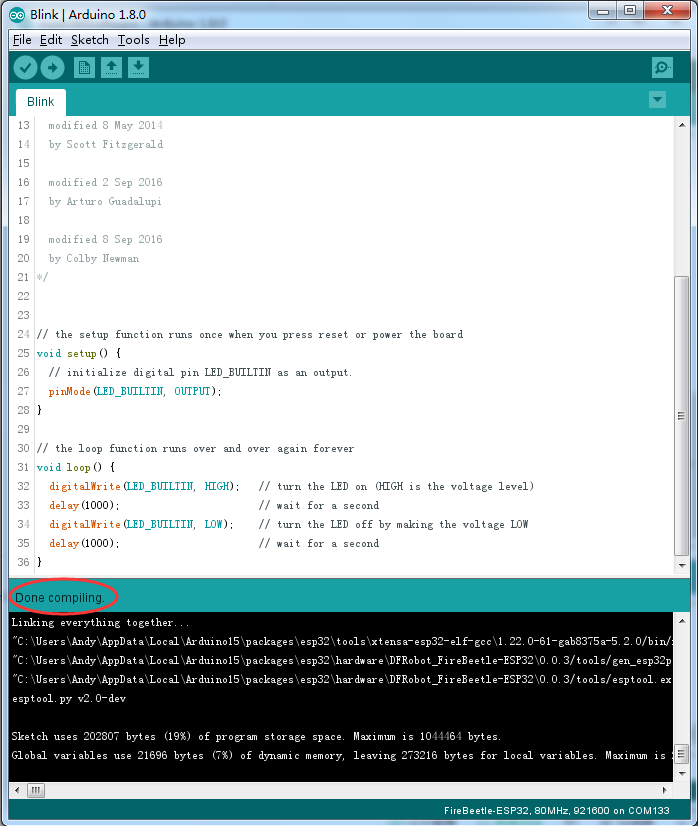
Done!
 kodera2t
 andriy.malyshenko
 deqing
 Georgi Angelov