 muzi
muziThat’s right, the robot I teach you to make this time is the BB-8 in the Star Wars: The Force Awakens. Ever since the first official trailer was released in October, the adorable BB-8 in its peculiar design has attracted a large number of fans and its popularity is comparable to some main characters. Of course, it itself is a leading character who played many parts in the film. At the world premiere in Los Angeles, BB-8 also‘rolled over’red carpet as one of the major characters.

In the film-making process , BB-8 was controlled like a puppet. Hence, it is not easy to build a BB-8 robot that can walk as free as that in the movie. While people was amazed by its performance, the working principle of BB-8 has sparked heated discussion. Some people think that it is the robot’s two internal gears that provide power to itself while remaining balance by adjusting to the weights. When the head using the magnet unit and ball sensor to conduct interaction, it can sense which direction is going upward and which one is moving forward. For the whole process, BB-8 can automatically adjust to its head so that it will not fall off.

You may wonder what the working principle of BB-8 is? The BB-8’s working principle was not unveiled until one Sphero patent was exposed. Unlike the opinion that the two balls of BB-8 worked independently, this patent revealed that they were actually integrated. According to the patent named ‘Magnetically Coupled Accessory for a Self-propelled Device’, there is a gravity device inside the ball which is composed of two shaft wheel motors and a vertical mast. When the shaft wheels are moving, the center of gravity will deviate and will affect the ball’s movement. The working principle is similar to that of a space ball. Like a space-ball, when an object enters in, the ball’s gravity will change by adjusting to its own position, and will finally make ball to spin and move forward.


As for the head, many people would think that the head keeps an upward position by constantly moving backward. In fact, it adopts the magnetic suspension technology and installs magnets in the BB-8 body’s interior mast. Hence, it can always remain on the same horizontal line with the ball’s center of gravity. Therefore, we can see that the BB-8 is always tilted in its movement. This is because the center of gravity is always tilted while moving.

The BB-8 I will discuss is a mini version. The main body parts were made by a 3D printer. The control unit uses a Romeo BLE mini (Small Arduino Robot Control Board with Bluetooth 4.0)by DFRobot. While inheriting all the functions of RoMeo BLE, it also integrates Bluetooth 4.0 communications, a 3 pin sensor interface and 2-way motor drive. Hence, if your project has high requirements for space, this mini controller is your absolute choice without doubt. Besides, the control part utilizes mobile GoBLE APP and Romeo BLE mini board to build communications to control BB-8. In terms of power, I have used a 1000mAh3.7v lithium battery as a power source. You also need a 5v boost module, as the working voltage of the Romeo BLE mini control board can be no less than 5v.

Now that you know the working principles, let’s start making the robot.
You will need the following components:
Romeo BLE mini X1
Bolts, studs,shims,nuts
Boost Module X1
Switch X1
Adapter X1
Battery X1
Motor X2
Magnet X1
Optical Axis X1
Wires

And you need to print the following components


 Jack Najarian
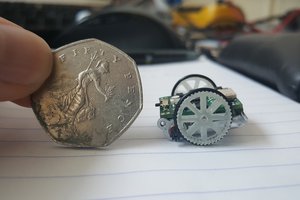
 Joshua Elsdon
where r d parts available?