 Felix Rusu
If you’ve watched the forum, it’s been suggested to develop a new Moteino board featuring new/more powerful/more flexible or even ARM microcontrollers. Mentioned candidates were the Atmega328PB, STM32, SAMD from Microchip and perhaps others were mentioned over time as well.
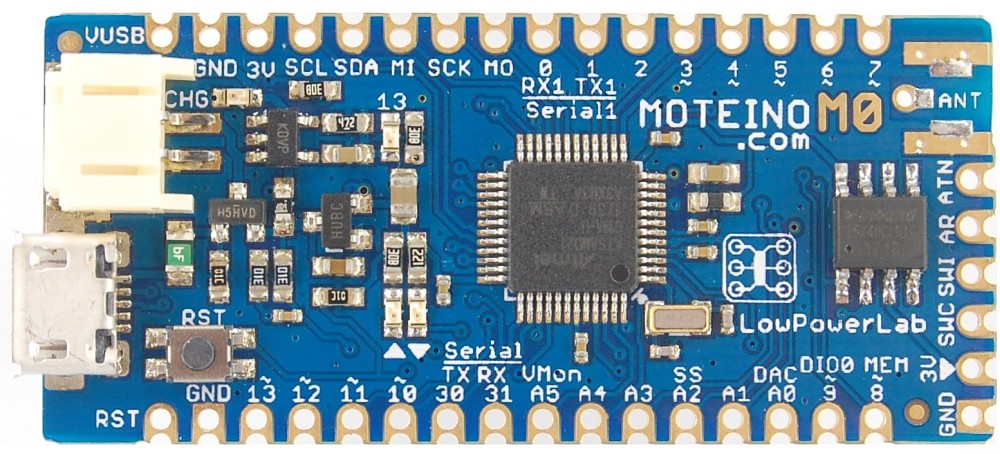
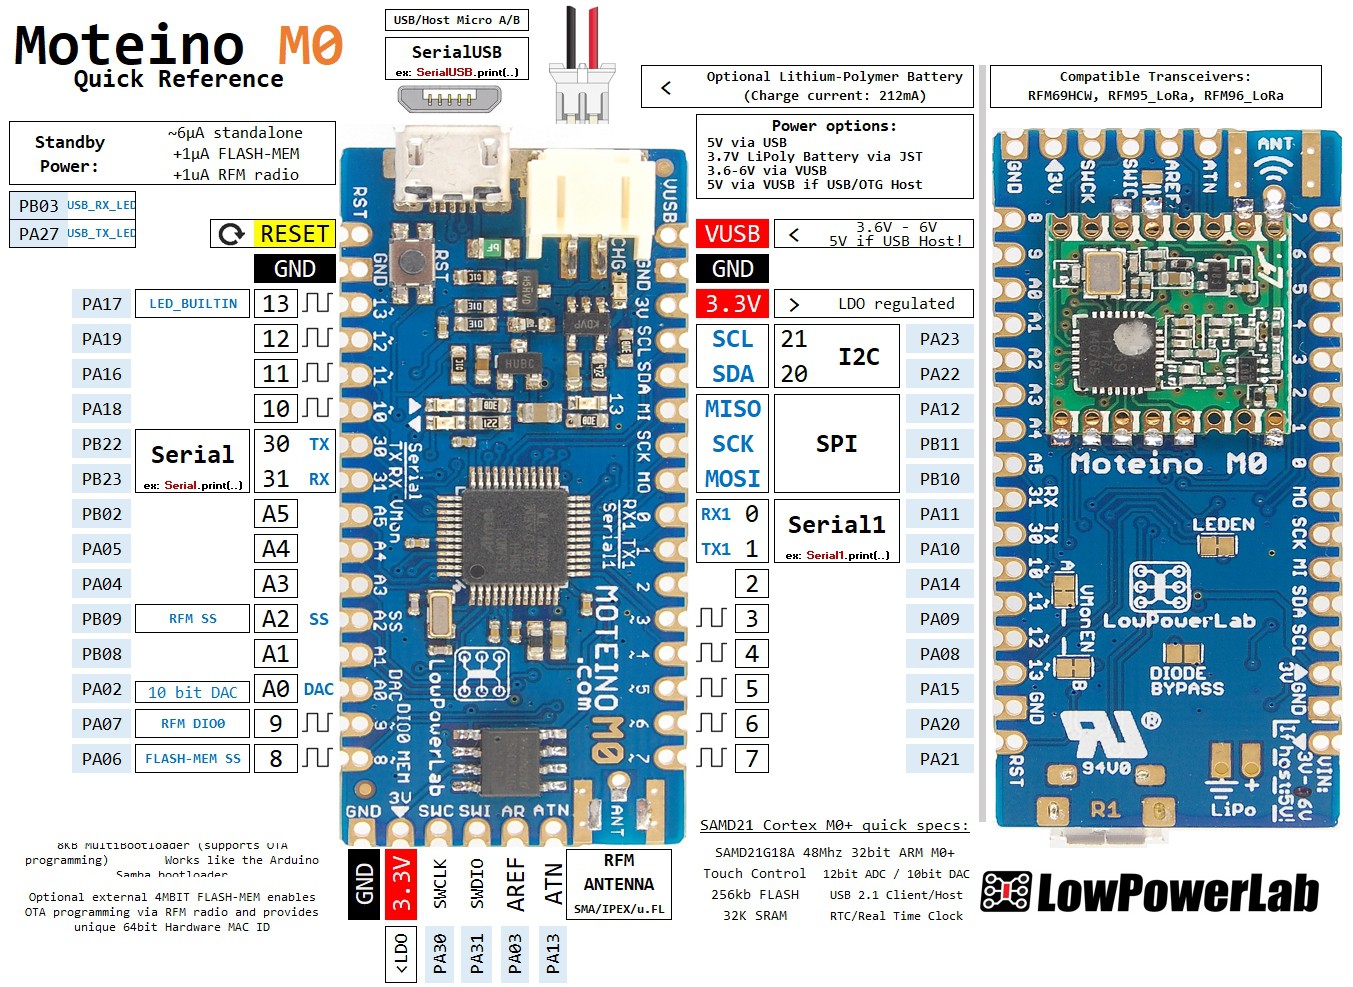
Say hello to MoteinoM0 – it features the popular SAMD21G ARM Cortex M0+ 32bit processor (48Mhz, 256kb FLASH, 32kb SRAM). It’s quite an awesome bit of silicon brains and after months of playing with it, tweaking libraries and sketches, testing peripherals and designing add-ons for it, and developing an Arduino package for it that is oriented on LowPowerLab‘s most important points of interest, it is now available to the public.
But SAMD21 has been offered by others for years you say. How is this exciting and why did this take so long? I didn’t want to spam the market with a new clone and claim this is the best thing since Arduino Zero. Here are a few highlights that I think will make MoteinoM0 different and interesting:
- long range wireless programming enabled just like all the other current AVR Moteinos!
- Got low power? You bet! How about 6µA in standby sleep? MoteinoM0 yields the real low power mode achievable by the SAMD21, 7µA in watchdog periodic sleep, +1µA for the external 4MBIT FLASH-MEM chip and radio module
- supports RFM69HCW and LoRa radios, plus secondary radios and add-ons, see below
- a modular design enables compact platform for I2C/SPI/GPIO add-ons, just a few examples to mention:
- SD-card logger ( with “zero” power control)
- weather node
- multi DOF accelerometer/gyroscope/magnetometer
- secondary RFM transceiver (say you want an FSK and LoRa Gateway to listen concurrently or combine different concurrent frequencies)
![]()
- break out as many useful and Arduino supported pins as possible in a symmetric and compact board layout
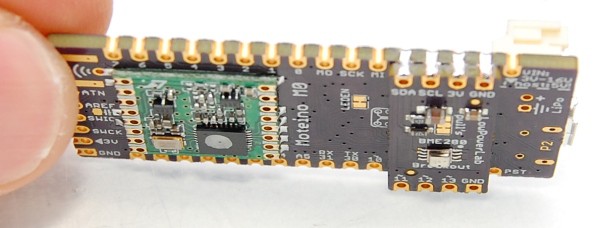
- ease of side castellated mounts allow these add-ons to be mounted directly flat on the PCB without additional headers, here’s a simple weather-node add-on board that only requires one sided soldering and can be easily removed and reused:
![]()

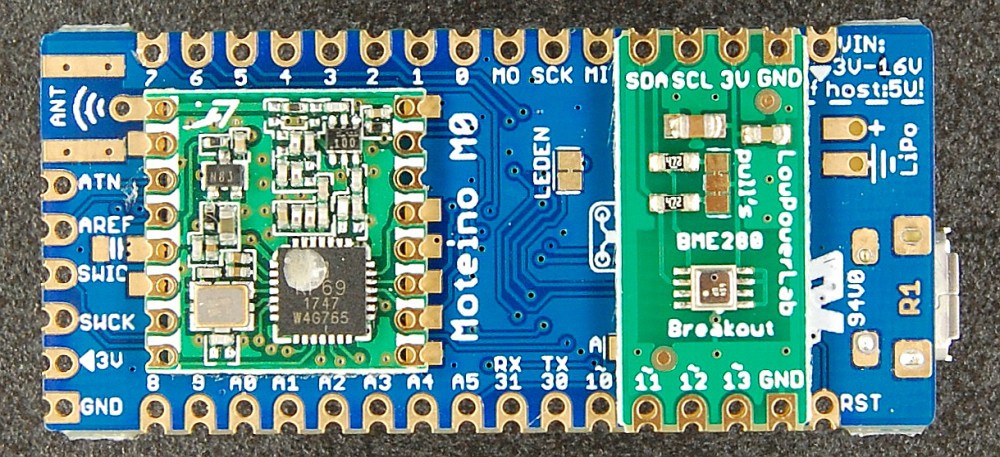
With the release of MoteinoM0 I also wanted to make available a few boards specifically designed to mount flat on the M0 PCB for a super compact wireless sensor platform.
The new boards include a BME280 Breakout featuring the same sensor as on the previous WeatherShield
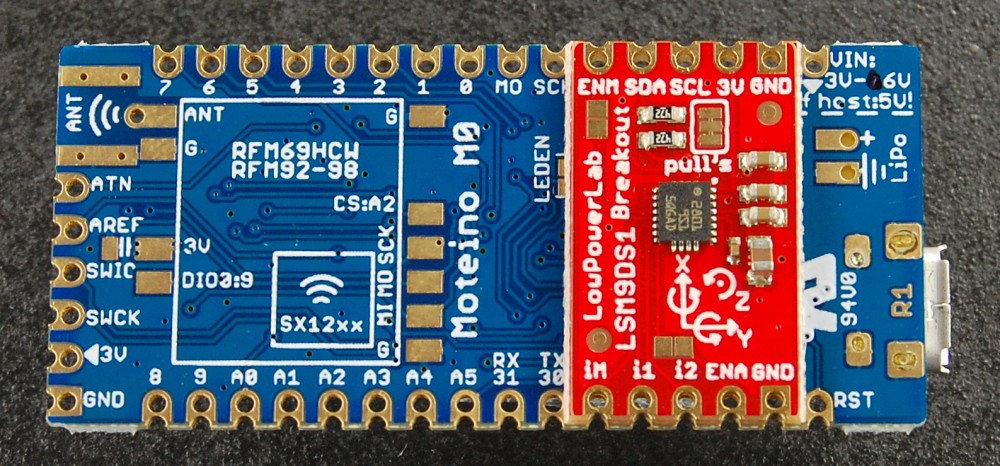
And there is an all new LSM9DS1 9DoF IMU Breakout featuring 3 sensors in 1 compact chip (acelerometer+gyroscope+magnetometer):
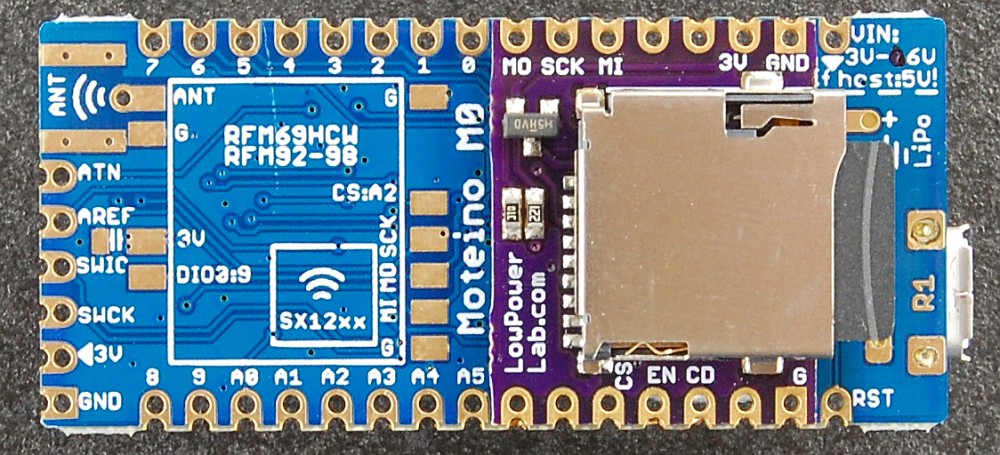
And here’s a mini SD-Card Logger Breakout featuring a low power switch to keep that hungry SDCard off when not in use
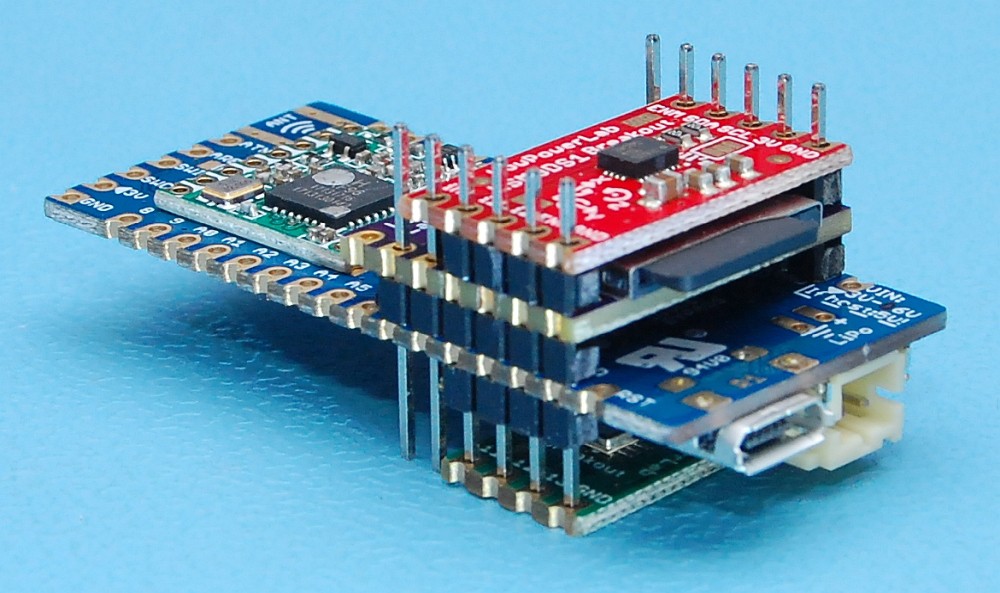
You don’t even need to use pins at all, just solder the castellated side mounts (aka half holes). You may later desolder these with hot-air or a wide chisel tip on your solder iron. You can of course use these on a breadboard or with any other Arduino/dev board. You can also stack all these on a single MoteinoM0 if you’d like, just need to get a little creative with stacking them to keep pins connected correctly:
The latest details and sample code are found added to the guide page.
Discussions
Become a Hackaday.io Member
Create an account to leave a comment. Already have an account? Log In.