0%
0%
Boost Your Google Home With Prota OS for RPi
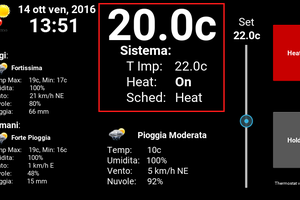
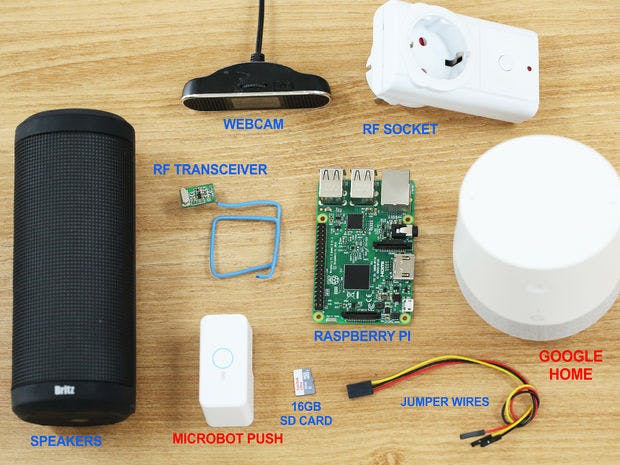
Extend your Google Home features to smart light, smart speakers, smart cam and smart appliances with those DIY tricks based on Raspberry Pi
 NaranInc
Become a Hackaday.io member
Already have an account? Log in.
Just one more thing
To make the experience fit your profile, pick a username and tell us what interests you.
Pick an awesome username
hackaday.io/
Your profile's URL: hackaday.io/username. Max 25 alphanumeric characters.
Pick a few interests
Projects that share your interests
People that share your interests

 Smart Technology
 Donald Derek