 BDM
BDM
DONE!!!! Finally have my 2min video although I need to learn how to edit videos properly.
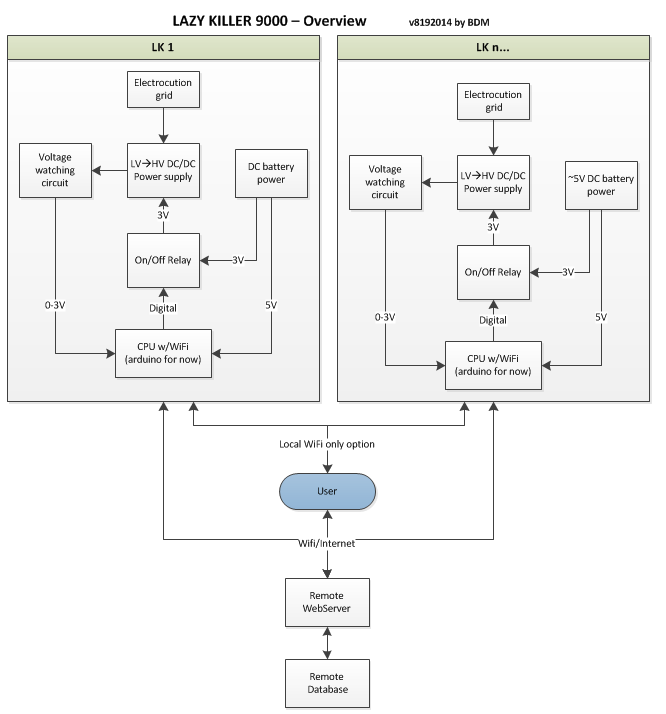
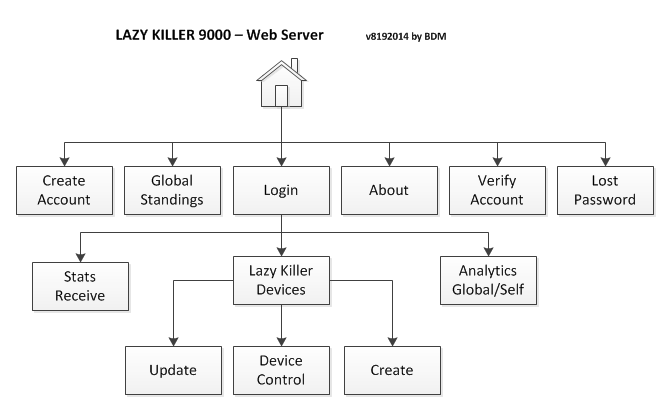
Overview diagrams

First component located.

Kids left it in the wrong place so I claimed it.
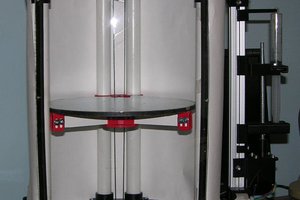
2nd/3rd components have been found. One was behind a counter and the other in IC land.

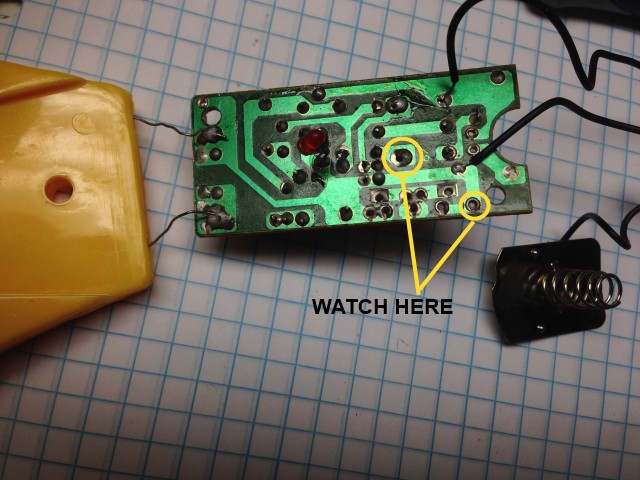
Gut the zapper and form the base for the zapper on the hat.
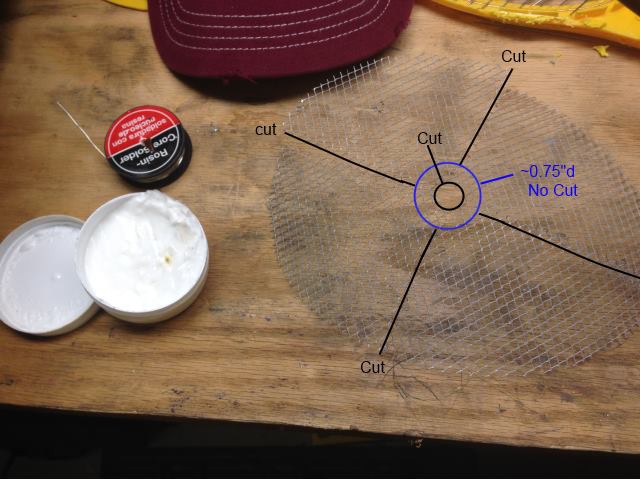
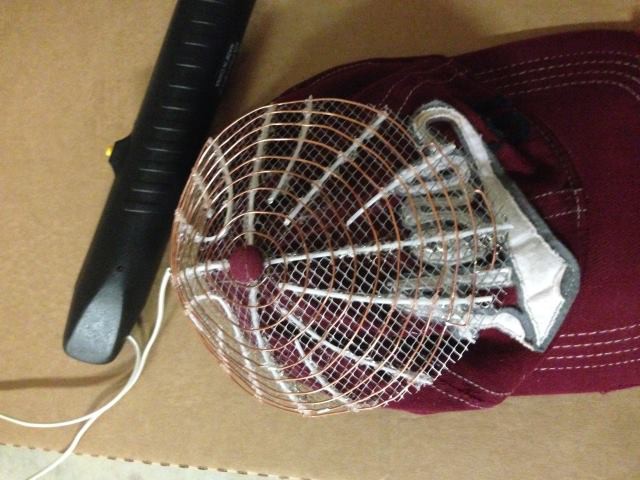
Solder the cut edges the best you can after slightly forming it your head. This electrode is a few inches short so may need to buy some more if this works.
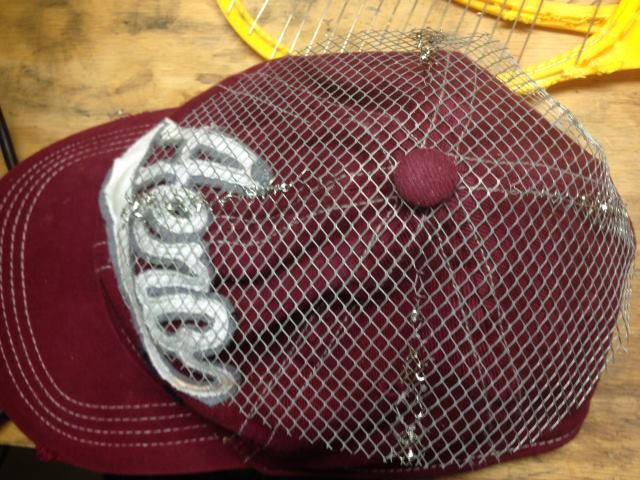
Tried to tie the electrode spacer but that was taking too long so I resorted to good 'ol messy hot glue. Takes about 5-6ft of 3mm PLA to make the spacer (It was EXACT thickness of the spacer included withe the original swatter. Design is different from front to back to see what was easier. The back was about 10 times quicker and next time everything will be folded.

Add top electrode via more hot glue and 10-12ft of 18ga solid copper wire. I didn't have one contiguous piece so I will be soldering pieces.
OK folks I was able to complete the electrocution hardware today and will move into the fun part of getting the arduino up and running on this. Was great after slaving in brew land and bbq land I was able to capture this wonderful moment. FIRSTTTT KILLLL! (took 1 minute.). Apologies in advance for poor video quality. I might go charge the real camcorder now to get 1080P and video that is not moving all over with my thoughts.
Yes, it does have a magic wand attached via some alarm wiring... Will figure that part out later once I have software working.

I didn't feel like messing with a voltage divider and really did not want 500V near the Arduino so I switched places. I take a pic in a few of the new location and components added to make it work. I can say that now the Arduino is looking at 1-2 volts (3 max) and the code can distinguish between on/zap/off (working on zap still and stuck zap). Here is some data dumps from the program charted in excel.
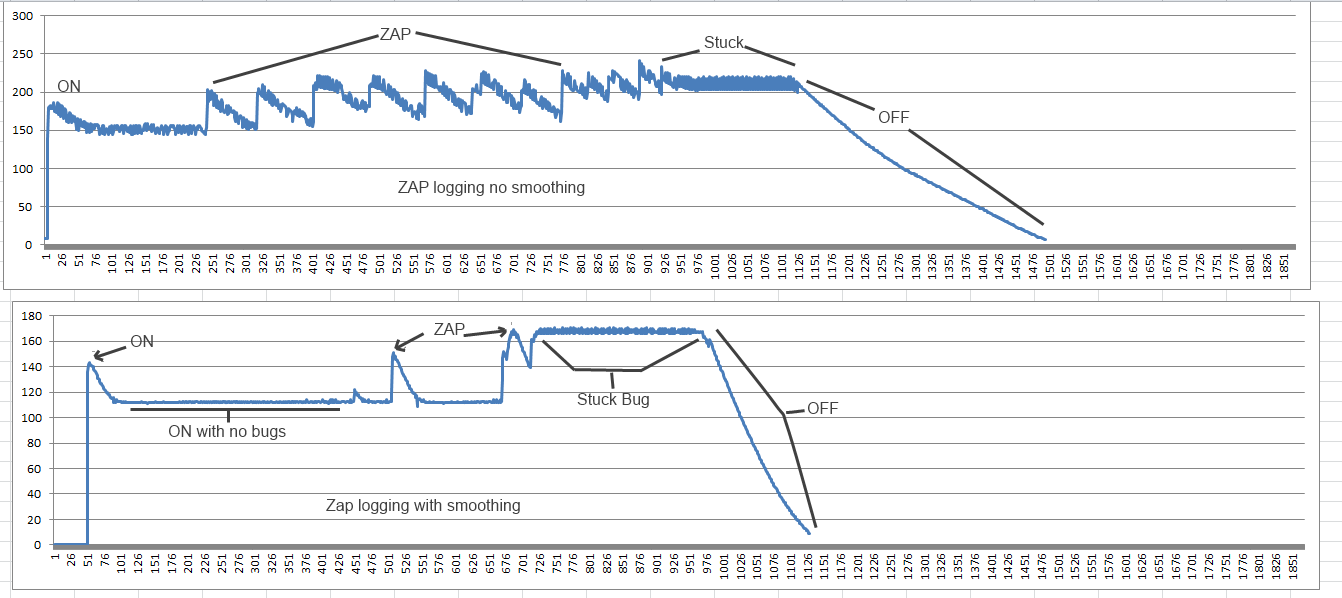
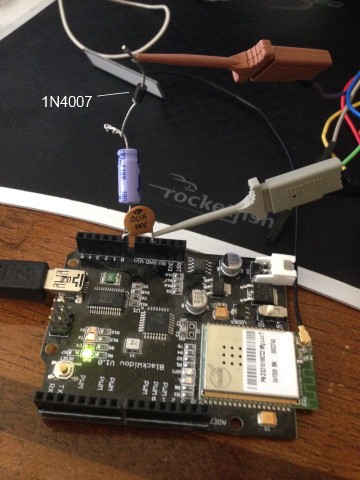
I do not know how this worked but I can tell you my method. 1.) find a small volt supply that fluctuates with zaps. 2.) added blue cap in picture and zapper stopped working. My theory was the zapper was using the cap instead of dumping everything to the short. So I found a diode and put it in thinking that would allow the voltage to flow in but not back out. WORKED! The data values were still jumping all over so I added the round disk cap and BAM the excel charts above. I may add a resistor later to make the caps discharge faster but I want to get the proto working and will deal with that later. New watch place in yellow
Code working on state detection and outputting JSON data. Next step is web side. VOLUME WARNING @ 0:20. Dog hates the zapping sound, must be having some flashbacks...


 Douglas Miller
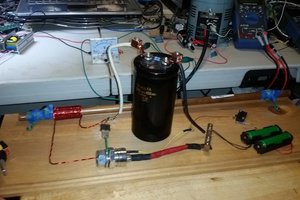
 3dscuba
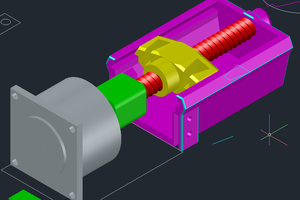
 Non-ICE
 Chris Jones