I plan on making an insect camera rig. It is inspired by the couple that have been posted to Hackaday and a few other commercial ones. To save money I am also going to make my own speed light flashes which will be permanently attached to the frame.
System Design Documentation:
There are three main aspects to this project. They are the frame, the triggering system, and the flash units.
The camera rig will be built with an aluminum frame. I want to try and keep it nice and light so it will be easy to carry around on hikes. Basic adjustments will be done in the field. One simple one is multiple mounting holes for attaching the camera. This lets me easily change my distance to what I wish to photograph without having to realign the laser and its sensor.
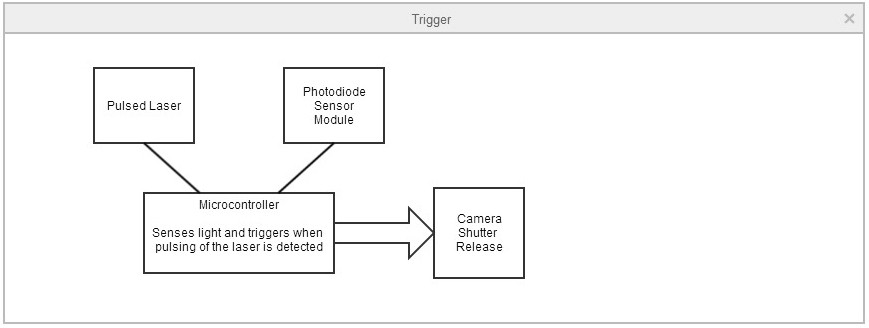
The triggering system will be composed of a photodiode, laser, and a microcontroller. The photodiode will sense the light reflected off the insect from the laser. The laser will be pulsed to help cut down on interference from sunlight, shadows, etc. A lens will focus the reflected light onto the photodiode. The microcontroller will serve a couple purposes in this setup. It will pulse the laser and also record measurements from the photodiode. By comparing voltage from when the laser is off to when it is on it will be able to tell if the light is coming from the laser and not just some bright reflection in the background.
The flash units will be composed of a charge circuit, capacitor bank, trigger coil, xenon tube, IGBT, and a microcontroller. The microcontroller will turn the IGBT on and off to trigger the flash and control its duration.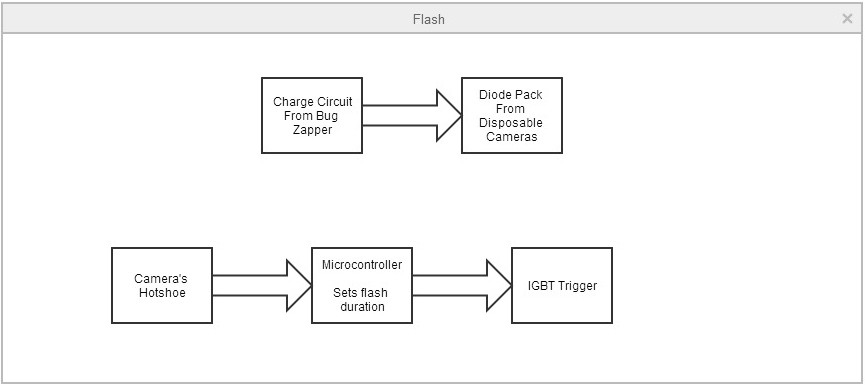
 Timescale
 Dylan
Dylan
 Jack Pearse
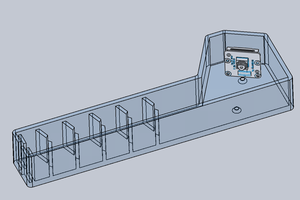
 Ivan Stepaniuk