Juan Albanell
Hardware
shelºF Sense
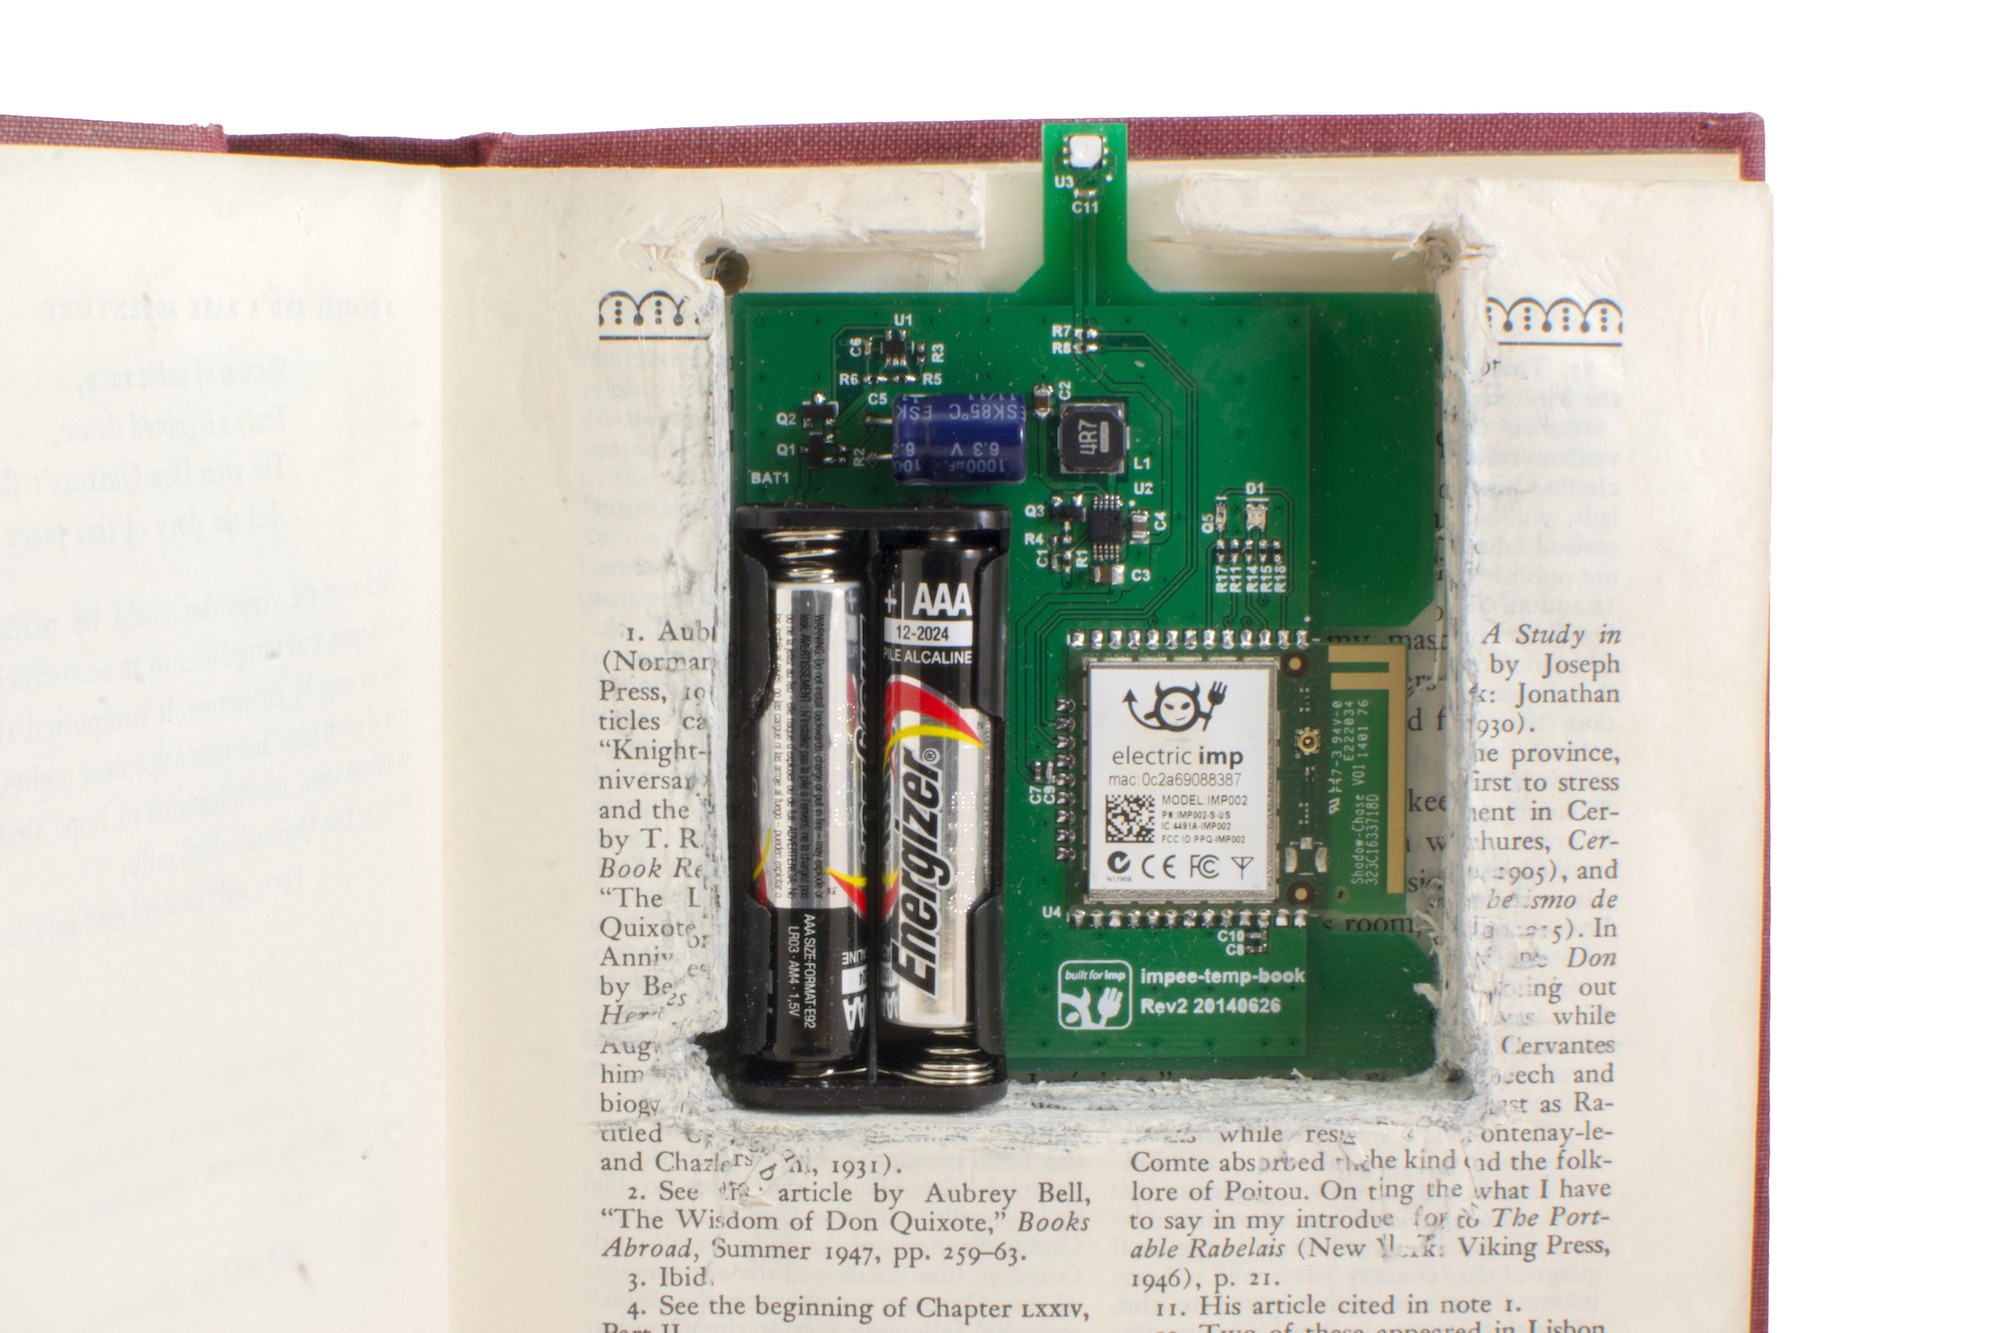
The first shelºF Sense device, the TempBook, is a small, simple board that is made up of an Electric Imp, a temperature sensor and a power supply.
The Electric Imp imp002 module is a great fit for this device since it has the ability to function in three states: sleep, shallow wake and wake. Sleep is when the imp is not performing any function and goes into a very low power mode (5uA) that it wakes up from after a set amount of time. Shallow wake is when the imp is performing typical microcontroller functions without connecting to the Internet, which is where a lot of the power consumption comes from (40mA). And wake is when the imp is connected to the Internet and ready to send/receive data (80mA). For a device that just measures temperature the imp is ideal since it only needs to be awake to quickly measuring temperature, which results in no battery waste.
The temperature sensor chosen for this device was the Si7021 temperature and humidity sensor. This IC was chosen because it is cheap, small and has a very simple I2C protocol that allows for quick setup. The board is powered by two AAA batteries that offer 3V and up to 1200mAh which was all that was needed for this low power application. This power source is then fed through a reverse voltage protection and under-voltage lockout circuit to ensure the safety of the board as a whole. This is then fed through the Torex XC9128 to produce the necessary 3V for the imp, which was chosen due to its efficiency and ability to save power when the imp is off.
shelºF Act
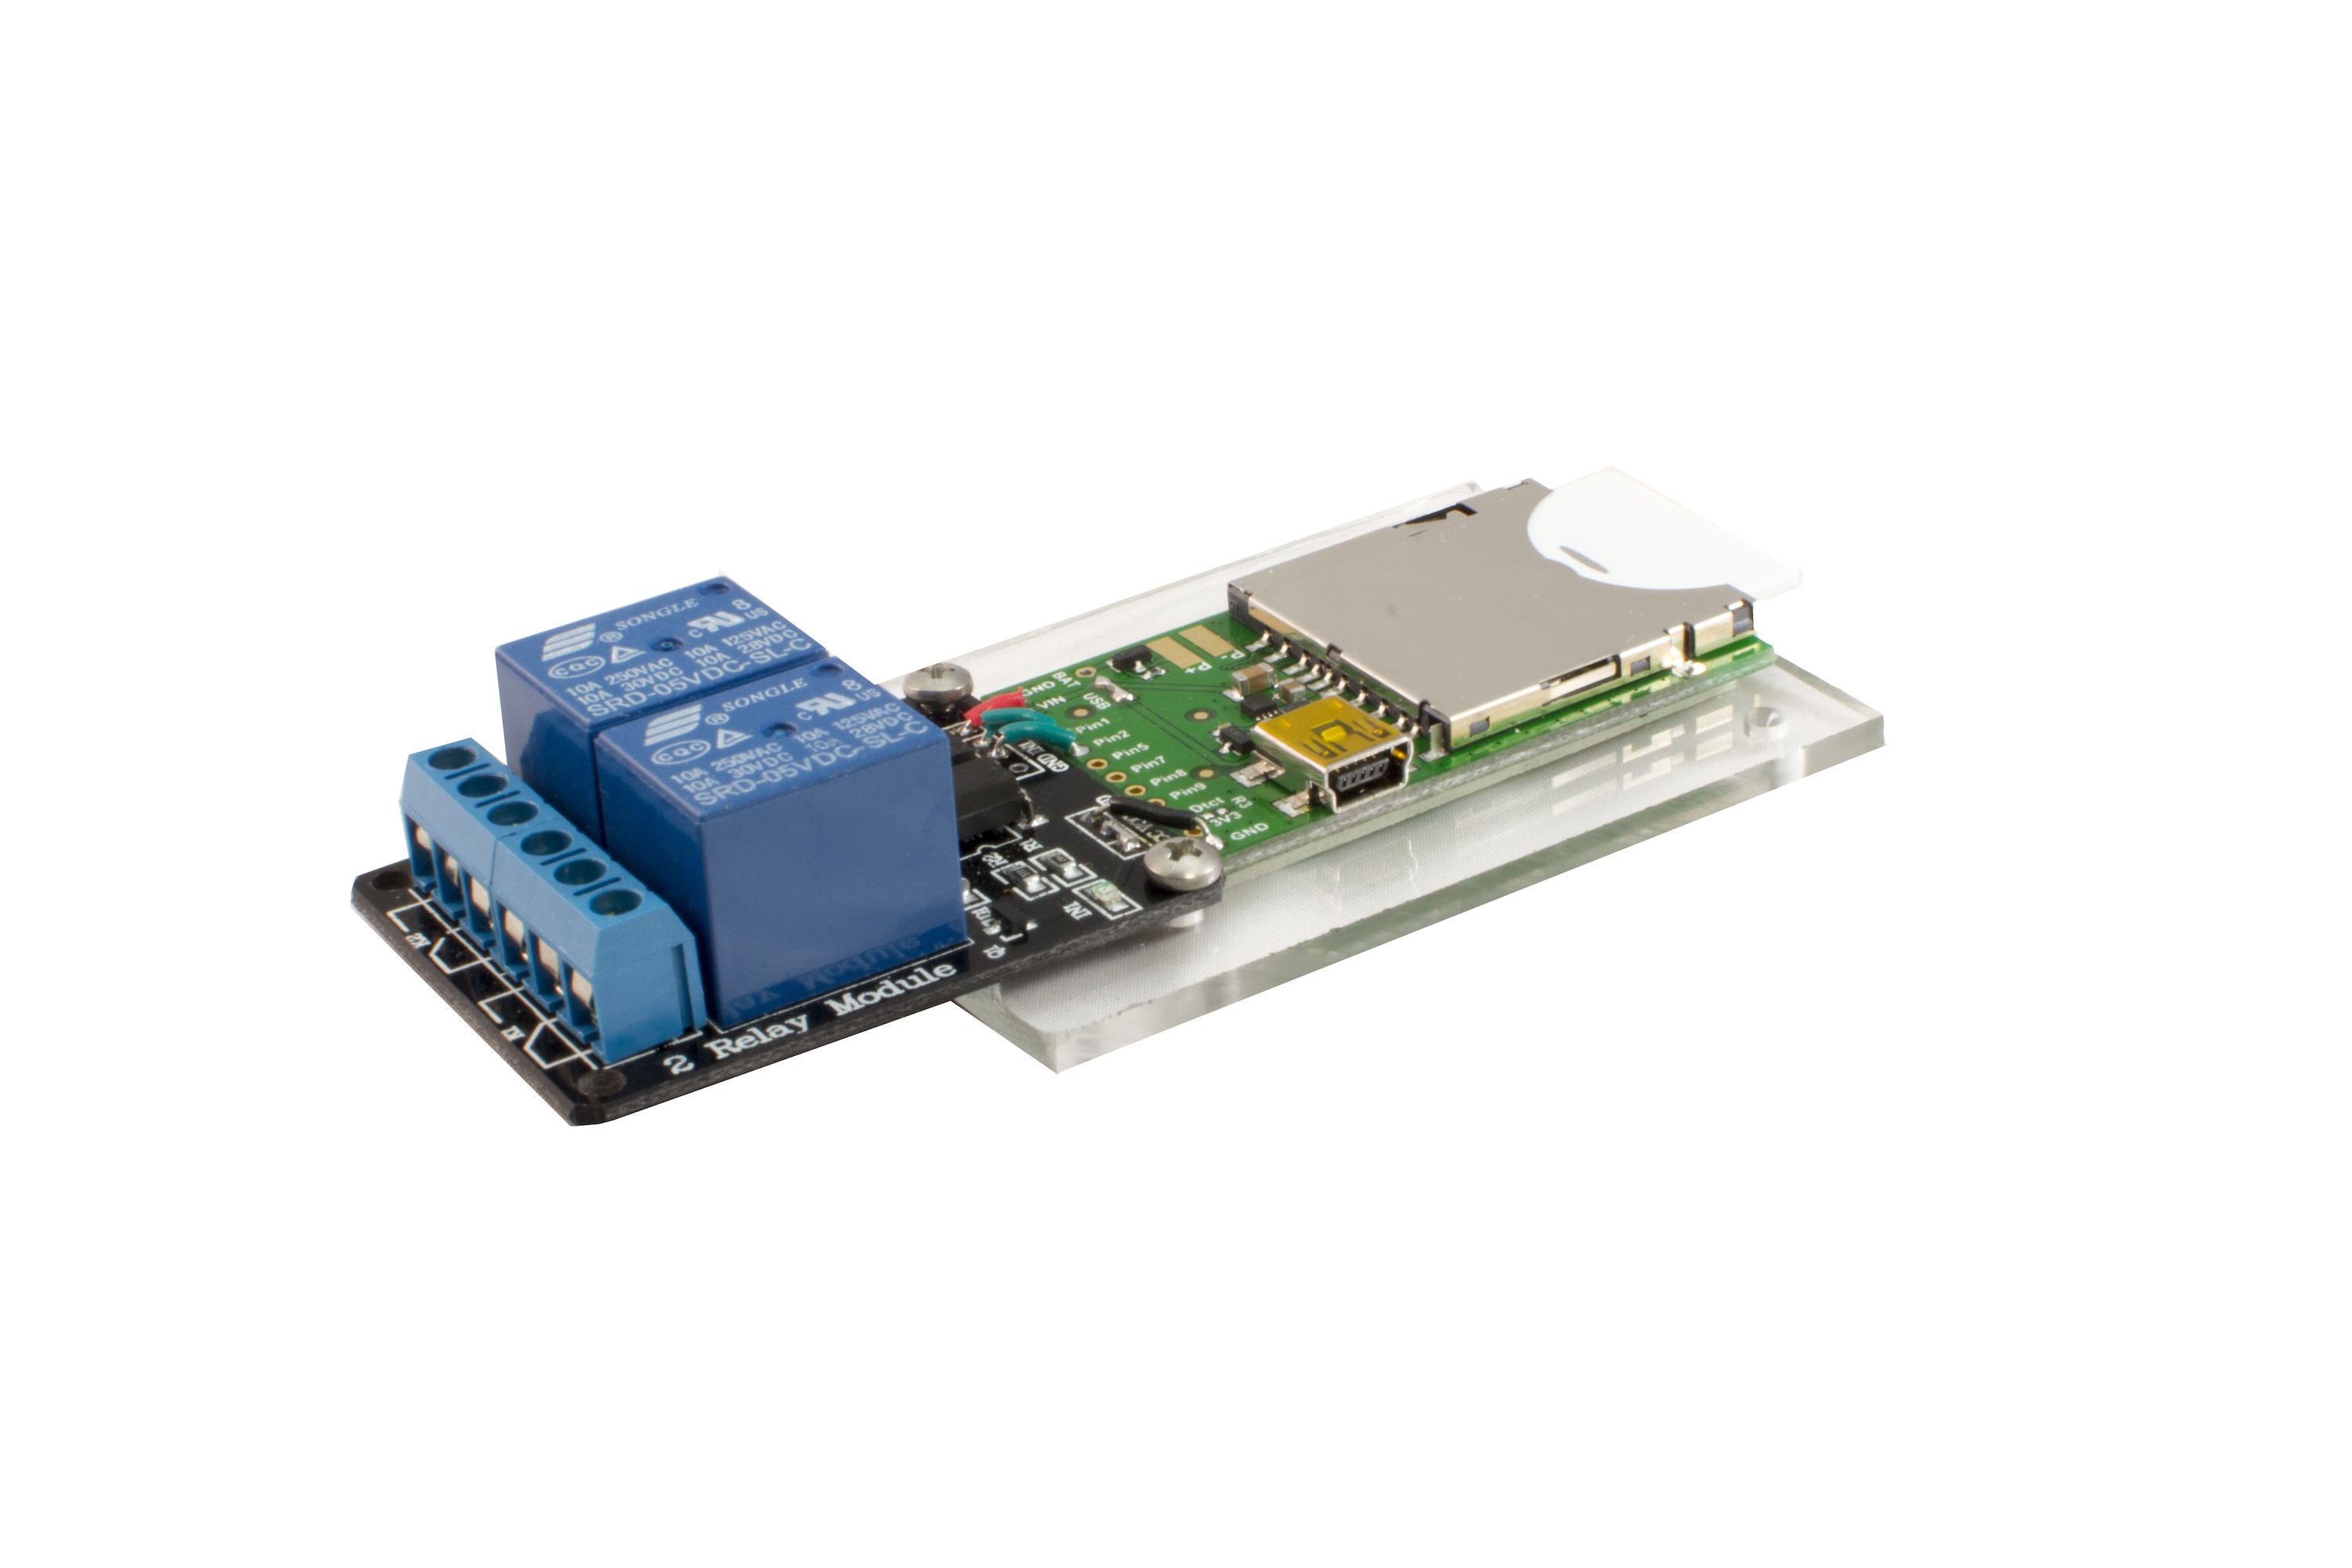
Most thermostats are designed to connect to four wires, one common wire and one each to control the fan, cooling and heating. Each mode is activated by connecting the common wire to the desired function or functions. Since the first iteration of shel°F is designed only for heating, it has one relay for the fan and one for the heater. I selected the 2-Channel Relay Module by SainSmart which has all the FETS and diodes necessary to drive the relays from the Imp. It is sold by many retailers and can be found for under $3. This module is then just connected to the Electric Imp April Board with 4 wires and the shelºF Act hardware is complete and connected to the Internet. The Electric Imp April Board is a great solution to connect to the Internet since anyone can go online and purchase it, and it works right out of the box with no complex soldering. This simple purchase and setup is very important to convince potential customers that this is not a task for an Electrical Engineer, but anyone who would feel comfortable setting up a normal thermostat.
Software
Model
A wireless thermostat system needs software for sensing, actuating, control and a server to connect everything together. It is clear to see that the first three components are controlled by the shelºF, but the main advantage of using the Electric Imp platform is that there is no need for an external server for the last component. Each device has an agent that it can communicate with, which in turn acts as a small server that can store data and take requests.The system model outlined below shows the connections between the app and the two imp devices. The App gets all of the necessary information from the Master Agent using http requests, never talking to the Sensor Agent. The Master Agent then gets all of the sensors’ states from data pushed by the Sensor Agents, and stores it in a table. Based on the sensor state and the targets set by the app the Agent then switches the relays accordingly.

shelºF Sense
The agent code for Sense is quite simple. When the system is configured it is passed the URL of the Master Agent. Whenever it receives a reading from the device it sends the temperature to the Master Agent via a HTTPS Post.
The Imp device code performs temperature/humidity measurement using the Si7021 sensor class and sends this information and its battery level to it's agent. In order to save battery, it attempts to deep sleep as much as possible reporting only when the temperature changes. The code uses a technique called a "shallow wake" which is a very short, low-power wakeup which does not connect. During the shallow wake the imp performs a temperature reading and then checks whether the reading is significantly different from the previously reported reading; only if the temperature has changed does the code connect and send the new value to the agent. In order to limit battery drain there is a 10 minute sleep after a report and then the imp shallow wakes once a minute after the initial sleep. This method trades off responsiveness in favor of longer battery life. Given the following assumptions:
- Shallow Wake = 0.00033 mWh
- Connect Wake = 0.15 mWh
- Battery Energy = 3000 mWh
The worst case scenario gives 30008*0.15*24=138 days which is over 3 months of battery life, and an average case where there are Imp wakes up and connects 3 times every hour gives 3000(37*0.00033+3*0.15)*24=270 days which is at 9 months.
shelºF Act
The shelºF Act device code is very simple since it only switches 2 pins from high to low according to whatever the agent sends.
The agent code, on the other hand, is the main server where all of the system information is stored and processed so there is more complexity. The agent works off requests from both the sensors and the app, it never pushes information out, it just responds. As a result, all of the action happens inside the http request handlers where there are five basic commands: update, target, room, remove, check and power. The “update” request is the only one the shelºF Sense units can make and it simply carries the information regarding the sensor’s state, creating a new sensor entry in the table if it is the first update. The “target” request is the app’s call to change the target temperature of the room the, as well as the priority of that room. The “room” request simply changes the name of the room tied to the sensor. The “remove” request deletes a sensor from the table, but it does not remove the master from the sensor agent, which is done separately by the app. The “check” request returns all of the sensors’ information in the table in json for the app to read. Last, the “power” request turns the system on/off, which allows the user to save power when it does not care about the temperature.
On every request the master agent runs the “checkTemp” function, which adds up the rooms’ targets minus the actual temperatures scaled by the priorities in order to determine whether to turn the heating on or off. This would work the same for cooling but it has not been implemented at the time to keep the system simple and not affected by season or outside temperature.
shelºF Control
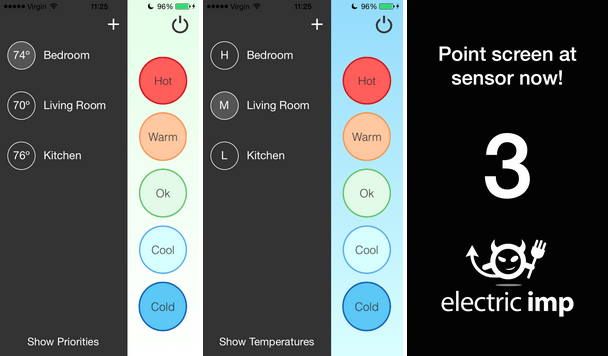
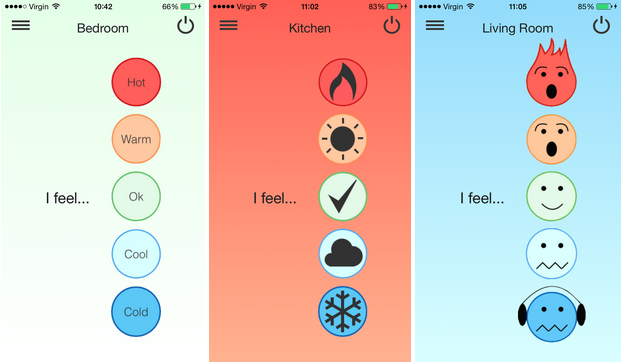
Since the wall unit is no longer in the system, the app becomes the only user interface to regulate temperature. The app performs the basic functions one would expect from a controller: read room temperature, set a room target temperature, add/delete rooms, change room names and power the system on/off. Yet given that the whole system is revolutionary, the user interface had to follow that lead. Instead of having arrow keys to move the target temperature up and down, the app sets temperature based on how the user is feeling, because the actual temperature does not really matter. It is all about comfort. The result was a simple and intuitive interface that allowed the user to select one of five comfort levels which then determined the target temperature of the room, without the need of numbers and guesses, just one click. The image belowshows the UI with the three available button skins, the leftmost one being the default which can be changed in settings.
The rest of the app’s interface follows a more conventional structure, with a power button in the top right that turns the system on and off and a burger menu button that swipes right the left tab bar. The menu view shows the rooms which can be clicked to select, but it also allows the user to click on the comfort level buttons and the power button, allowing for faster interaction. Rooms can be added by clicking on the plus button which takes you to the Electric Imp BlinkUp section and walks the user through the shelºF Sense unit setup process, and they can then be deleted by long-pressing an entry. The bubbles on the left of the room show its temperature, which can be set to Celsius, Fahrenheit or Kelvin in the settings. If the “Show Priorities” footer is clicked the bubbles change to show the priorities of each room, which determine their weight in the final heating/cooling decision, and the value, high “H”, medium “M and low “L” can be toggled by clicking on the bubble.