 Jazzmyn
"Bored No More"
Interactive Display Board
When you press one of the buttons on the control panel multiple events happen depending on the button pressed. A photo wheel will spin and display a photo in the picture window for every button. The associated back-lit stencil will light highlighting the appropriate section of the board to look at. Other events such as a door will open, a photo spinner will start, or the credits roll will be activated.
The main features I have built and have working:
- Control panel with 5 large LED arcade buttons
- Good for attracting attention of both young and old
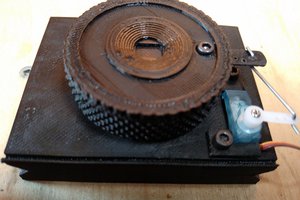
- Rotating picture wheel with a view window on the board
- Foam core wheel powered by stepper motor
- Flip up door to reveal additional information
- Foam core door on coat hanger wire powered by a servo
- Moving arrow to attract attention
- Foam core arrow on coat hanger wire powered by a servo
- Pentagon shaped photo spinner
- Made with foam core powered by small DC motor
- Spinning cylinder for a credit roll
- 3d printed frame and gears powered by small DC motor
- Light up stencil signs
- Invisible until back-light led's turn on
 theschlem
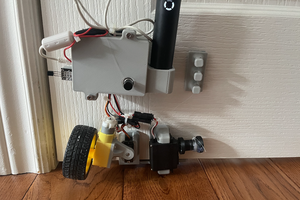

 amr.mostaafaa
 Richard Hogben