Problem
We wanted to put paintball markers on buggies. Originally I started with a traditional hack, by buying electronic markers, soldering onto their PCBs, and bolting them down. We quickly discovered some disadvantages to this technique.
Our high-vibration application meant we were breaking a lot of balls inside the hopper and marker. My hacked approach meant that sometimes wires broke. When this happened we would have to stop and clean everything out, or change markers. Since they were bolted down, that was a real pain. It took 2 people working together 2 minutes to change a marker.
Solution
We decided to change markers to the Tippmann A-5 since they have a reputation for being reliable, and to design a proper mount for them that would both hold them securely, and allow for a fast change of a fouled marker.
Electronics
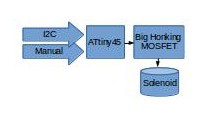
The electronics uses a solenoid actually meant for the A-5, and a PCB based on an ATTiny45 that either communicates with a host controller over I2C, or is triggered manually.
System Design:
Circuit schematic:

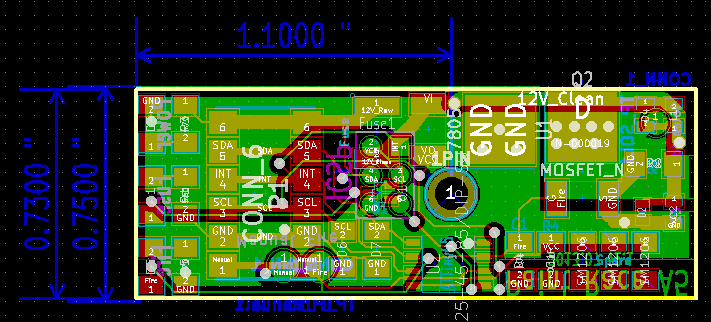
Board layout:
I wish there was a way to attach files...

The three LEDs on the back (Power, Fuse & Fire) provide some insight to what is going on.
I tuned the timing "experimentally" for the minimum time needed to engage the solenoid, and the minimum time needed for the marker to re-cock after firing, but these numbers could be adjusted over the I2C connection. The firmware was uploaded using a test bed with pogo pins that would connect with the ICSP pads on the back of the PCB, and I could use the other test pads to verify that everything went correctly before soldering on the solenoid and its capacitor.
In my application I did firing over the I2C bus since I had I2C connections everywhere already, but the Manual pin can be pulled to ground for testing (at maximum speed).
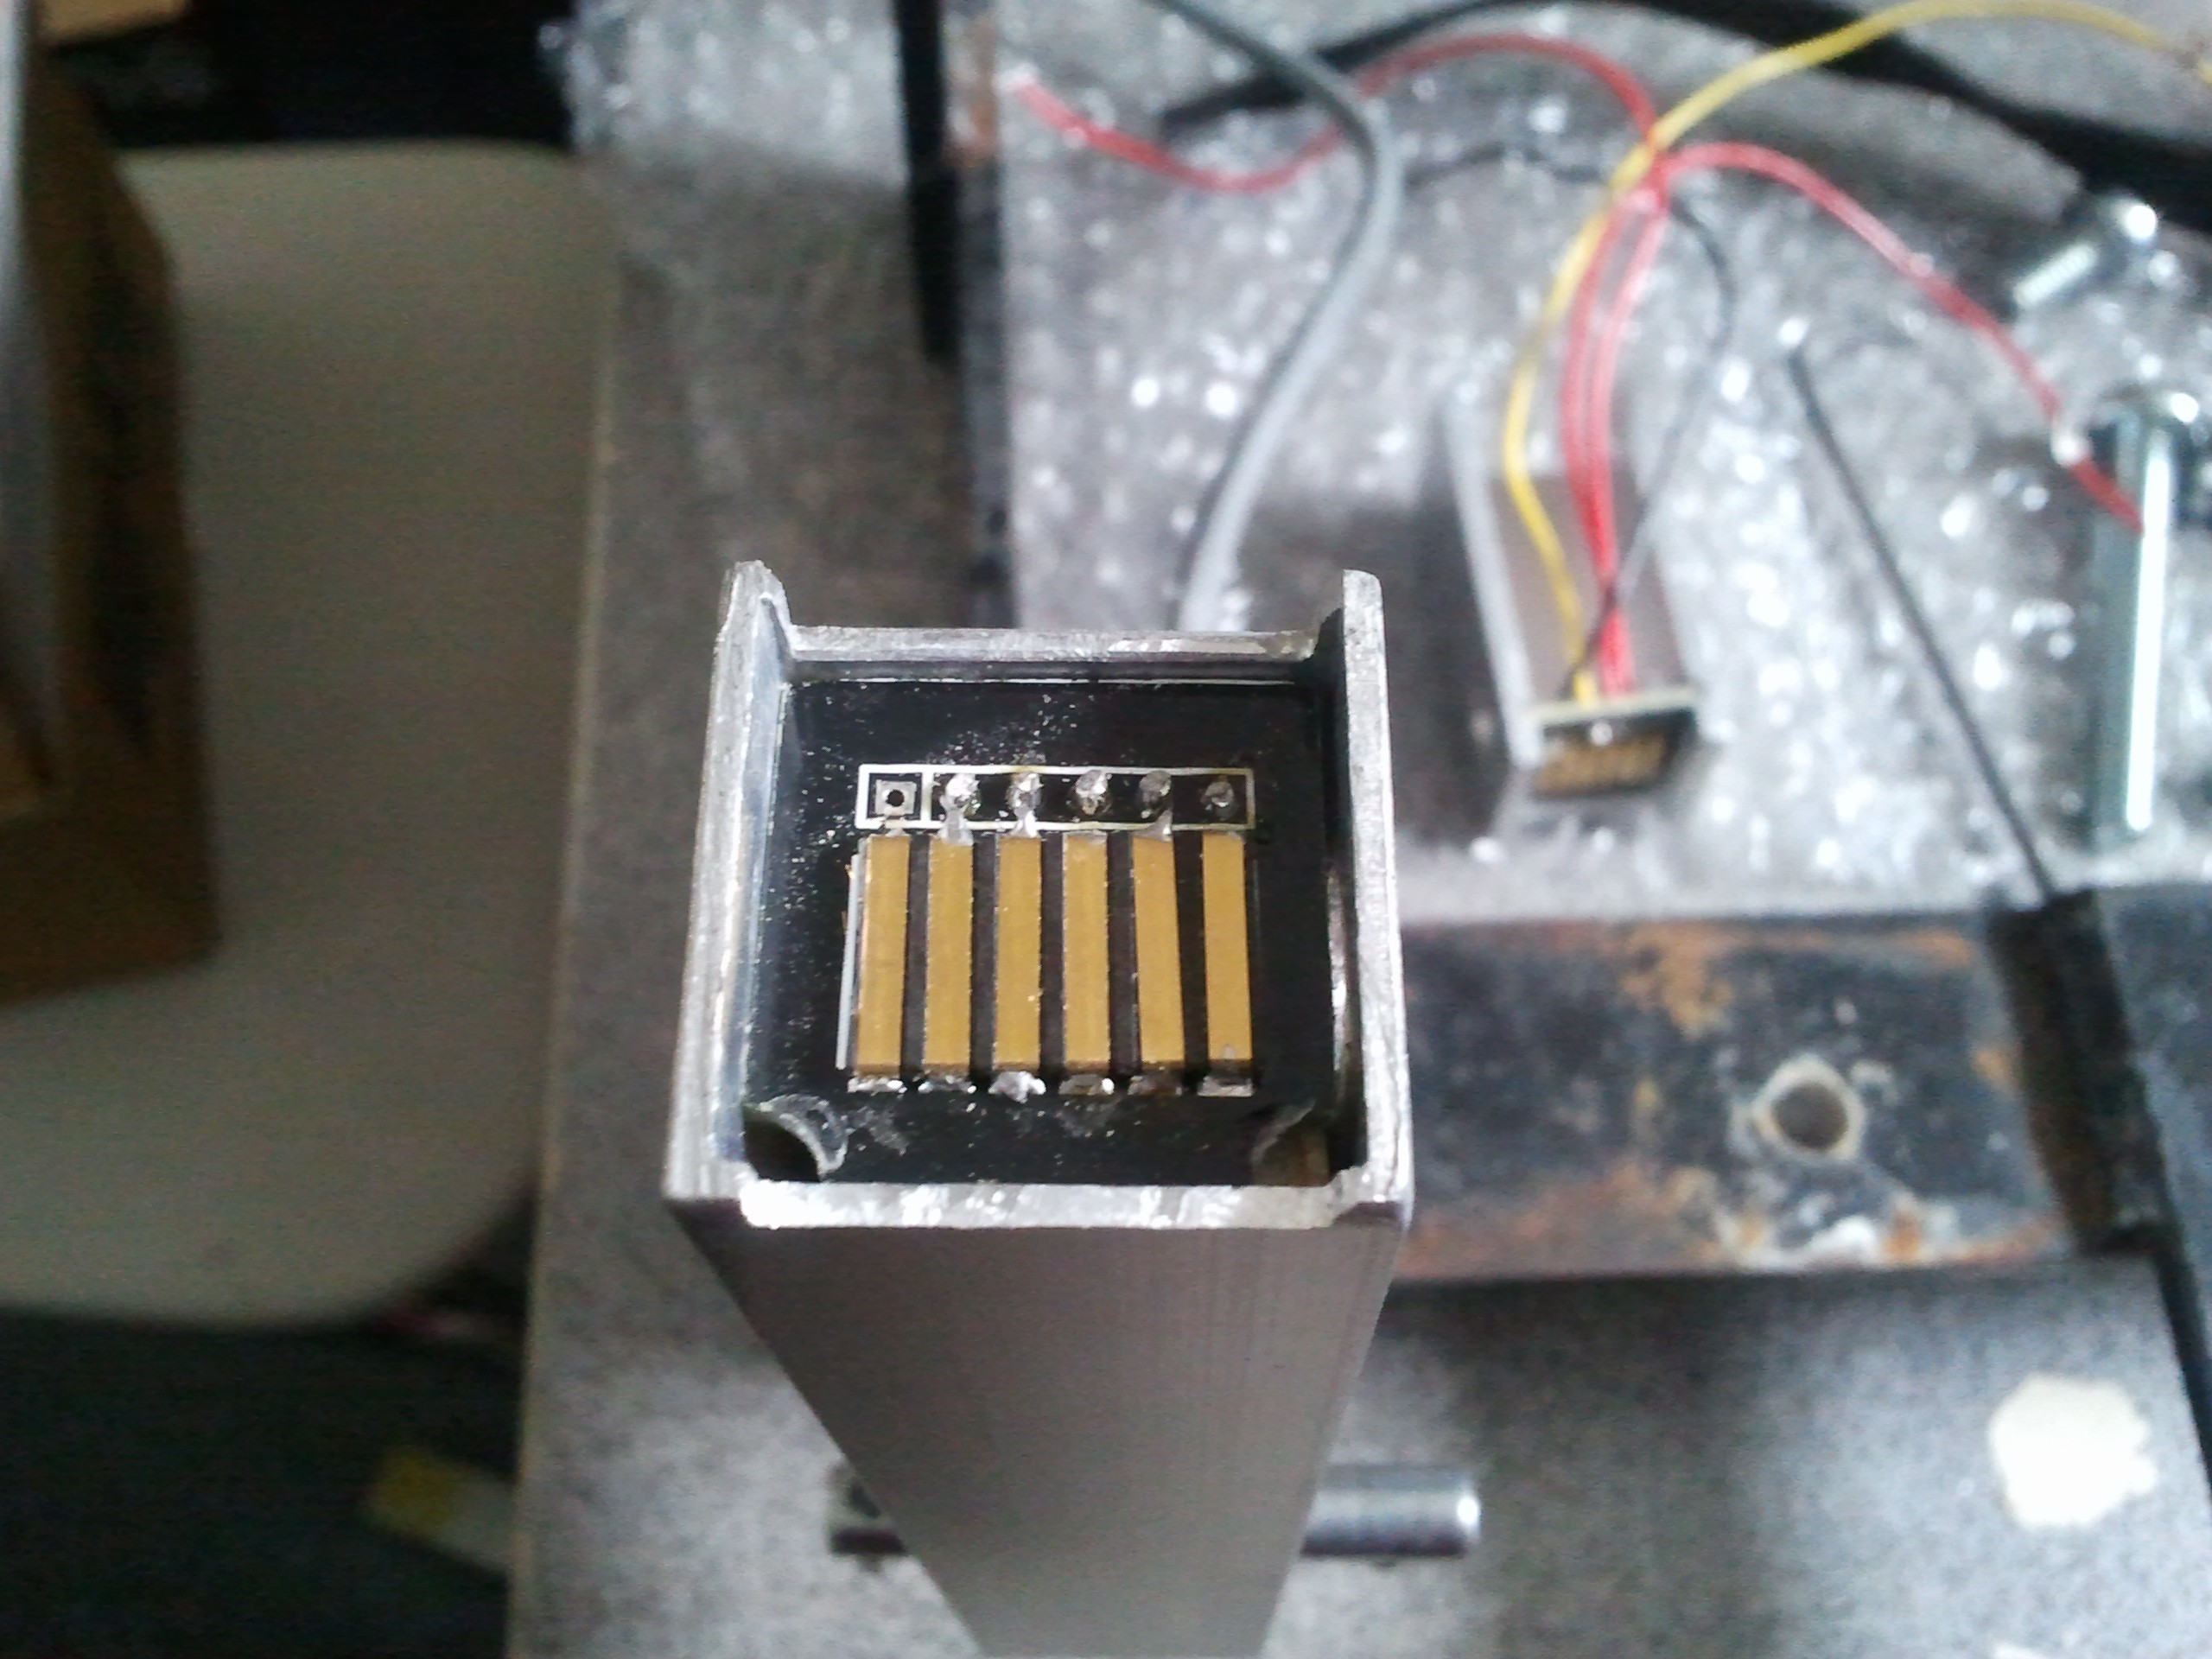
There is a springy connector that connects electrically as the mechanical connection is made to simplify putting the marker on.
Mount
The PCB and solenoid sit inside a frame made from aluminum profile, which replaces the stock handle and firmly mounts to whatever you want a marker on.
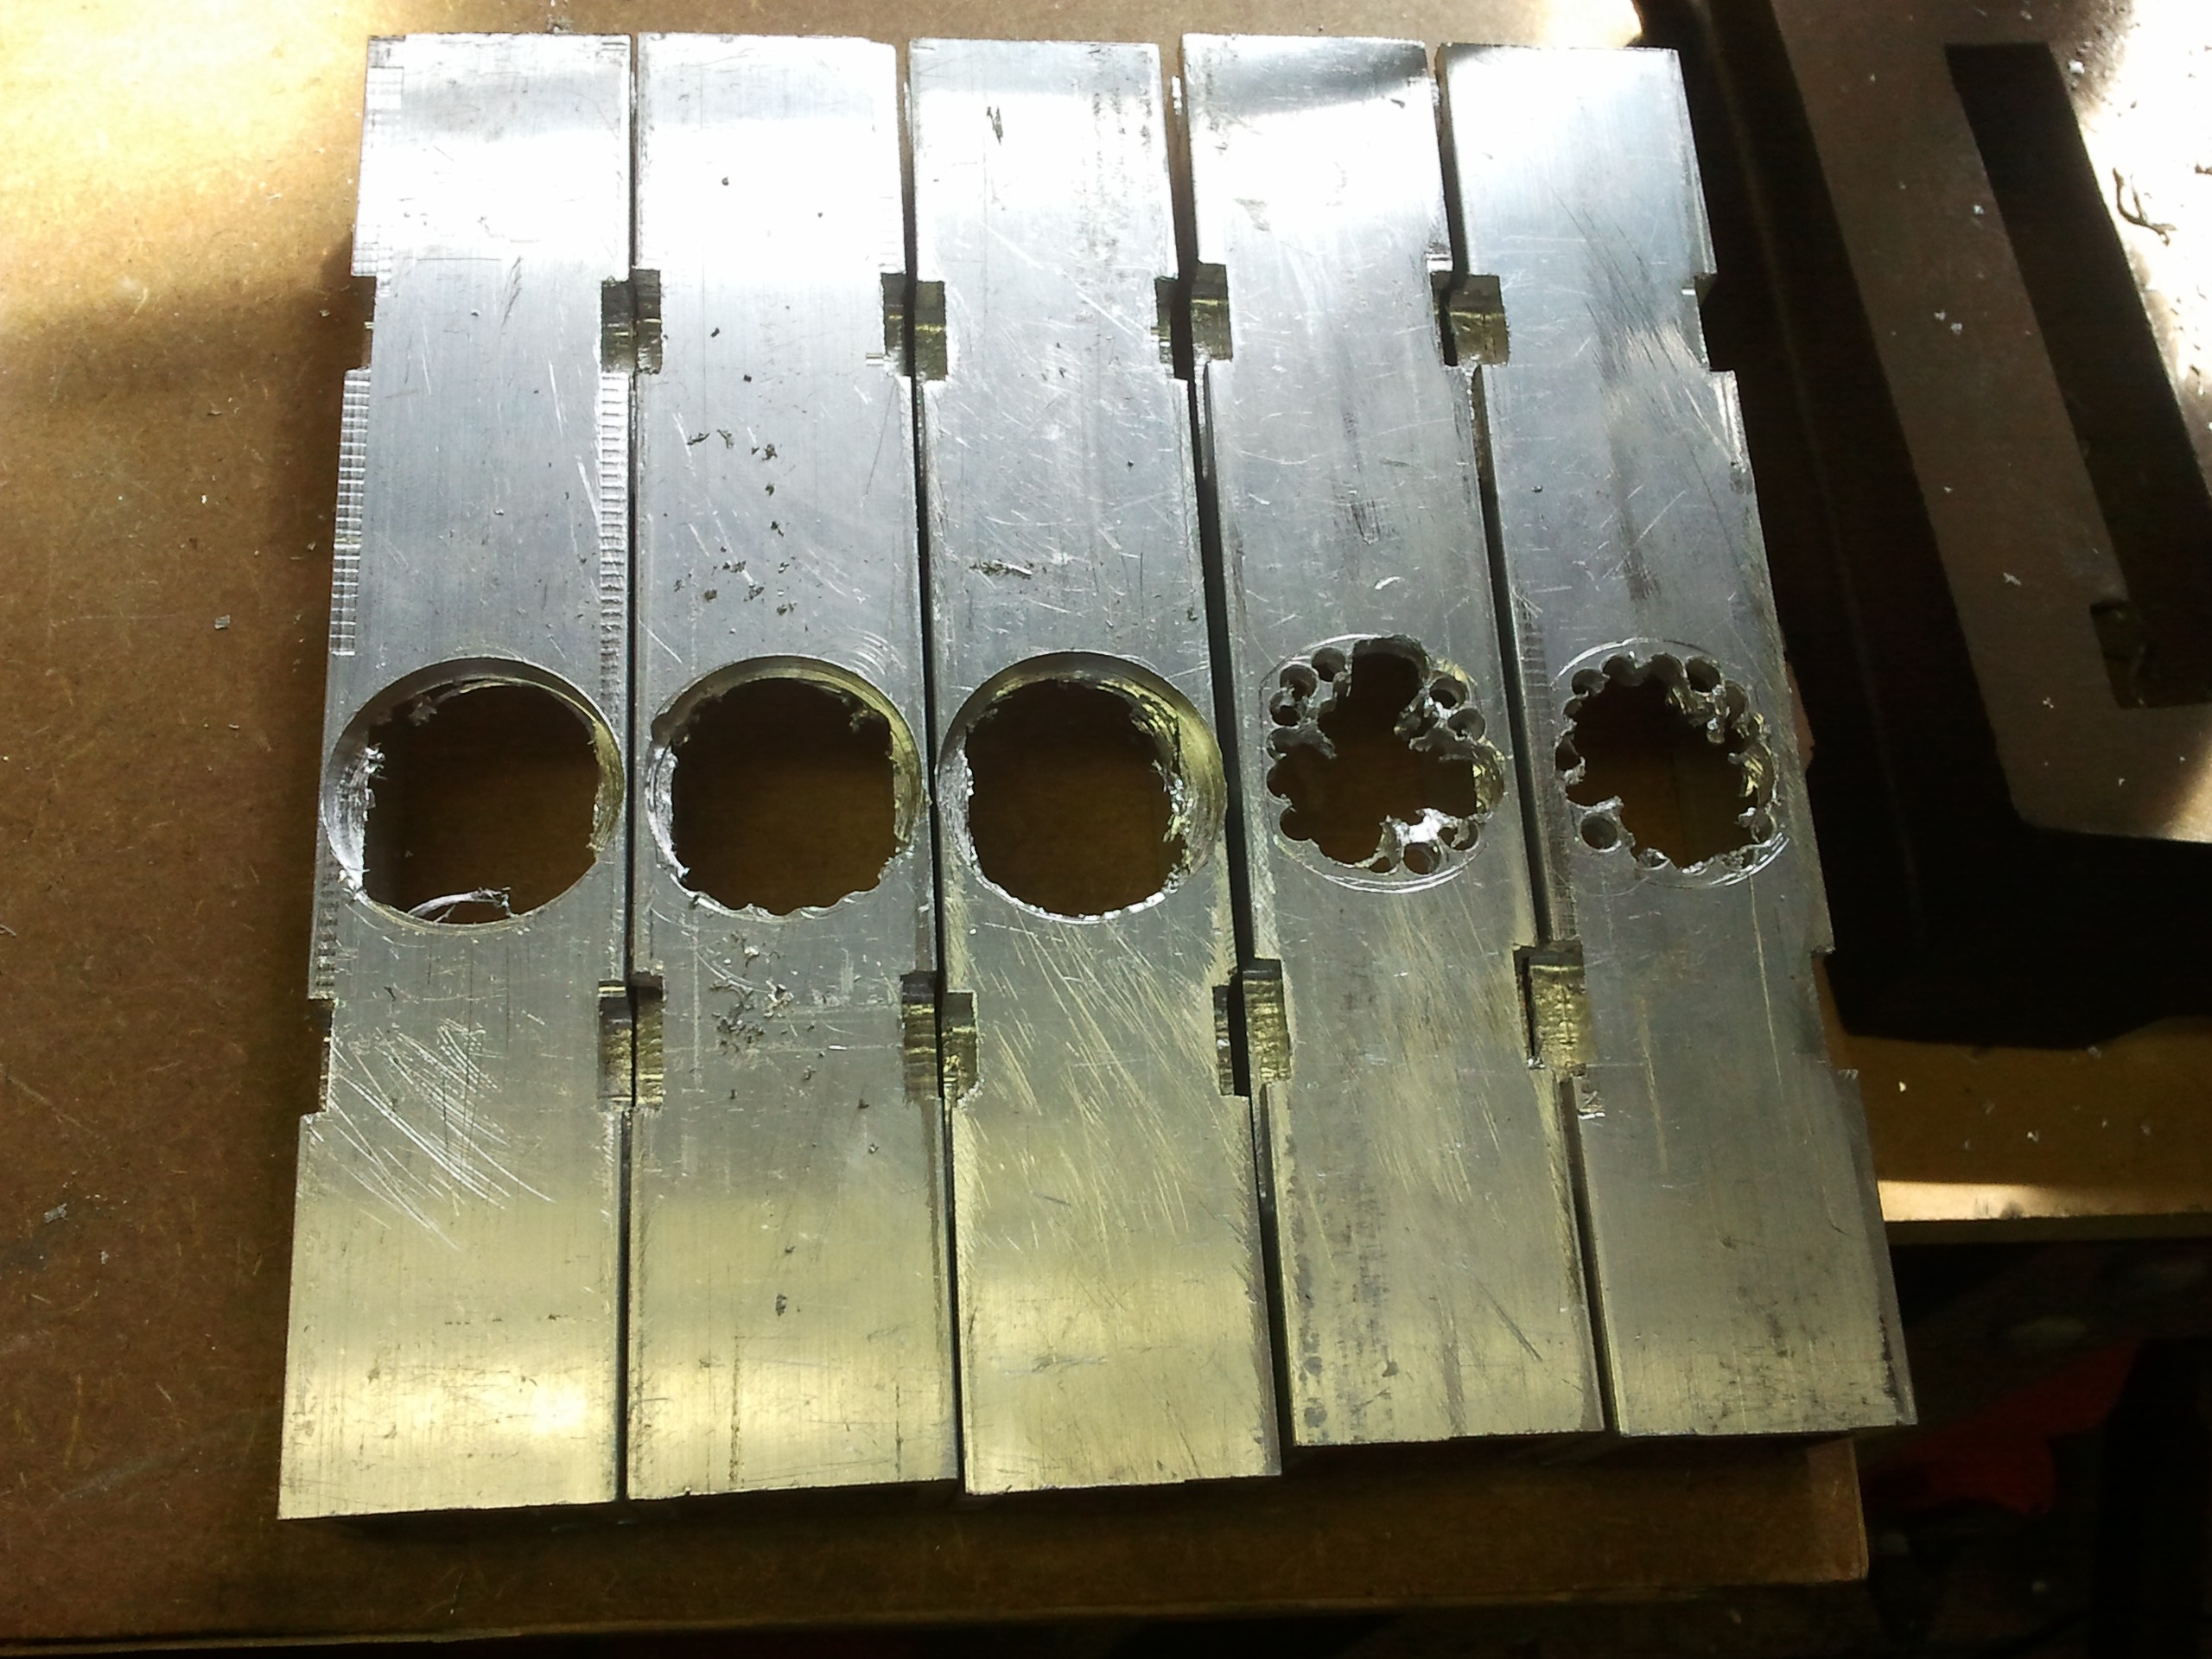
The frame is made from 3 pieces of profile, milled to fit.
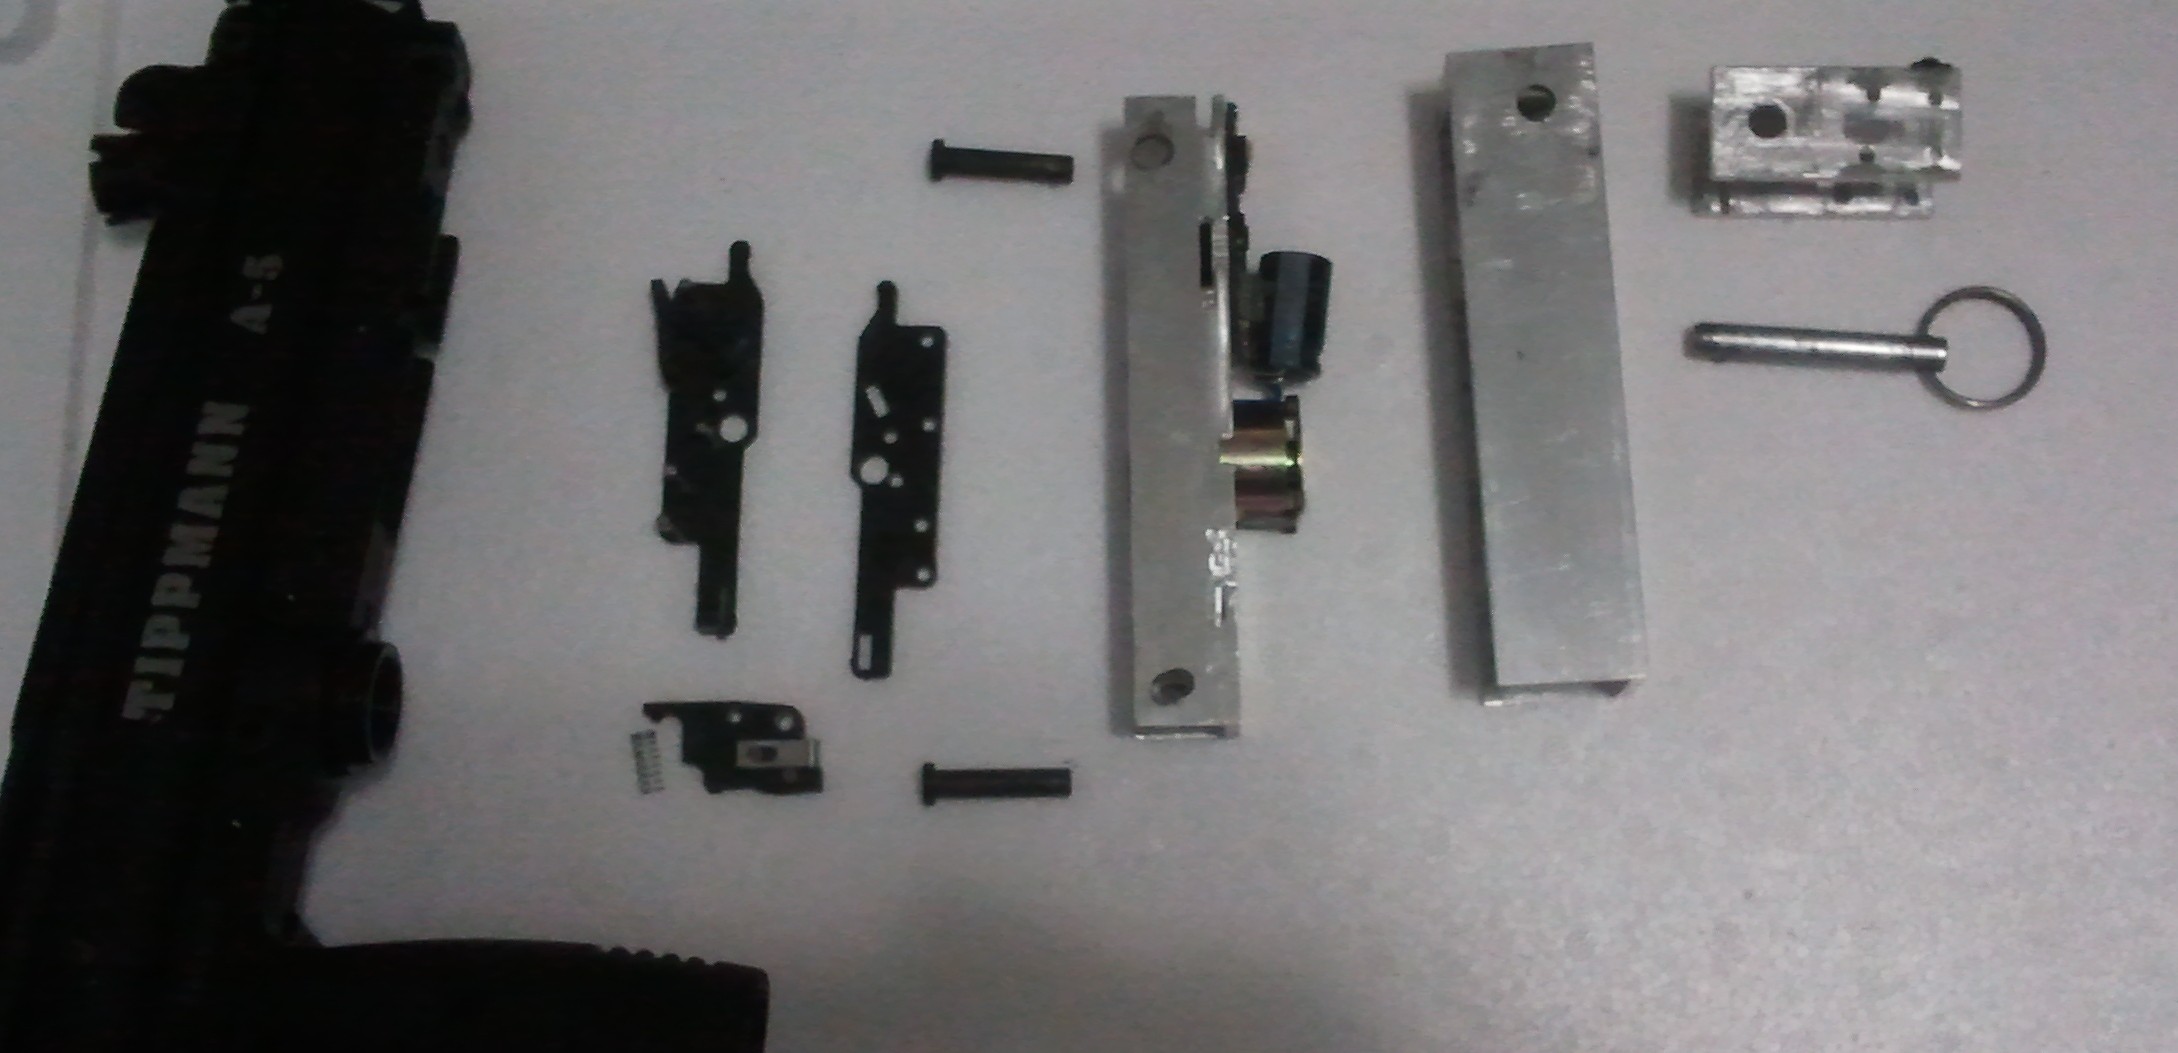
The trigger must be cut off to give the solenoid pin something to push against. This is the only permanent modification to the marker that is required. Unfortunately, after this it's a little hard to put the handle back on and fire normally, so either commit to this being a mounted marker, or get a spare trigger.
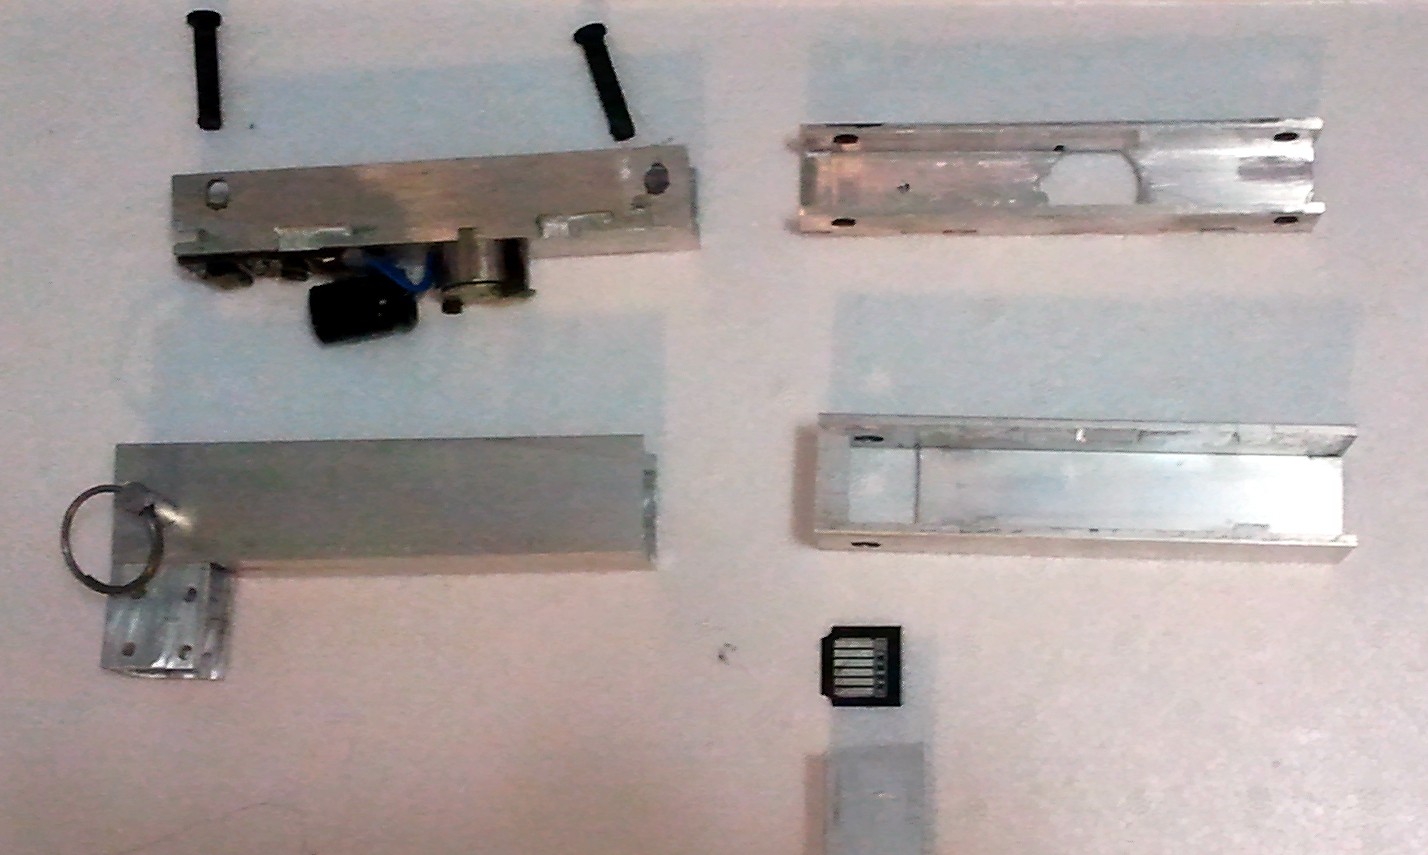
The top piece ( 25mm U profile) fits onto the marker where the handle was, and holds the electronics against the firing mechanism using the original pins from the handle. It has slots cut into it so the second piece can slide+lock into it. The friction holds the two together, and these two stay with the marker.
The second piece (35mm square profile) has tabs to lock with the slots from the first piece, and a square opening in the bottom to accept the lower mount.
The bottom piece has the mating electric connector plate fitted into the top of it, and is fixed to the robot / buggy / whatever.
When it's time to mount the marker, drop the marker onto it and insert the pin for a solid mechanical and electrical connection. We also put a pin through the front handle for an even more solid mount, and used a quick connect remote line for high pressure air (HPA) to power the marker.
Results
I could now change out a marker in 30 seconds or less.
Of course after I went through all this it turned out to be so reliable we never needed to change a marker in the middle of the day. We have never broken a paintball with this system. The A-5 lived up to its reputation, and was a good choice for this application since we could mount a large HPA supply.
Our target application was to put the marker onto a vehicle, so you may think there is a handy and tempting source of 12V power available. Not shown is the rest of the system, which includes essential power filtering to avoid frying the marker.
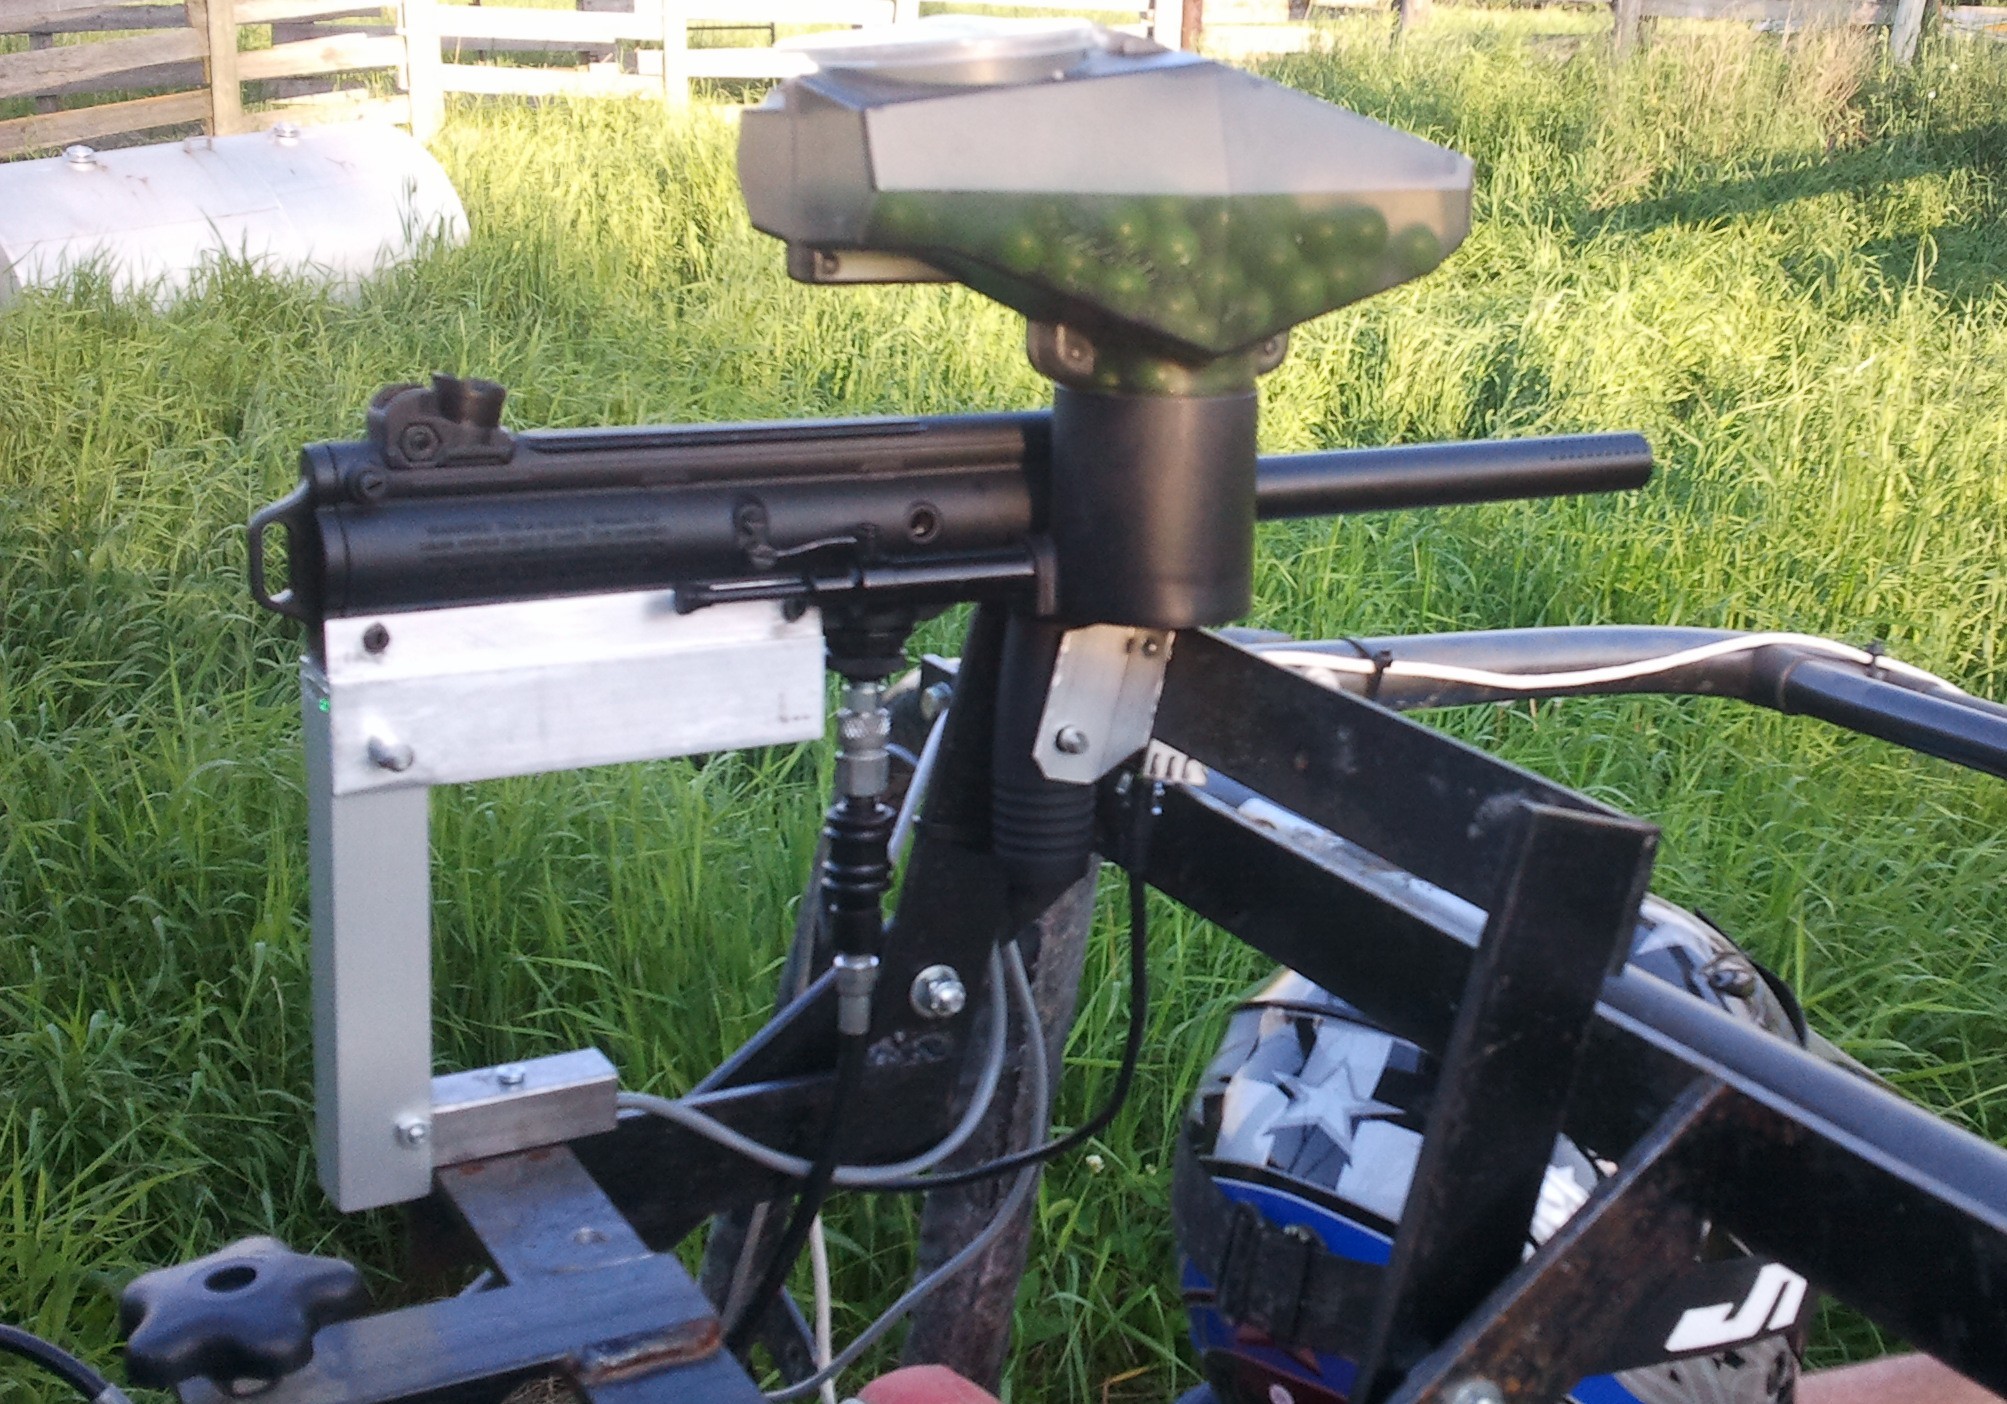
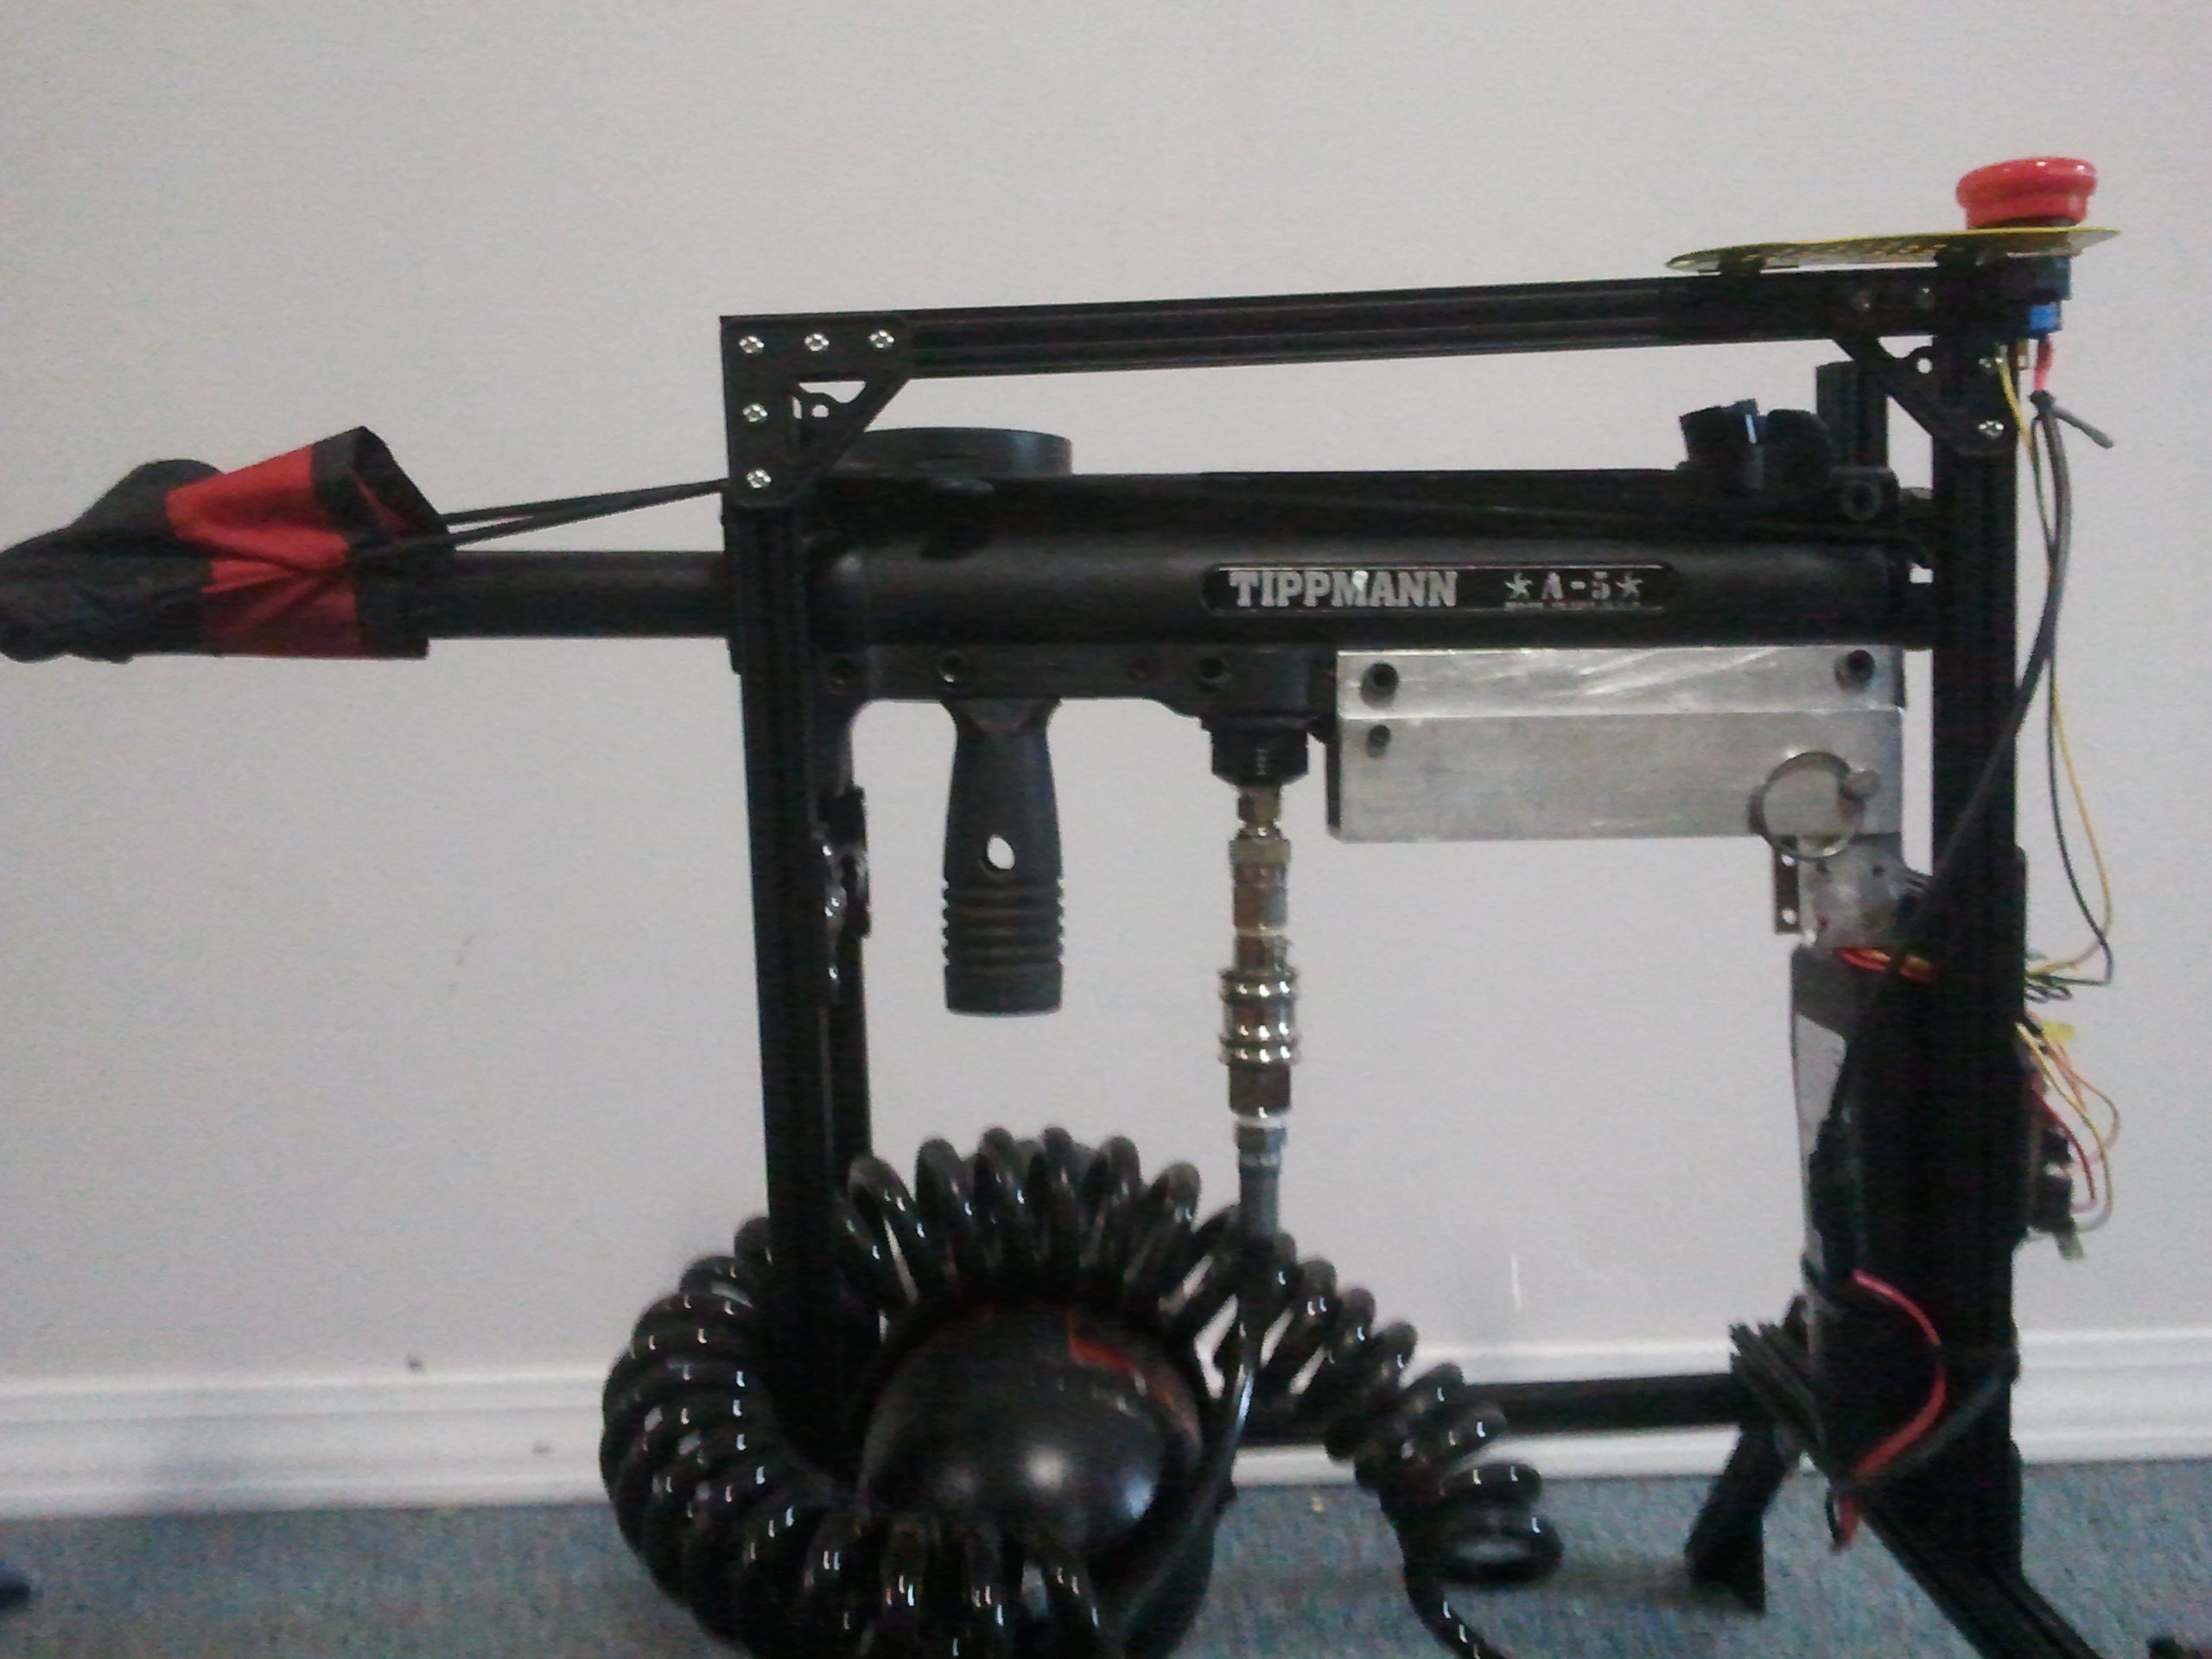
Marker on the test stand:
Marker in its home on a buggy: