 Darren Blaxcell, aka Pork
System Overview
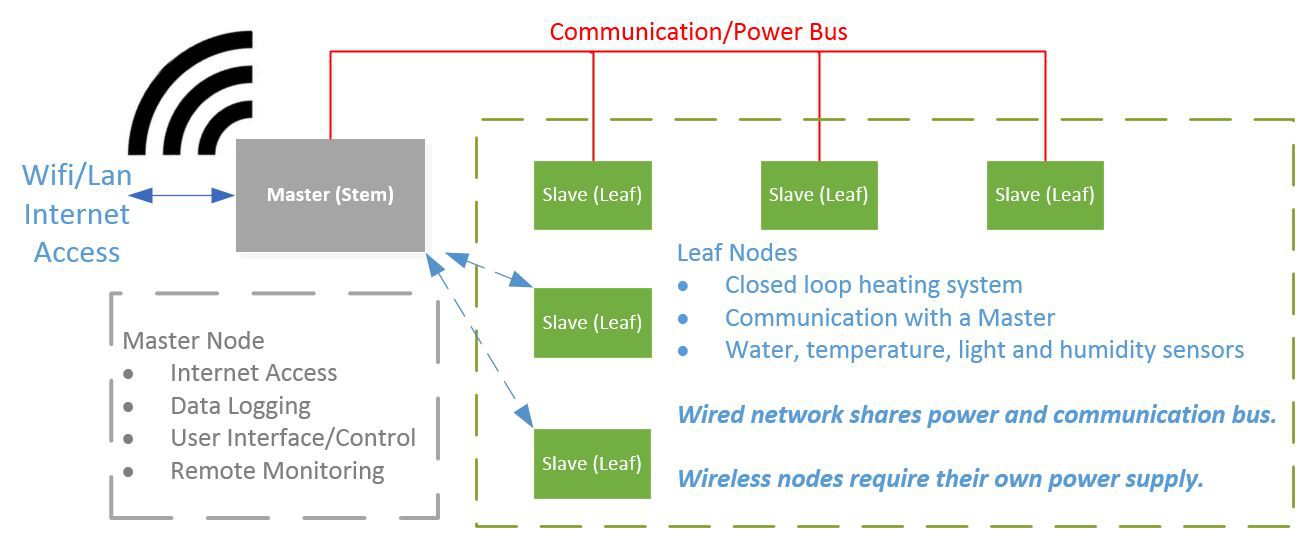
Leaf Nodes
The leaf nodes will have several capabilities:
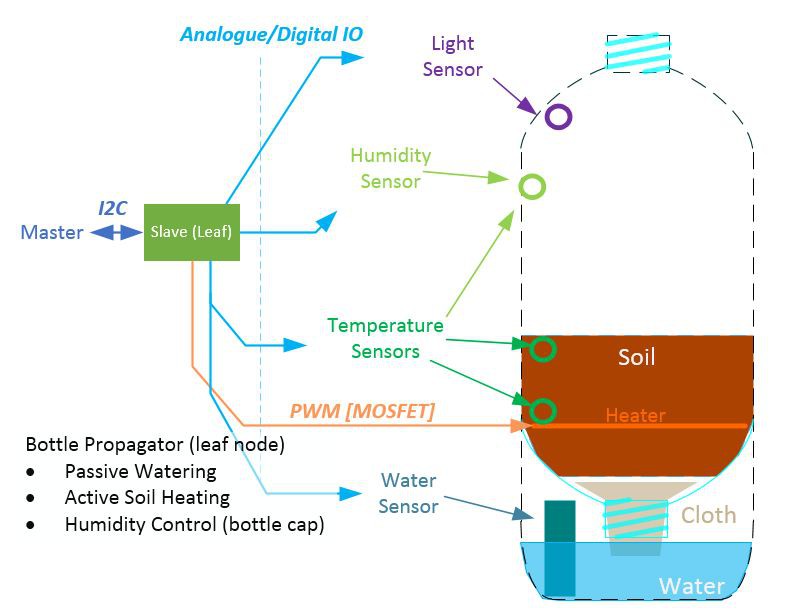
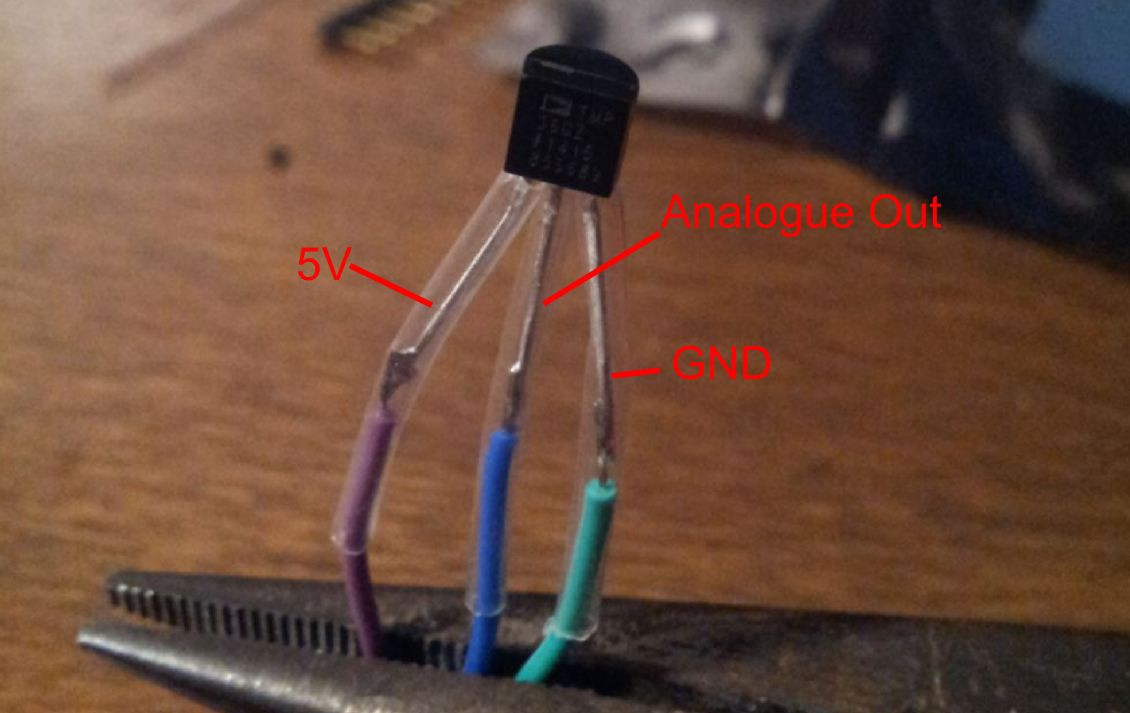
- Air, Soil and Humidity Sensing
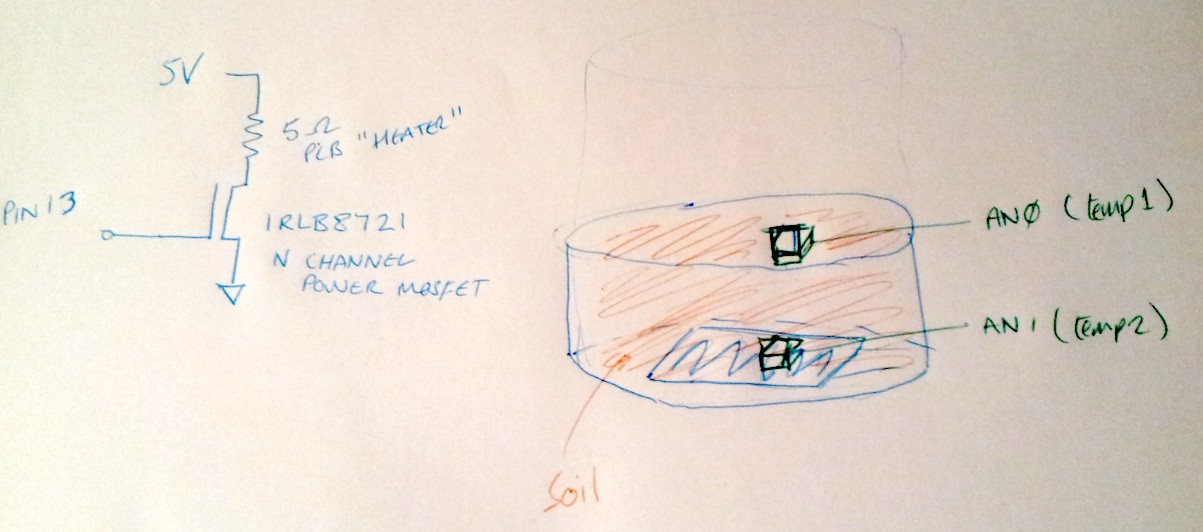
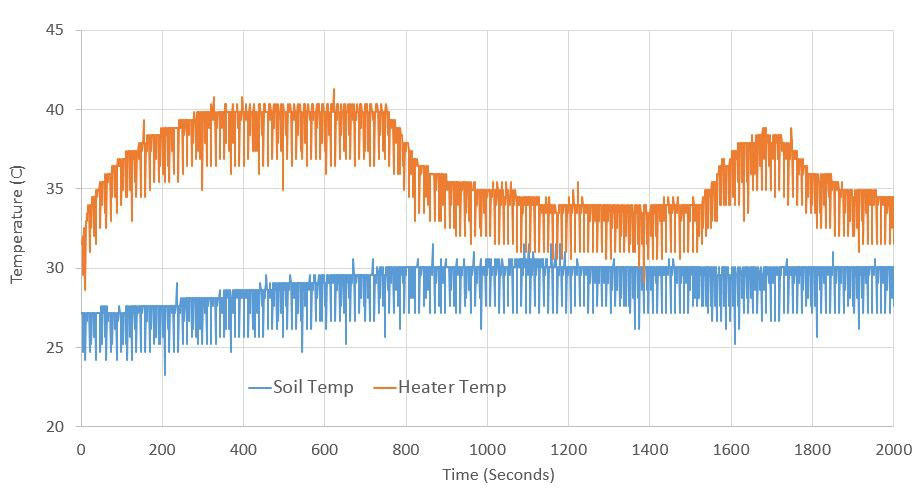
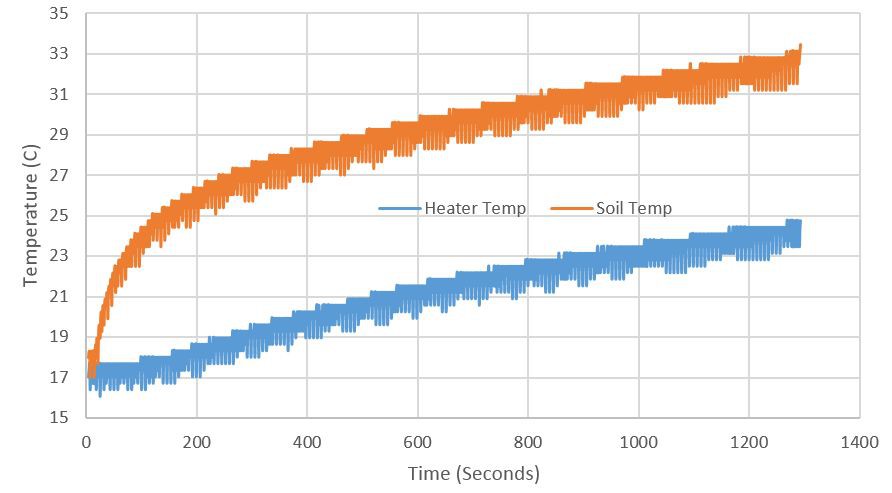
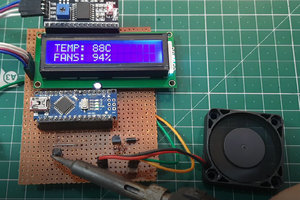
- Temperature regulation
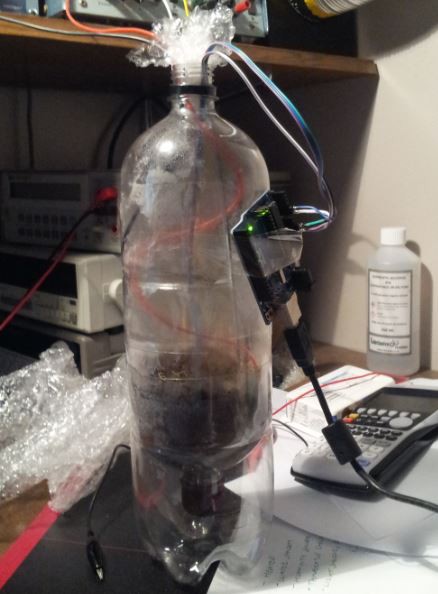
- Water level monitoring
- Light sensing
- Slaves on a larger network for logging
In addition It would be nice to have the option of a single node and a way to configure it to keep associated costs low.
Read more »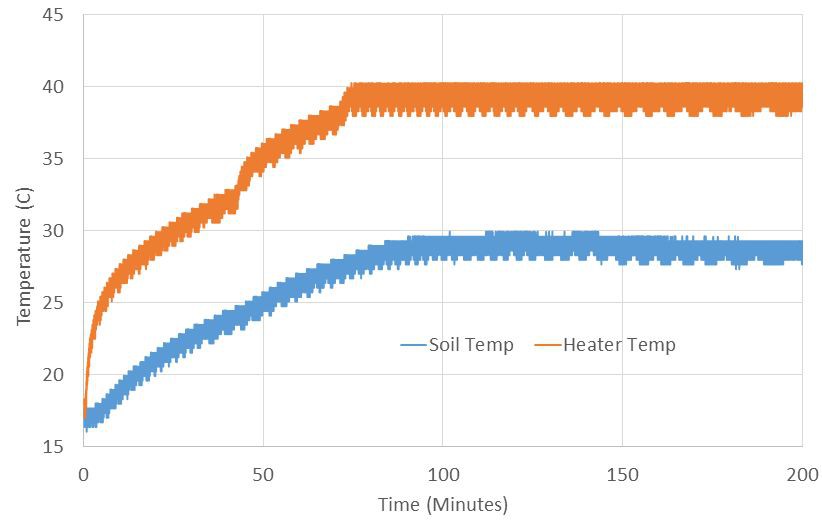
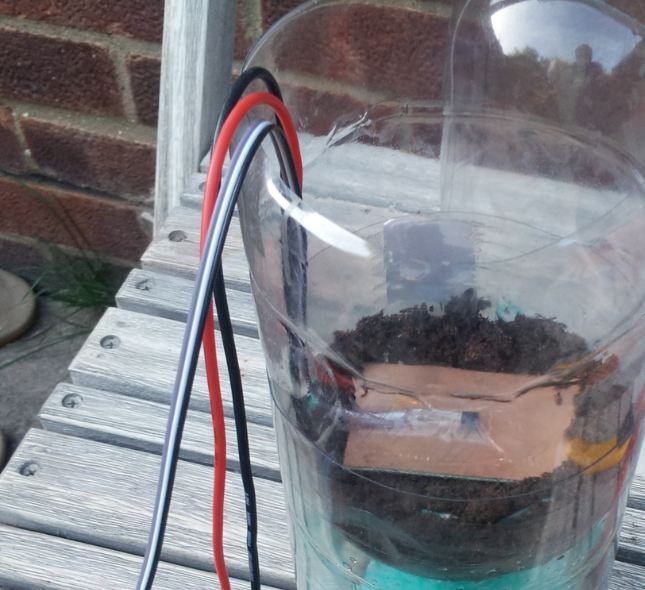


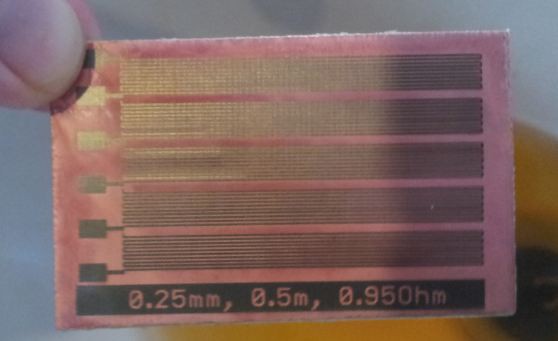
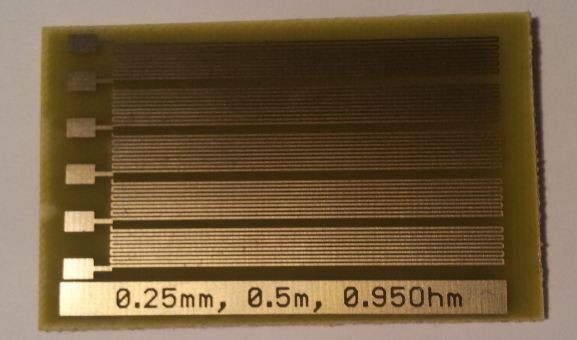
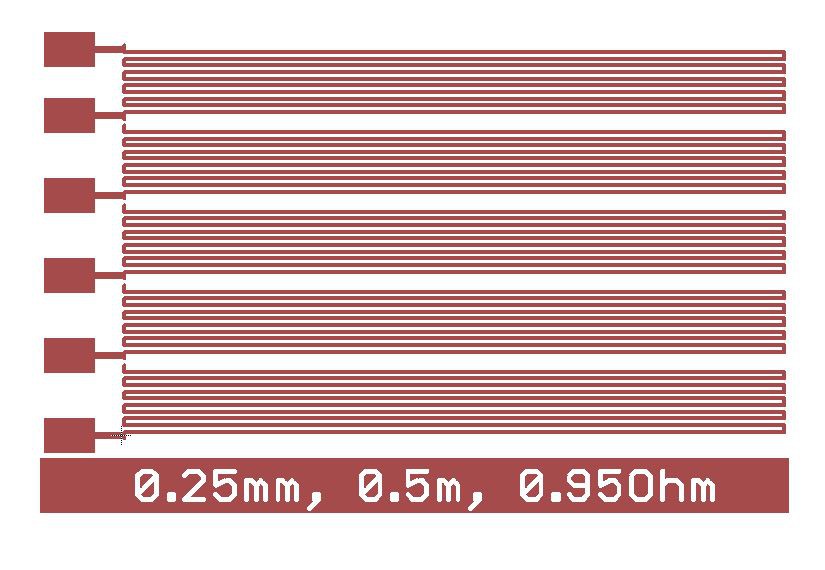 The photosensitive board was exposed and developed.
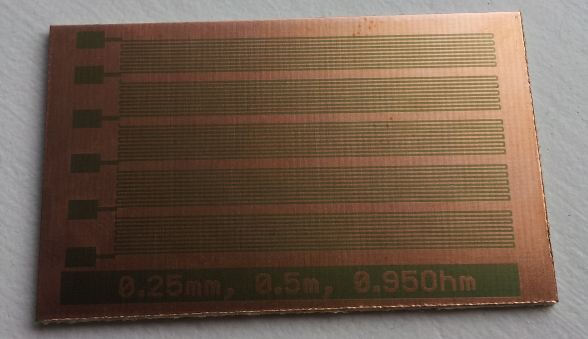
 Sagar 001
 Kyle Gabriel
 Lithium ION
 gokux
gokux