After a wild December full of socialising, dancing, heavy drinking and other joys of student life, it's time to switch back to the "geek mode" again. Having my "Arduino to IDE" interface built and (more or less) understanding how it works from the hardware point of view, it is time to dive into the software again.
Where has the project stalled?
As I mentioned before- what I am doing, has already been done by Carlos Durandal's ATAPIDUINO project. While I could simply upload his code (it works fine) and move on, I couldn't sleep without understanding how it works, what it does and why it works. Most of all I was wondering, how did he know what to do?
When I first tried to figure out how to communicate with CD-devices, I landed up in a mess of protocols, standards and various documents that had the right keywords, but I didn't understand shit there. What I did learn then was that ATAPI is the right thing to look for.
Then, I tought I could answer my question by looking at CD-drive Linux drivers. But it turned out to be too complicated, for a newbie like me, to learn anything useful from it. The functionality (e.g. CDROMEJECT) in linux drivers matched the functions described in various ATAPI documents and ATAPIDUINO, though. So it wasnt a total shot in the dark.
But this time, I am armed with a working interface, it's source code (atapiduino) and the right keywords in mind. I've decided to study ATAPIDUINO and compare it's working to the ATAPI standard. If everything matches, I've found the answer to my question- you can learn how to communicate with CD-drives, by reading the right standard.
What standard to choose?
There are some people that tried to simplify and explain the mess of ATAPI standards, CD-drives and various implementations. I found the table in the wikipedia article useful, since it summarizes the development of the standard and it's features.

I have decided to study the ATA/ATAPI-4 standard, since it was the first to introduce the packet interface and the first to mention the CD-drives. I guess it contains all the fundamentals and doesn't include any special-fancy-features that were added later, which I don't need in this project. The standard is written by the T13 Technical Committee, which is a part of the NCITS, which is...whatever. Something that sounds like a big and scary round table of engineers, corporates and politicians trying to destroy the world, hah.
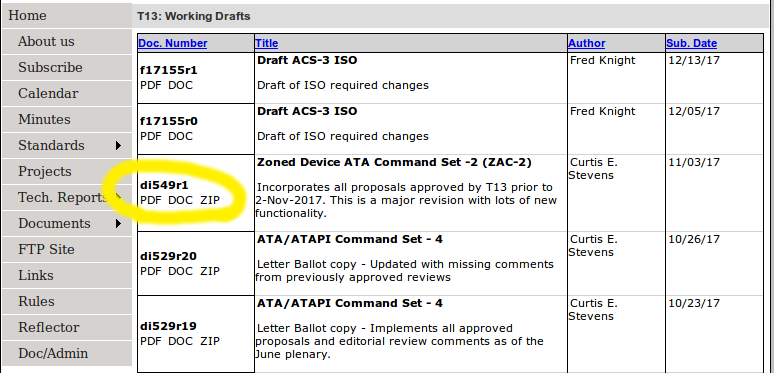
Did you know? The T13 Technical Commitee has a website with a list of all the standards, working drafts, documents etc. It looks precious. You can even choose between PDF, DOCX etc. The only problem is, you can't. It's just a text, not a download link! Even for working drafts. And by the way- why do you have to pay, to see a standard?!

Where to start reading?
When you open the ATAPI standard, don't be like me and try reading it from the beginning- you will fall asleep immediately. Table of Contents is your friend :)
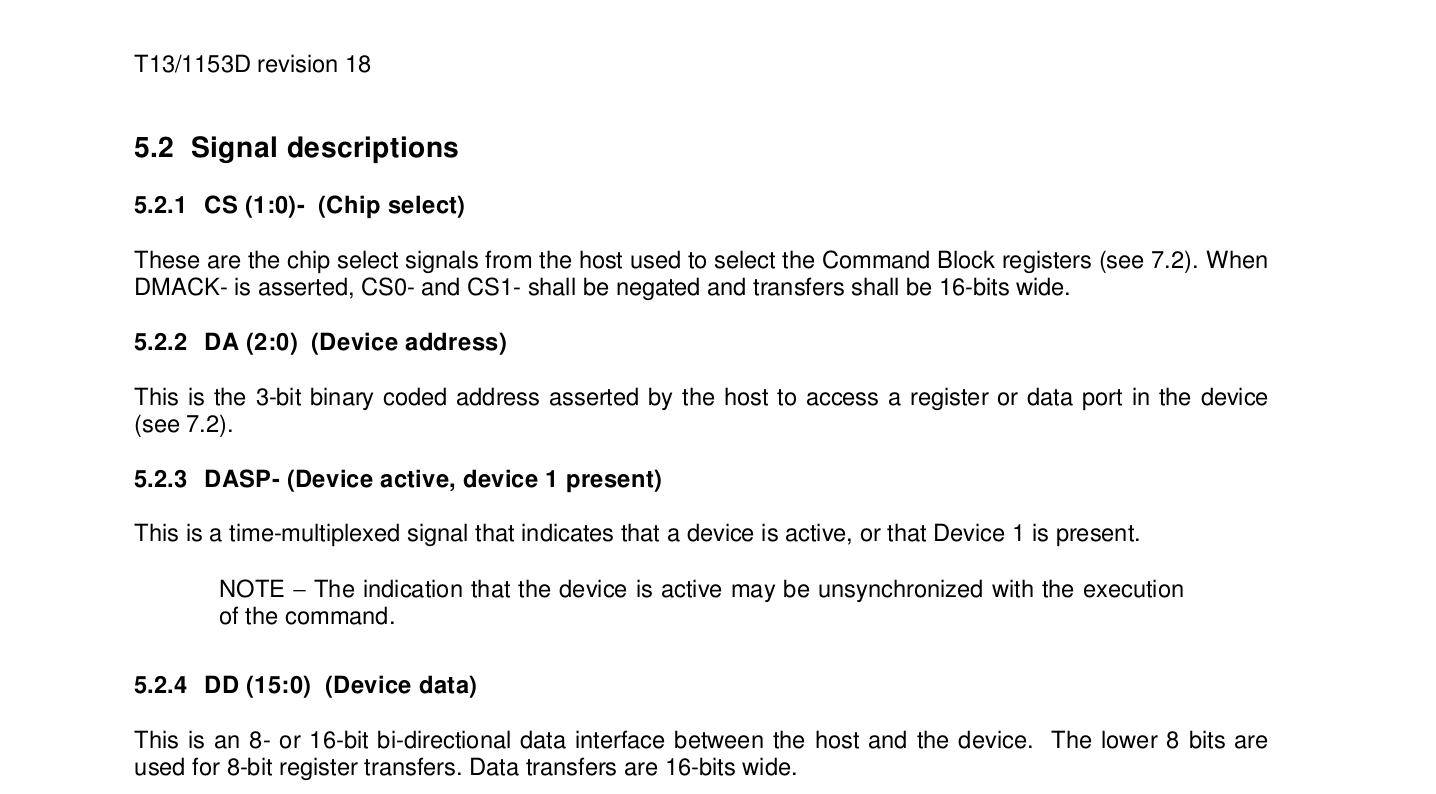
I would say that the most interesting chapter to begin with is [ATAPI 5: Interface signal assignments and descriptions]. There you can read more about individual pin functions.

I then discovered that there are two ways to communicate with an ATAPI device [ATAPI 6.1: Command delivery]. One way is via writing directly to interface's registers and the other way is to send packets. Before diving into this, let's make one thing clear: what are registers?
Learning about registers
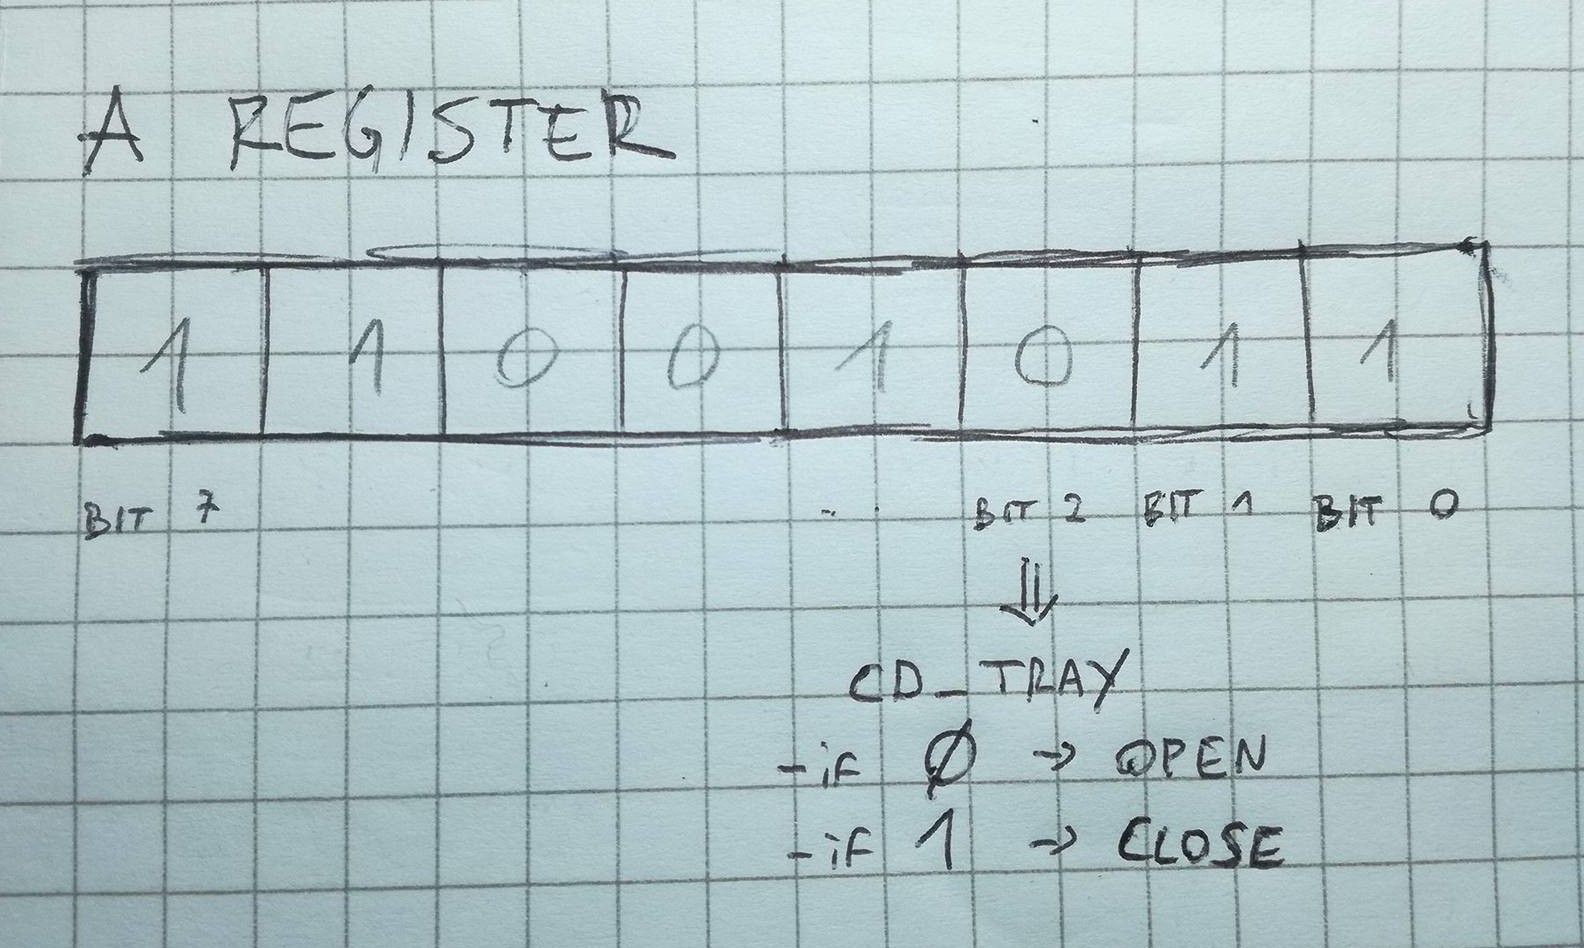
For dummies (like me)- registers are "things" that store bits. Usually they contain 8-bits (a byte) or 16-bits etc. Each individual bit, has it's own meaning. For example, if my CD-drive only had one register with 8 bits, one bit would control the CD-tray. Setting this bit to 1, would open the CD-tray and clearing the bit to 0 would close it. I learned something about ATAPI registers in this guide.

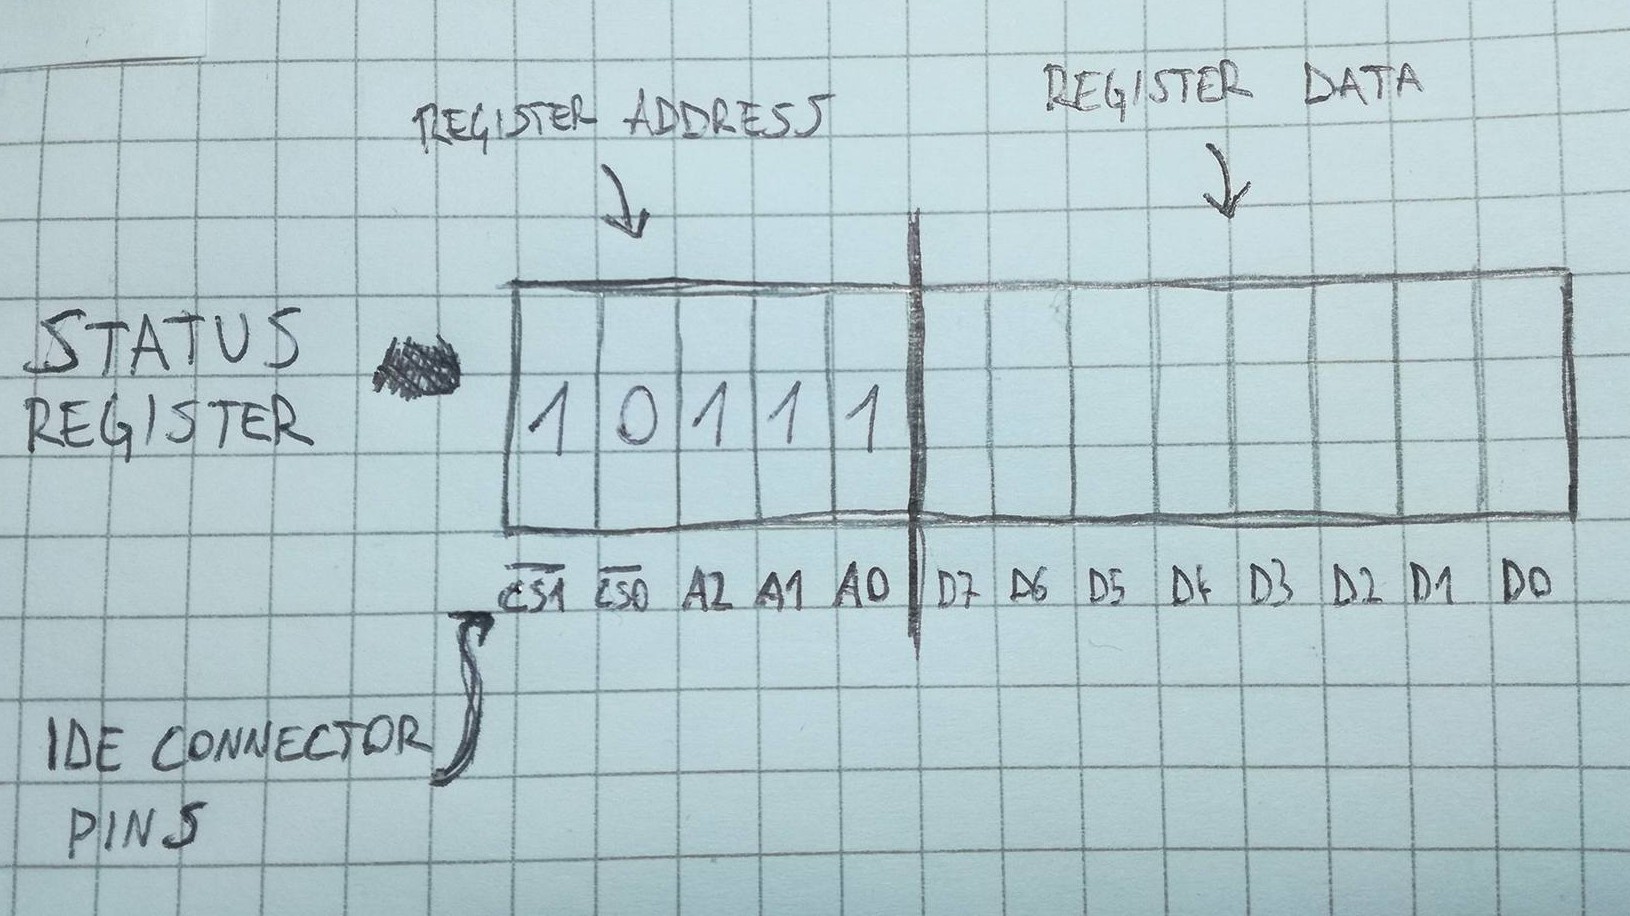
There are 9 registers used in CD-drives (there are more, but not used). Some of them have two names, depending on whether you are reading from or writing to the device. According to the guide reading/writing to the registers works like this:
- Set the register address, by controlling the pins A0, A1, A2, ~CS0 and ~CS1. (In ATAPI standard they are reffered to as DA0, DA1, DA2).
- In case of writing to registers, write the desired command and it's parameters to the register (pins D0: D7).
- Set ~RD or ~RW low (= to assert), depending whether you want to read from or write to the register.
- Read the status register, to see if the operation was successful.
NOTE: In ATAPI standard there is a bit "weird" way of displaying register's address. Assert means to "activate" a pin (e.g. set it to 1). Negate means to "deactivate" a pin (e.g. set it to 0). This notation is used, because the CS0 and CS1 are active low. That said, to activate the pin you have to set it to 0 (low). Pins DA0-DA2 are "normal" or active high. So to activate them you set them to 1.
What I couldn't understand right away is that each register has it's own address, and it's "space" for bits. How ATAPI devices work is that you set the register's address and the device will "display" it's content in the data port (pins D7:D0).

I now understand how communication to ATAPI devices (CD-drives) works, in general. I hope that my explanations makes someones life easier, as I spent quite a lot of time to understand this >.< I am wondering how much faster could I learn this, if I had an instructor or went to university class about this :)
What began as a software project log turned out to be more of a standards & registers log. Ewgh!
In the next project log, I'll describe my studies of ATAPIDUINO code and comparing it to the ATAPI standard.
 jurc192
Discussions
Become a Hackaday.io Member
Create an account to leave a comment. Already have an account? Log In.