0%
0%
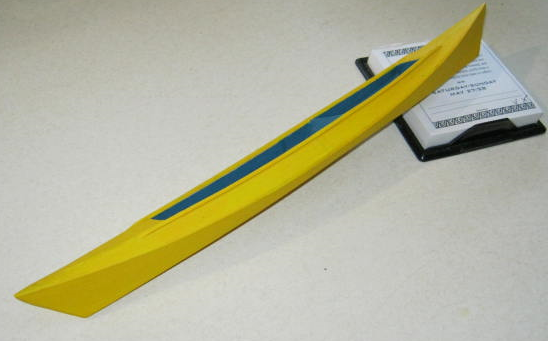
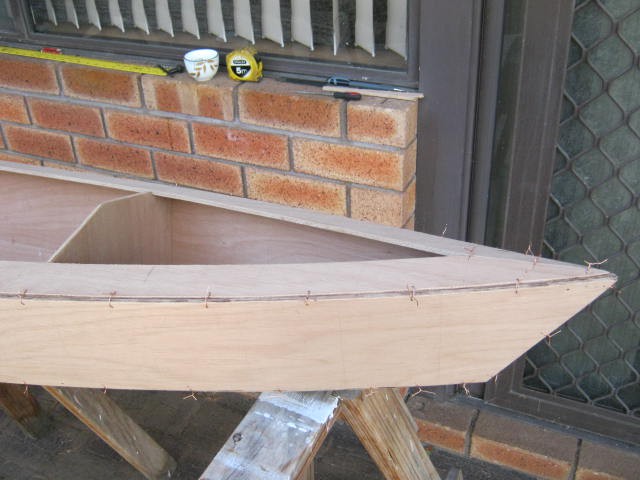
Stitch and Glue Small Boat/Canoe Building
A place holder for some of my future stitch and glue small boat and canoe projects
 agp.cooper
Become a Hackaday.io member
Already have an account? Log in.
Just one more thing
To make the experience fit your profile, pick a username and tell us what interests you.
Pick an awesome username
hackaday.io/
Your profile's URL: hackaday.io/username. Max 25 alphanumeric characters.
Pick a few interests
Projects that share your interests
People that share your interests

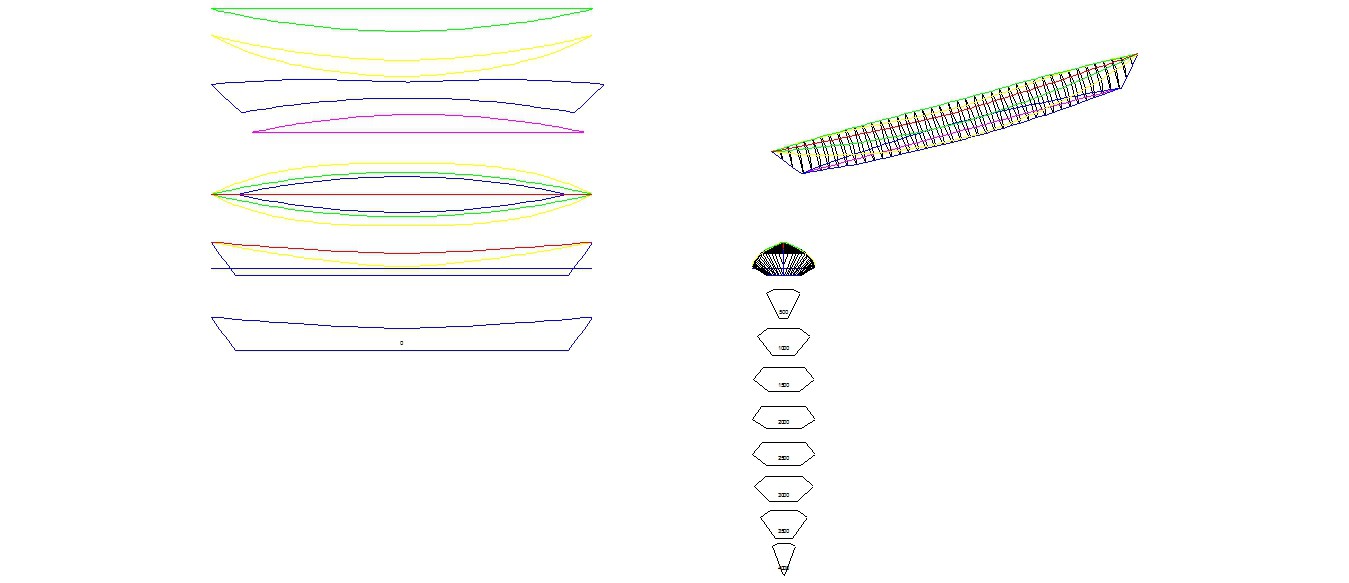

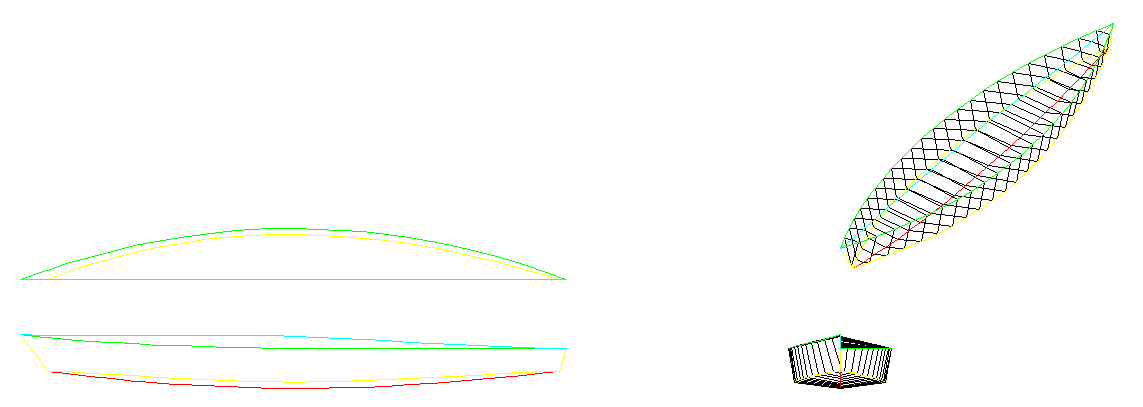
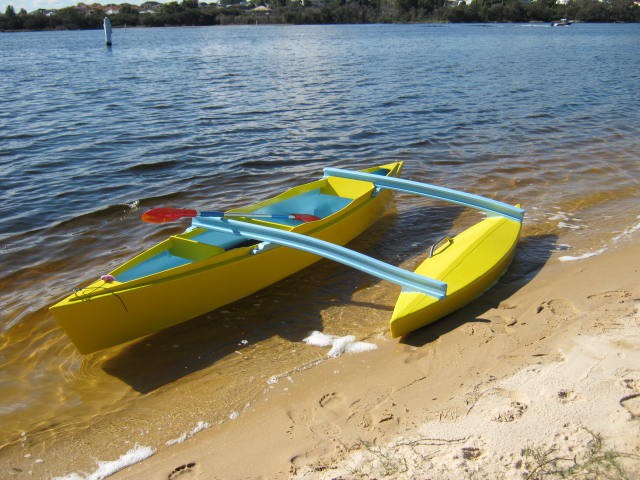
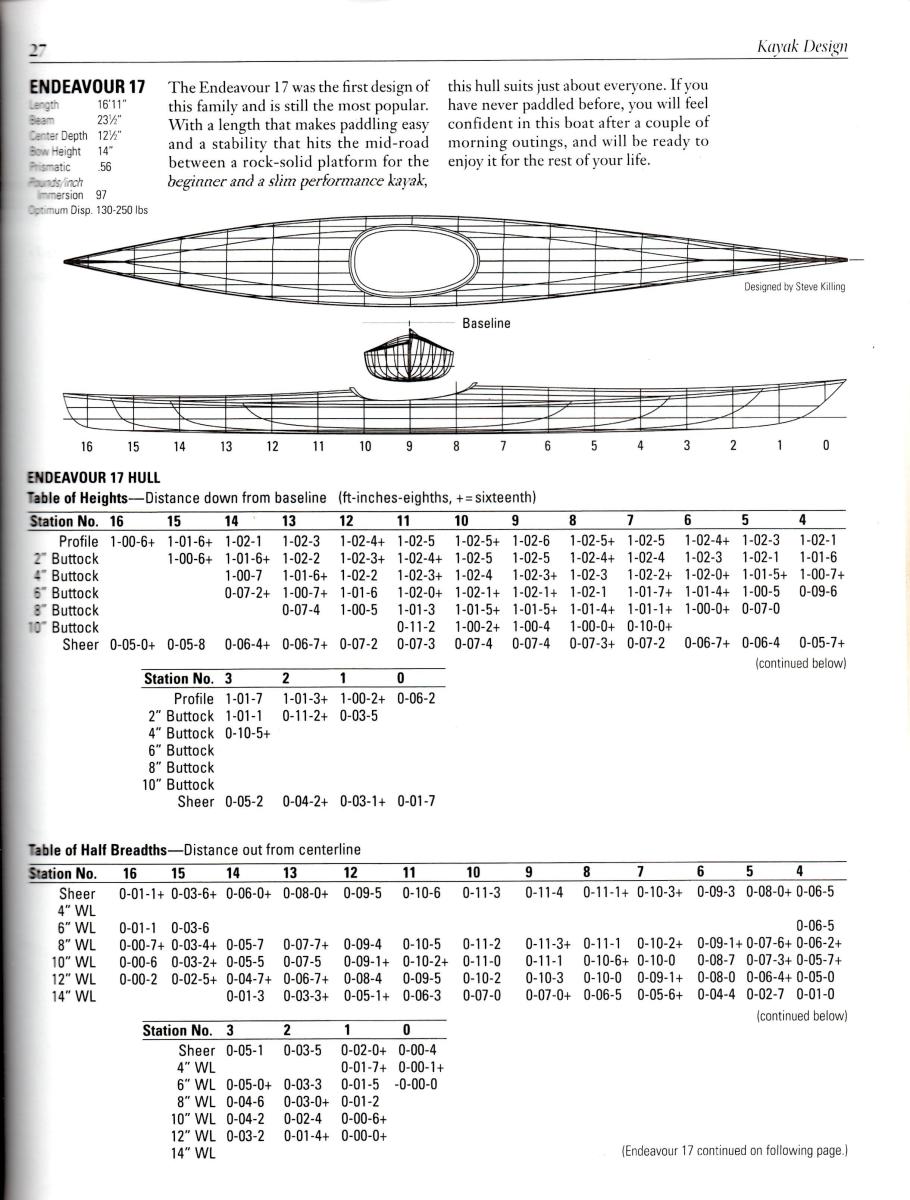
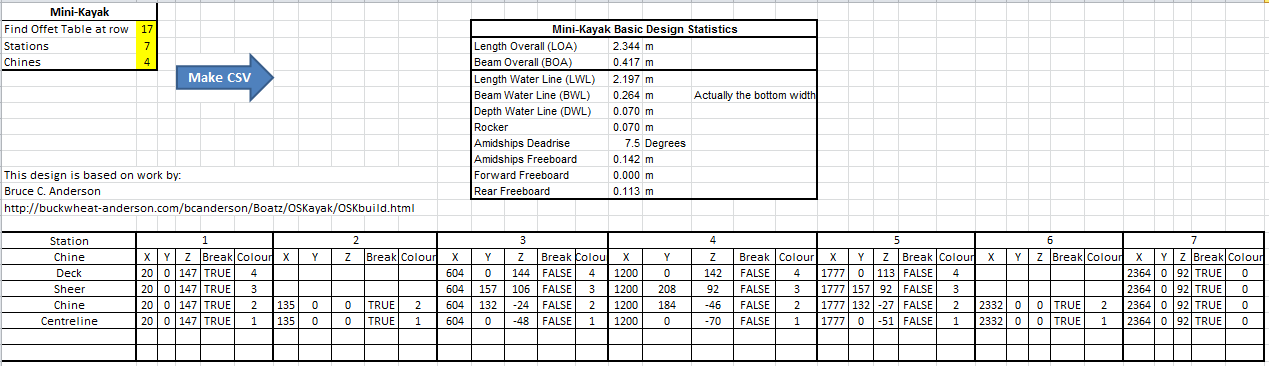
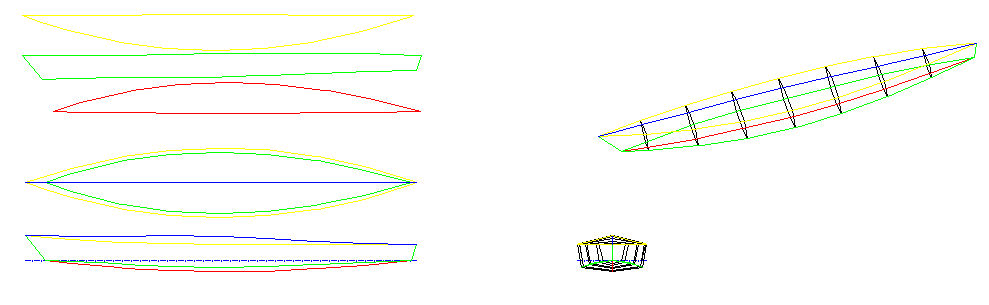
 The lofted design:
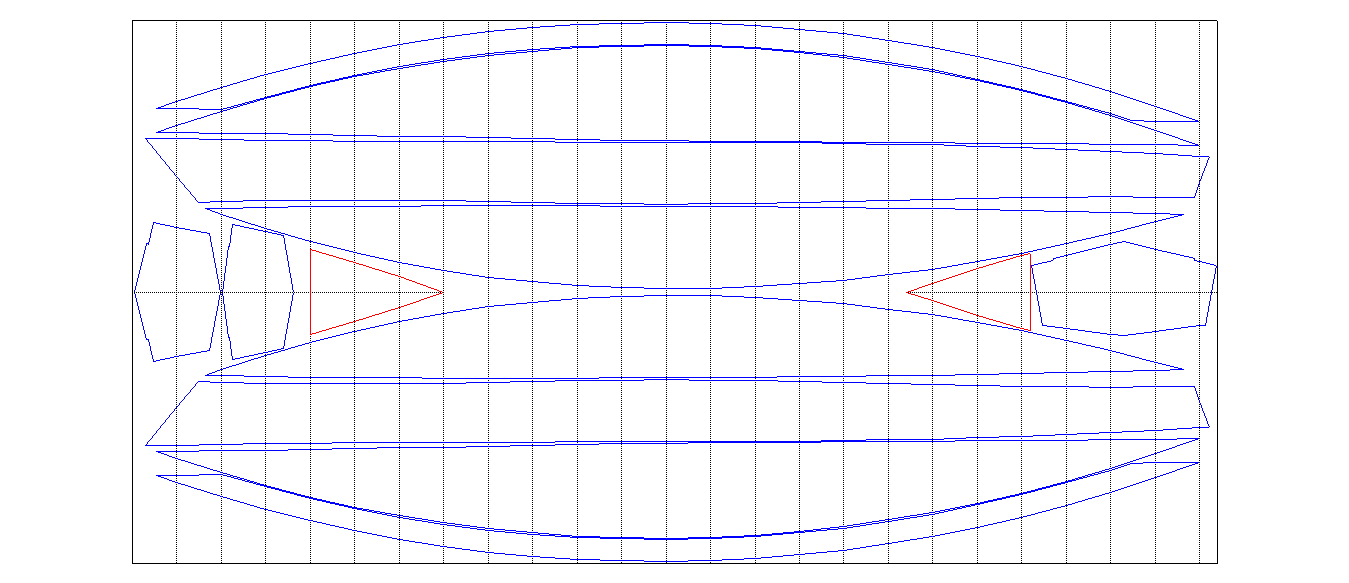
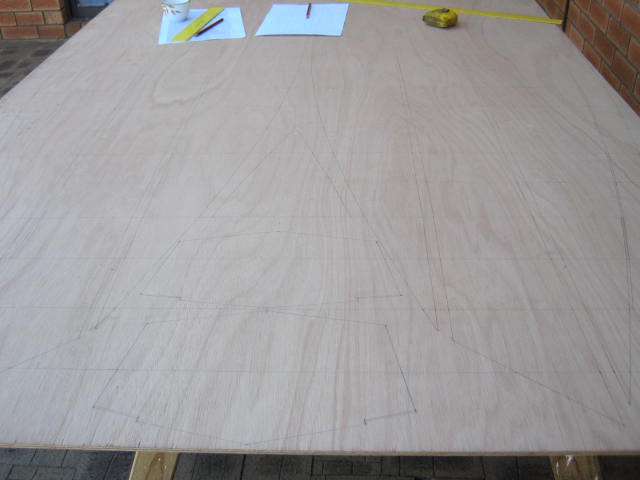 The cutout panels:
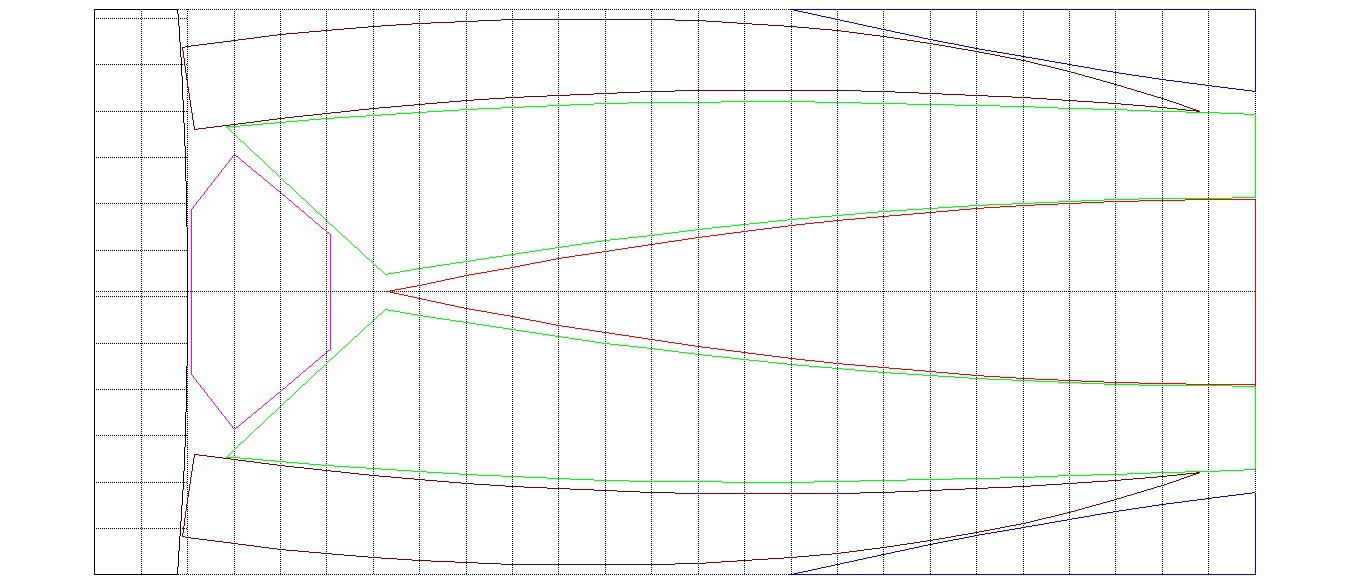


 (source:
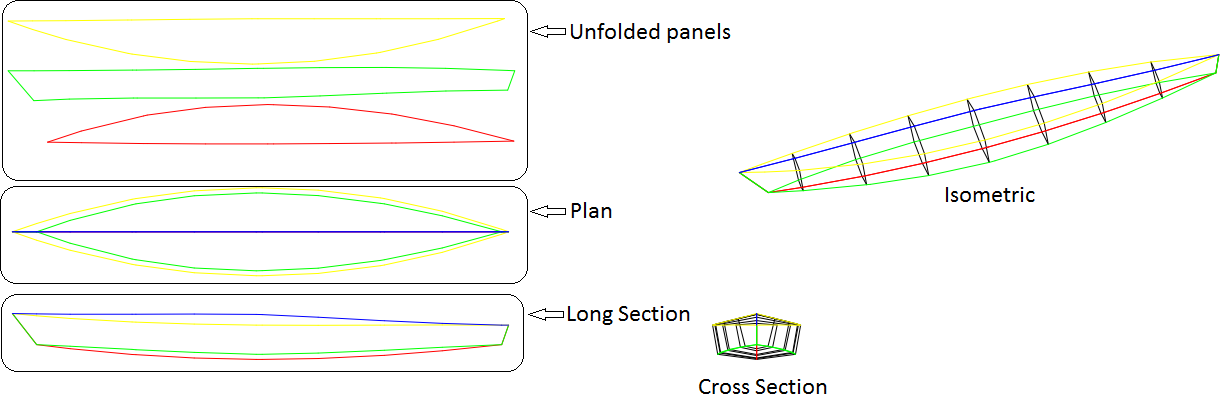


 TAIBHSE DESIGNS
 Abd-el-rhman
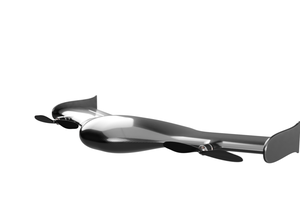
 Naman Pushp
Our strategic focus is on developing Electron Beam (EB) curing adhesives and next-generation semiconductor materials as we continuously improve the use of adhesives and resin materials. https://www.uvadhesiveglue.com/