 Simon Merrett
...mostly. There are still a couple of little details for the automatic turn off and a new feature I want to add to indicate when the supercapacitors have charged to full capacity (rather than waiting for any indicator LED on the USB battery bank to indicate that the #Yapolamp isn't drawing any more current).

But I wasn't going to let those software defined features stop me from declaring V1.3 released! To recap, we have a 12F supercapacitor bank being charged with a transistor-based constant current circuit from (nearly*) any USB power supply. *I haven't tested all of them, so can't claim complete compatibility! It has reverse discharge protection diodes to prevent an inquisitive tongue placed on the PCB contacts from seeing any current (I have tested this - always go lead-free on the PCB finish for this kind of design!). The ATtiny402 controls an inductor flyback LED driver and a momentary push button is the only user input, to switch between a very low power "always on" mode, so the torch can be found in the dark, and a "full on" mode that allows dark-adjusted or light-adjusted eyes to navigate around a dark house or read a book. "full on" mode lasts 25 minutes with the 12F capacitors. Here's a comparison between "always on" and "full on" modes:

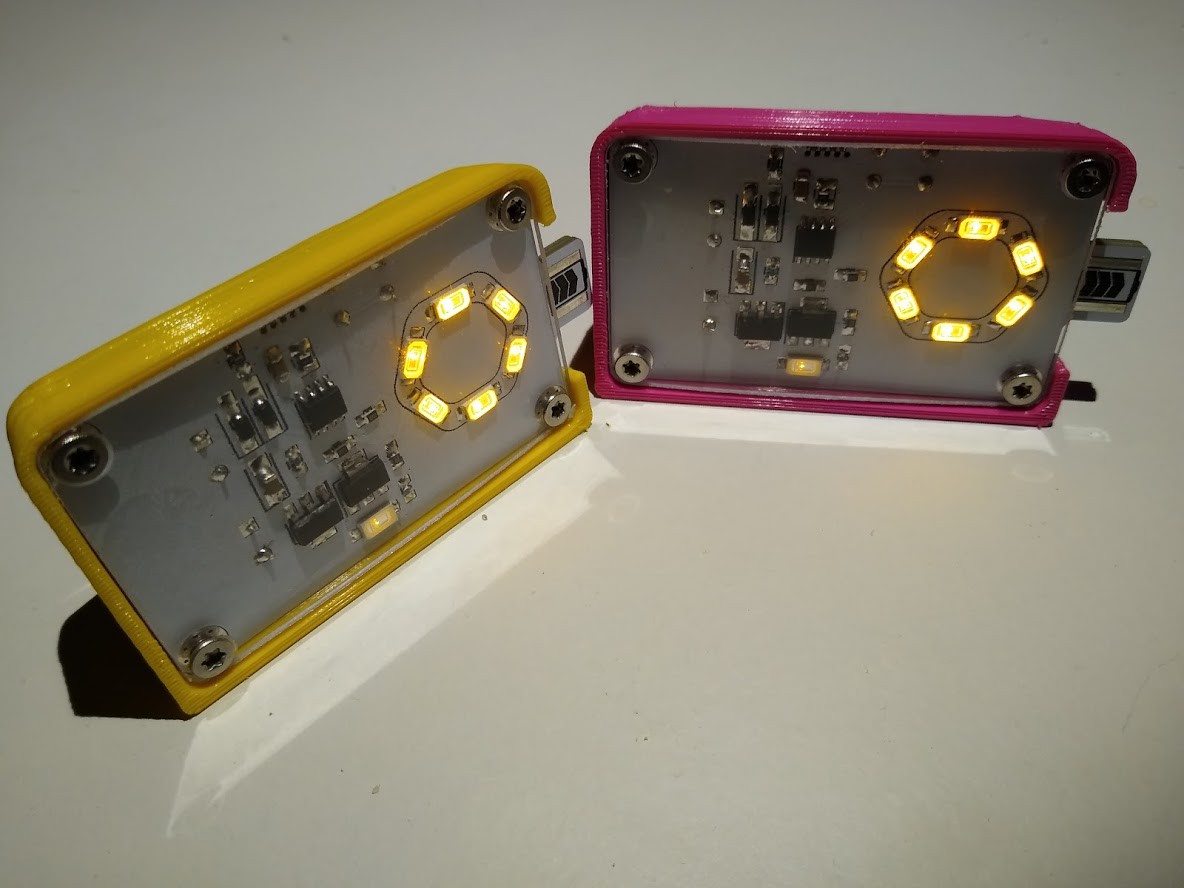
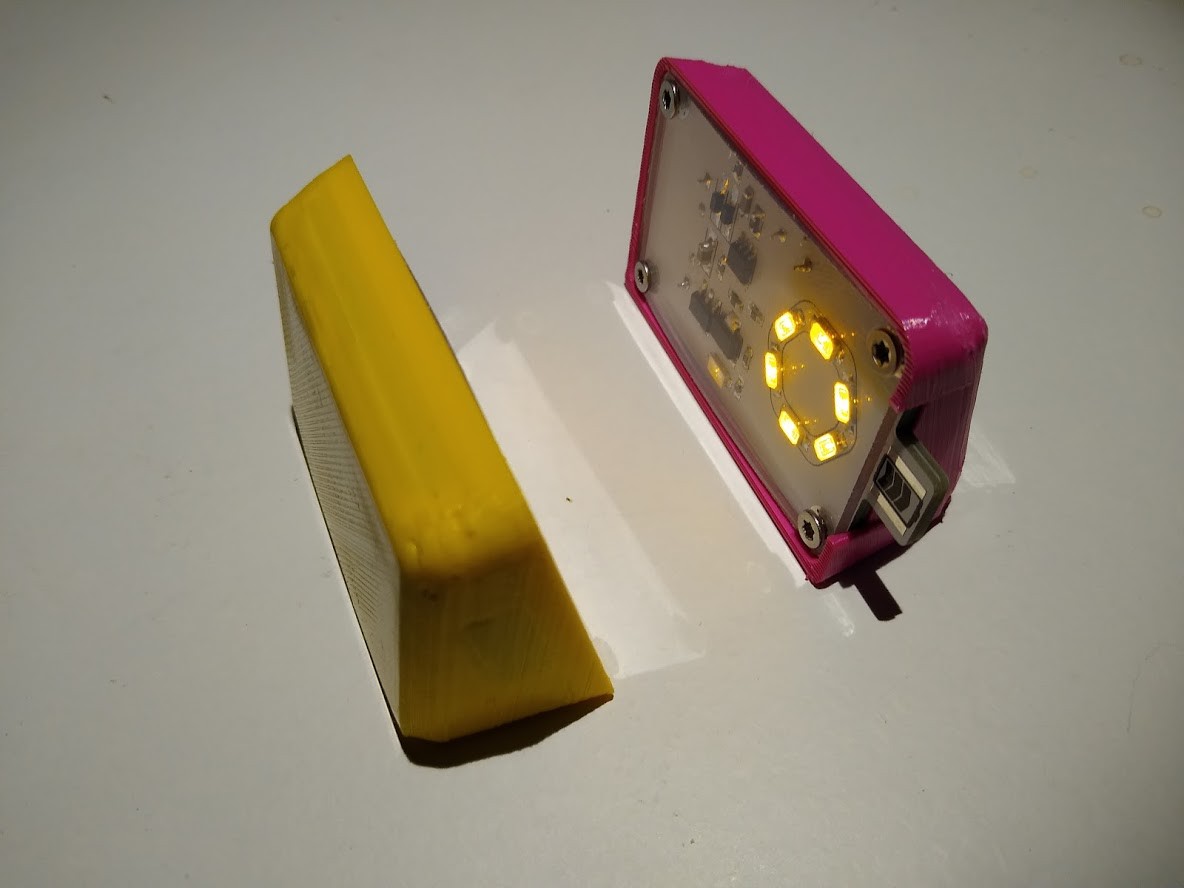
The 3D printed enclosure is angled so that the torch can be seen on a bedside table, like an alarm clock, or laid on your chest or sheet to illuminate the pages of a book you're looking at in bed. The momentary push button is inverted, so the user just has to squeeze the screen into the enclosure to press it.

The PCB keeps all the components apart from the supercaps, button and inductor on the front surface and there's a 2mm polycarbonate cover over the PCB for protection, while allowing you to appreciate the internal components.
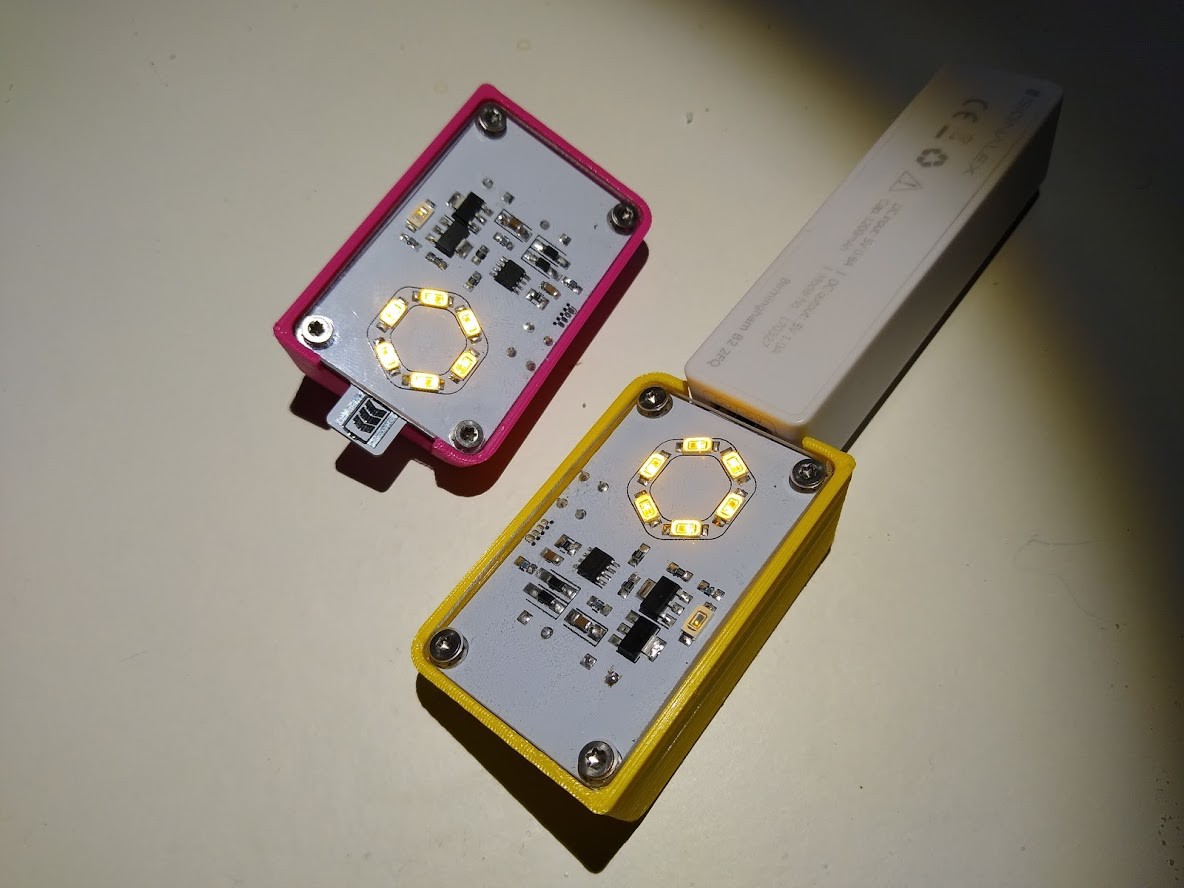
Charging a Yapolamp V1.3 takes a minute or two from any basic USB power supply.
The PCB is 1.2mm thick and a second, shortened and unpopulated PCB is placed on the back of the USB connection segment of PCB that protrudes from the enclosure, as even a 2mm thick PCB isn't thick enough to get a good fit inside a USB receptacle. Two 1.2mm layers stacked is perfect:
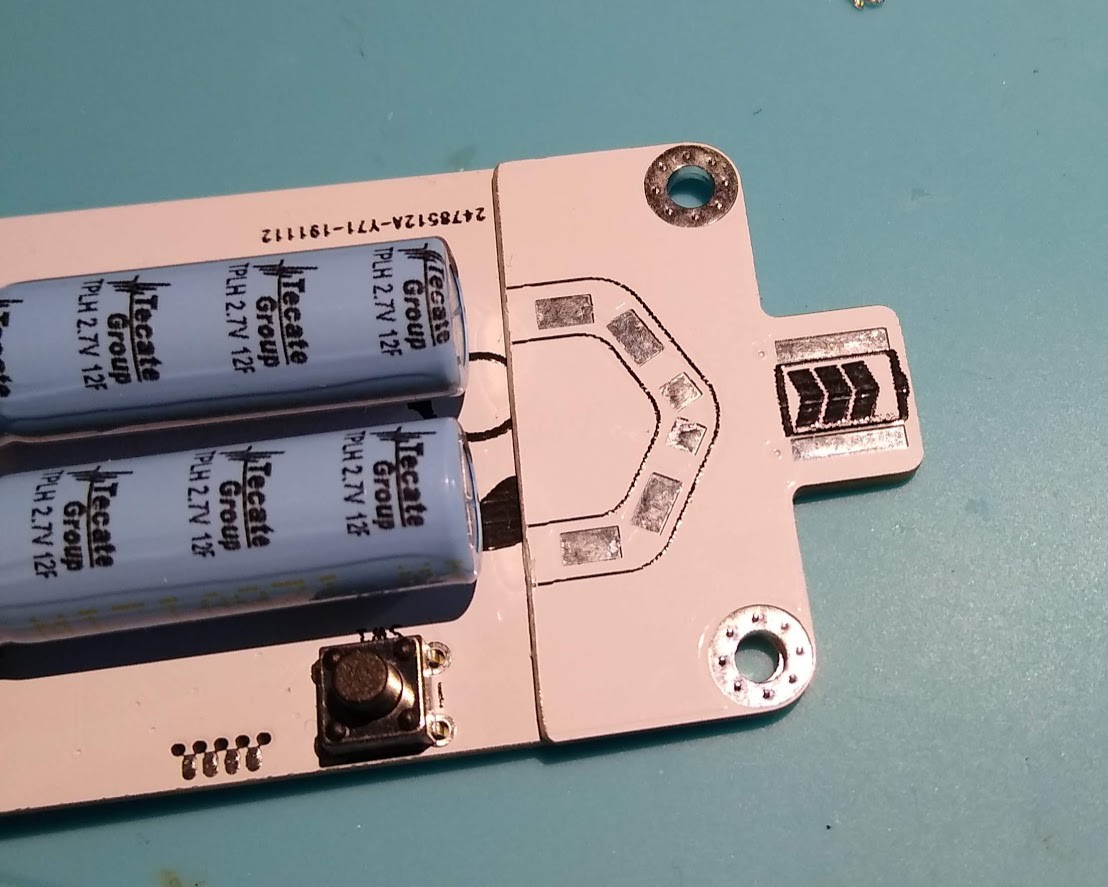
My only downfall in this part of the design is that I put a copper ground pour on the back side of the PCB in the vicinity of the USB connector segment, so when the soldermask gets scratched off and if the user puts the connector into the USB pack the wrong way (easy to do), there could be a short of the USB power supply. So I turned the second piece of PCB over and the separated (and unconnected) pads are now what would be touching the USB connections if inserted the wrong way.
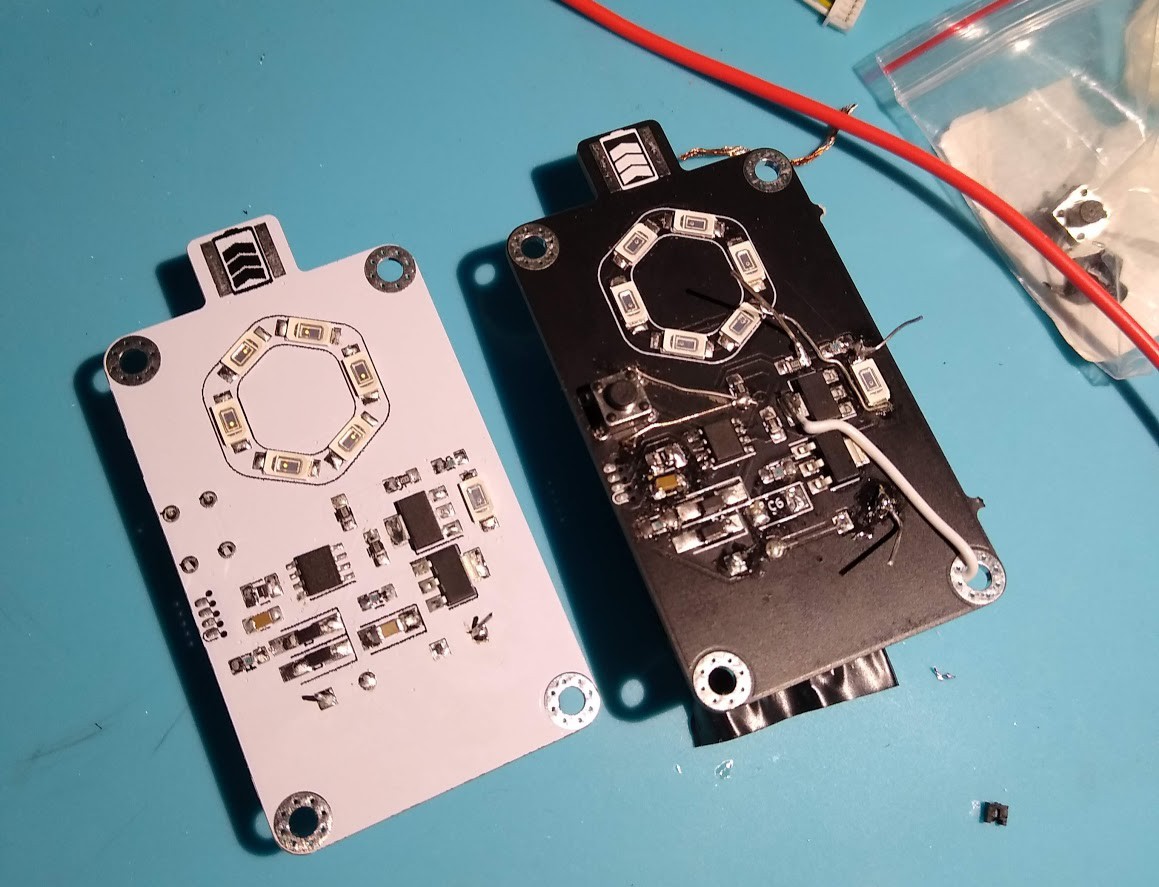
Here's the release version of the PCB next to the awful greenwired one from last time:
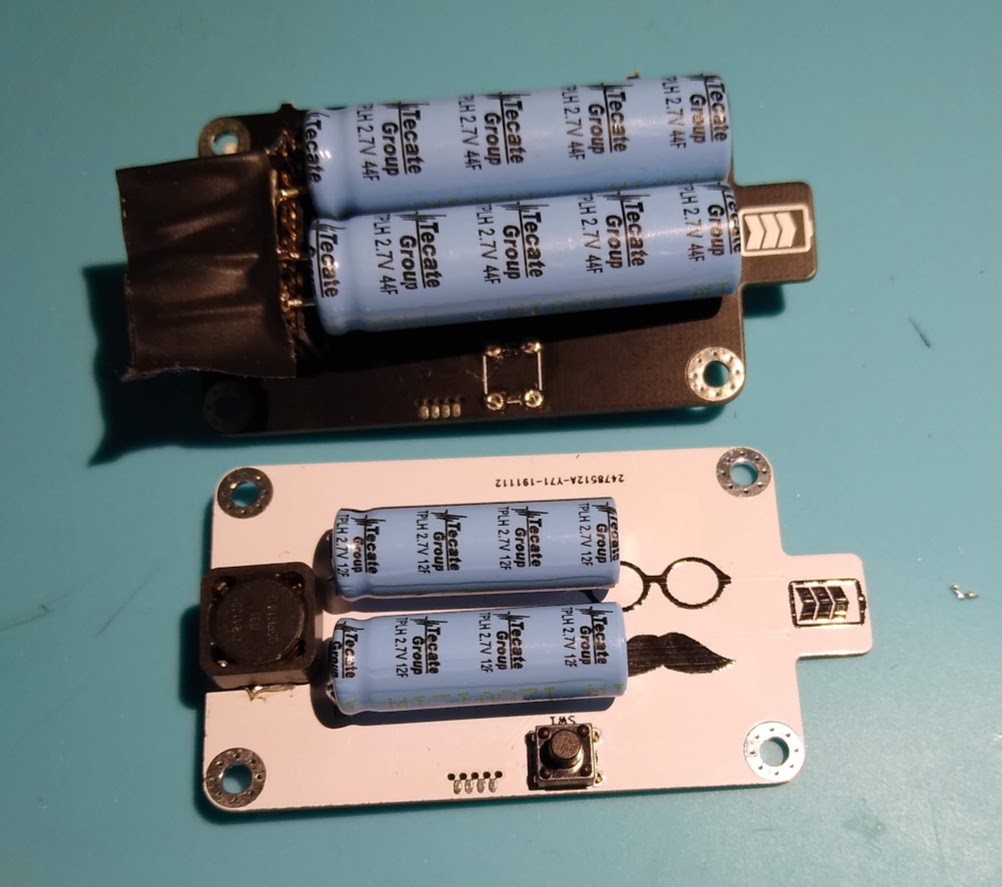
And you can see the significant space saving of the smaller 12F bank, compared to the experimental 30F (maybe 44F, depending on who you believe).
There's a Ted in every torch*!
It's time to wrap these two Yapolamps up for Christmas now. If there's interest, I'll share the files for the enclosure, PCB and tiny402 code.
*with apologies to @Ted Yapo for getting the shape of both his glasses and moustache wrong. Clipart licensed for reuse is relatively sparse in those subject areas. I hope the homage is received warmly though.
Discussions
Become a Hackaday.io Member
Create an account to leave a comment. Already have an account? Log In.
That's really cool; I especially like the acrylic over the PCB so that you can see but not touch. Well done.
BTW, my glasses are flat, non-prescription fakes and the mustache is glued on. It's all an elaborate disguise. For reasons.
Are you sure? yes | no
It's polycarbonate - my children are relatively peaceful but I thought "if it's good enough for riot shields, it's good enough for children's electronics". Thin (2mm) acrylic didn't give me the impression it would last long if dropped on a hard surface. The transparent property is especially rewarding in "full on" mode when the voltage dropper LED (the dim one, away from the main ring of LEDs) is on view. It's sole purpose is to translate the inductor voltage to a level (in conjunction with a voltage divider) that will be seen as digital logic on the ATtiny input, closing the loop on the automatic pulse generation. But the fact it glows dimly and can be seen doing it's job is lovely.
I love wearing glasses all the time now - they mean I always have eye protection on for drilling/cutting and I don't get caught out if I forget! I presume your disguise also came with a false nose to join the glasses and moustache together...
Are you sure? yes | no
oh, I'll have to take a closer look the schematic
nope, they don't make fake noses this large; I'm stuck with it
Are you sure? yes | no
@Ted Yapo don't look just yet - I haven't uploaded any of this year's documentation yet!
Are you sure? yes | no
@Ted Yapo but in the meantime, here's some more detail about the LED dropper - https://hackaday.io/project/25115-yapolamp/log/165917-pulses-not-pauses
Are you sure? yes | no
Please don't ever rely on your everyday glasses as a protection :) They don't protect you from stuff getting behind them and flying straight into your eyes.
Been there, done that. Especially when using a grinder always wear glasses that leave but the smallest gap to your skin...
Are you sure? yes | no
@Jan you're right of course but I don't always remember to put proper safety glasses on and I'm glad there's something there by default.
Are you sure? yes | no
ps, there's even a fuse in this version!
Are you sure? yes | no
Hey @Simon Merrett this looks awesome! I like the easy and tidy case you printed for it. Makes it usable instantly!
Are you sure? yes | no
Thanks! That was my introduction to FreeCAD and I don't think I'll be going back to Fusion360 or Onshape unless I get a really complex requirement. FreeCAD has all the CAD and CAM I think I will need for a while to come.
Are you sure? yes | no
Ha, I just thought the exact opposite. Working with Solidworks and Inventor on a daily basis at work and I really really (like really²) dislike how FreeCAD behaves and feels.
But I got the hang with KiCAD after a while, guess it'll be the same for that program...
Are you sure? yes | no