Dmitry
 | CrashPlan is a great service to backup data. Even if you are dealing with ARM devices and need CrashPlan on Raspberry Pi! It’s possible to use this service onsite, offsite and cloud way. Besides, CrashPlan provides different plans to suit your needs and budget, including the free one for local backup to external drives. Another alternative for automatic backup is Backblaze. It offers personal, business and cloud backup options with a large list of integration services (such as Synology, Retrospect or Cubix). You can even get the first 10GB of a hard drive space for free, choosing the cloud storage! |
The real spoiler about Backblaze appears when it comes down to a compatibility… You won’t find anything, but Windows or Mac archives on their web-site. What a grief! CrashPlan, on the contrary, is available for Windows, Mac and Linux (the x86 Linux), but can’t be run on Raspbian. So, how can we build up a stable Raspbian backup process if it’s not even compatible with Raspbian? I would say, it is possible and, what’s more, even easy. As easy as running TeamViewer, Spotify, Wine or playing great games on Raspberry Pi! If you want to set up CrashPlan and build automatic backup process on Raspbian for FREE, read this article to the end and use the tutorials mentioned herein. The overall process of running CrashPlan on Raspberry Pi is quite boring. In a nutshell, you set up ExaGear, it creates x86 Linux environment within Raspbian and BOOM! You can set up CrashPlan, as it becomes compatible with x86 Linux due to ExaGear. If you are a bookworm and want to learn all the details of binary translation, find them in my another post “ExaGear Desktop virtual machine for Raspberry Pi”. Otherwise just scroll down |
Raspberry Pi test stand configuration
Model | Raspberry Pi 2 Model B | Raspberry Pi 3 |
Frequency | 1000 MHz | 1200 MHz |
Memory | 1 GB RAM | 1 GB RAM |
Operating System | Raspbian Jessie from April 2017 | Raspbian Jessie from April 2017 |
Software | CrashPlan 4.8 for Linux ExaGear Desktop 2.1 for Raspberry Pi 2 | CrashPlan 4.8 for Linux ExaGear Desktop 2.1 for Raspberry Pi 3 |
CrashPlan installation guide
Download CrashPlan for Linux
Go to CrashPlan official web-site, find “Try it free” button, push it, find yourself on the page with different plans, find the free plan column, push the download button, then … C’mon! Here is the link – https://www.crashplan.com/en-us/download/! Follow the link and do some more useful stuff or just have fun while the archive is downloading The only thing you shouldn’t miss is this really tiny Linux link. Click on it, because you need to download the Linux version of CrashPlan.

Set up ExaGear Desktop
1. Put ExaGear Desktop archive with installation packages and ExaGear Desktop license key in the same folder. Open Terminal (command line), move to this folder and unpack the archive using the following command:
$ tar -xvzpf exagear-desktop-rpi*.tar.gz |
2. Install and activate ExaGear by running install-exagear.sh script:
$ sudo ./install-exagear.sh |
Launch guest x86 system
3. Enter the guest x86 system using the following command:
$ exagear Starting the shell in the guest image /opt/exagear/images/debian-8 |
Check that you’re in x86 environment by running the ‘arch’ command:
$ arch i686 |
4. It is recommended to update apt-get repositories on the first launch of the guest system:
$ sudo apt-get update |
Install CrashPlan
5. Remember! It is super important for you to download specific libraries to enable CrashPlan browser operations. Simply input:
$ sudo apt-get install lxrandr libgtk2.0-0 libXtst6 cpio |
6. Now, you have to get back to the folder, where CrashPlan archive has been previously downloaded. Usually, it is the “Download” folder if you’re using a Raspberry Pi model. In case of Raspberry Pi, the path to the folder that you should input into the command line is the following:
$ cd /home/pi/Downloads |
7. As soon as you are inside this directory, unpack the files:
$ tar -xvzpf CrashPlan_4.8.2_Linux.tgz |
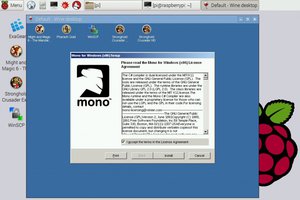
8. Install CrashPlan inside the x86 guest system....
Read more »