 jordan314
Parts list
- 3 16x24 Red LED Matrix Panels - https://www.adafruit.com/products/555
- 6 10-pin short socket IDC cables https://www.adafruit.com/product/556
- Sparkfun ESP8266 Thing Dev https://www.sparkfun.com/products/13711
- 2 Sparkfun 4-channel Logic Level Converters - Bi Directional (or 1 8 channel one) https://www.sparkfun.com/products/12009
- USB cable or 5V power source
- 2 feet aluminum angle - something like http://www.homedepot.com/p/Everbilt-2-in-x-96-in-Aluminum-Angle-with-1-16-in-Thick-802607/204273998
- Hot glue, screws, hookup wire
Setup
Chain the three panels together using adafruit's tutorial. Remove the J5 jumpers if present. https://learn.adafruit.com/16x24-led-matrix/multiple-displays
Grind the aluminum angle to the proper length and use hot glue to mount it to each side of the matrices. 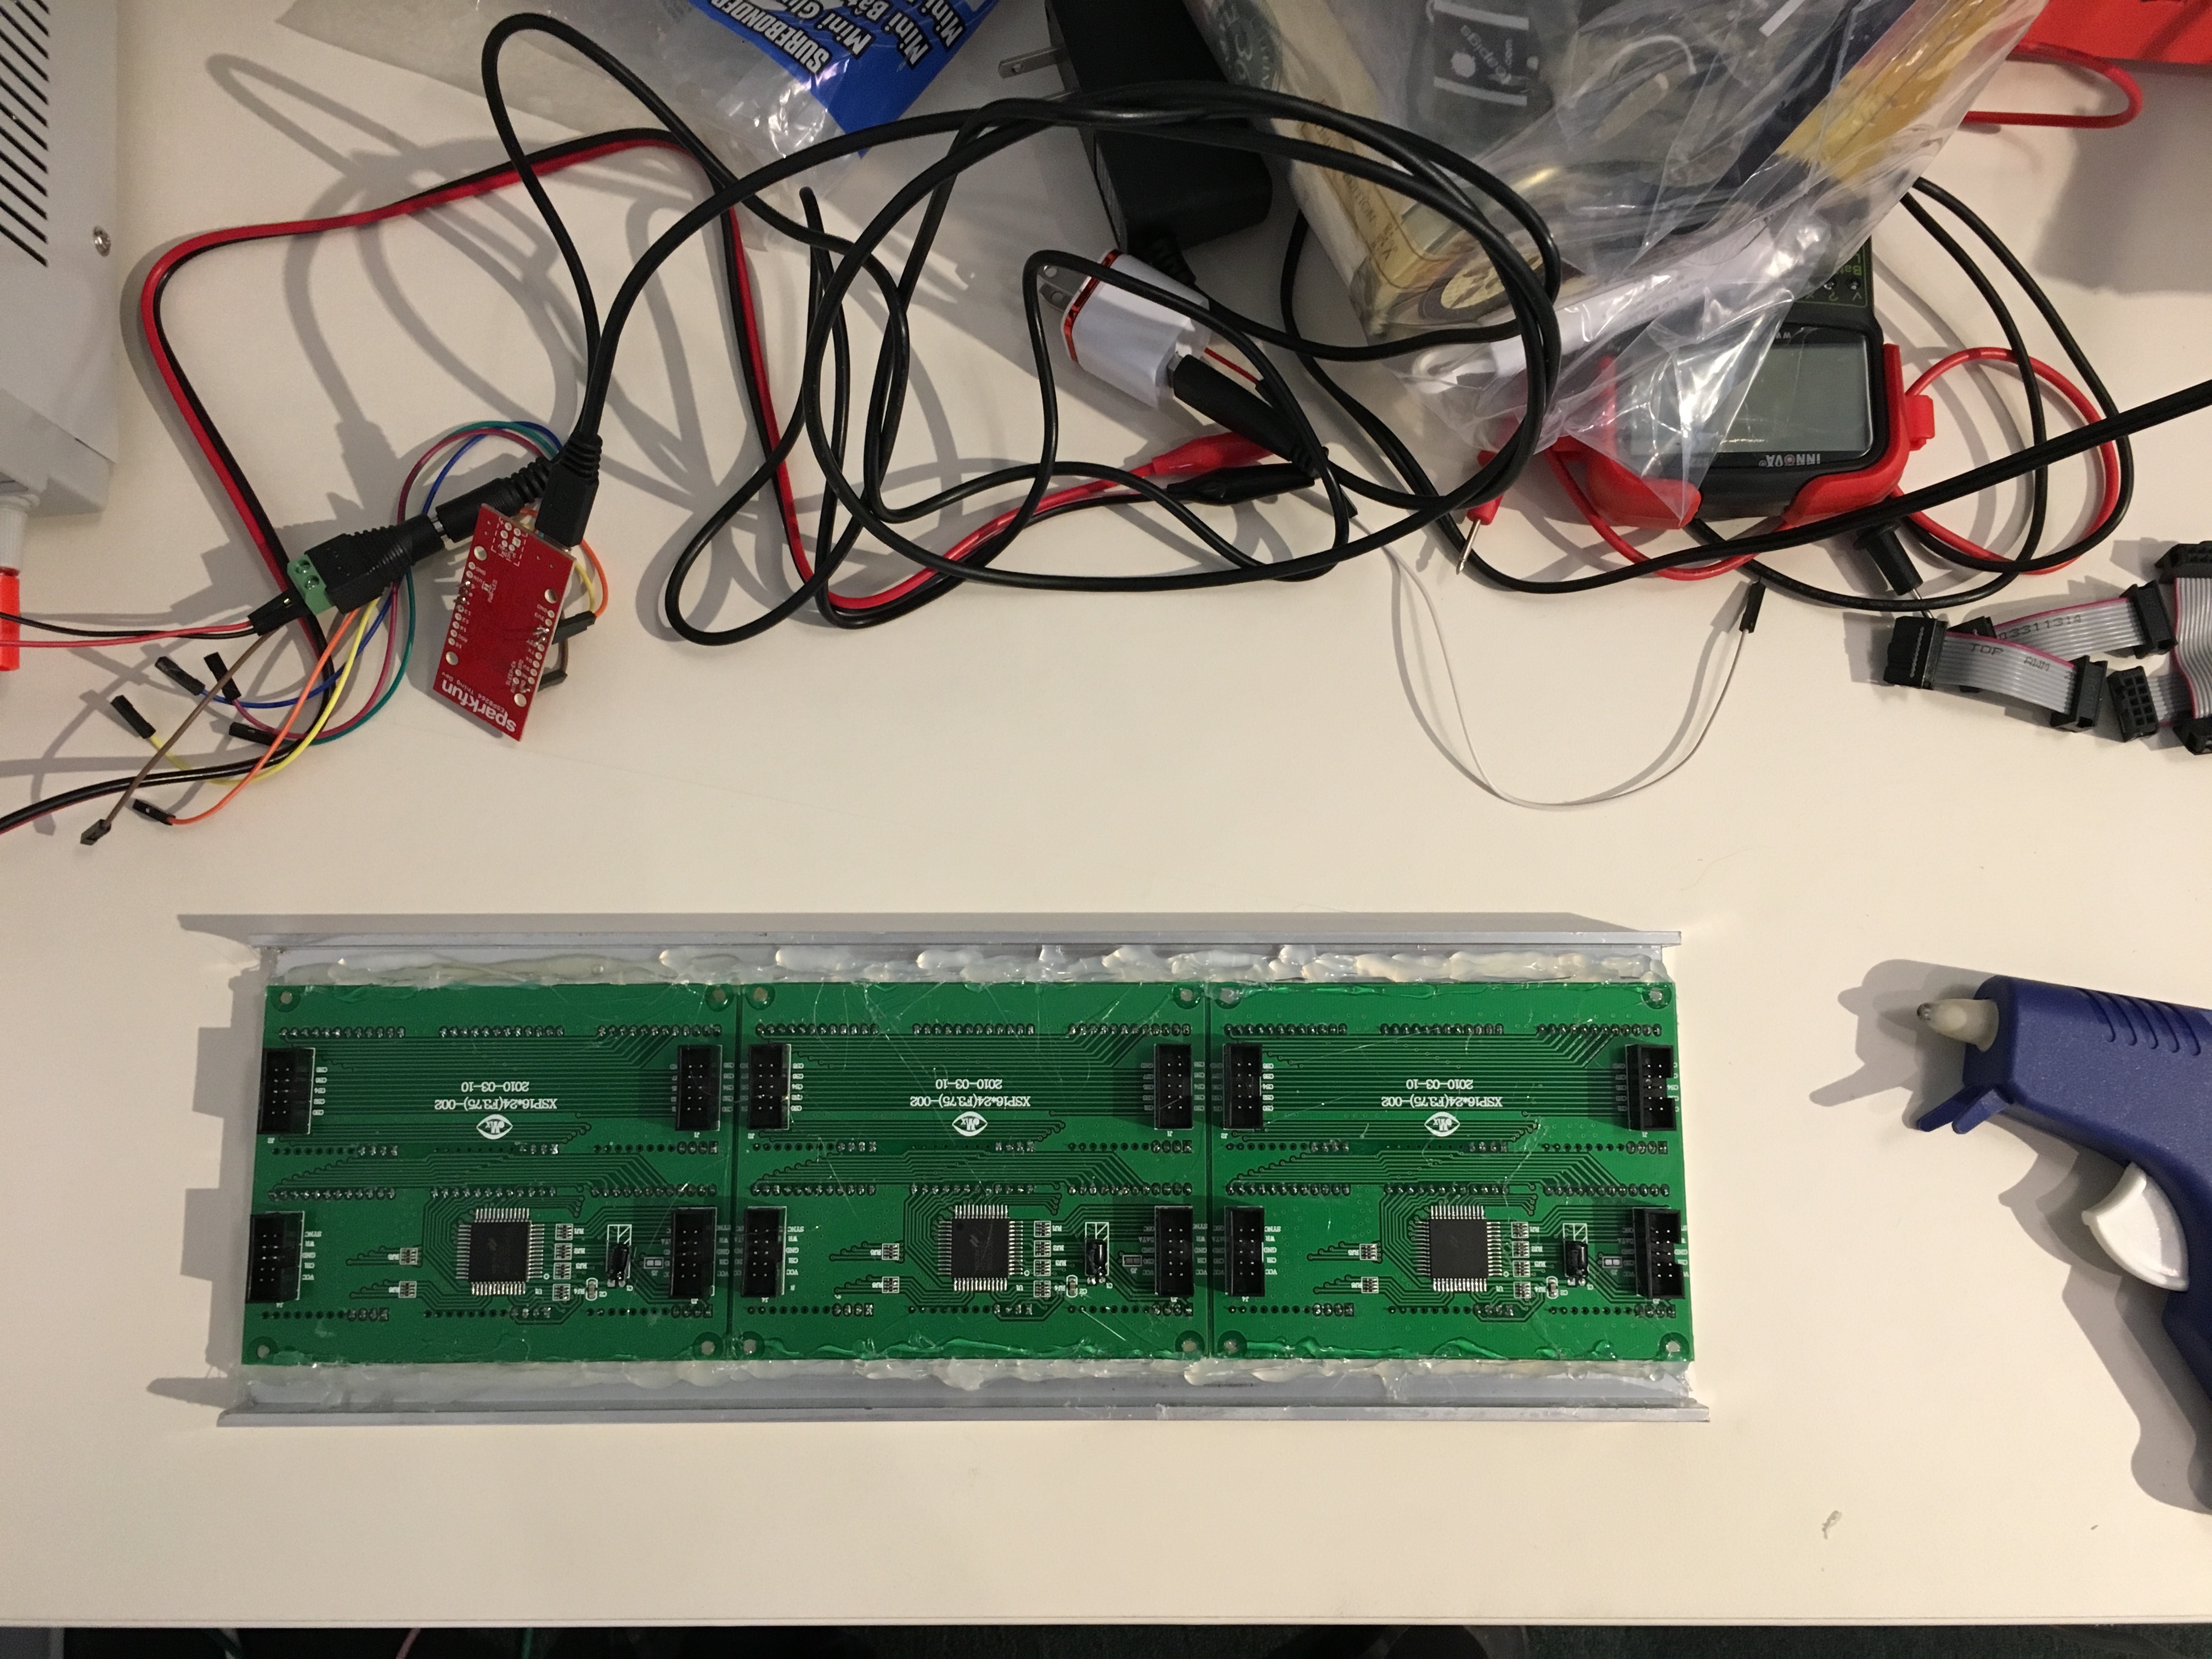 I used additional wood and hot glue to make a mounting bracket and support for the boards.
Splice a Y cable to hook up the 3.3V from the Thing Dev to the LV on each Logic Level Converter.
Splice another Y cable to hook up the 5V from the Thing Dev to the HV on each LLC.
Connect two GNDs from the Thing Dev to GND on the LV side of each LLC.
Connect the GNDs from the HV side of the LLCs to two GNDs on the Matrix Panels.
Each LLC has 4 channels. Use three channels on one LLC to connect the CS1, CS2 and CS3 lines to the Matrices. Use two channels on the second LLC to connect the Data and Write lines to the matries. All connections from the Thing Dev should be on the LV side (3.3V) and all connections to the matrices should be on the HV side (5V).
Connect the lines as follows:
GPIO 2 - LLC - to DATA on matrices
GPIO 14 - LLC - to WRITE
GPIO 16 - LLC - to CS0 (Matrix 1)
GPIO 13 - LLC - to CS1 (Matrix 2)
GPIO 12 - LLC - to CS2 (Matrix 3)
Connect your 5V power source to both VIN+ (by the USB slot) and VCC on the matrices, and grounds to both - and GND on the matrices. Alternatively, power through USB but chain from - and + on the Thing Dev to the Matrices VCC and Ground.
Code
Open up utcclock.ino in Arduino. Install the Sparkfun Thing Dev board and choose the Sparkfun ESP8266 Thing Dev in Tools > Board. This project also requires the following additional libraries:
Timelib https://github.com/PaulStoffregen/Time
Timezone https://github.com/JChristensen/Timezone
ESP8266WiFi, ESP8266mDNS and ESP8266WebServer (I believe these are installed with the board) https://github.com/esp8266/Arduino/
Enter in your SSID and password in the ssid and password variables, and click compile. If everything works you should see "CONNECTING WIFI", "SYNCING", and then the UTC and PST time.
To send a message with a web browser:
http://utcclock.local/sendmessage
(Or use the API directly with a GET or POST request, to utcclock.local with "message" as the only variable, up to 255 chars)
To lower the brightness to minimum:
http://utcclock.local/?brightness=1
To increase the brightness to maximum:
http://utcclock.local/?brightness=15
 Paul Andrews
 JK
JK
 Mike Szczys
 Gauthier Legrand