 Andrei Mehiläinen
The device connects to user stream and displays all the incoming tweets for that user. This basically means the same tweets the user would see on her Twitter main page. Additionally, a track paramter can be set to include tweets containing specified keywords.
The tweet currently shown on the display can be retweeted, liked and shared by sending link to it in direct message. This way user can easily access shared tweet on some other device.
Application uses Twitter REST and Streaming APIs and implements OAuth 1.0a authorization as described here.
Unicode is supported. Glyphs for all characters found in Arial Unicode MS font are embedded in the binary. The glyphs are regular and bold variants with the sizes of 10 and 13. The font size is automatically selected based on the length of the tweet. Additionally, word wrapping and keyword (hashtag) highlighting are performed for tweet text.
Building the hardware
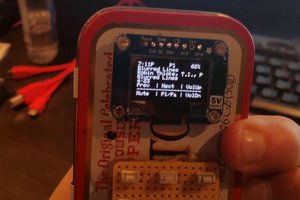
Any ESP8266 based module with at least 4 MB flash and SPI pins, such as ESP-12E, can be used. NodeMCU-DEVKIT is a good choice since it already contains 3.3 V regulator suitable for powering OLED display.
In addition to the display, there's a MPU6500 accelerometer connected on the SPI bus. Accelerometer is used for an automatic screen rotation. Devices on the SPI bus are connected in the following way:
| ESP8266 | SSD1322 | MPU6500 |
| GPIO5 | RESET | |
| GPIO4 | CS | |
| HMISO (GPIO12) | SDO | |
| HMOSI (GPIO13) | SDIN (D1) | SDI |
| HCS (GPIO15) | CS | |
| HSCLK (GPIO14) | SCLK (D0) | SCLK |
The SSD1322 based displays are quite common. One can be purchased e.g. from buydisplay.com or from AliExpress or eBay. The display's communication mode must be changed to 3-wire SPI in case it is not the default. Refer to the display documentation for the instructions how to change the mode. Usually some R0 resistors must be re-soldered.
There are two push buttons used for accessing the device menus. Both buttons are connected to the analog input pin of the ESP8266. Please see the schematics here.
Building the software
esp-open-sdk is a preferred toolchain for this project. Other toolchains may work too, but are not tested.
After cloning this repository, in the makefile you need to set paths to your SDK installation and set the name of the serial port used for flashing. To build everything, run:
make all
Due to the limitation of ESP8266 being able to directly access only addresses < 1 MB of the SPI flash, the font data is separated to its own segment and is read indirectly. Slightly modified versions of the linker script and esptool are needed for producing the font segment. Both, the linker script and the esptool, are included in this repository.
Flashing the binary
When flashing for the first time, the font data needs to be flashed. Run
make flashallThis will flash the application segments and the font segment. The operation takes a few minutes even at the high baud rate, but it only needs to be done once if the font is not changed. From now on,
make flashcan be used. It only flashes the application segments, which is much faster.
Usage
Device settings can be changed through the serial interface (115200/8-N-1). The following syntax should be used:
parameter:value<CR>At least the following parameters must be set by the user:- ssid - WiFi SSID
- pass - WiFi password
- consumer_key - Twitter Consumer Key (API Key)
- consumer_secret - Twitter Consumer Secret (API Secret)
- access_token - Twitter Access Token
- token_secret - Twitter Access Token Secret
In order to obtain Twitter keys, user must create a new Twitter app with her own account:
- Go to https://apps.twitter.com/app/new
- Fill the form (content doesn't matter).
- When the app is created, go to Permissions tab and check that the app has at least Read and Write permissions.
- Go to Keys and Access Tokens tab and copy the keys into the device.
The device should now be able to login to Twitter with the user's account and display tweets from the user's stream. To include additional tweets into the stream, the following parameters can be used:
Please see the...
Read more »


 mikeneiderhauser
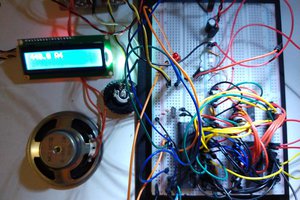
 Ken Yap
 sgall17a
 WJCarpenter
It's fantastic! Could i test it on my ESPboy? It's also ESP8266 based but have oled 128х64...