The initial bugs are worked out of the Arduino code for the ESP8266. Pushing and holding the “sump low” button triggers the “sump pump” LED simulating the sump pump running. Then pushing the “sump high” button turns the LED off simulating the sump pump stopping.
I decided to use DS18B20 temperature sensors for the nutrient solution and ambient temperature sensing. These sensors are reasonably accurate, small, inexpensive, and have good Arduino library support.
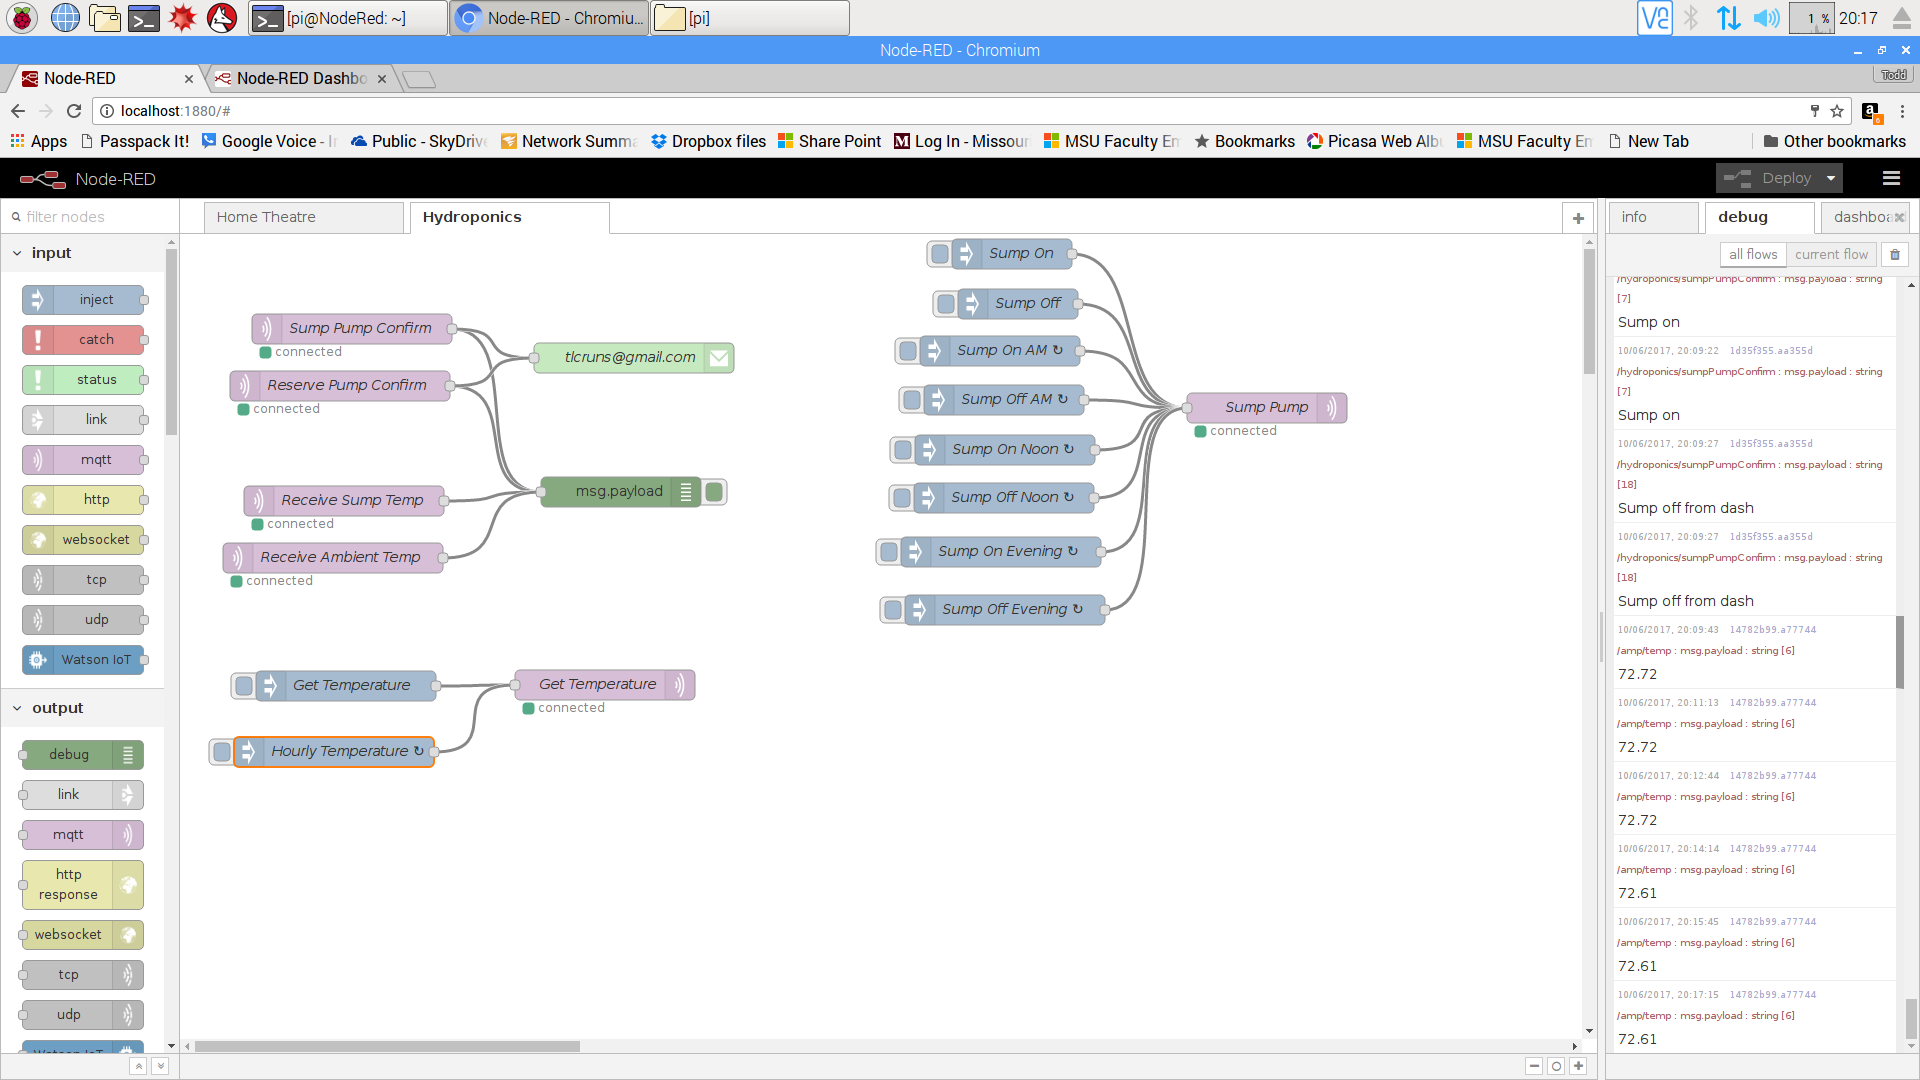
I started work on the flow description in Node-Red running on the Raspberry Pi that will control everything. If you aren’t familiar with Node-Red, Richard Wenner did an outstanding step-by-step overview and installation YouTube tutorial at: https://www.youtube.com/watch?v=WxUTYzxIDns&t=379s
My initial flows look like this:
/hydroponics/sumpTemperature --> requests sump temperature
/hydroponics/ambientTemperature --> requests ambient temperature
/hydroponics/sumpPump --> Turn sump pump on(1)/off(0)
/hydroponics/reservePump --> Turn reserve pump on(1)/off(0)
/hydroponics/sumpPumpConfirm <-- Confirm receipt of sump command
/hydroponics/reservePumpConfirm <-- Confirm receipt of reserve command
I am using the Node-Red time inject function to turn the sump pump on at 07:00, 12:00 and 19:00 and run for 30 minutes each time. The ESP sends a confirmation which I display in the debug window as well as sending me an email for now. Since this is Wi-Fi and the ESP is going to be out in the garden I need some assurance, at least in the beginning, that it is receiving both pump on and off commands. For now the Pi is requesting both temperatures every hour (using Node-Red inject) and displaying them in the debug window. I intend on either logging these temperatures locally or possibly doing an integration with my Azure account.
Discussions
Become a Hackaday.io Member
Create an account to leave a comment. Already have an account? Log In.