 Sophi Kravitz
I'm so excited that Blue Stamp Engineering is using this design for their engineering summer camp in NYC.
This is how to program the ESP8266 on the blimp PCB (note that the joystick uses an Adafruit Feather ESP32):
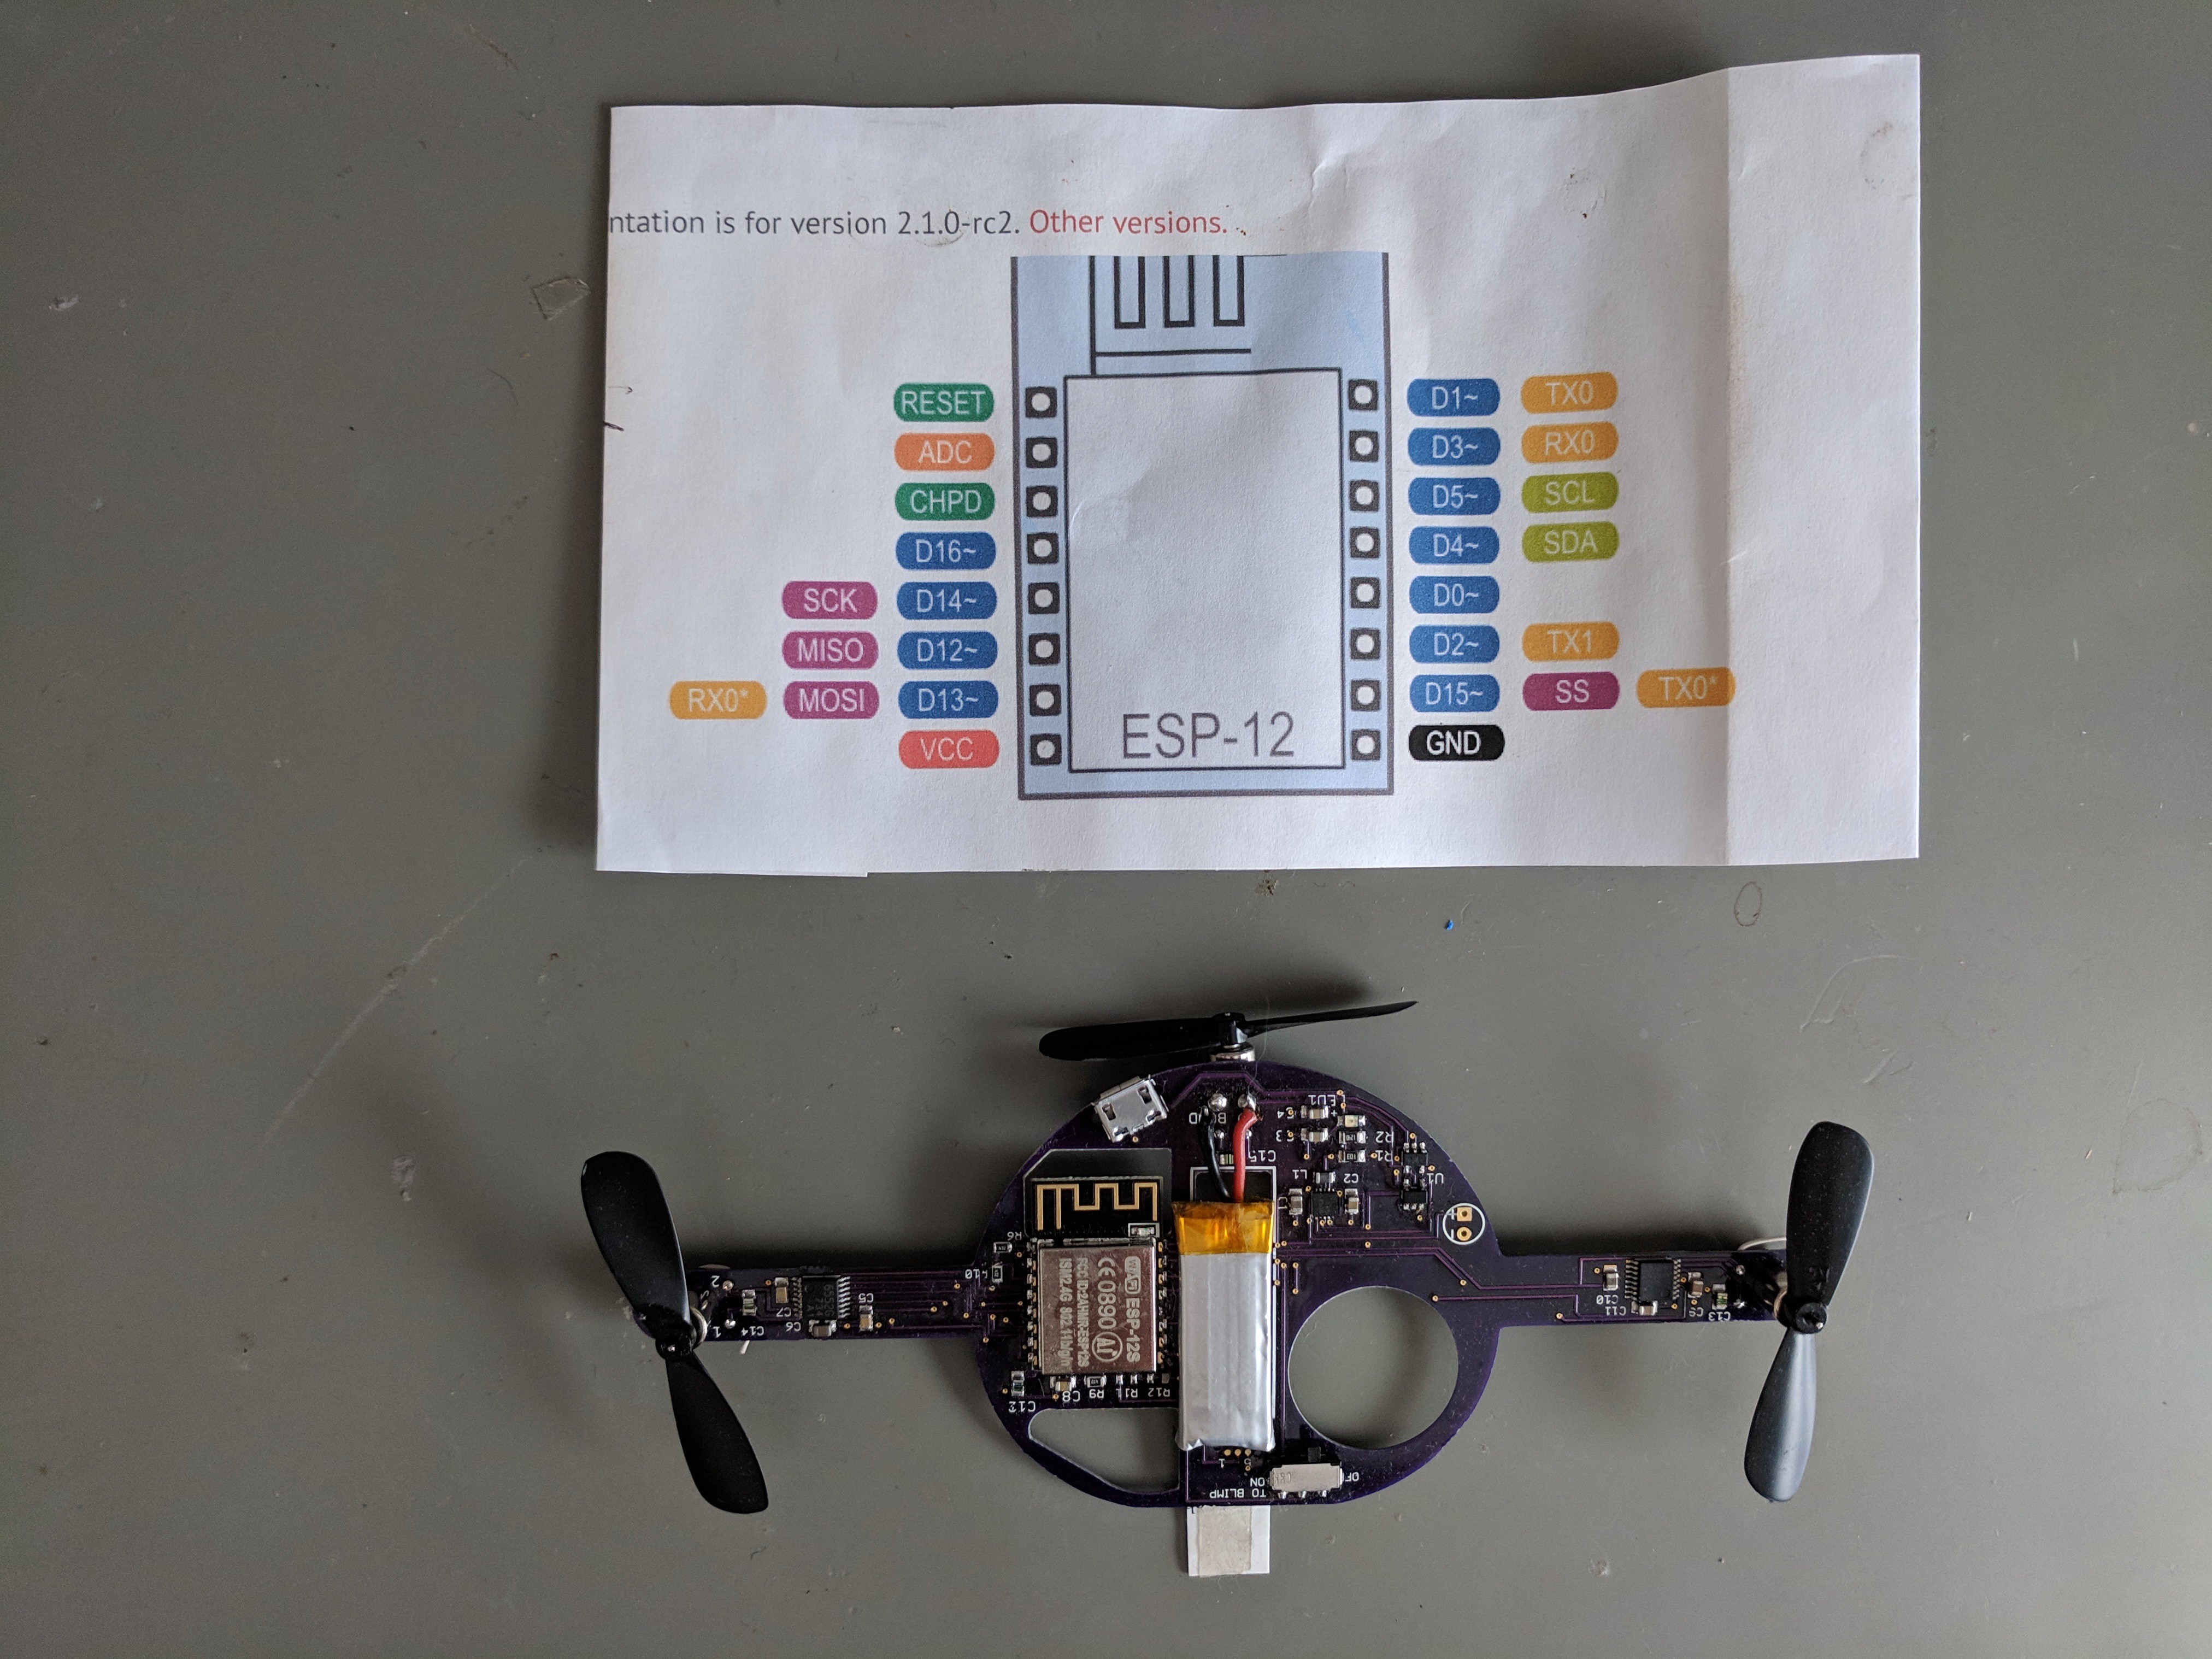
Shown here is the pinout for the ESP8266. To program it, the process is to hold D0 low, while hitting reset. D0 stays low while programming. I use a tag-connect cable PN TC2030-FTDI-TTL-232R to program the ESP8266.
Adafruit builds the programming circuit into their ESP8266 Feather board with a latching circuit (transistor). Their Huzzah board has two switches that go to Reset and D0 which you manually toggle in order to program.
These examples are excellent, and useful. However, the blimp has weight constraints so there is no room for switches or transistor circuits.
To program the board, I solder temporary wires onto the reset pin (pin1), and D0 (pin 12).
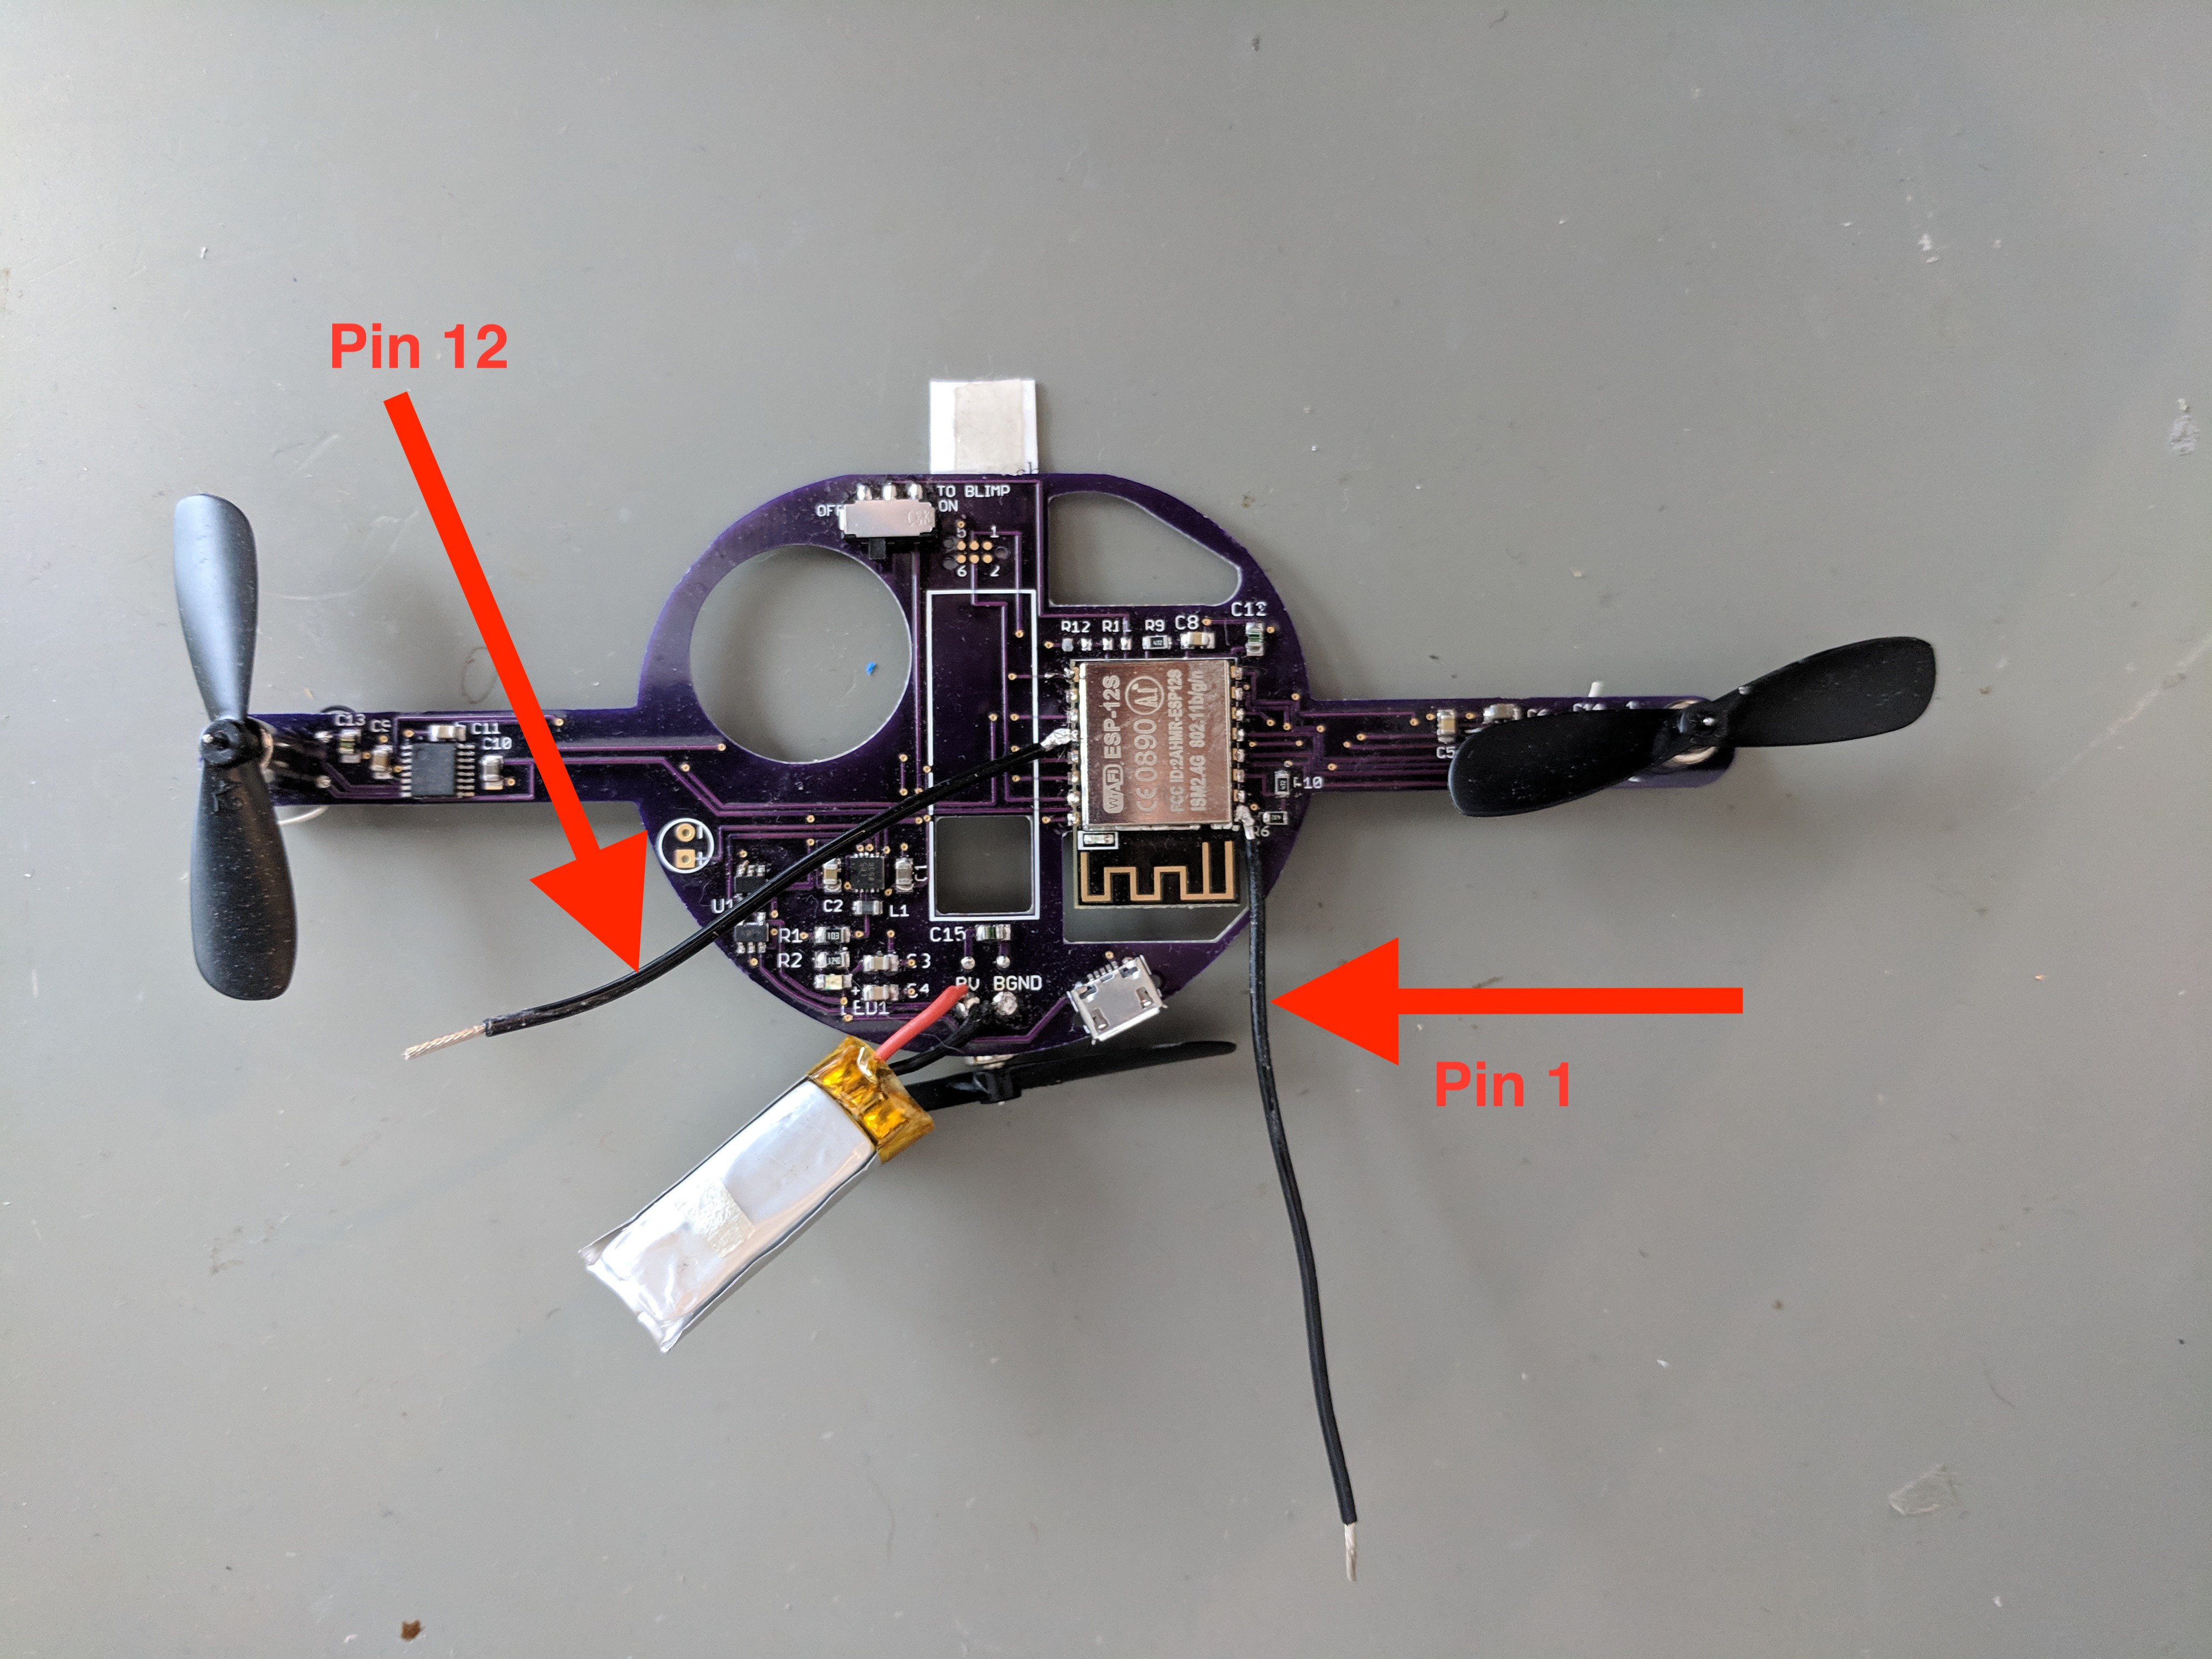
It also helps to have an extra ground wire dangling from somewhere- you can use an alligator clip from BGND to D0. Sometimes I desolder the battery and use the benchtop power supply to power the board (sometimes called the target) while programming.
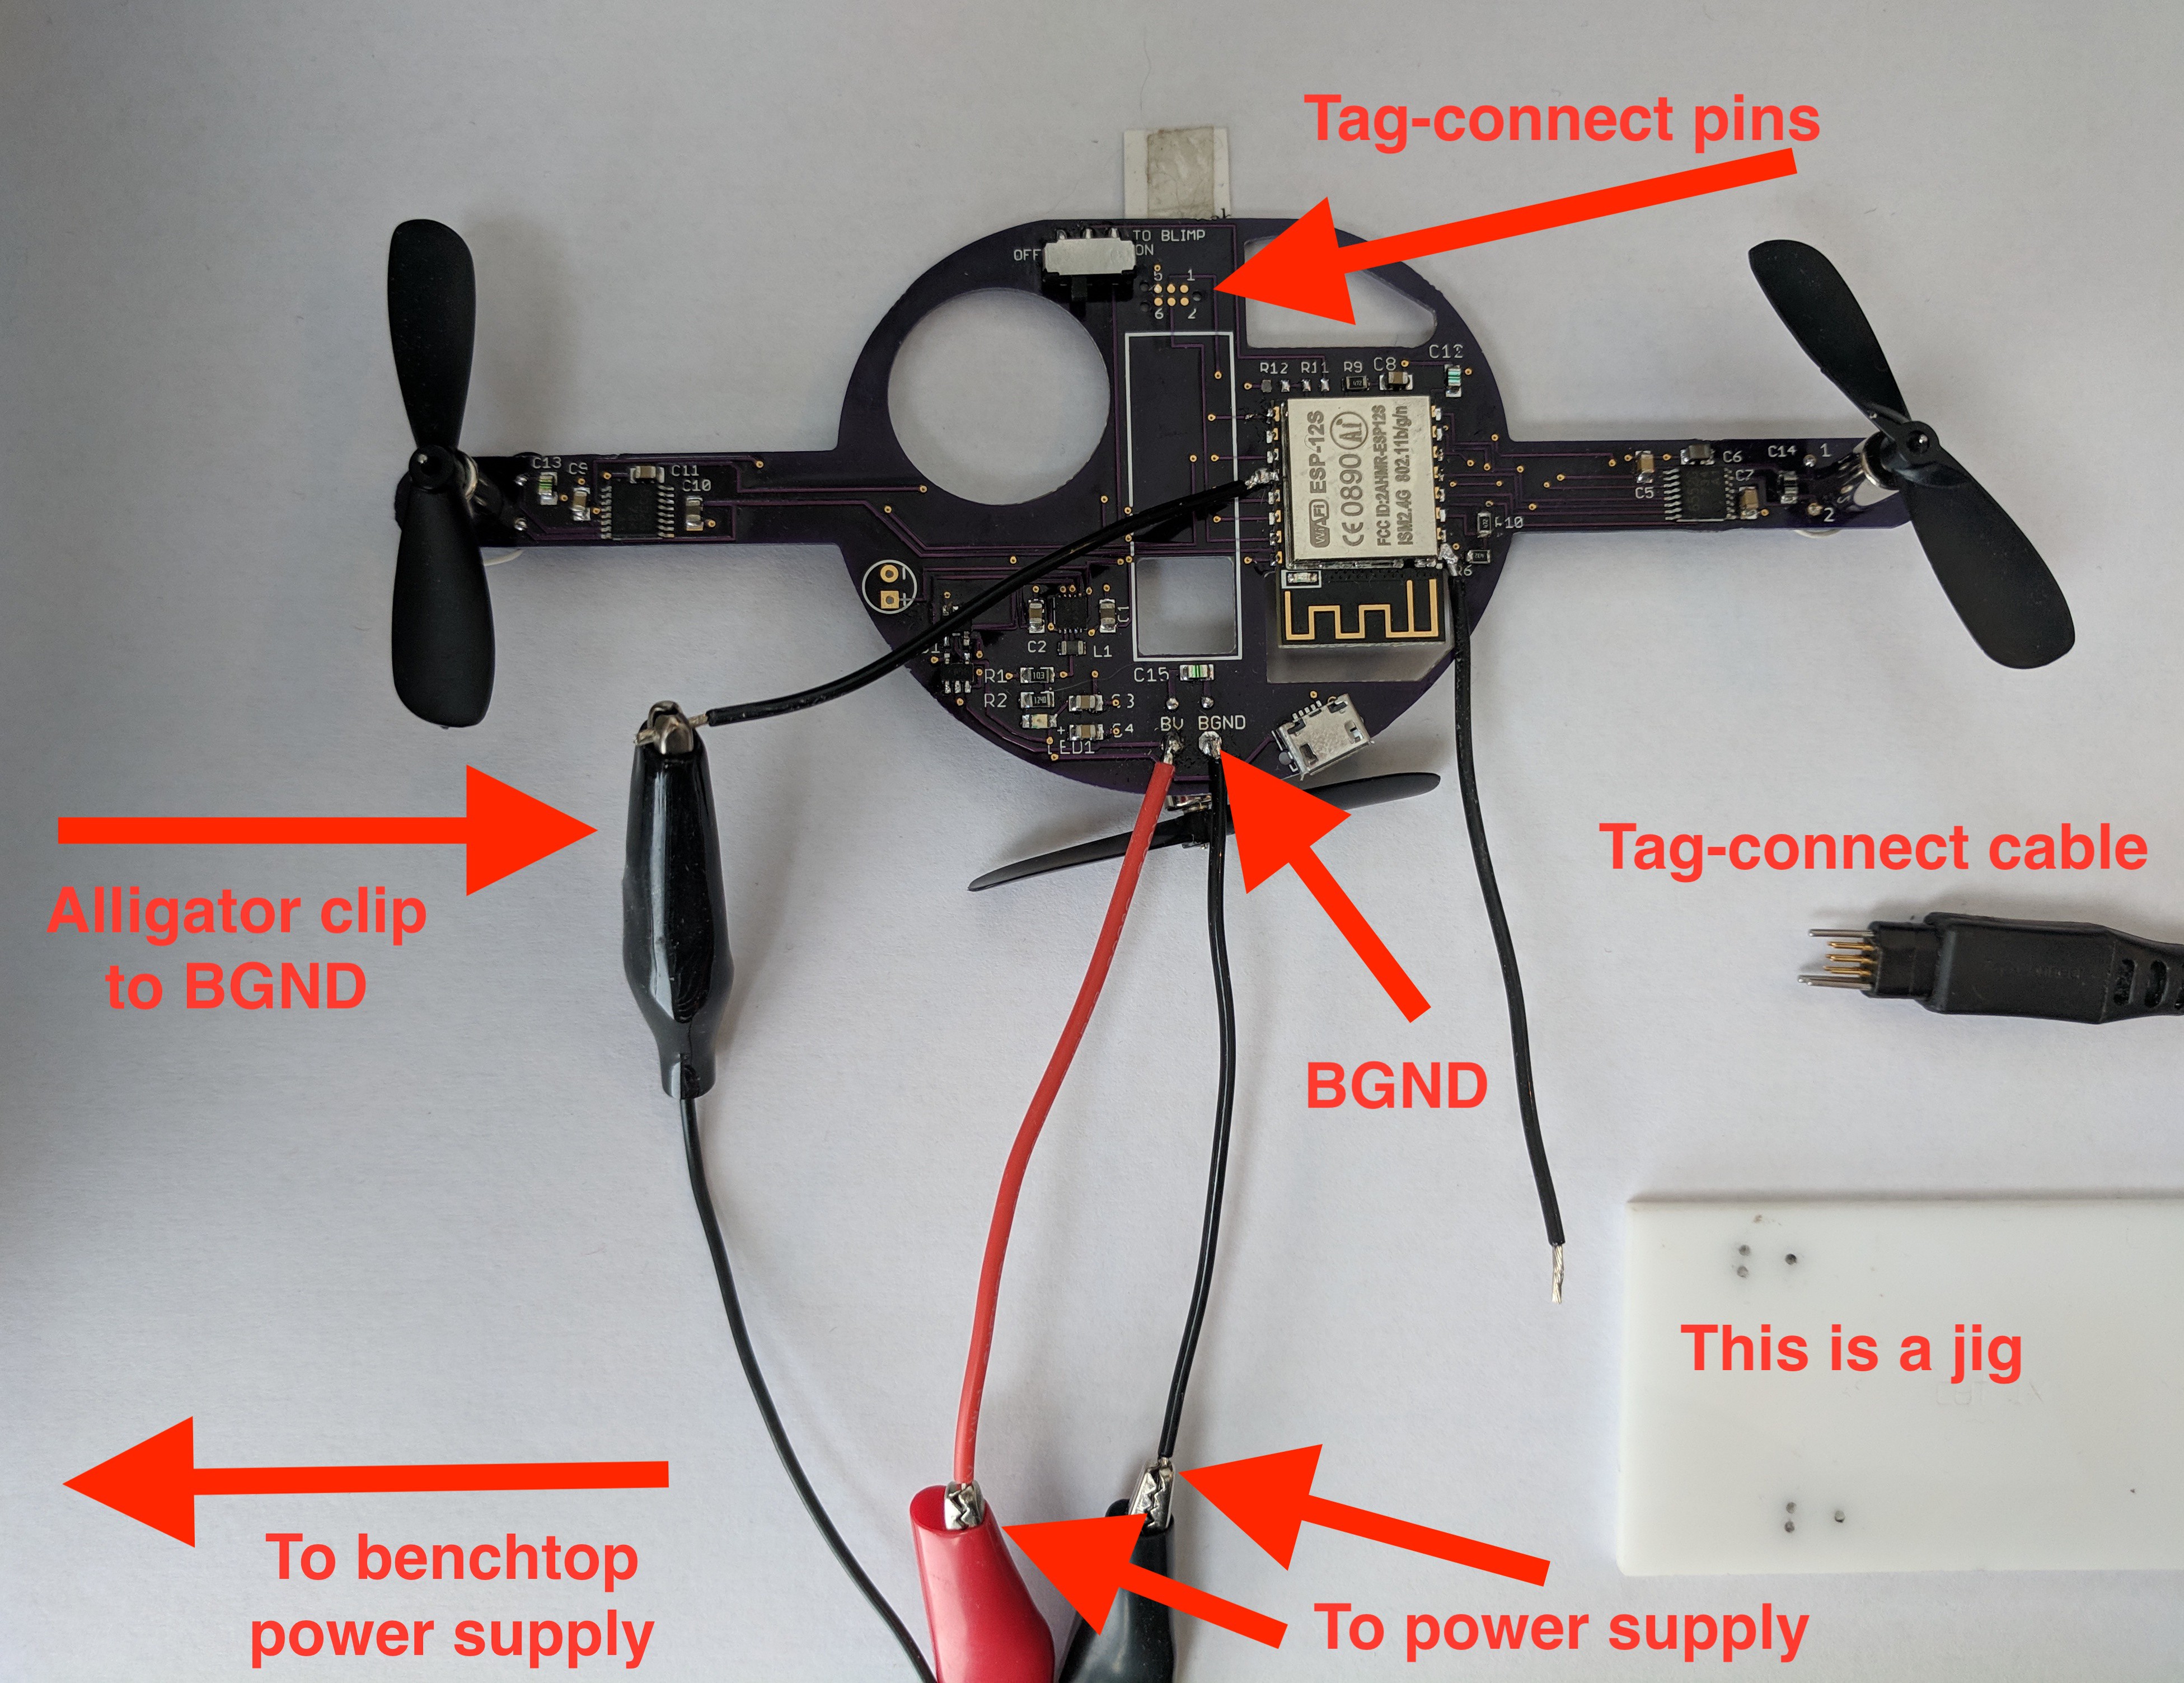
There's a lot going on in the above image. This is how to connect the board:
- Benchtop power supply to anywhere between 3.4 and 4.2 V is connected to BV and BGND (B stands for battery).
- Alligator clip from BGND to D0.
- Tag-connect cable from USB on computer to tag-connect pins on board.
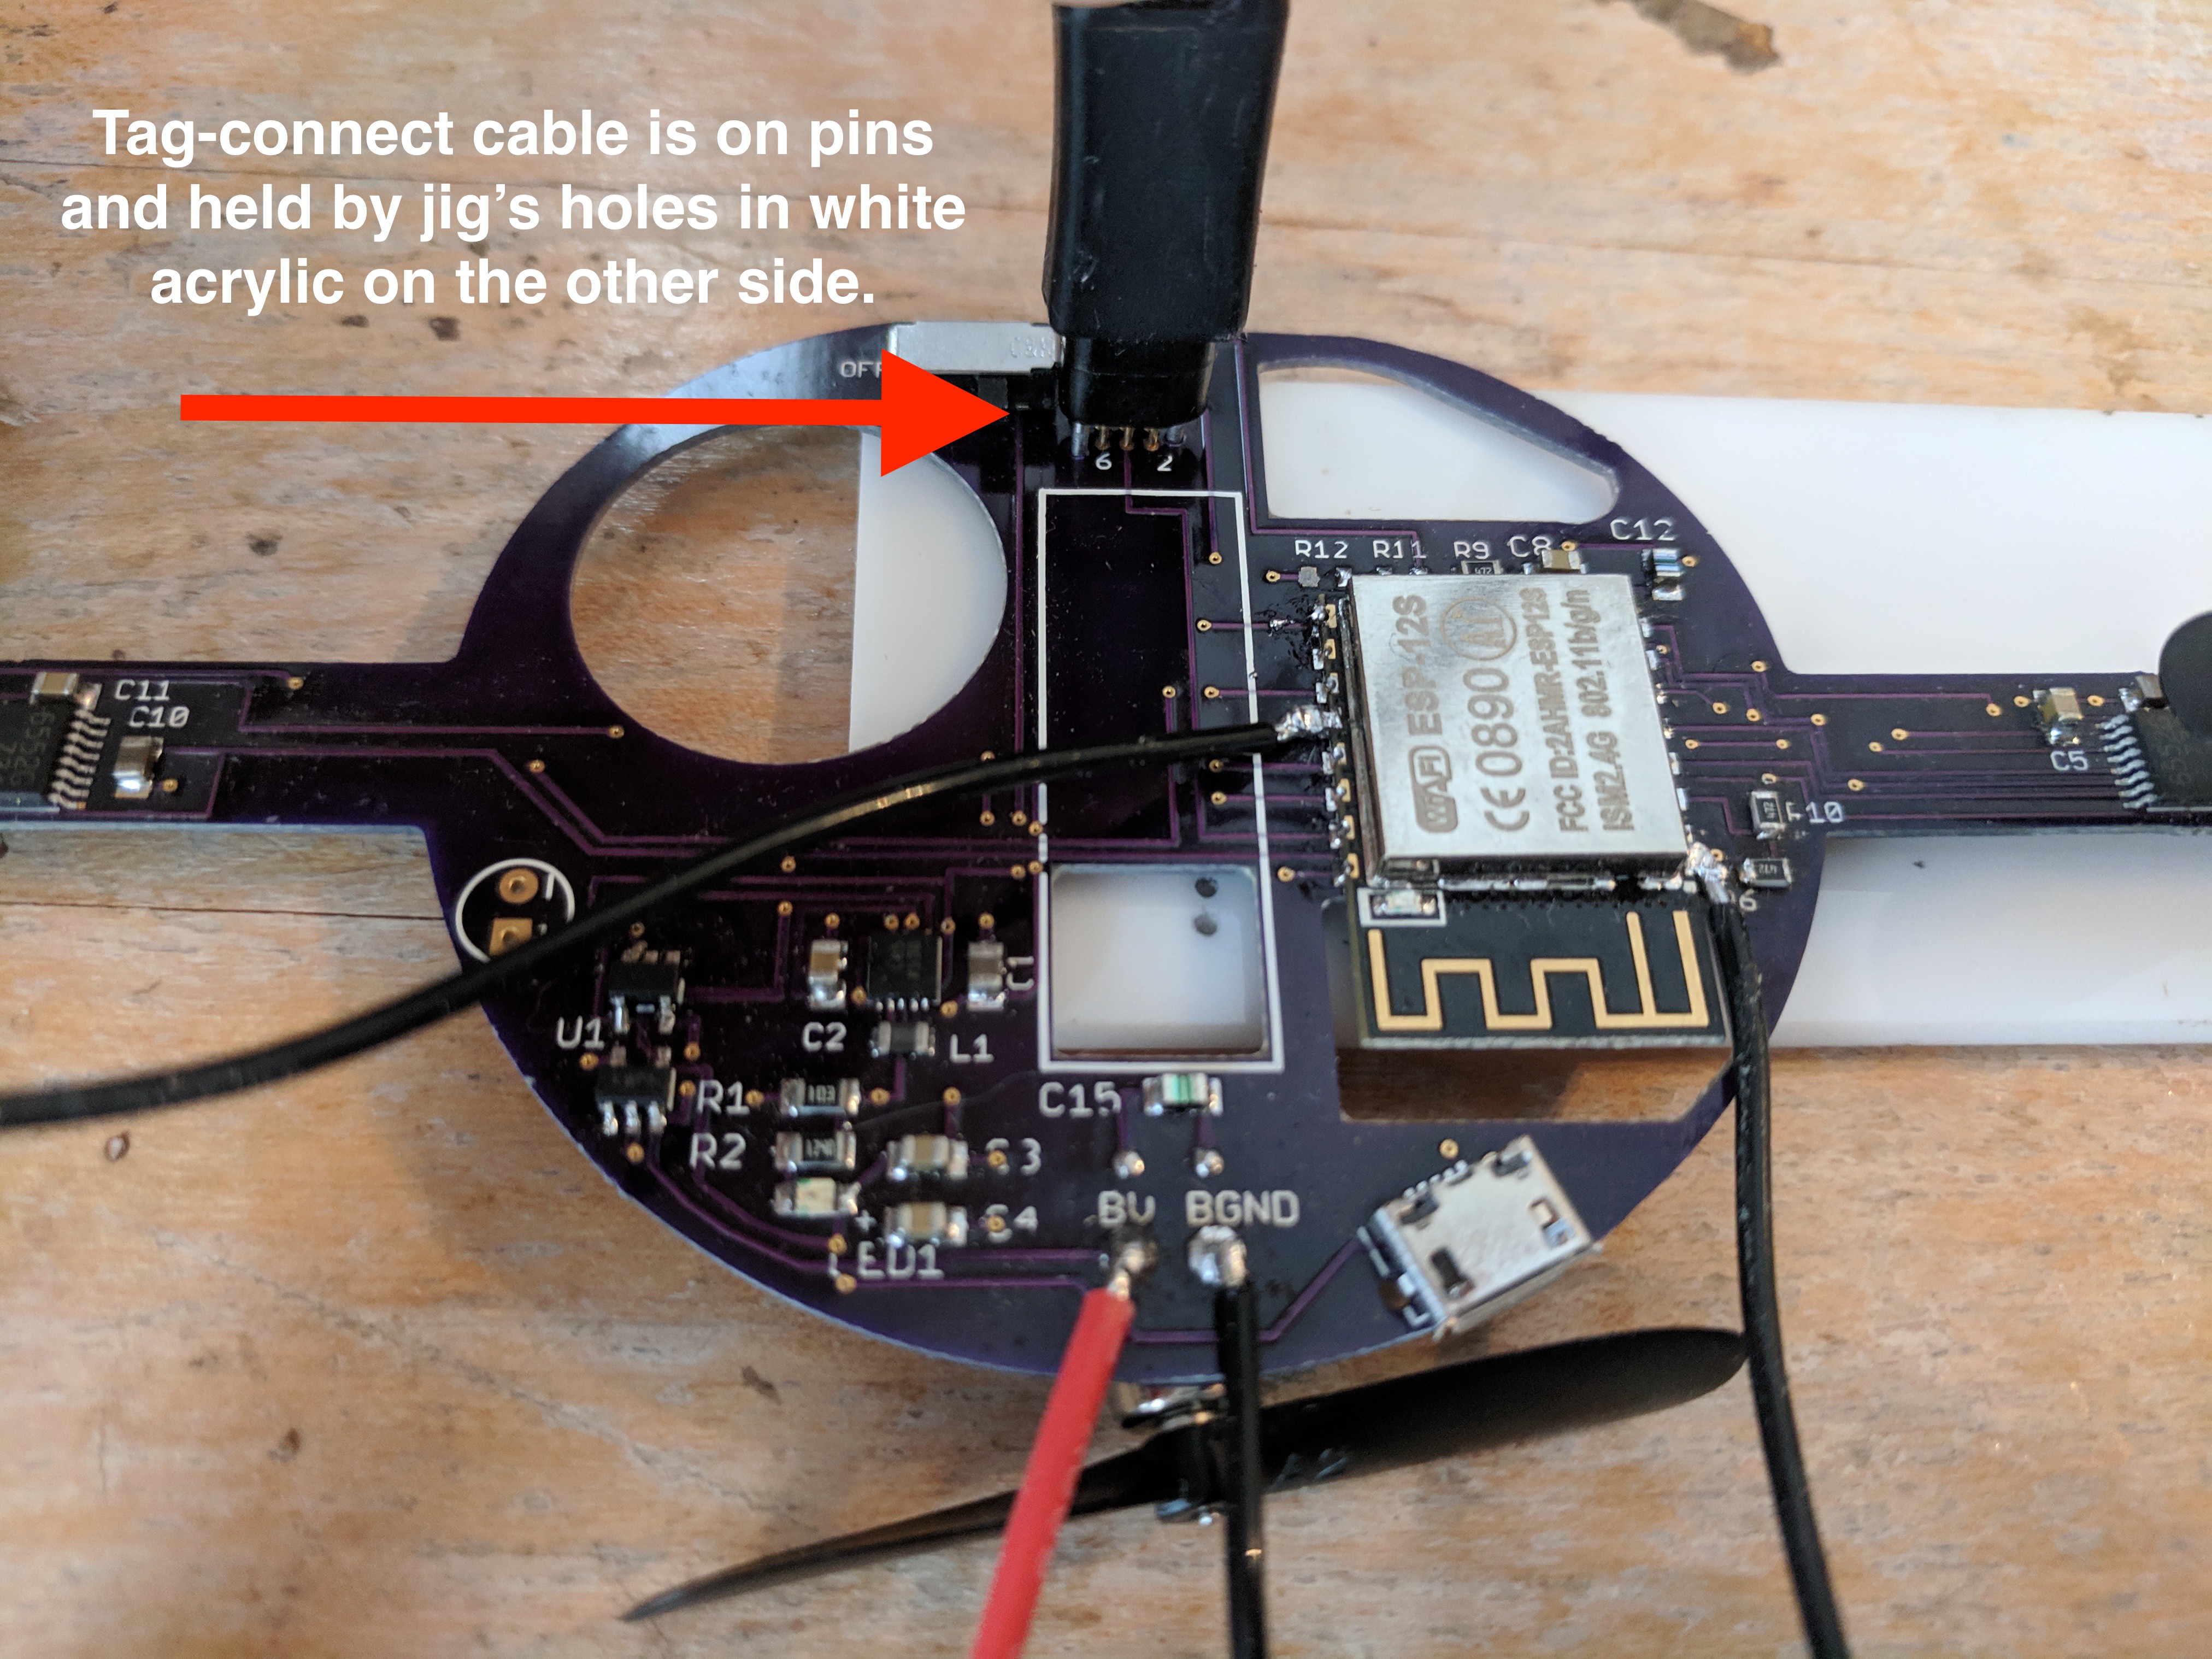
On the image below, I'll show you how the tag-connect jig works. You don't need a jig at all, but the holes in the white acrylic that line up with the tag-connect holes works quite nicely. A second person to hold the cable works quite nicely too ;)
Now that you're connected, here are the programming steps.
- Attach D0 to GND (alligator cable)
- Touch reset to ground. The black wire on pin 1 should be long enough to touch either the alligator cable or GND somewhere else. There is only one GND on the board (no separated GND planes).
When you touch reset, you should see the blue light on the ESP8266 blink. If you do not see a blue light, make sure that you've turned the switch located at the top of the board on.
- Open the Arduino IDE and load in the blimp server file. Your Arduino folder should look like this:
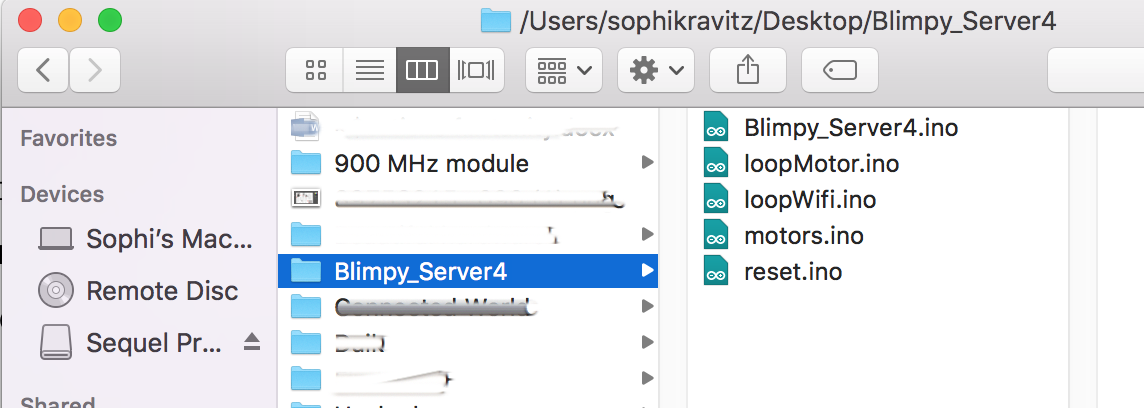
If your folder is organized like the above, when you open the Arduino file Blimpy_Server4.ino, it will look like this:
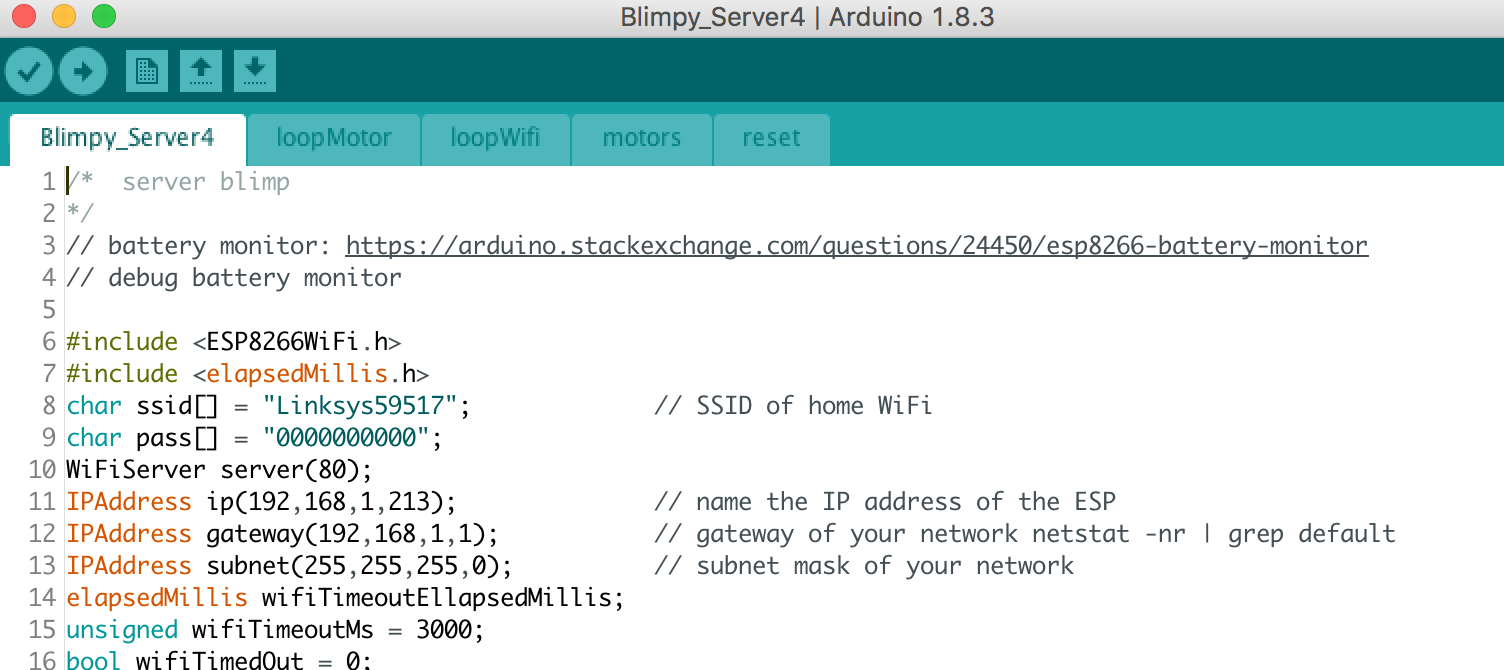
You can also put the file into one long thing rather than breaking it up. I find it easier to stay organized with tabs for different sections of code, but YMMV.
Please note: you will need to add in your own SSID (line 8) and password (line 9). I use a local router which isn't connected to the internet (best) but you can use any router.
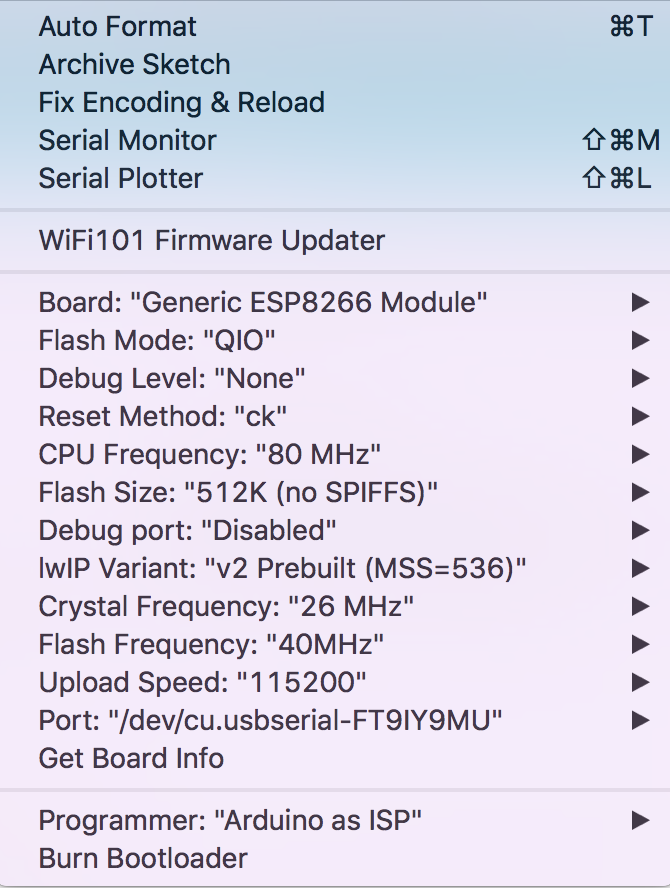
SETTINGS FOR ARDUINO UPLOAD
Tools > module > board: Generic ESP8266 module
Port > tag-connect, will have a few numbers
Programmer >Arduino as ISP
Once you've got all of that set up, you can upload! You'll see a line of dots appearing on the bottom of the Arduino IDE until it reaches 100%.
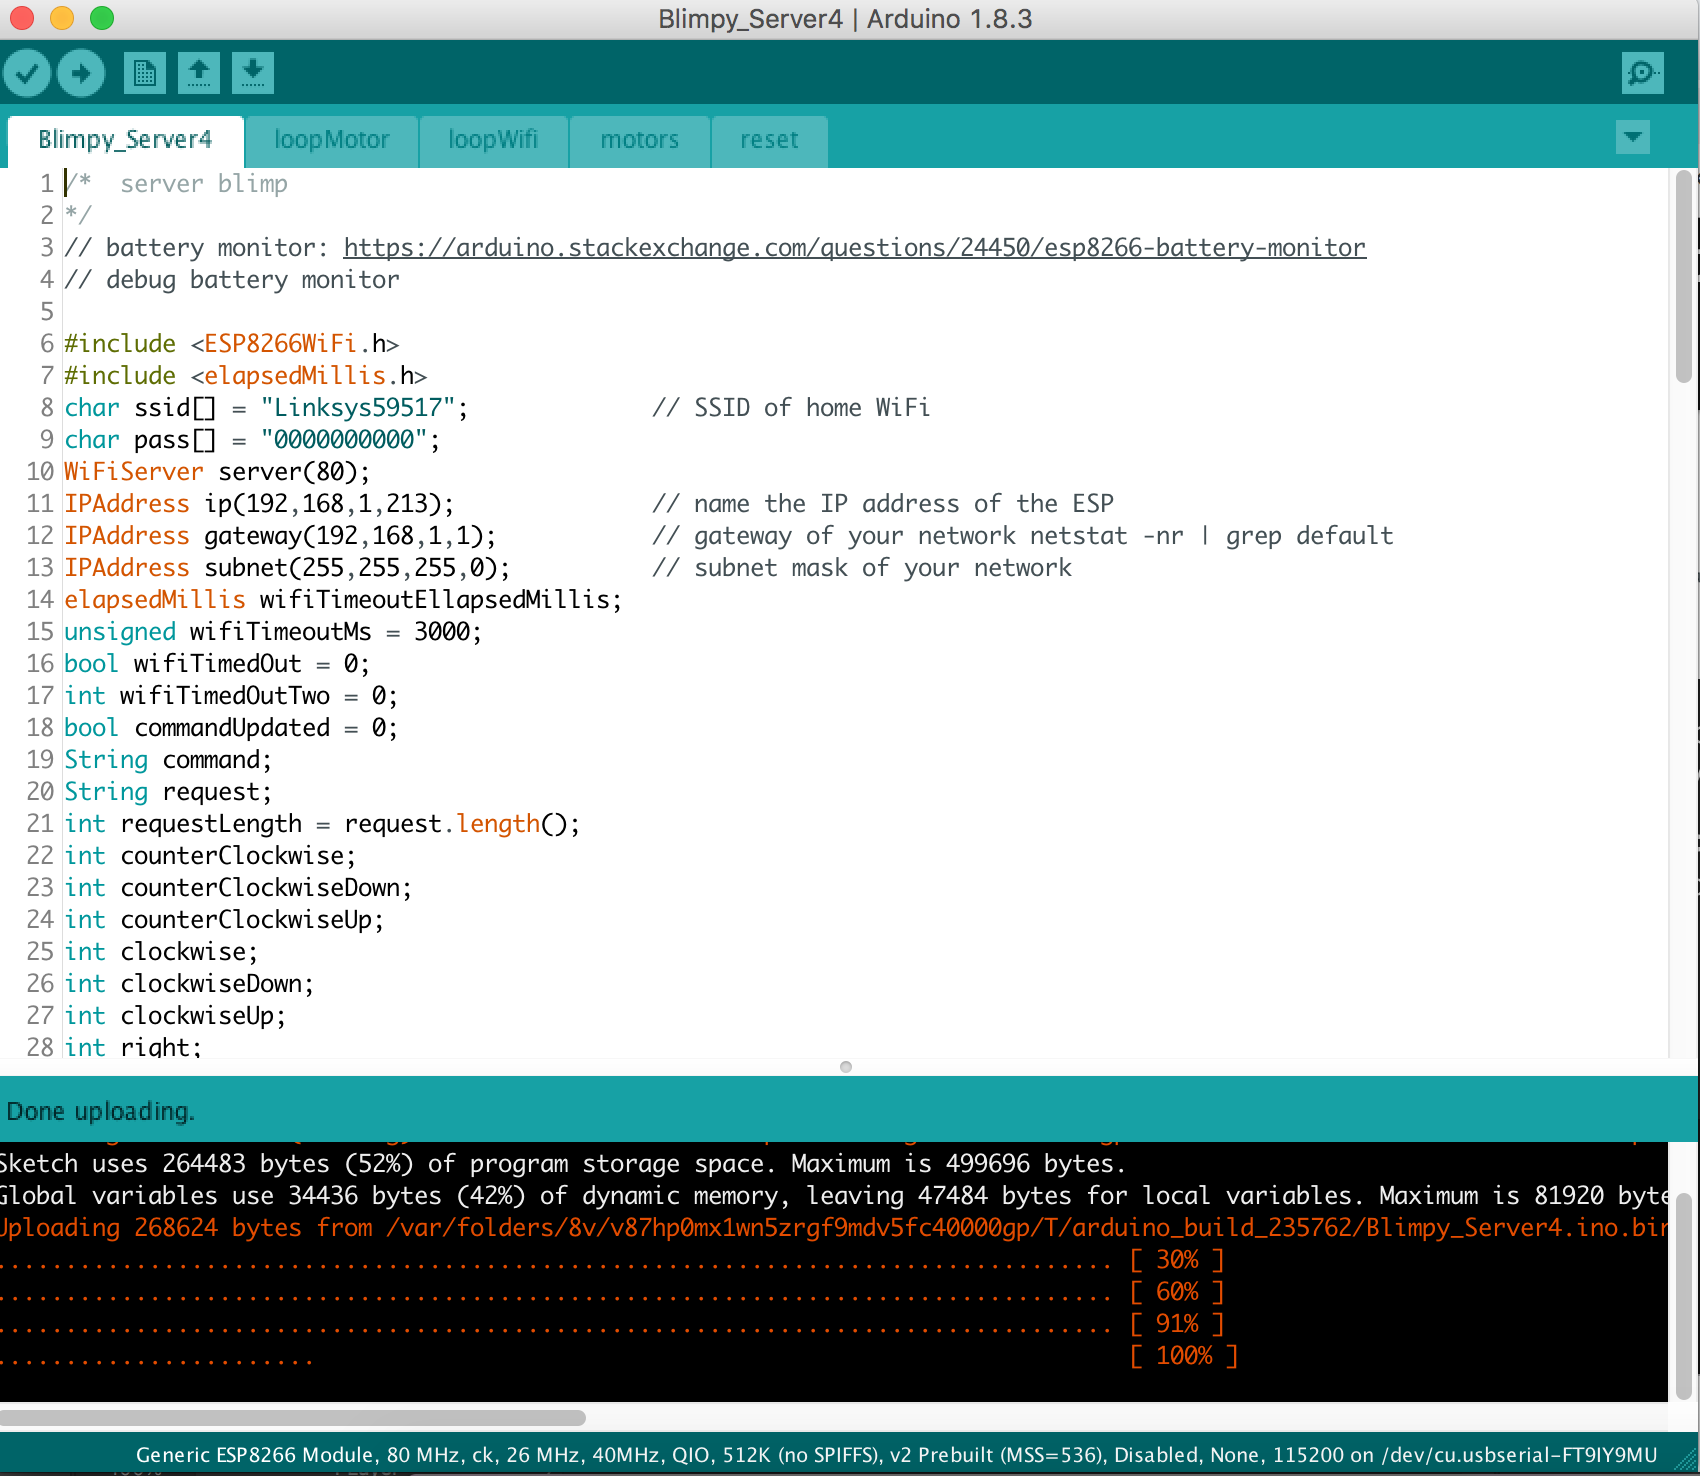
That's it!
The above directions are just for the blimp board itself (server). You'll need to upload the client to an Adafruit Feather ESP32, but that's quite straightforward.
Discussions
Become a Hackaday.io Member
Create an account to leave a comment. Already have an account? Log In.