 Pinomelean
Once the gears were in place, it was time to attach the legs to the rest of the mechanism and assemble it whole for the first time.
I noticed that i needed spacers for three joints in every leg. Those could be built by stacking washers until the stack was the right thickness. But i didn't have enough stainless washers for all eight legs, and didn't want to wait for shipping as i could only get them online.
I decided that i would have the spacers turned out of aluminium. This would be a tidier solution than a stack of washers, and would probably behave better in the mechanism.
[And yes, i can get machined parts in my city within a week but i can't find stainless washers of the right size. Go figure!]
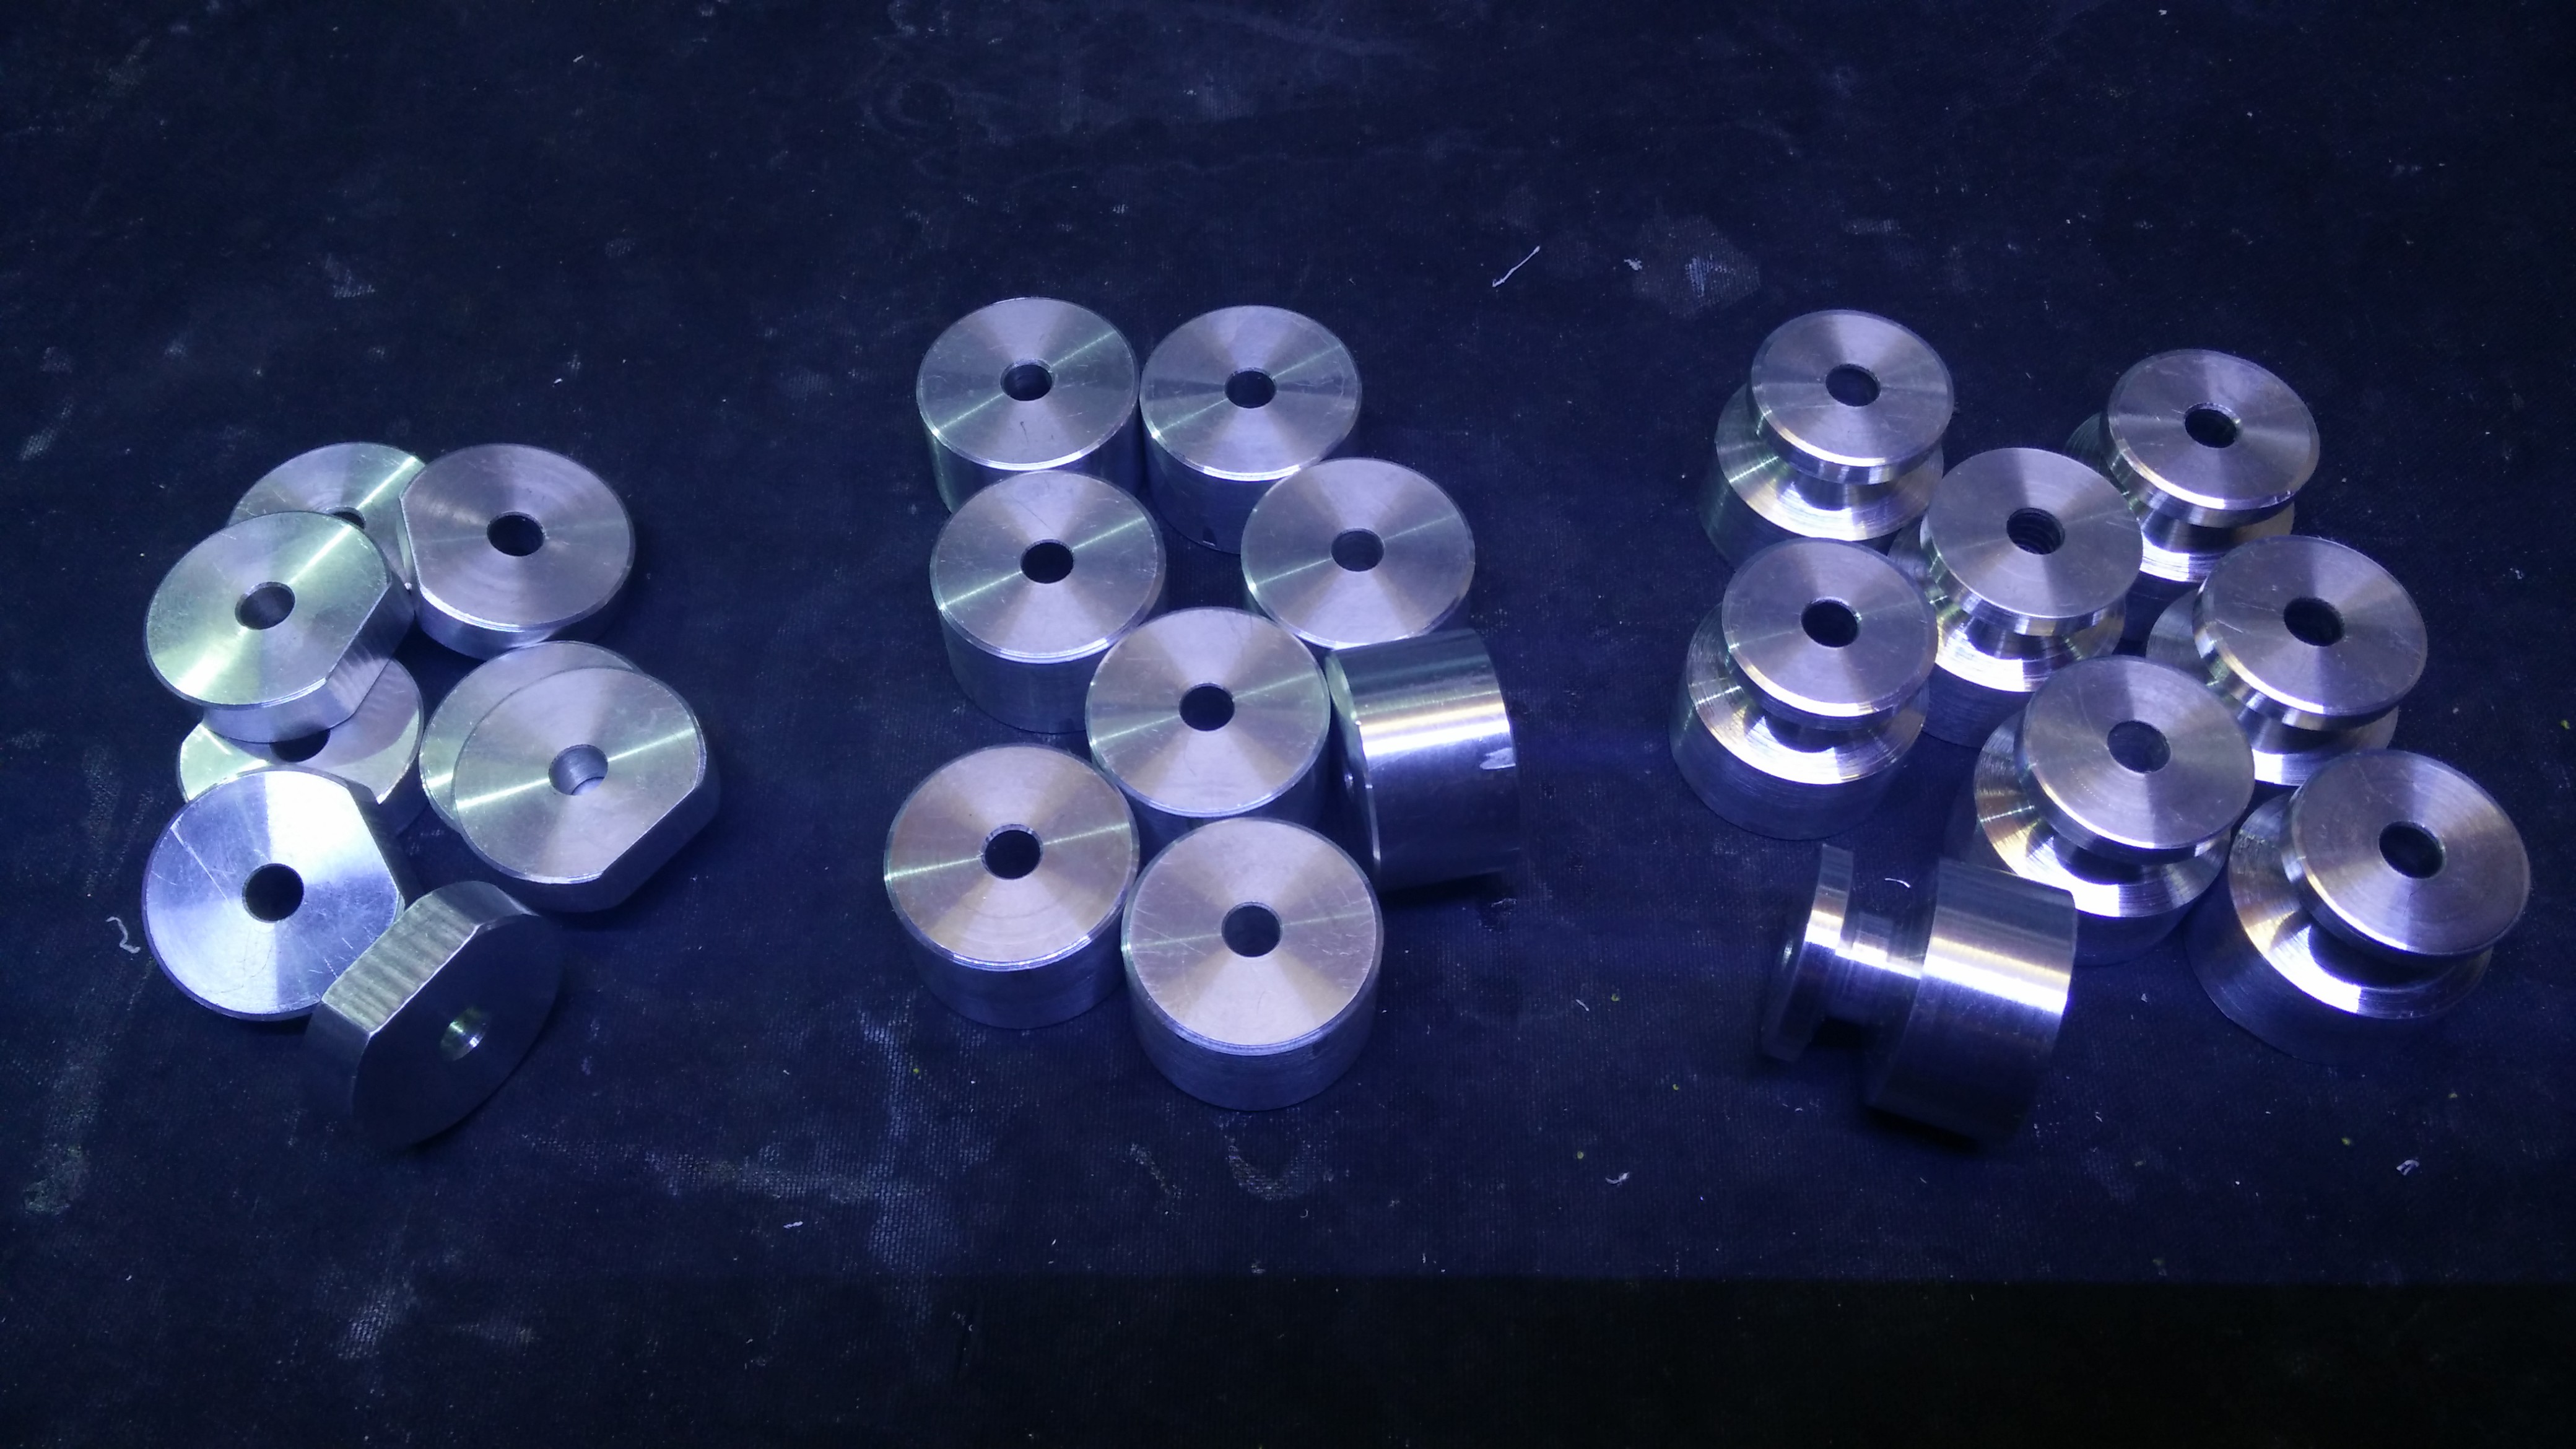 All the spacers have a 6mm hole in the center for the axles to pass through. The following are the ones i used (eight of each one):
The ones on the left are 8mm thick, 28mm in diameter and have a flat surface which can be made by filing or milling 1mm off the side.
The ones in the center are 17mm thick and 28mm in diameter.
The ones on the right are a bit more complicated, to avoid one of the linkage parts hitting an axle while in use, i had to design in a smaller diameter "neck" which would allow that part of the linkage to get closer to the joint. Here's a drawing that details this part (dimensions in mm):
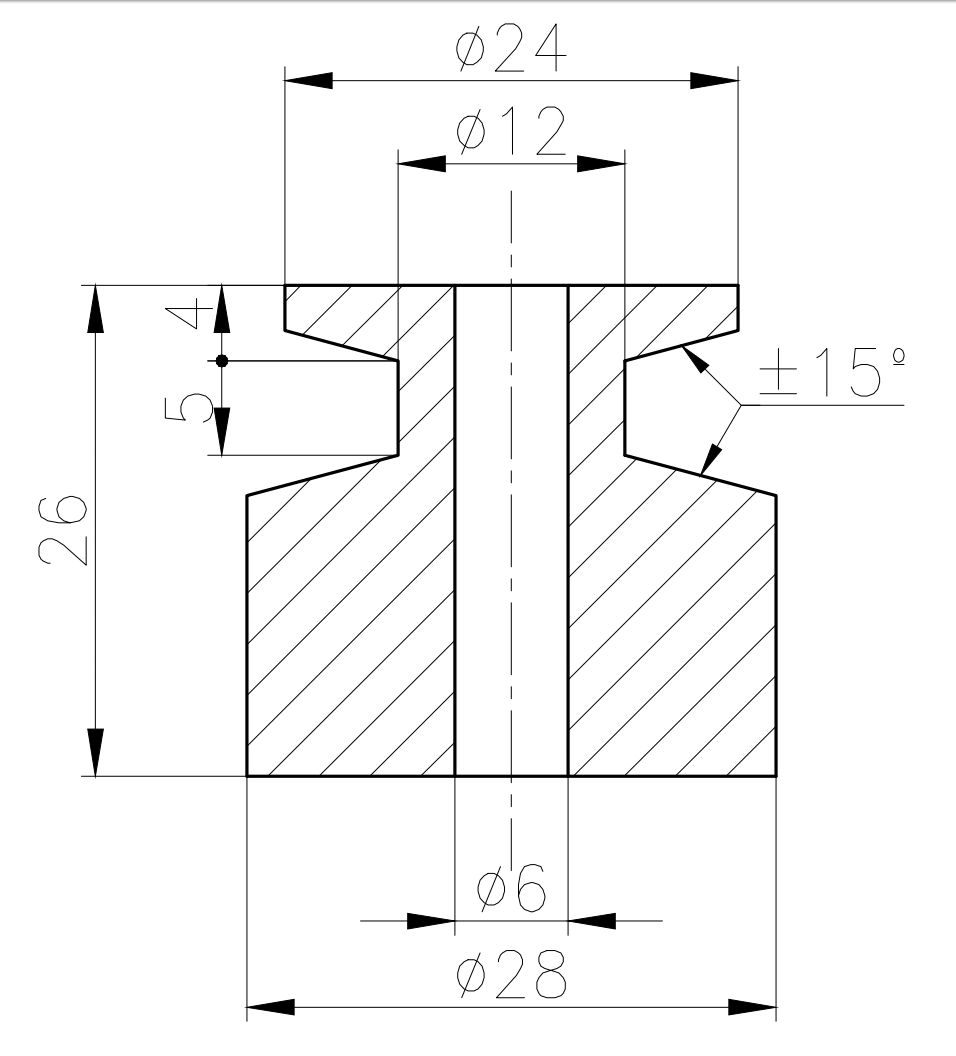
Had i noticed how close to the axle the other part in the linkage would get, i would have designed them with a different shape, but i noticed when fitting the legs to the mechanism, which was too late to change them.
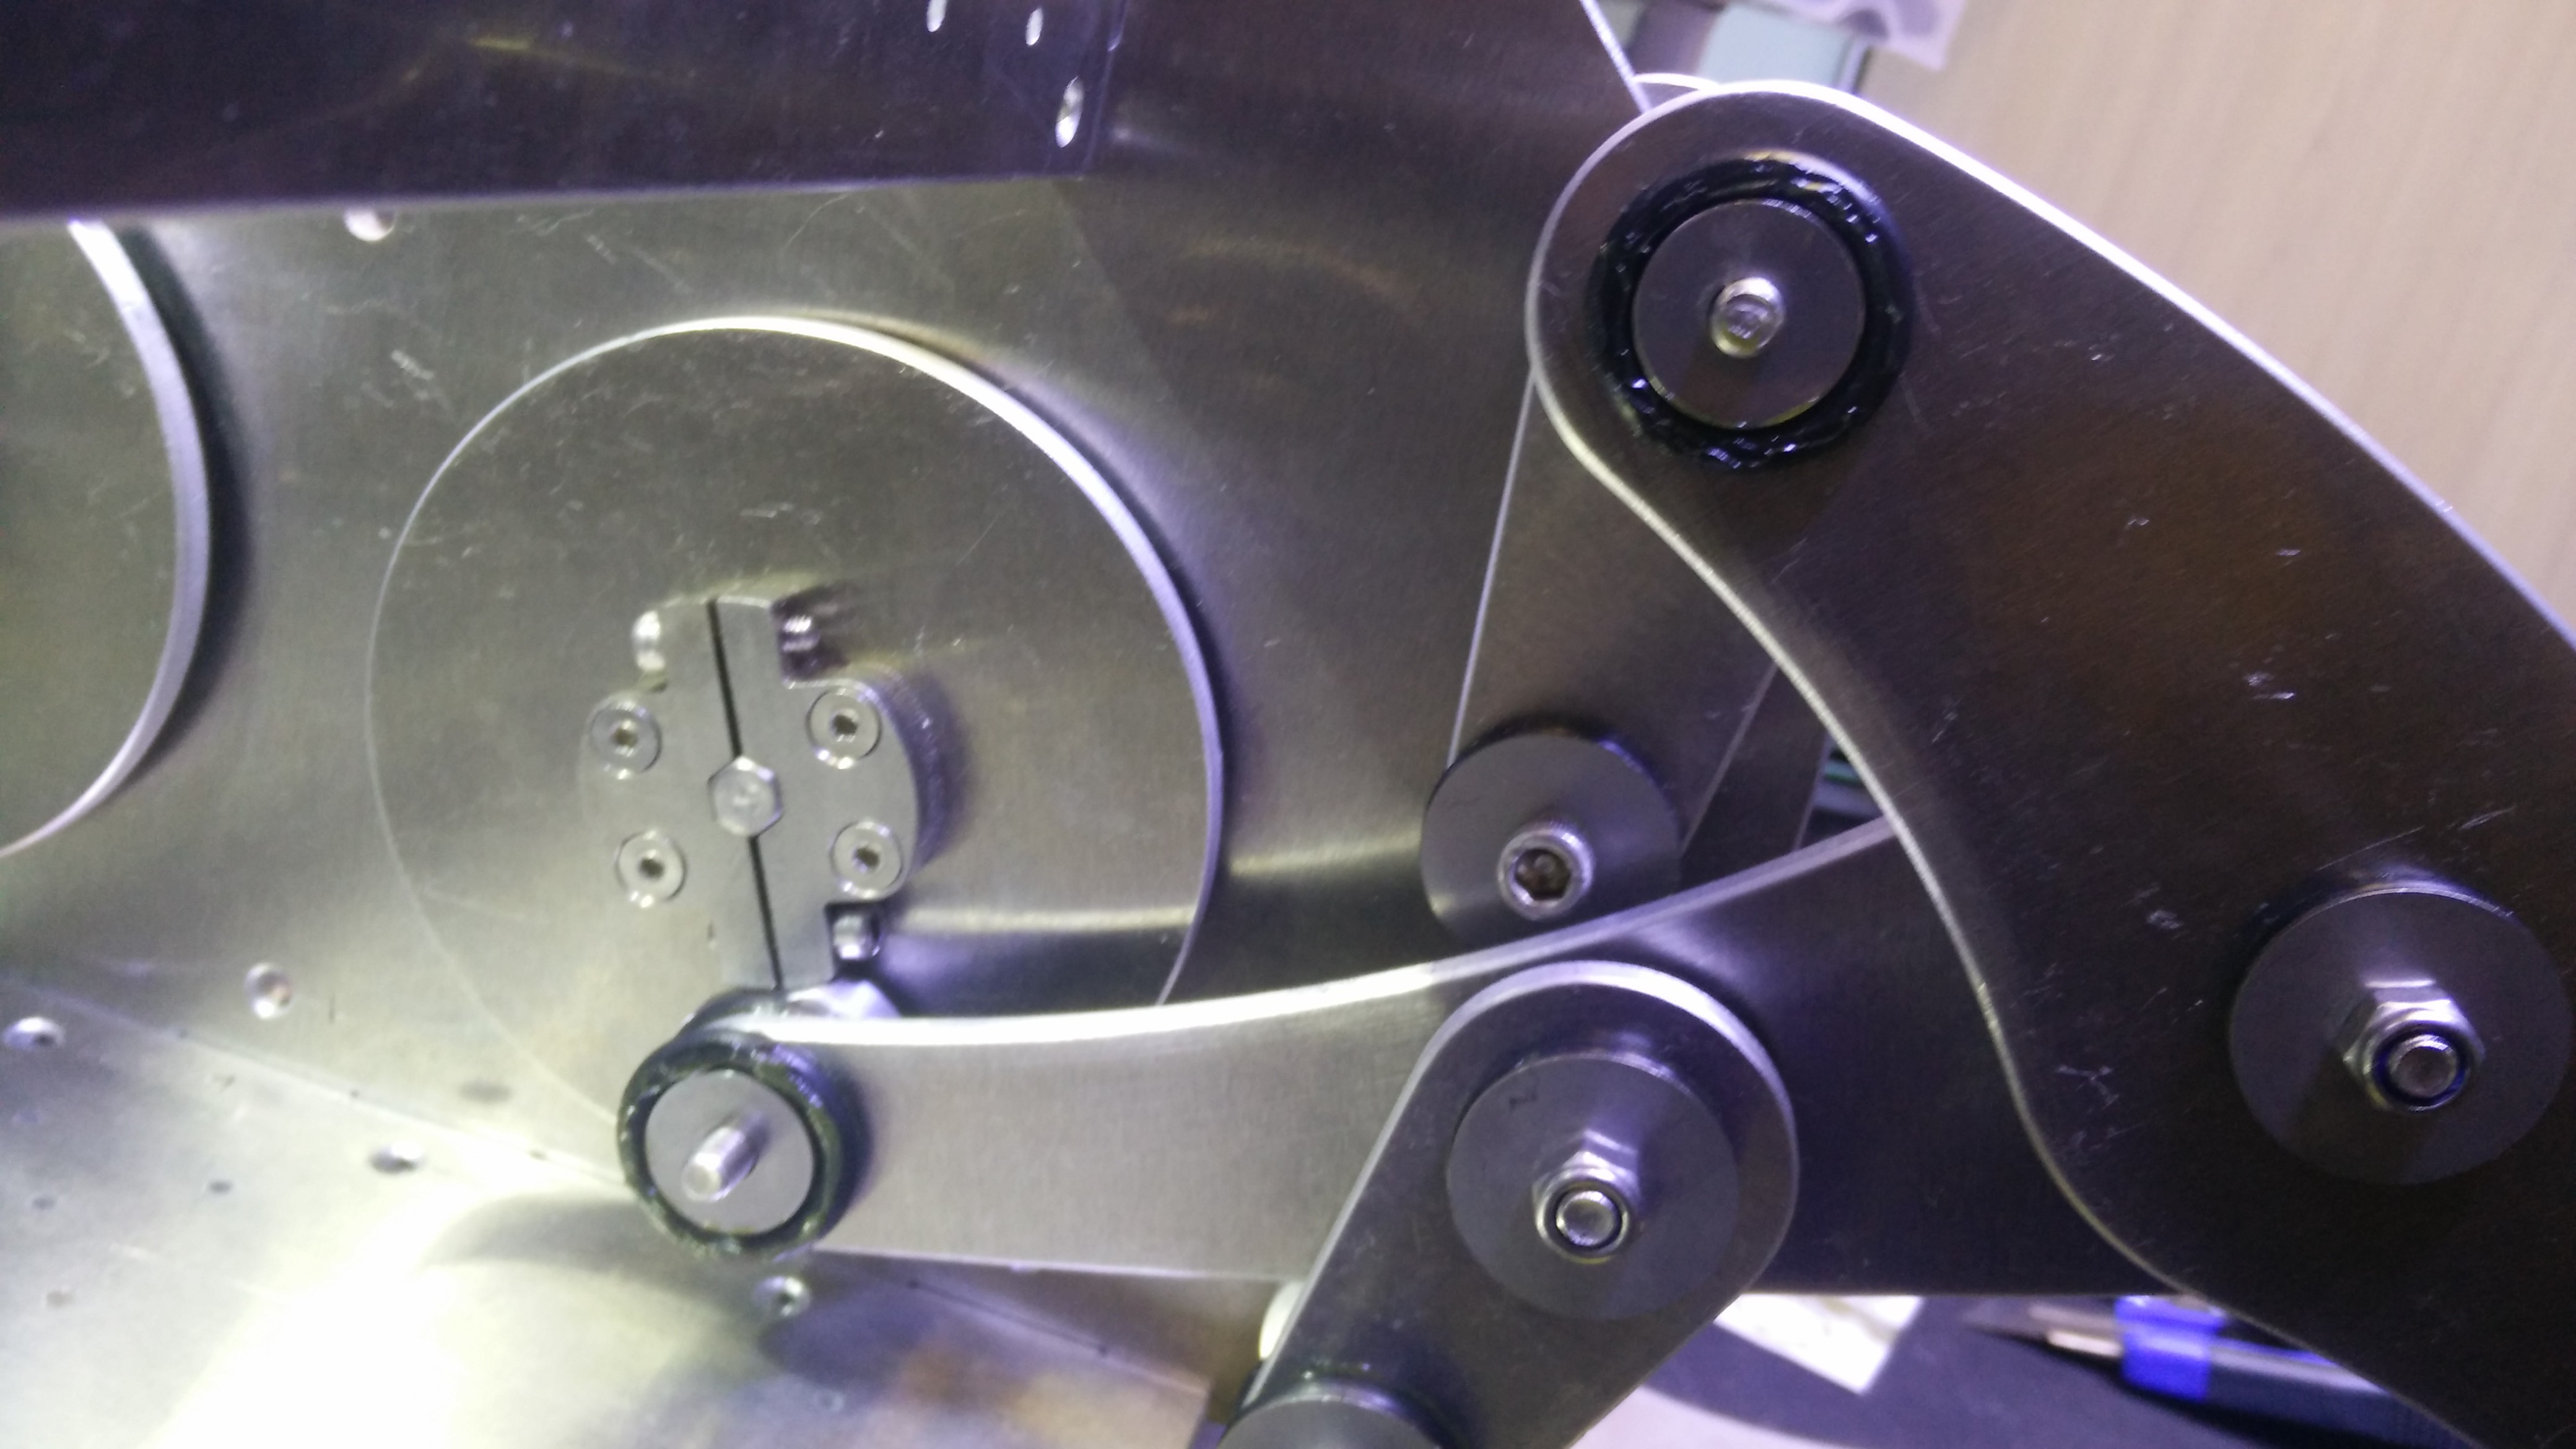
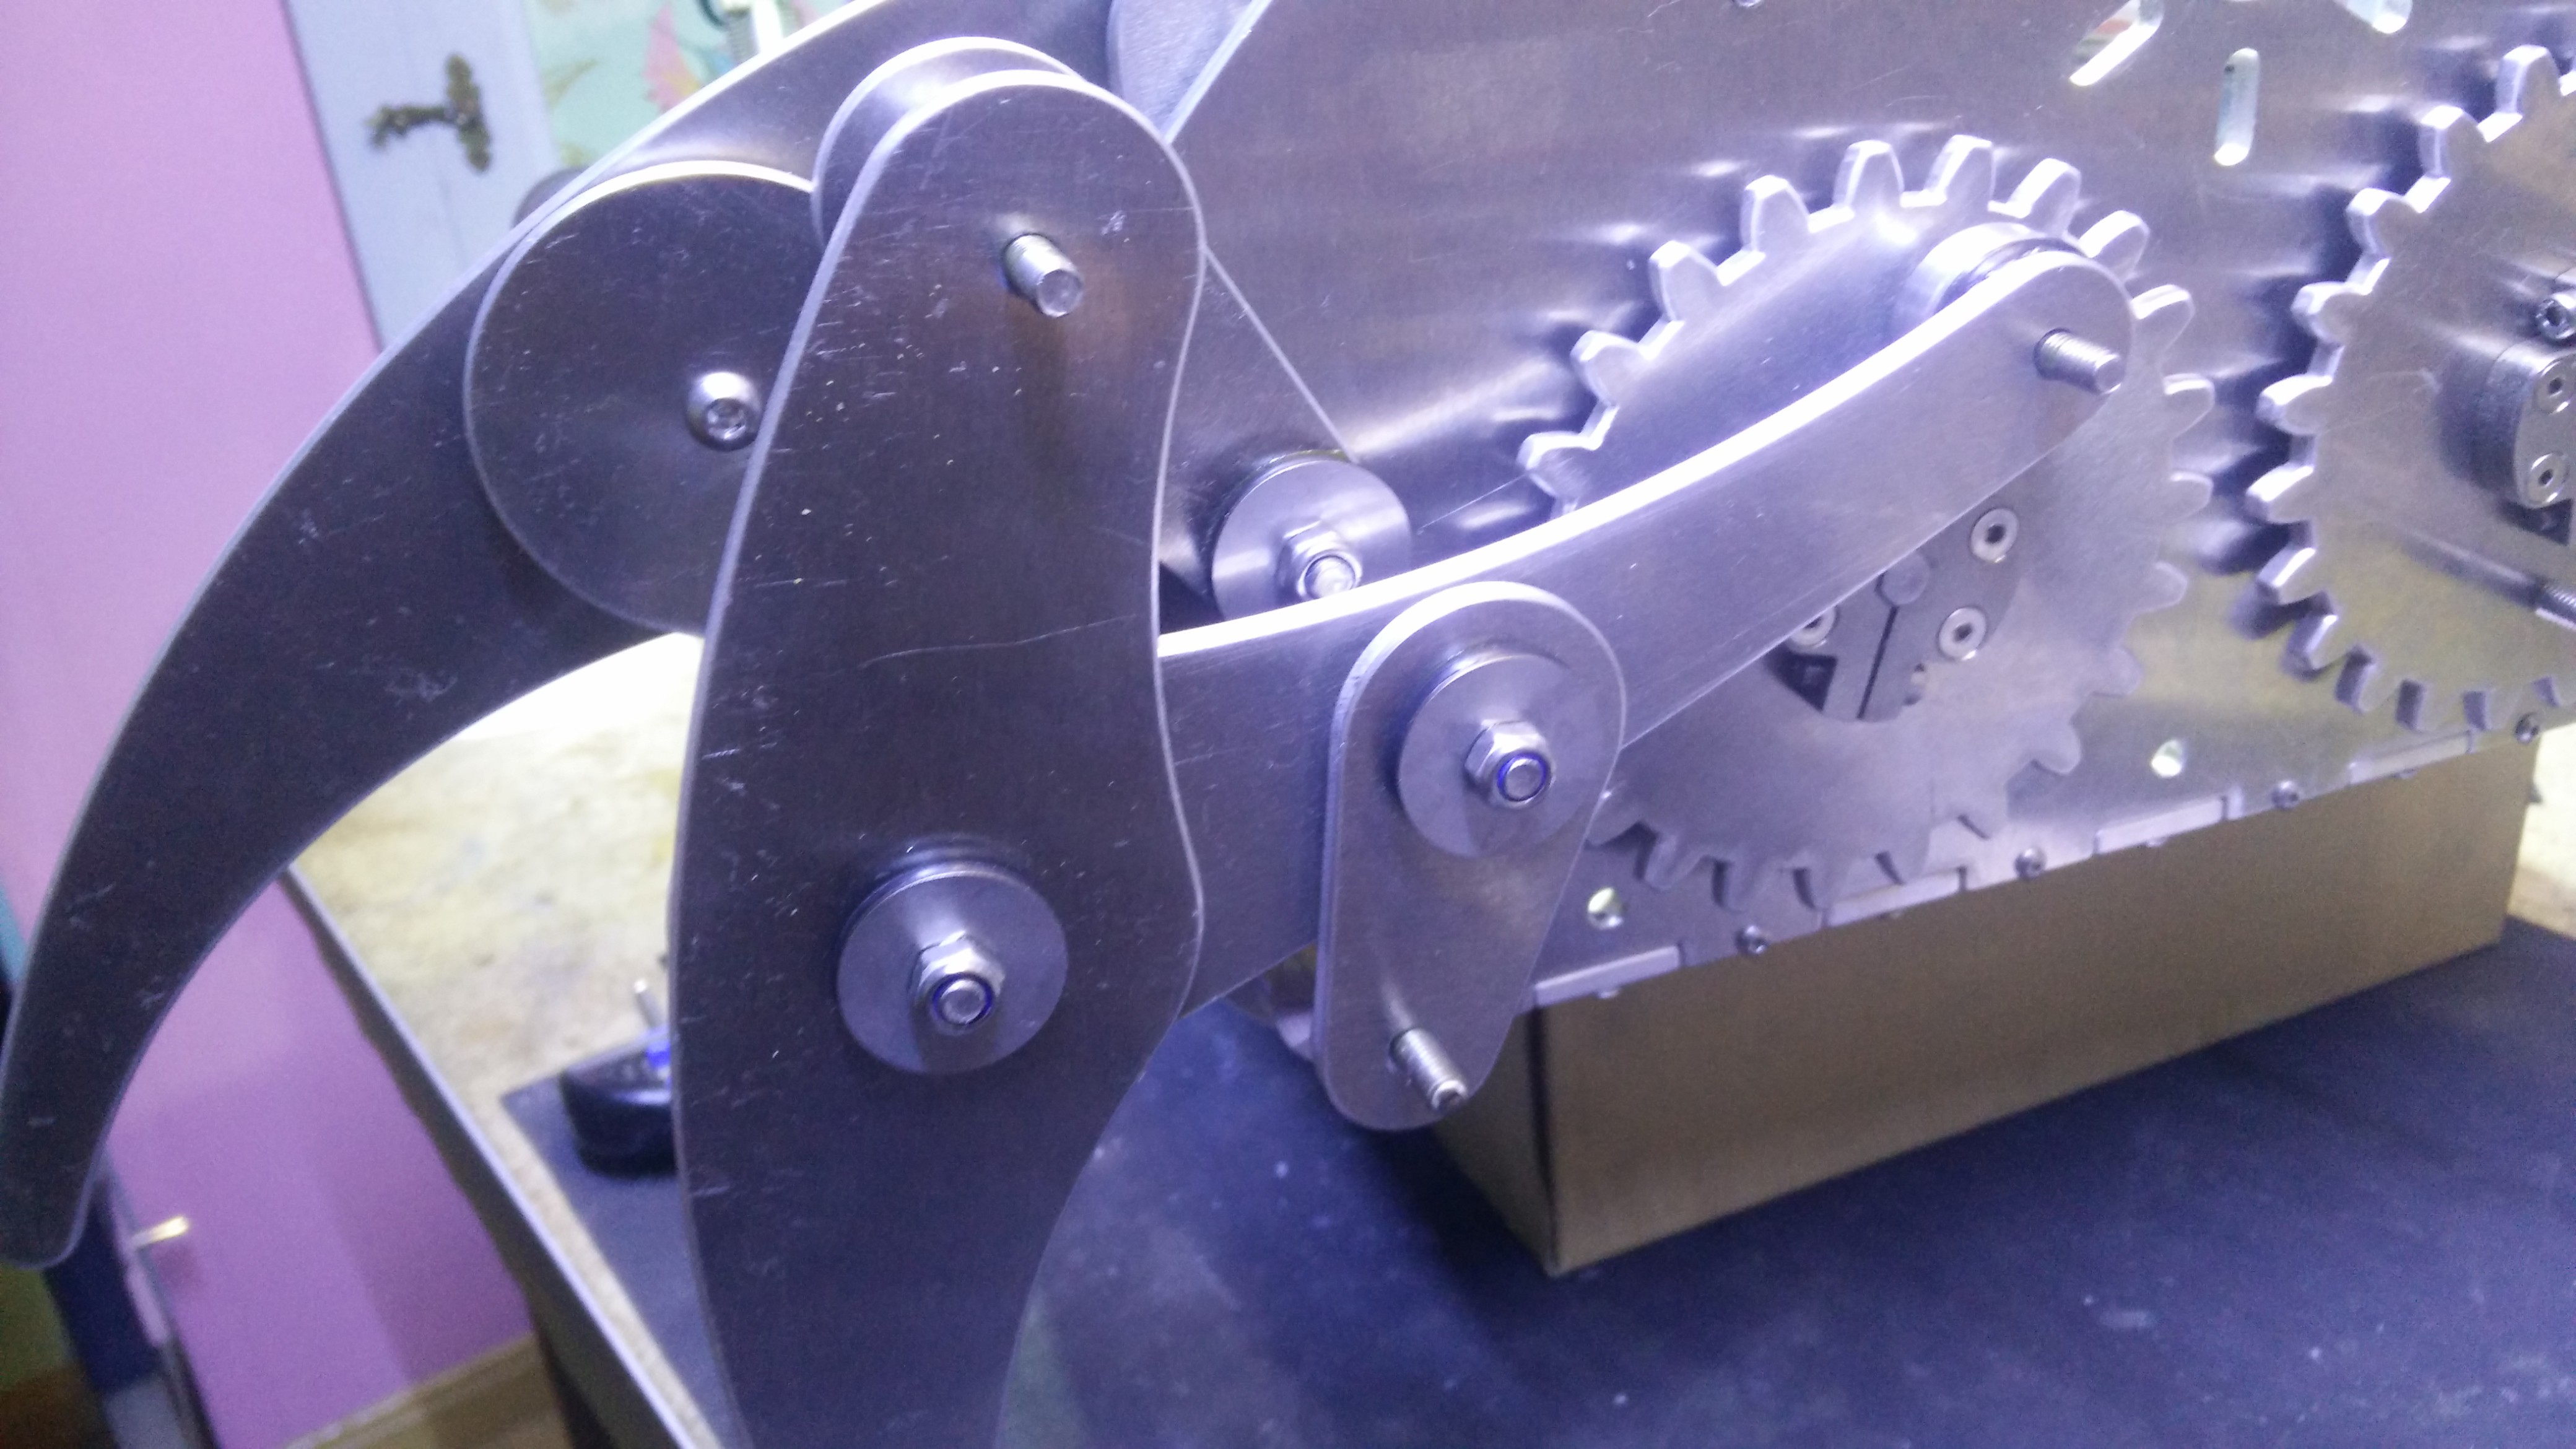
I'll now show the assembly of the mechanism for a pair of legs, for which i already have the leg linkages assembled as i have shown in a previous log:

To start the assembly i tighten M6 x 45mm button head bolts onto the upper pivots from the inside. They will act as axles for the upper part of the leg.
The 8mm spacer is placed on the 35mm bolt protruding from the wheels and gears, with the flat part clearing the axle clamps. The 17mm spacer is placed on the upper pivot bolt.
 Greased thrust bearings (AXK 0619) and o-rings are placed on both spacers.
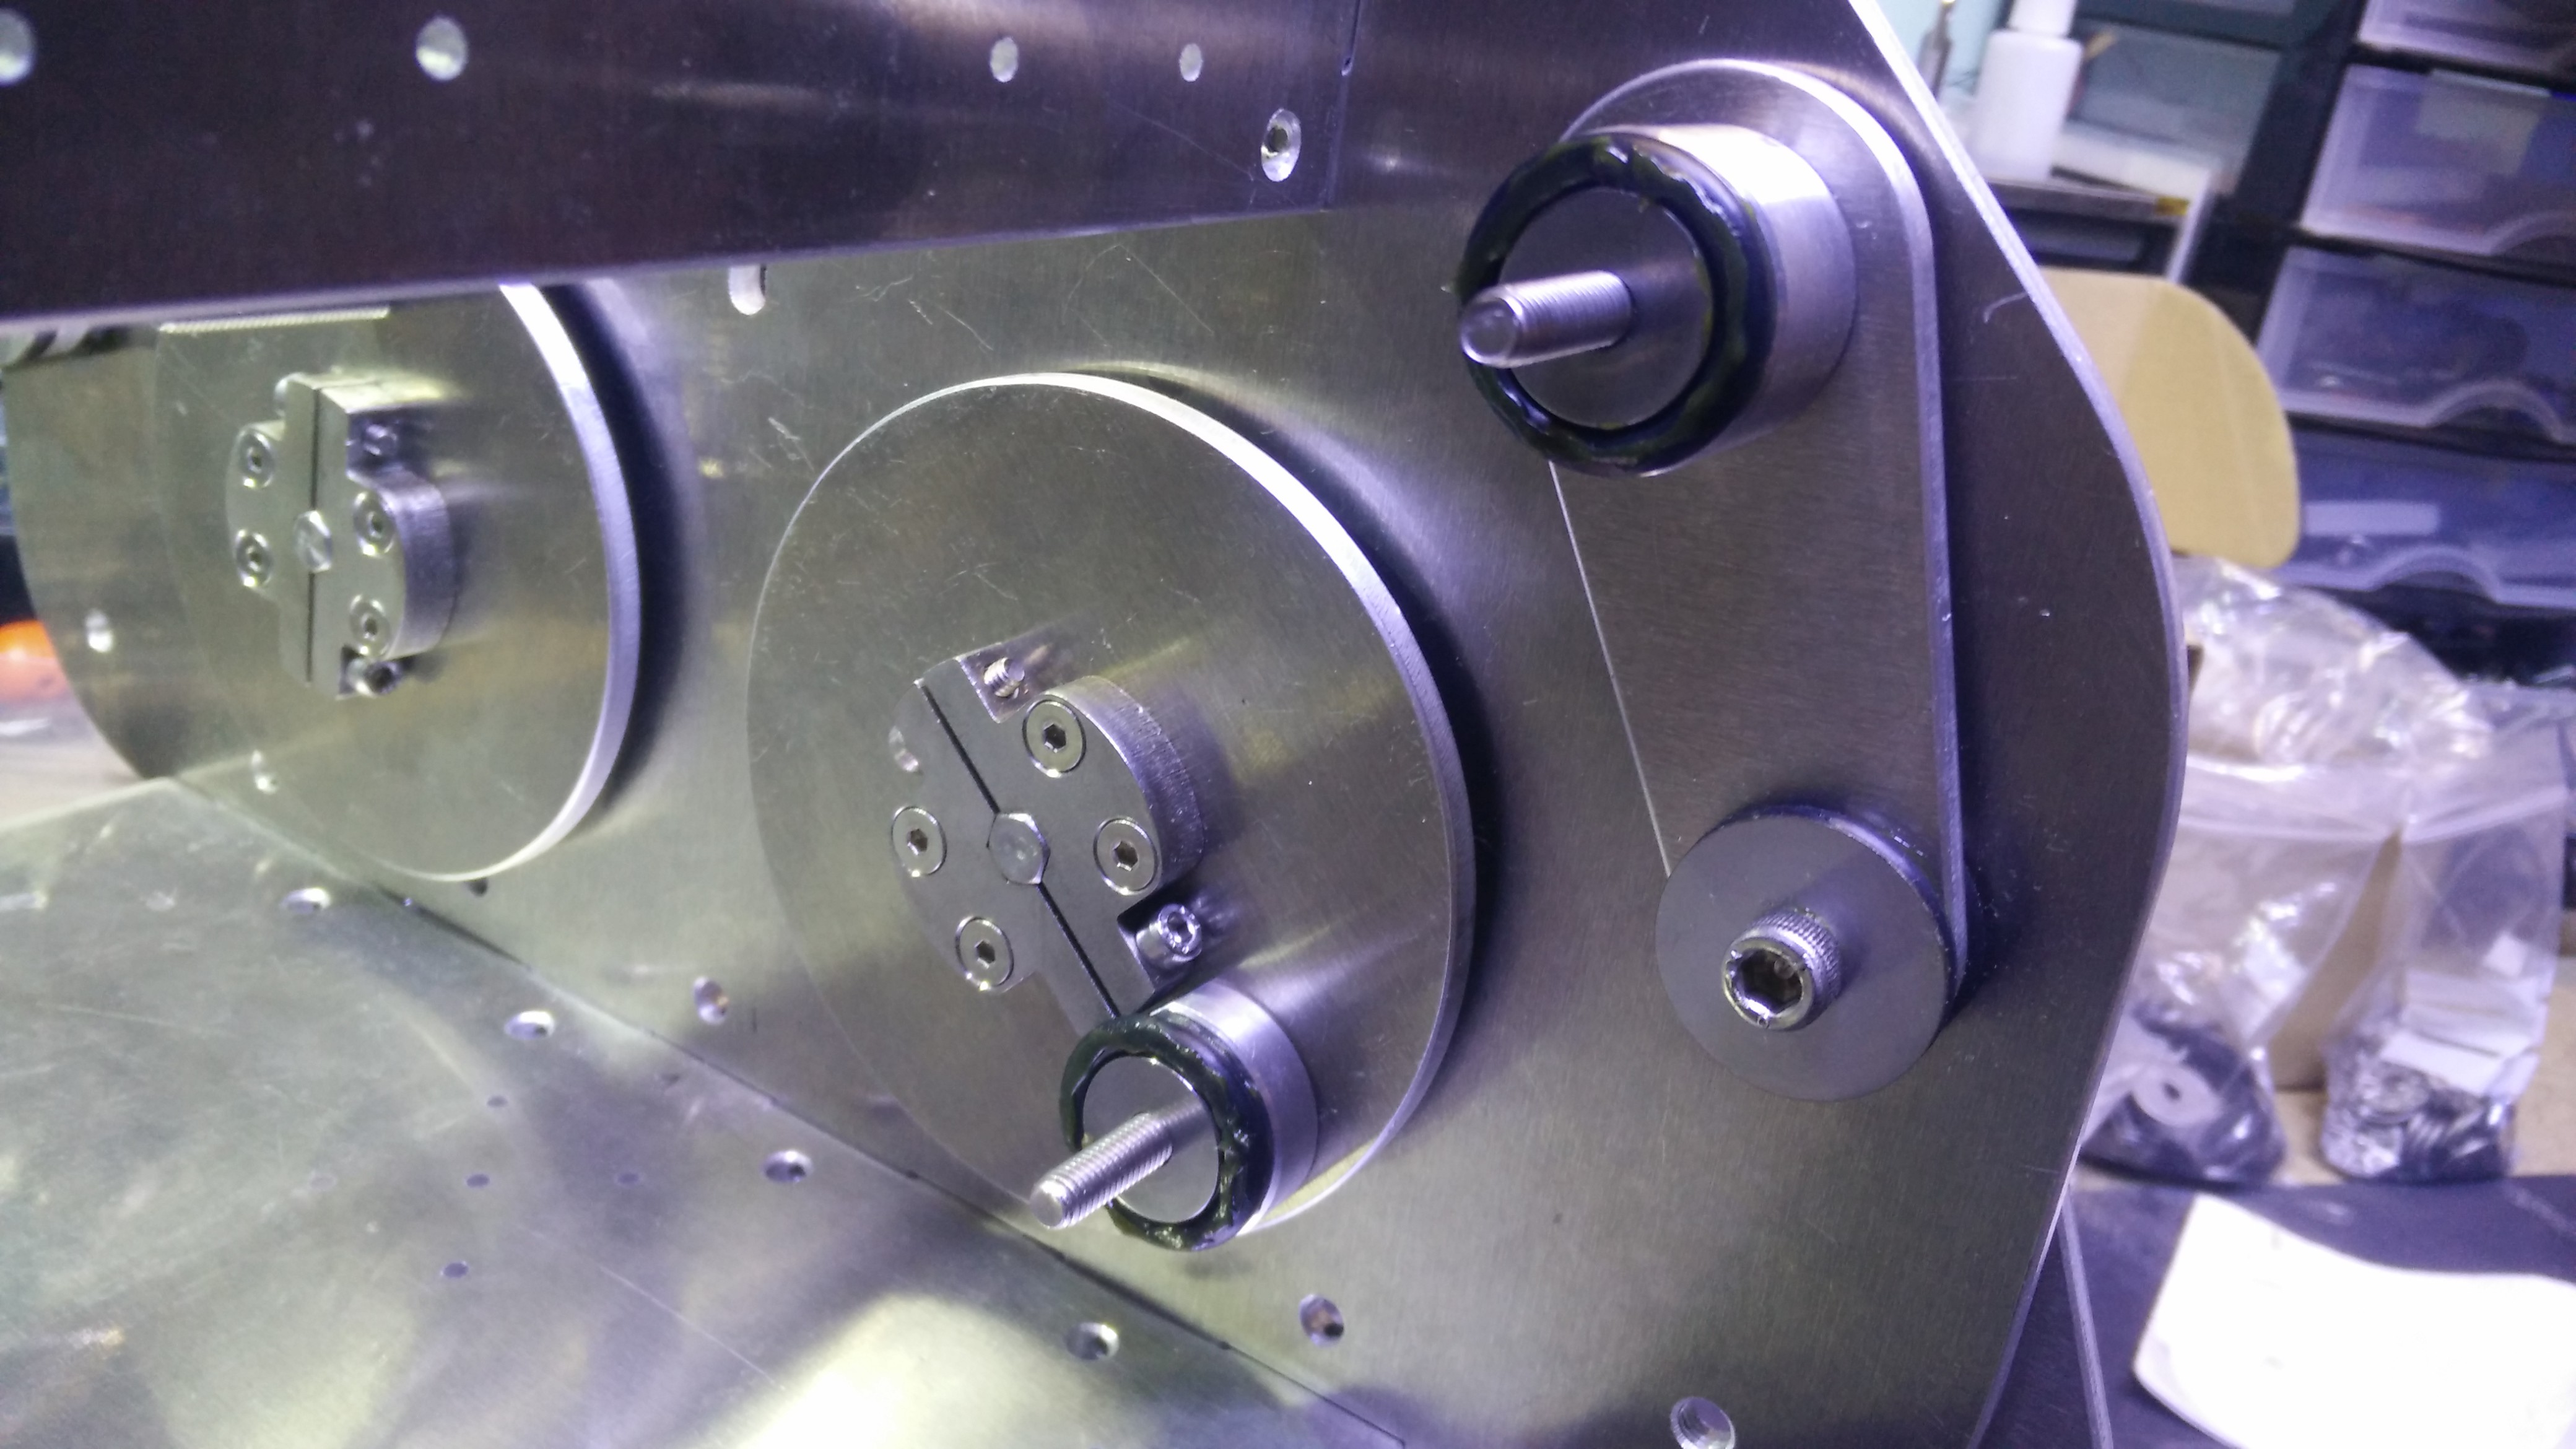
The leg linkage could be placed now on the pivot and wheel, but i found it easier to put the third spacer on the leg before, so i prepare it separately.
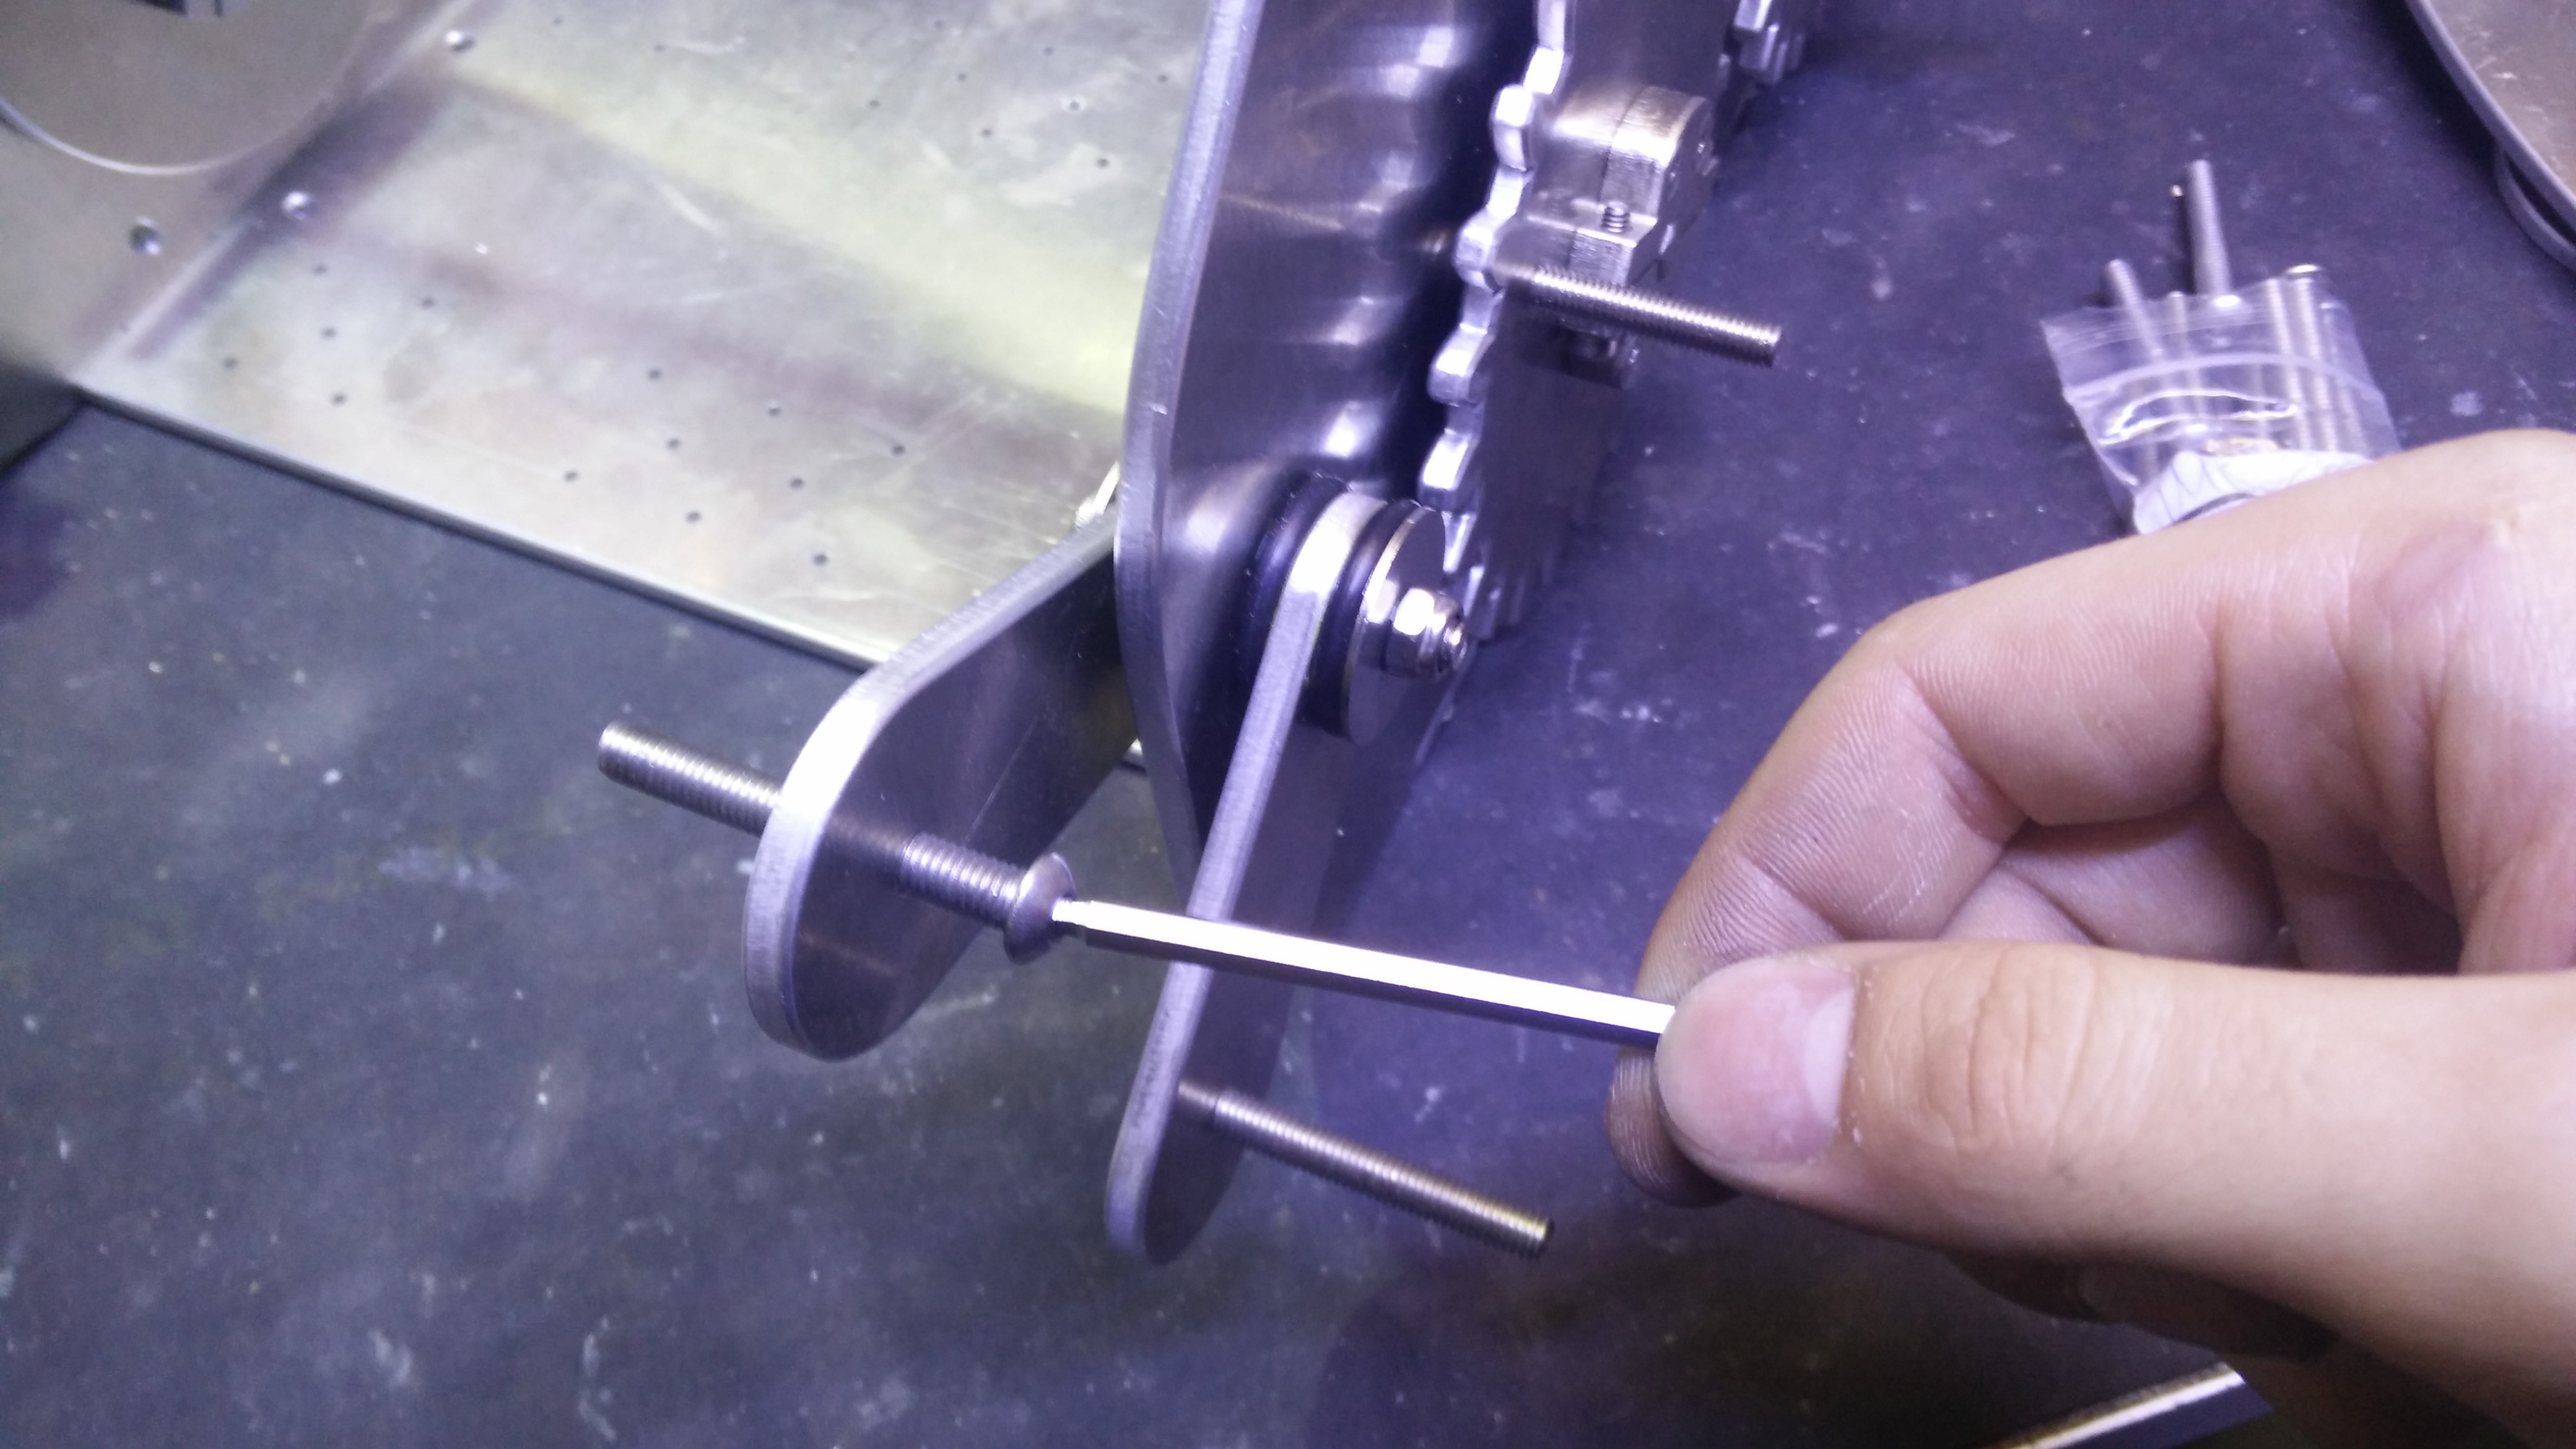
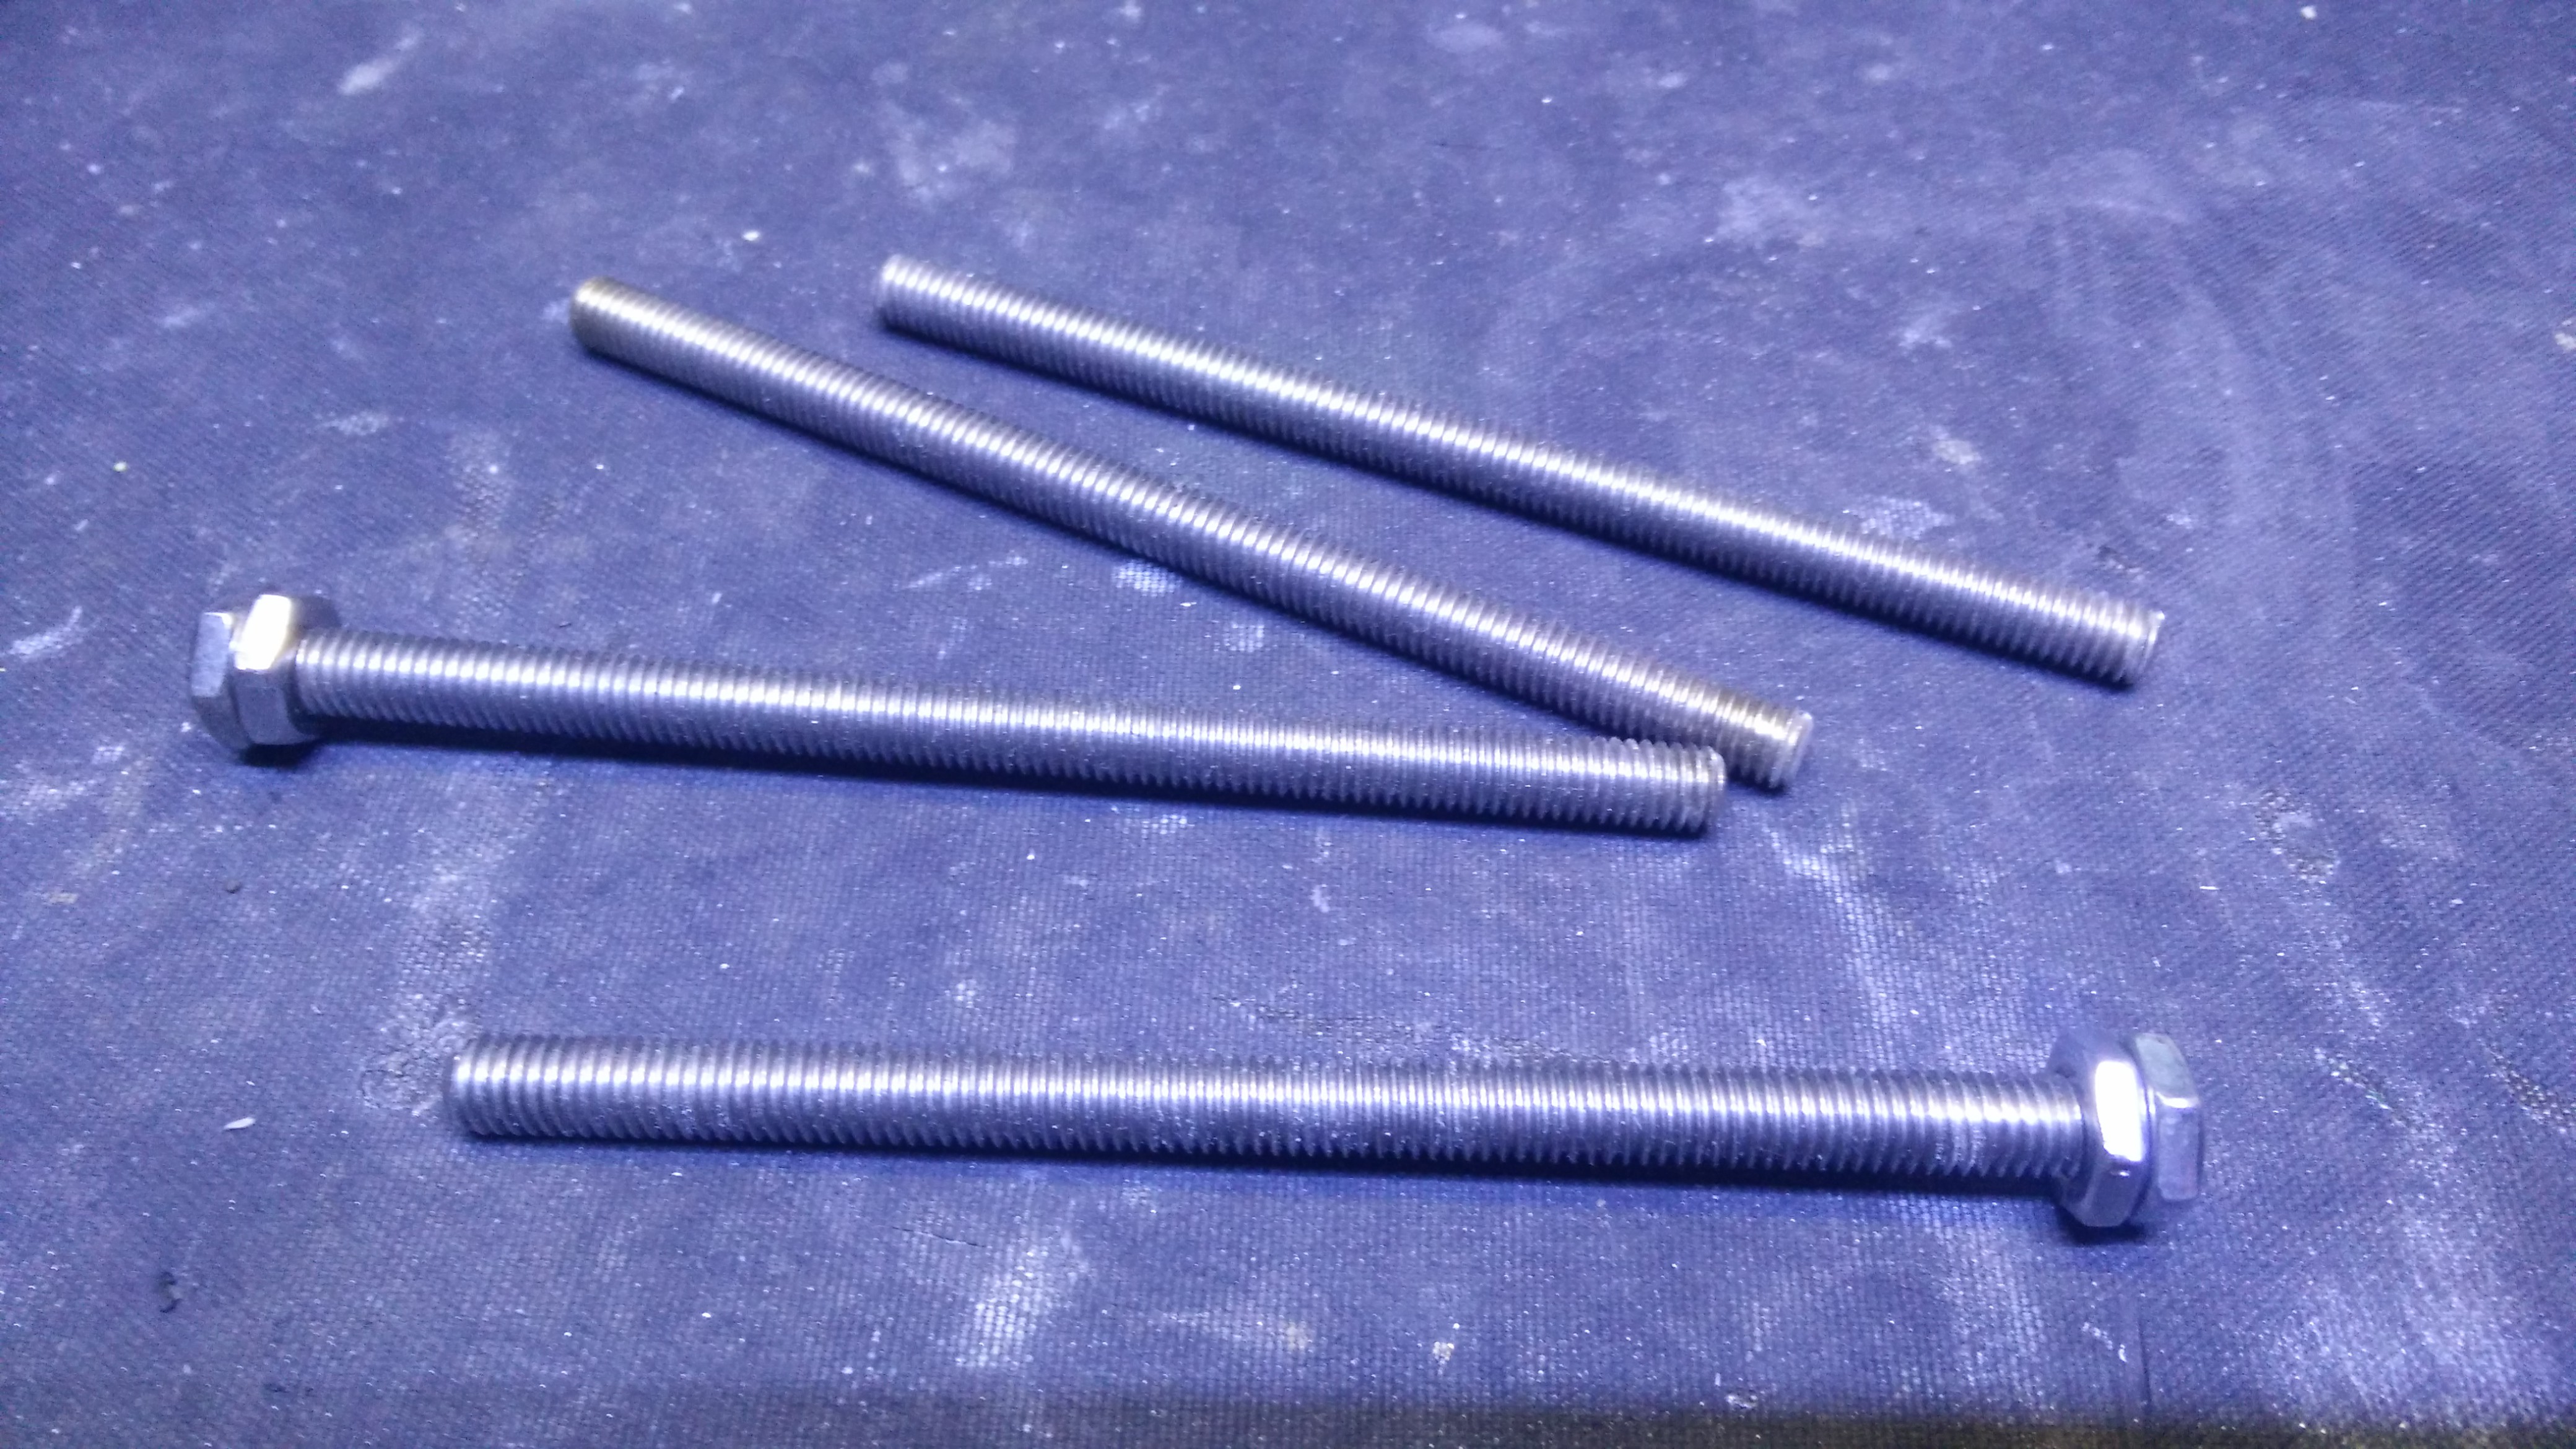
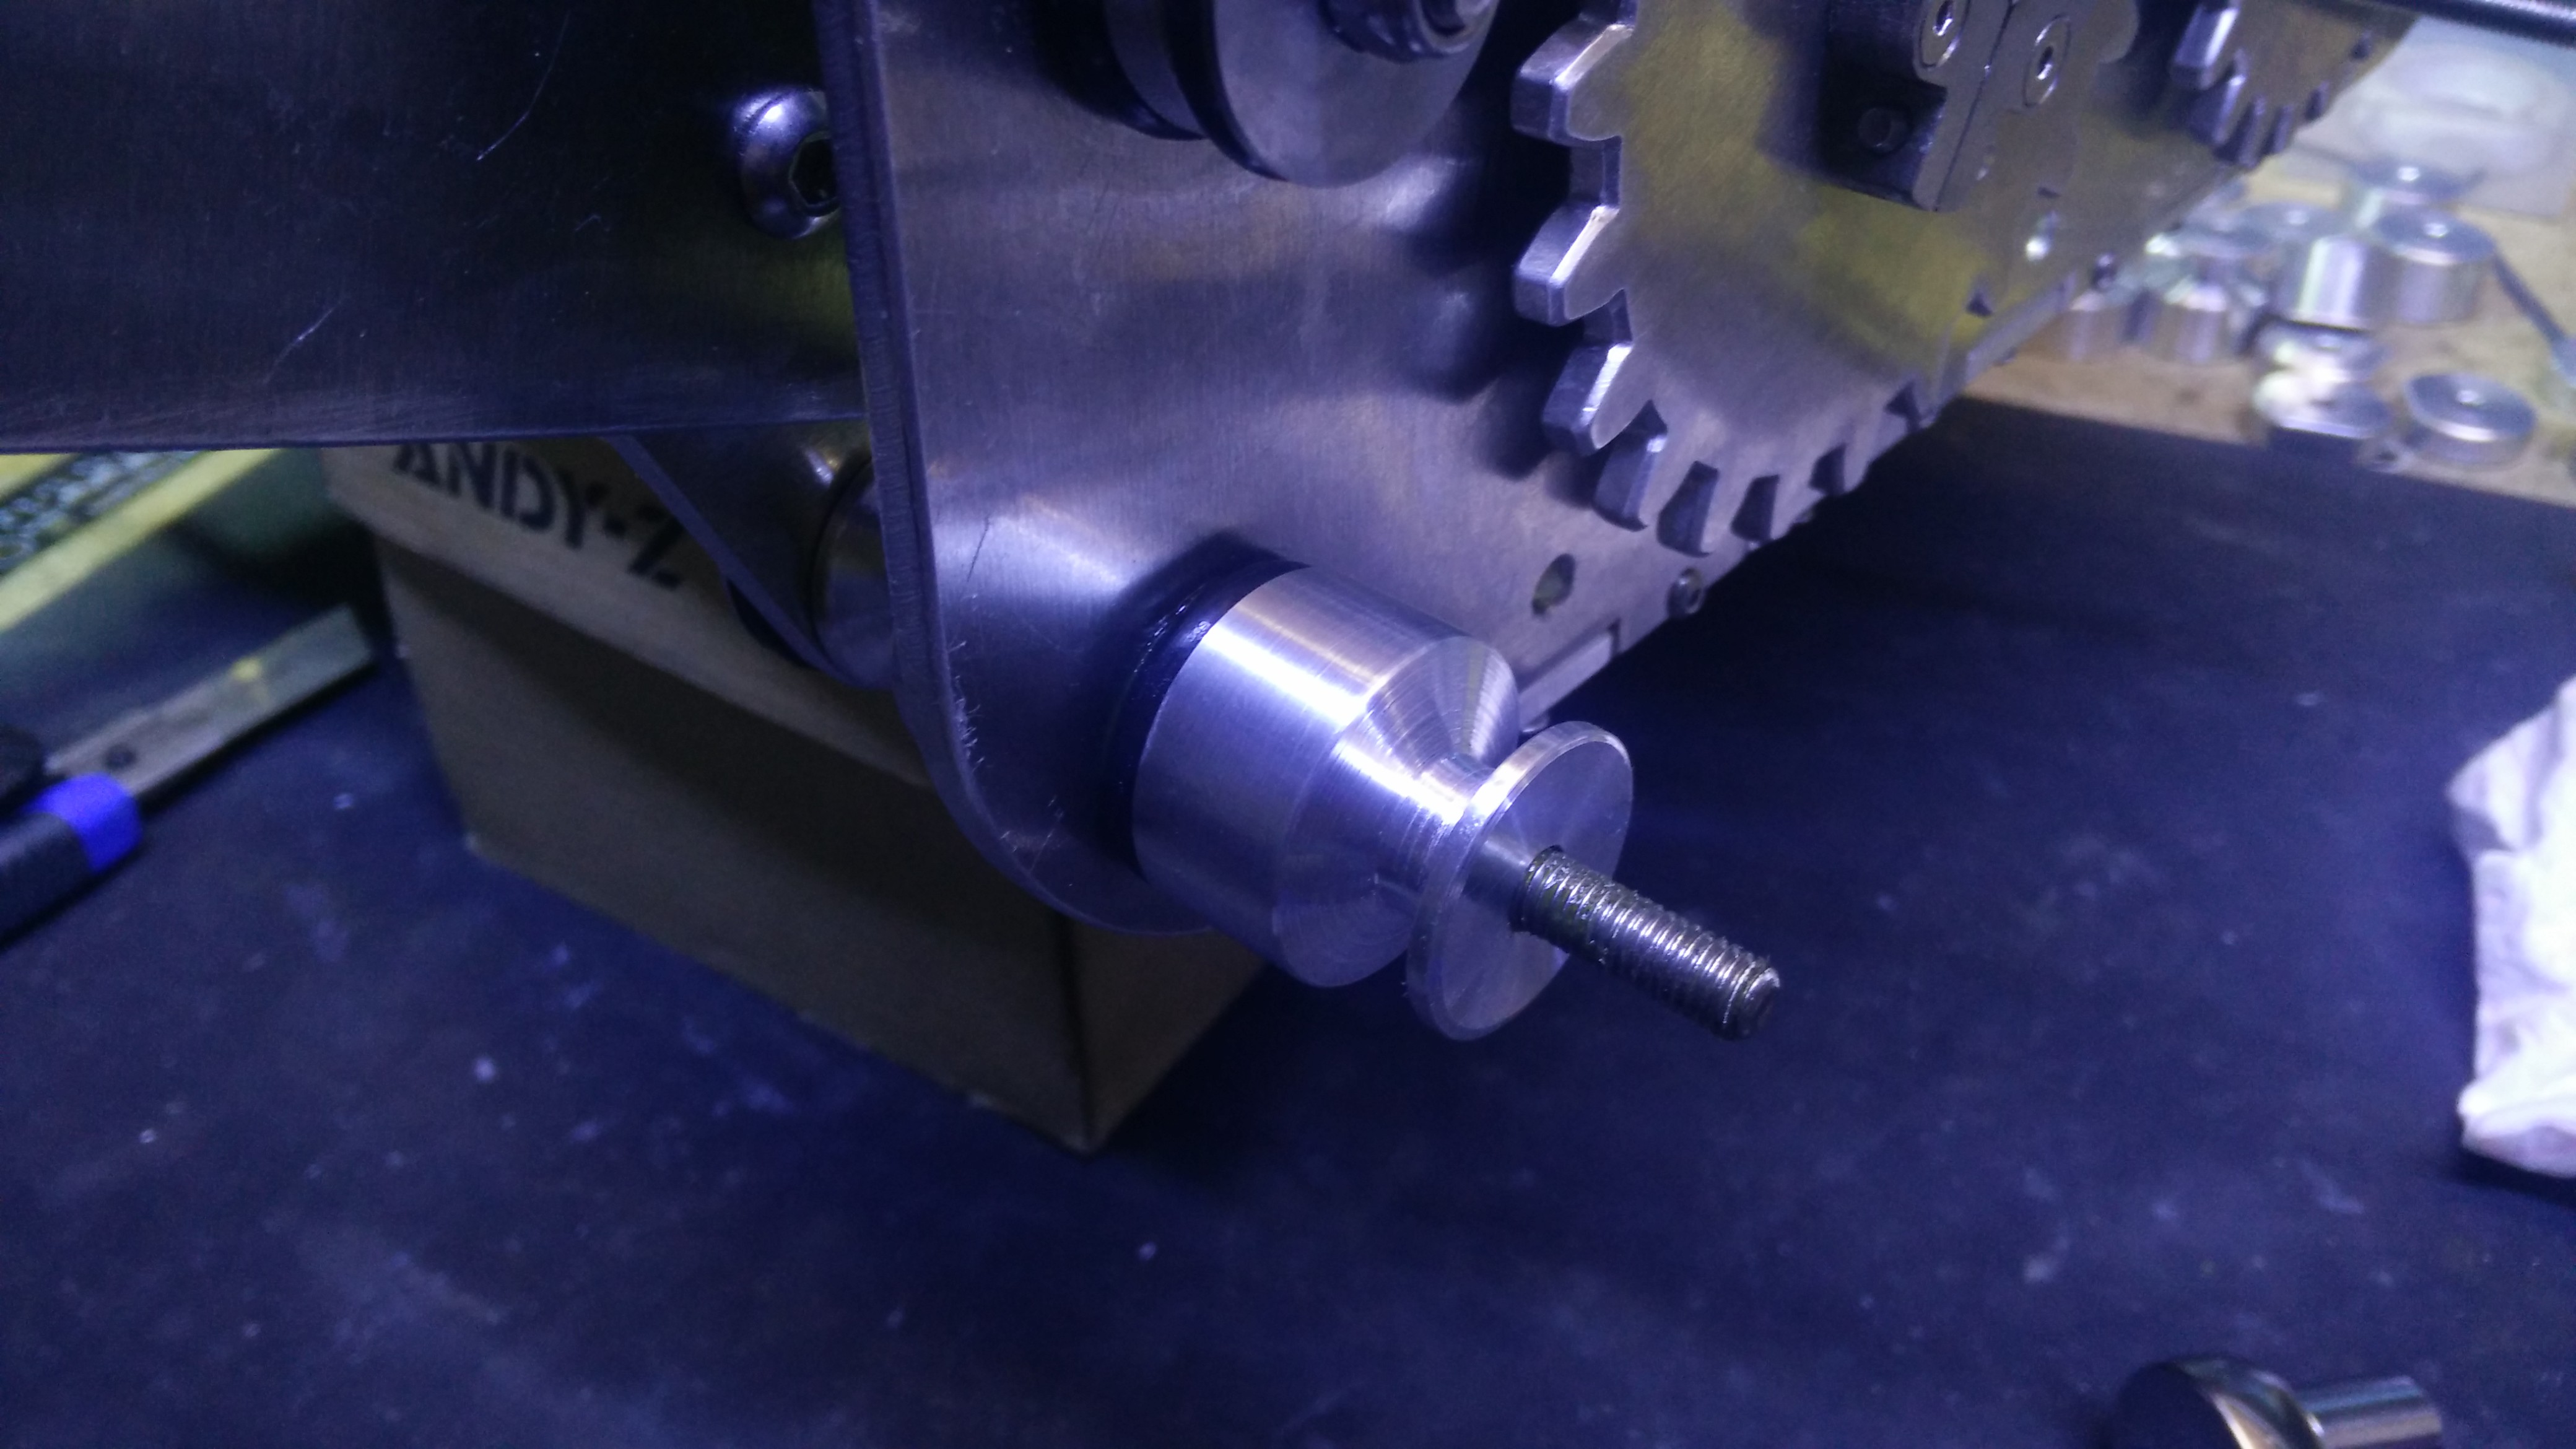
Another thing i couldn't get were stainless M6 x 95mm bolts, so 10cm pieces of threaded rod and lock nuts were used instead.
Into the threaded rod slide a 27mm stainles washer (of the ones i had laser cut), followed by a greased bearing and o-ring.
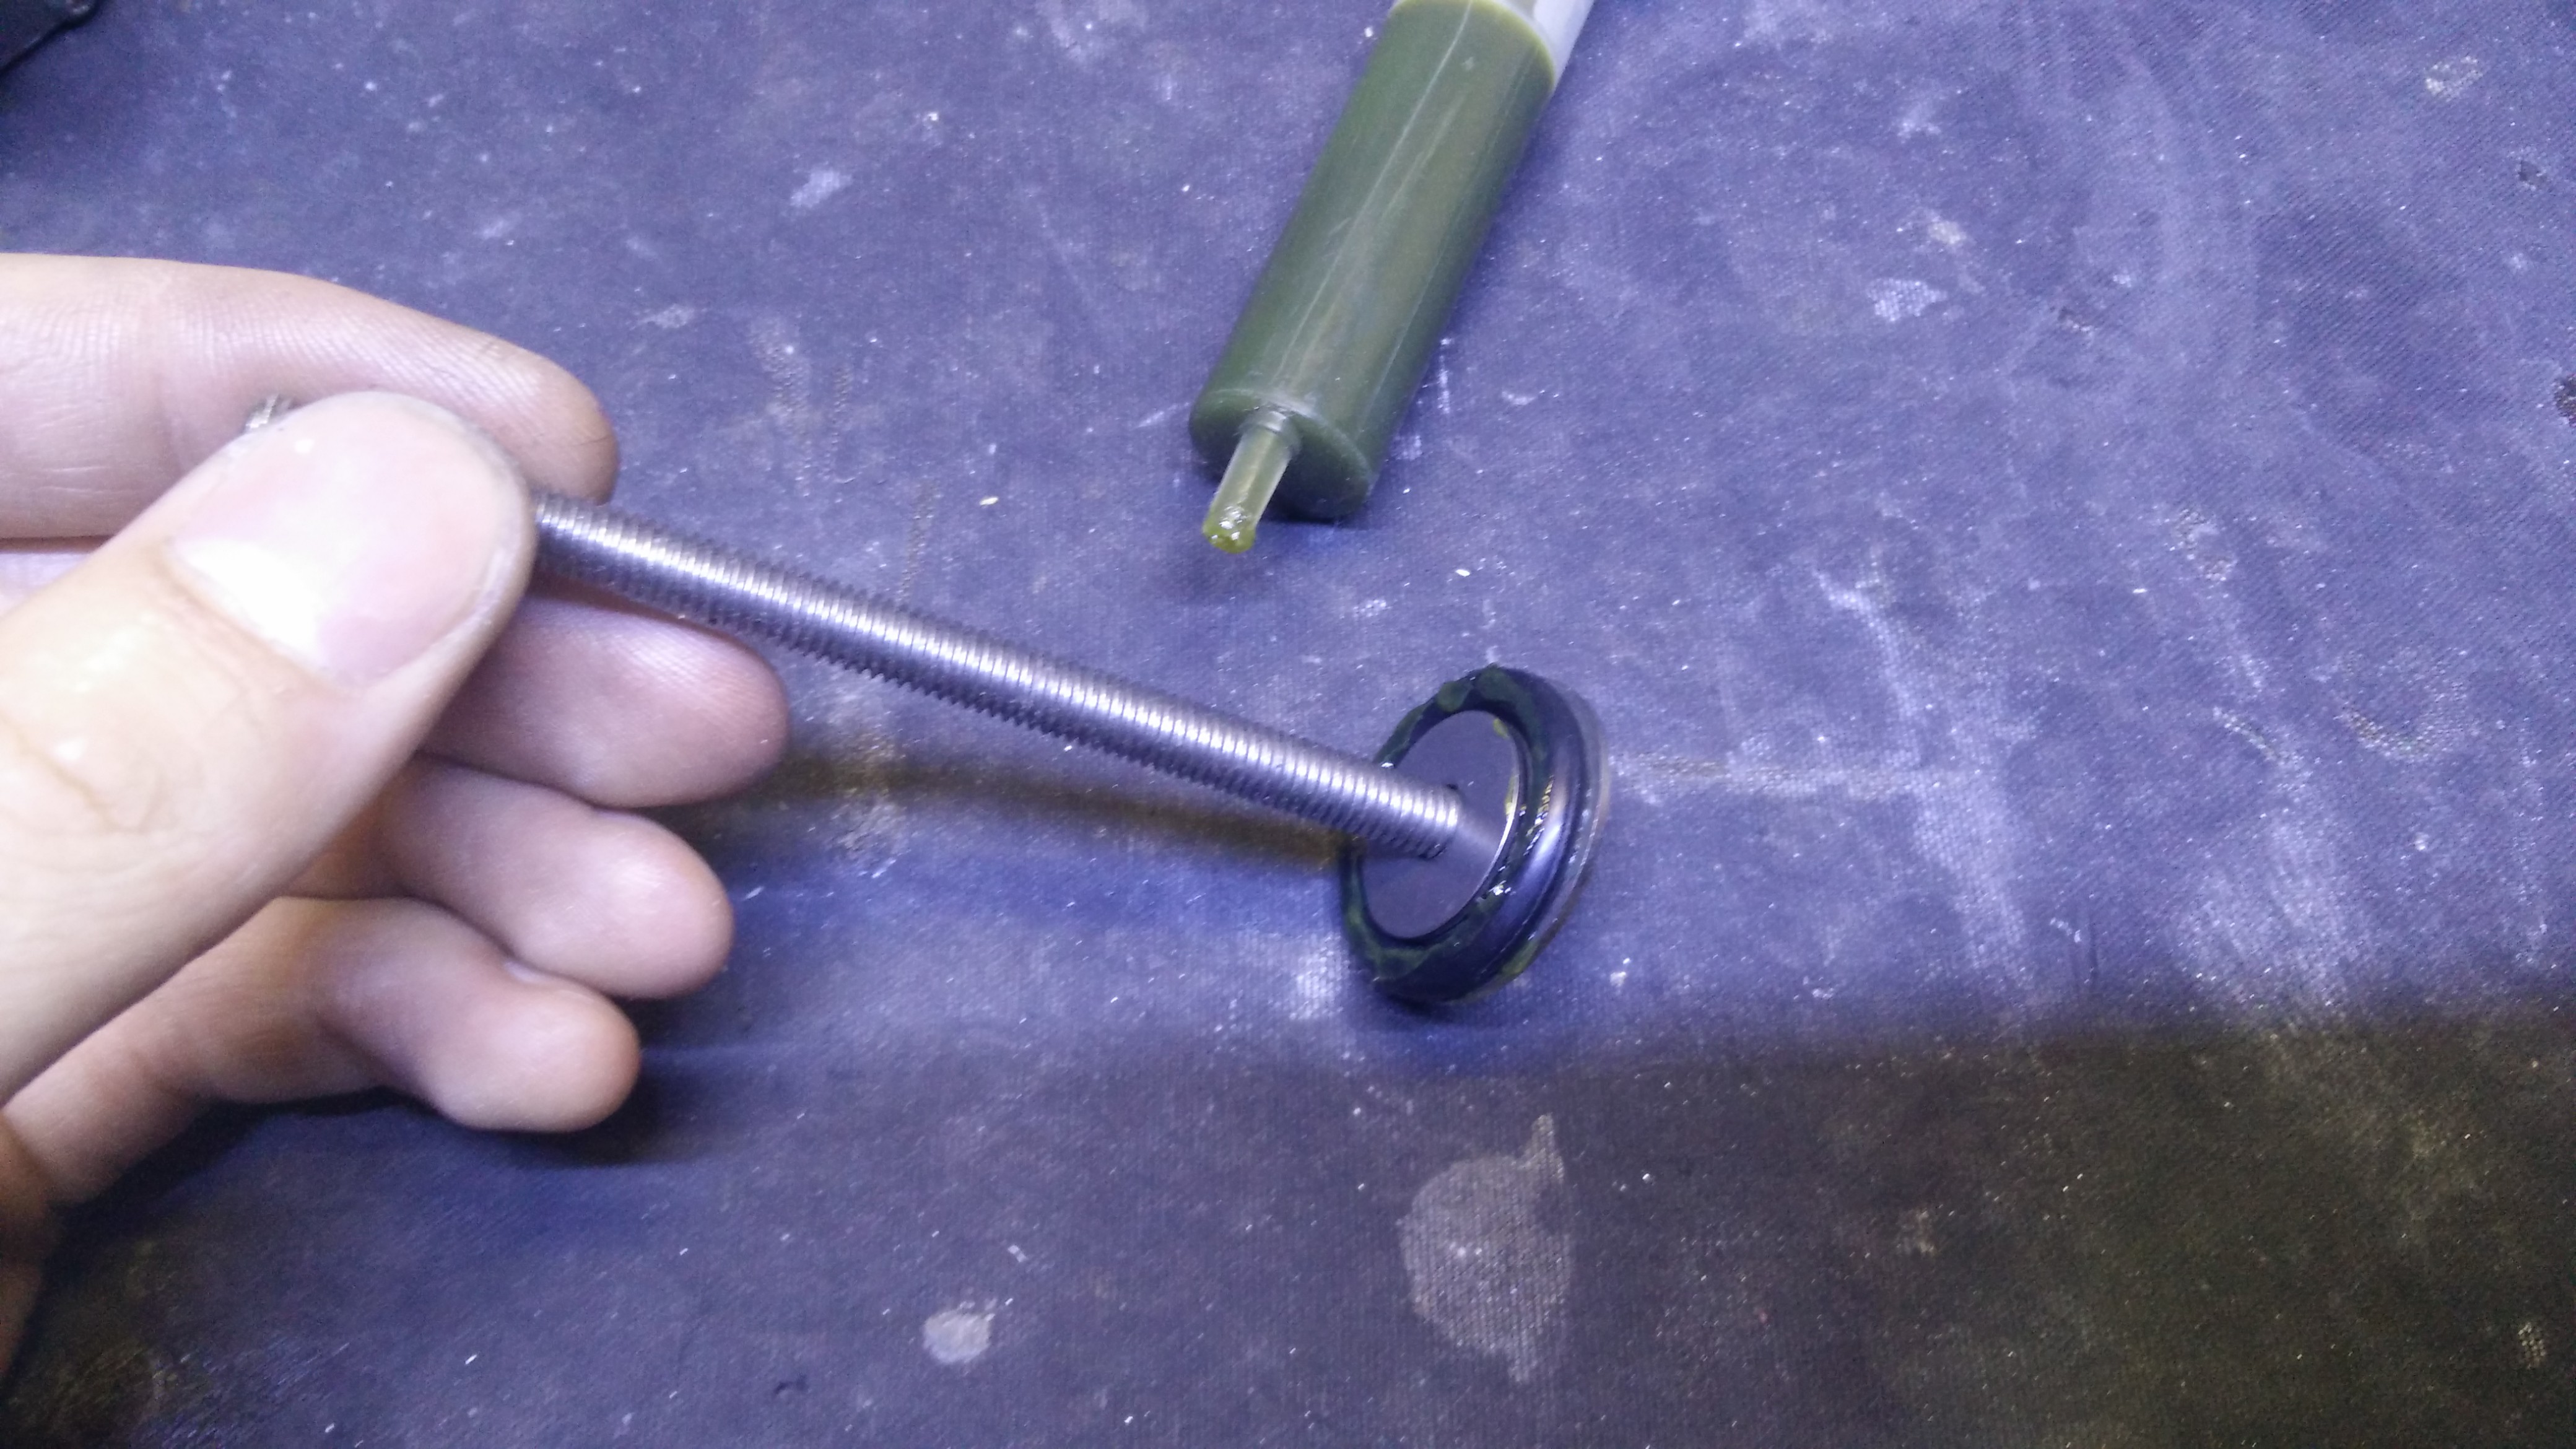
Then the rod is put through the small lower pivot in one leg linkage and then greased. The 26mm spacer is placed with the thin part facing the leg pivot, and a bearing and o-ring is installed on it.

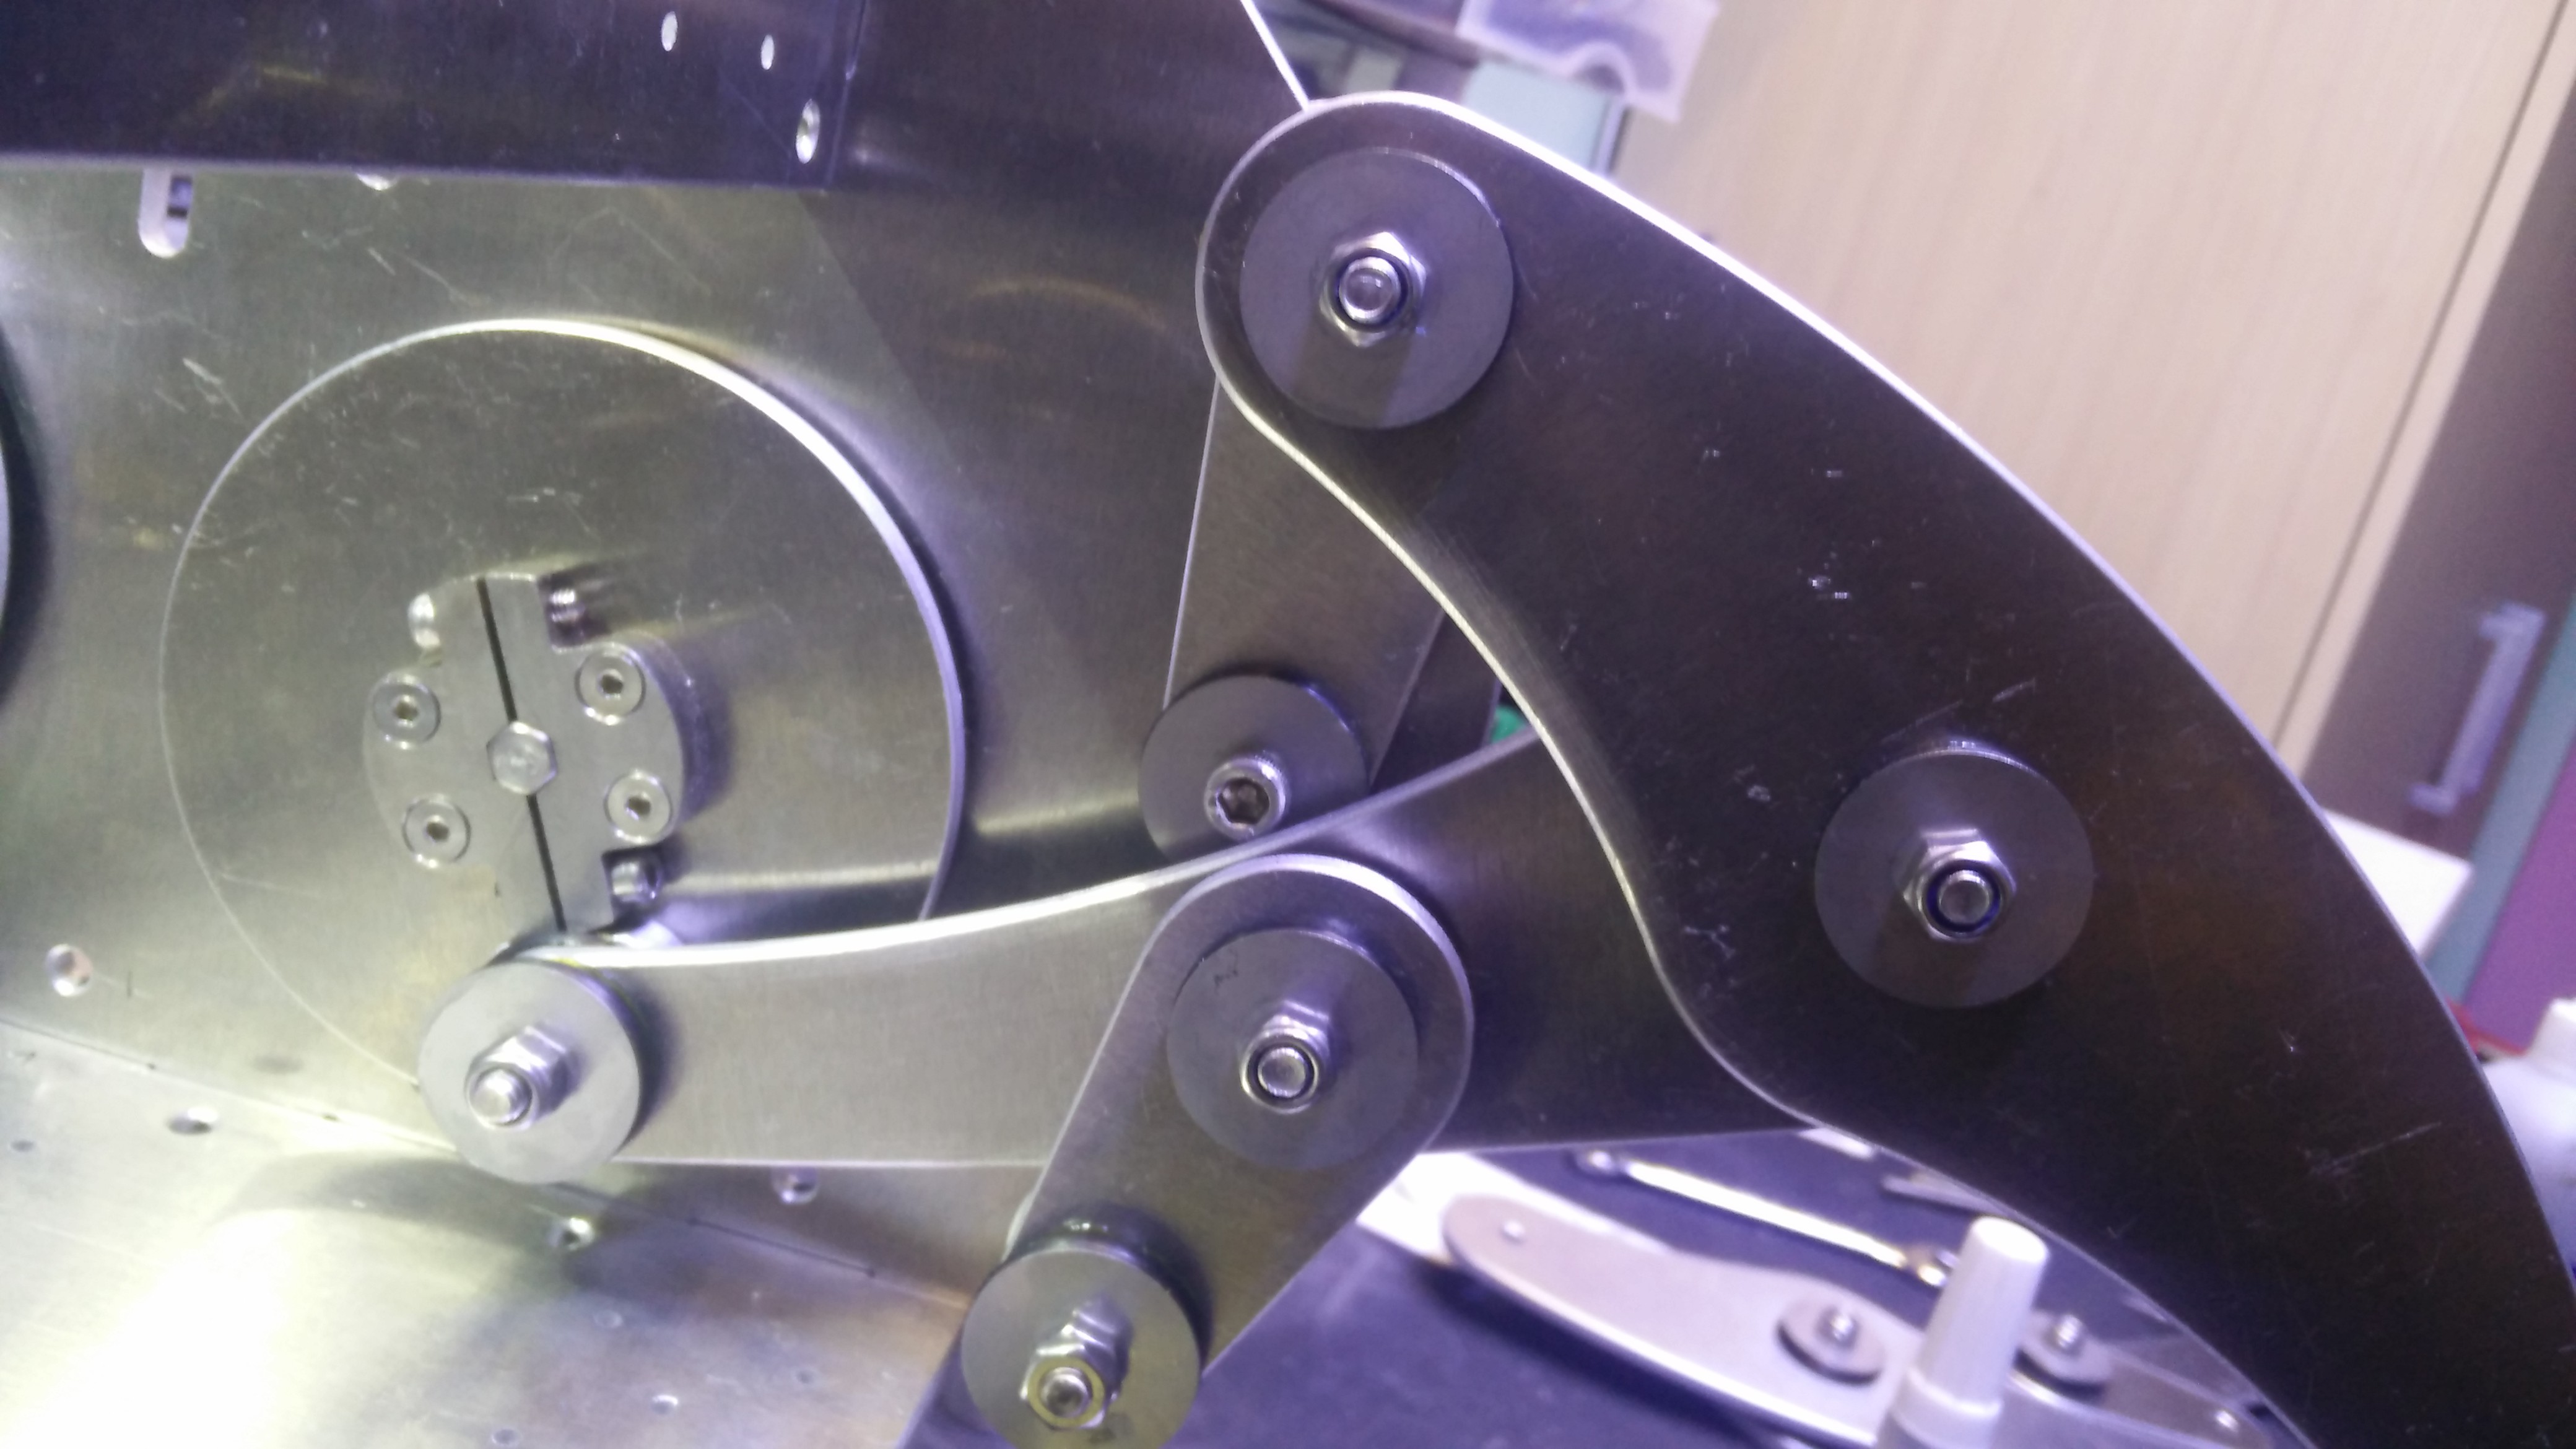
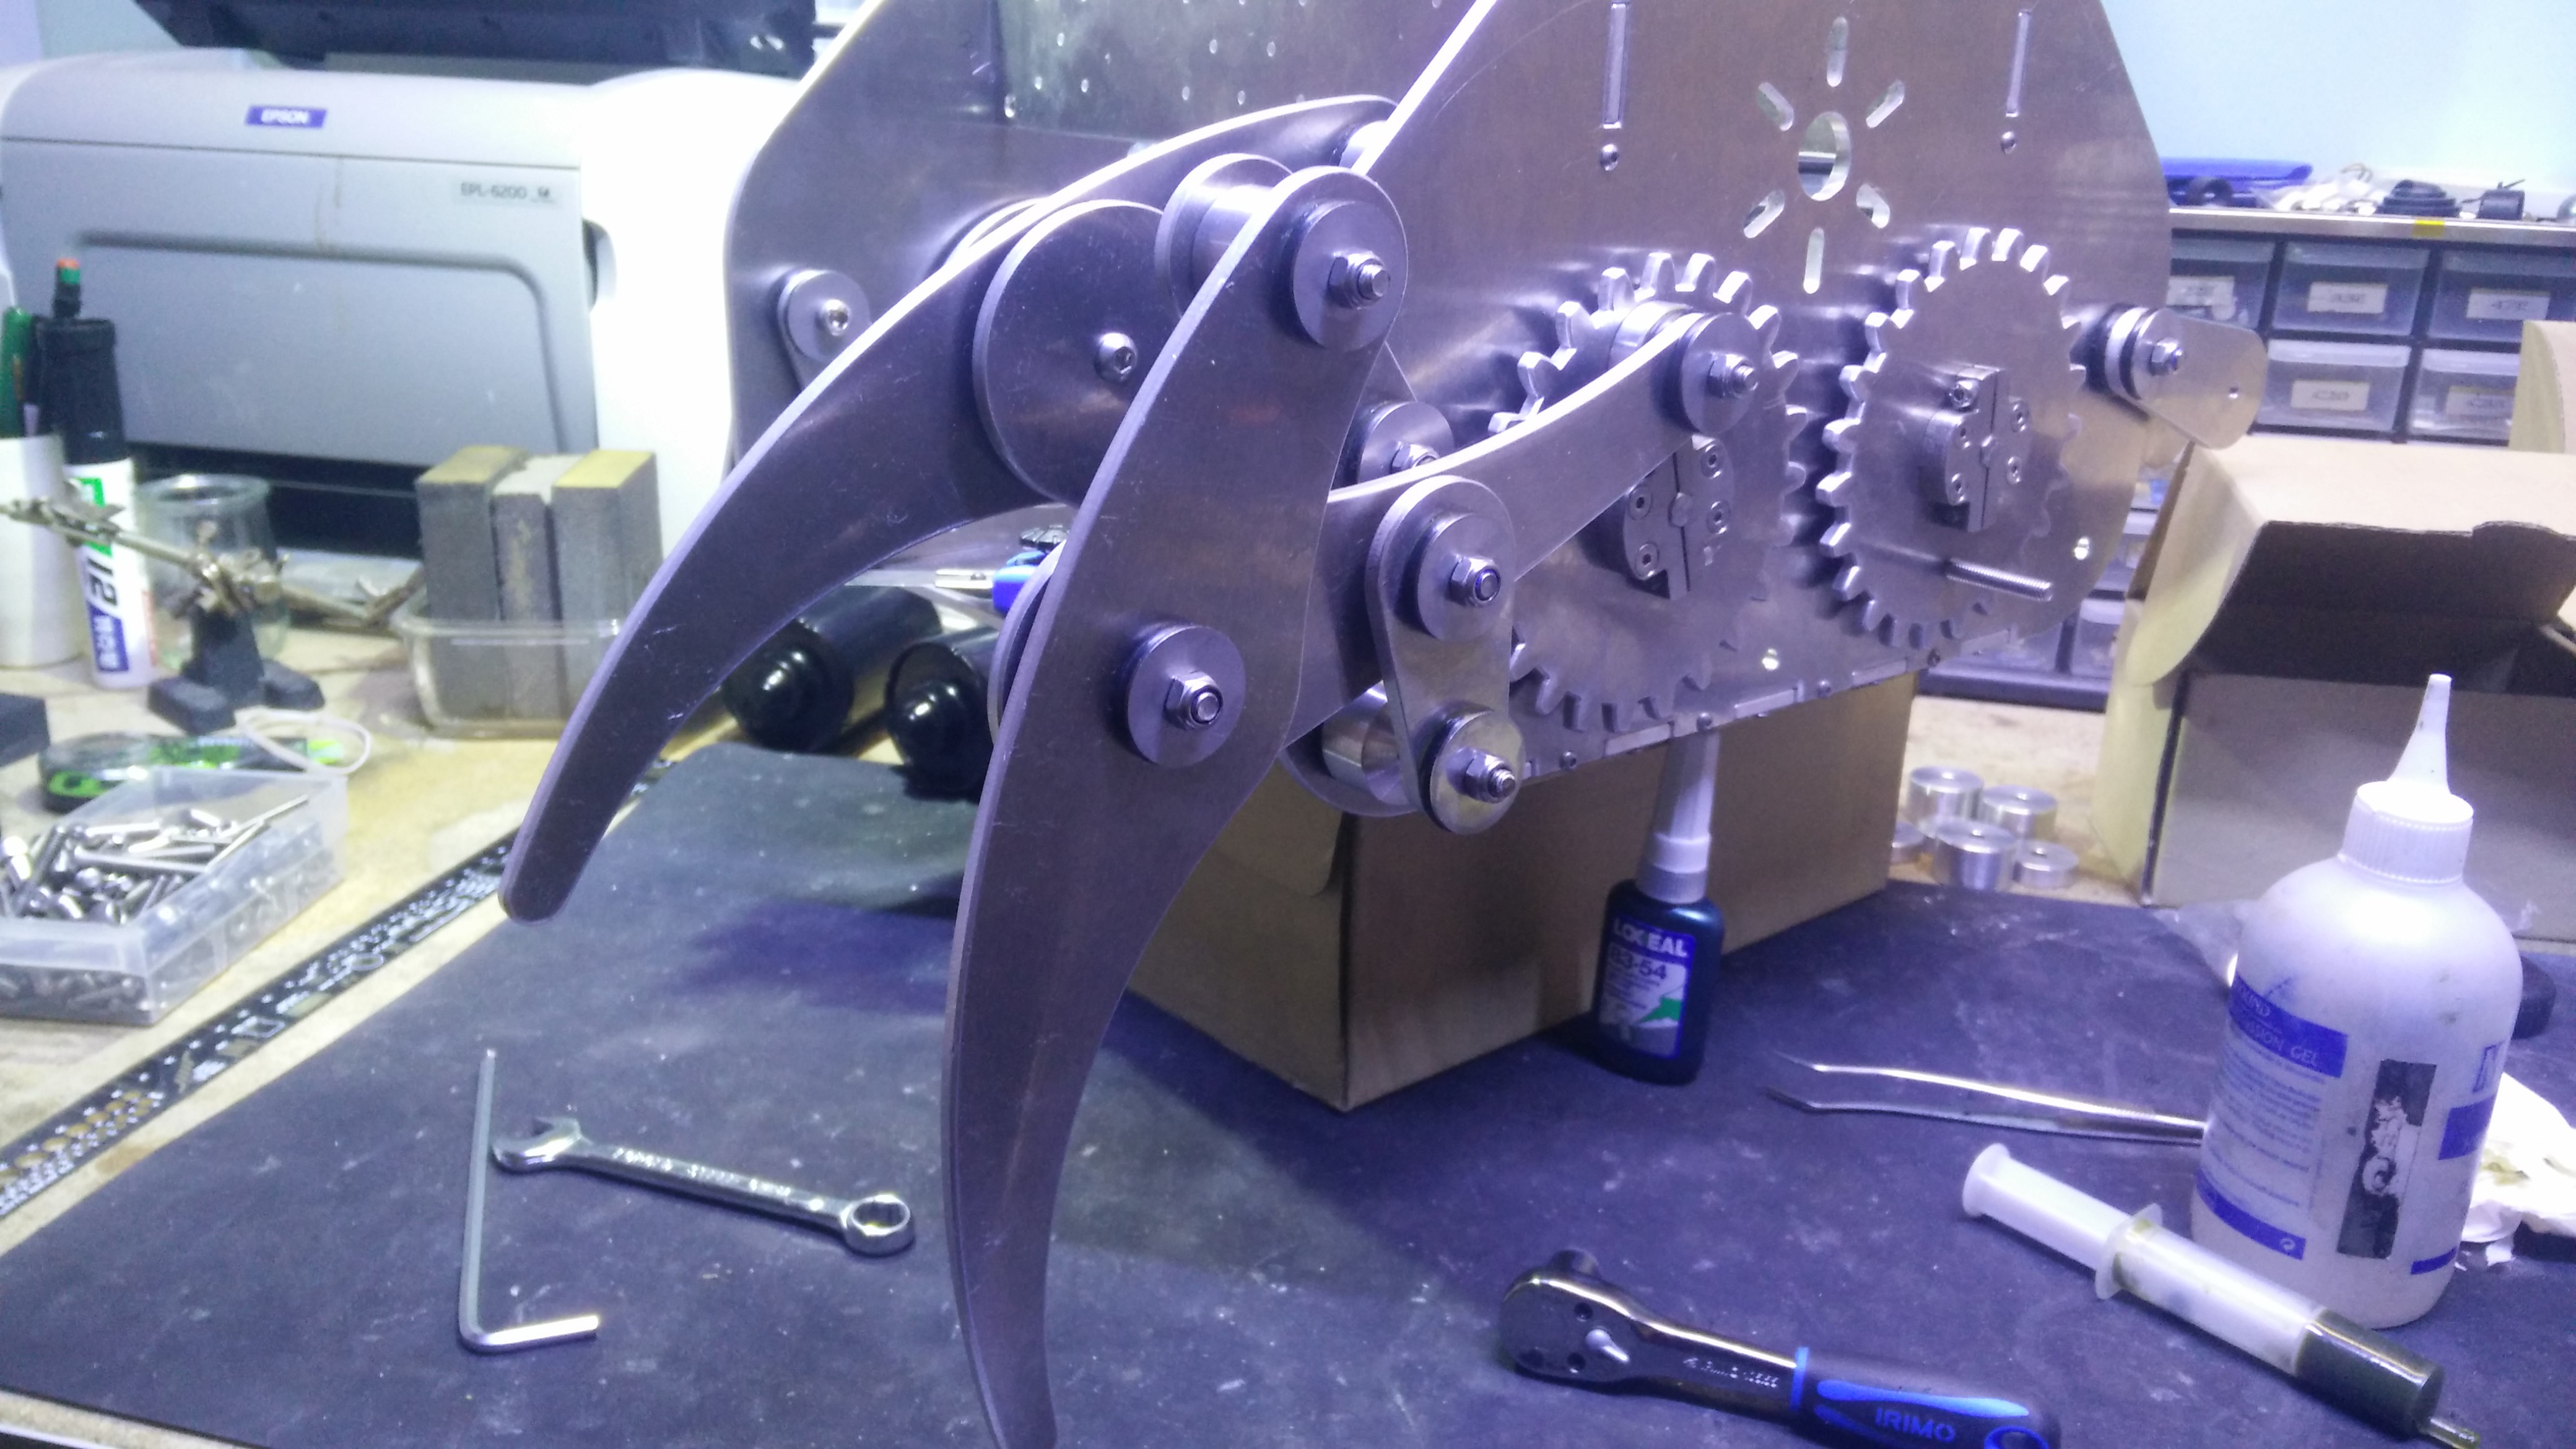
After covering the axles in grease, the whole leg was fitted onto the rest of the mechanism as seen below:
A thrust bearing and o-ring is placed on each protruding bolt.
 Followed by a covering washer and a nylon-insert lock nut.
 Once the inner leg is done, similar steps are followed for the outer leg.
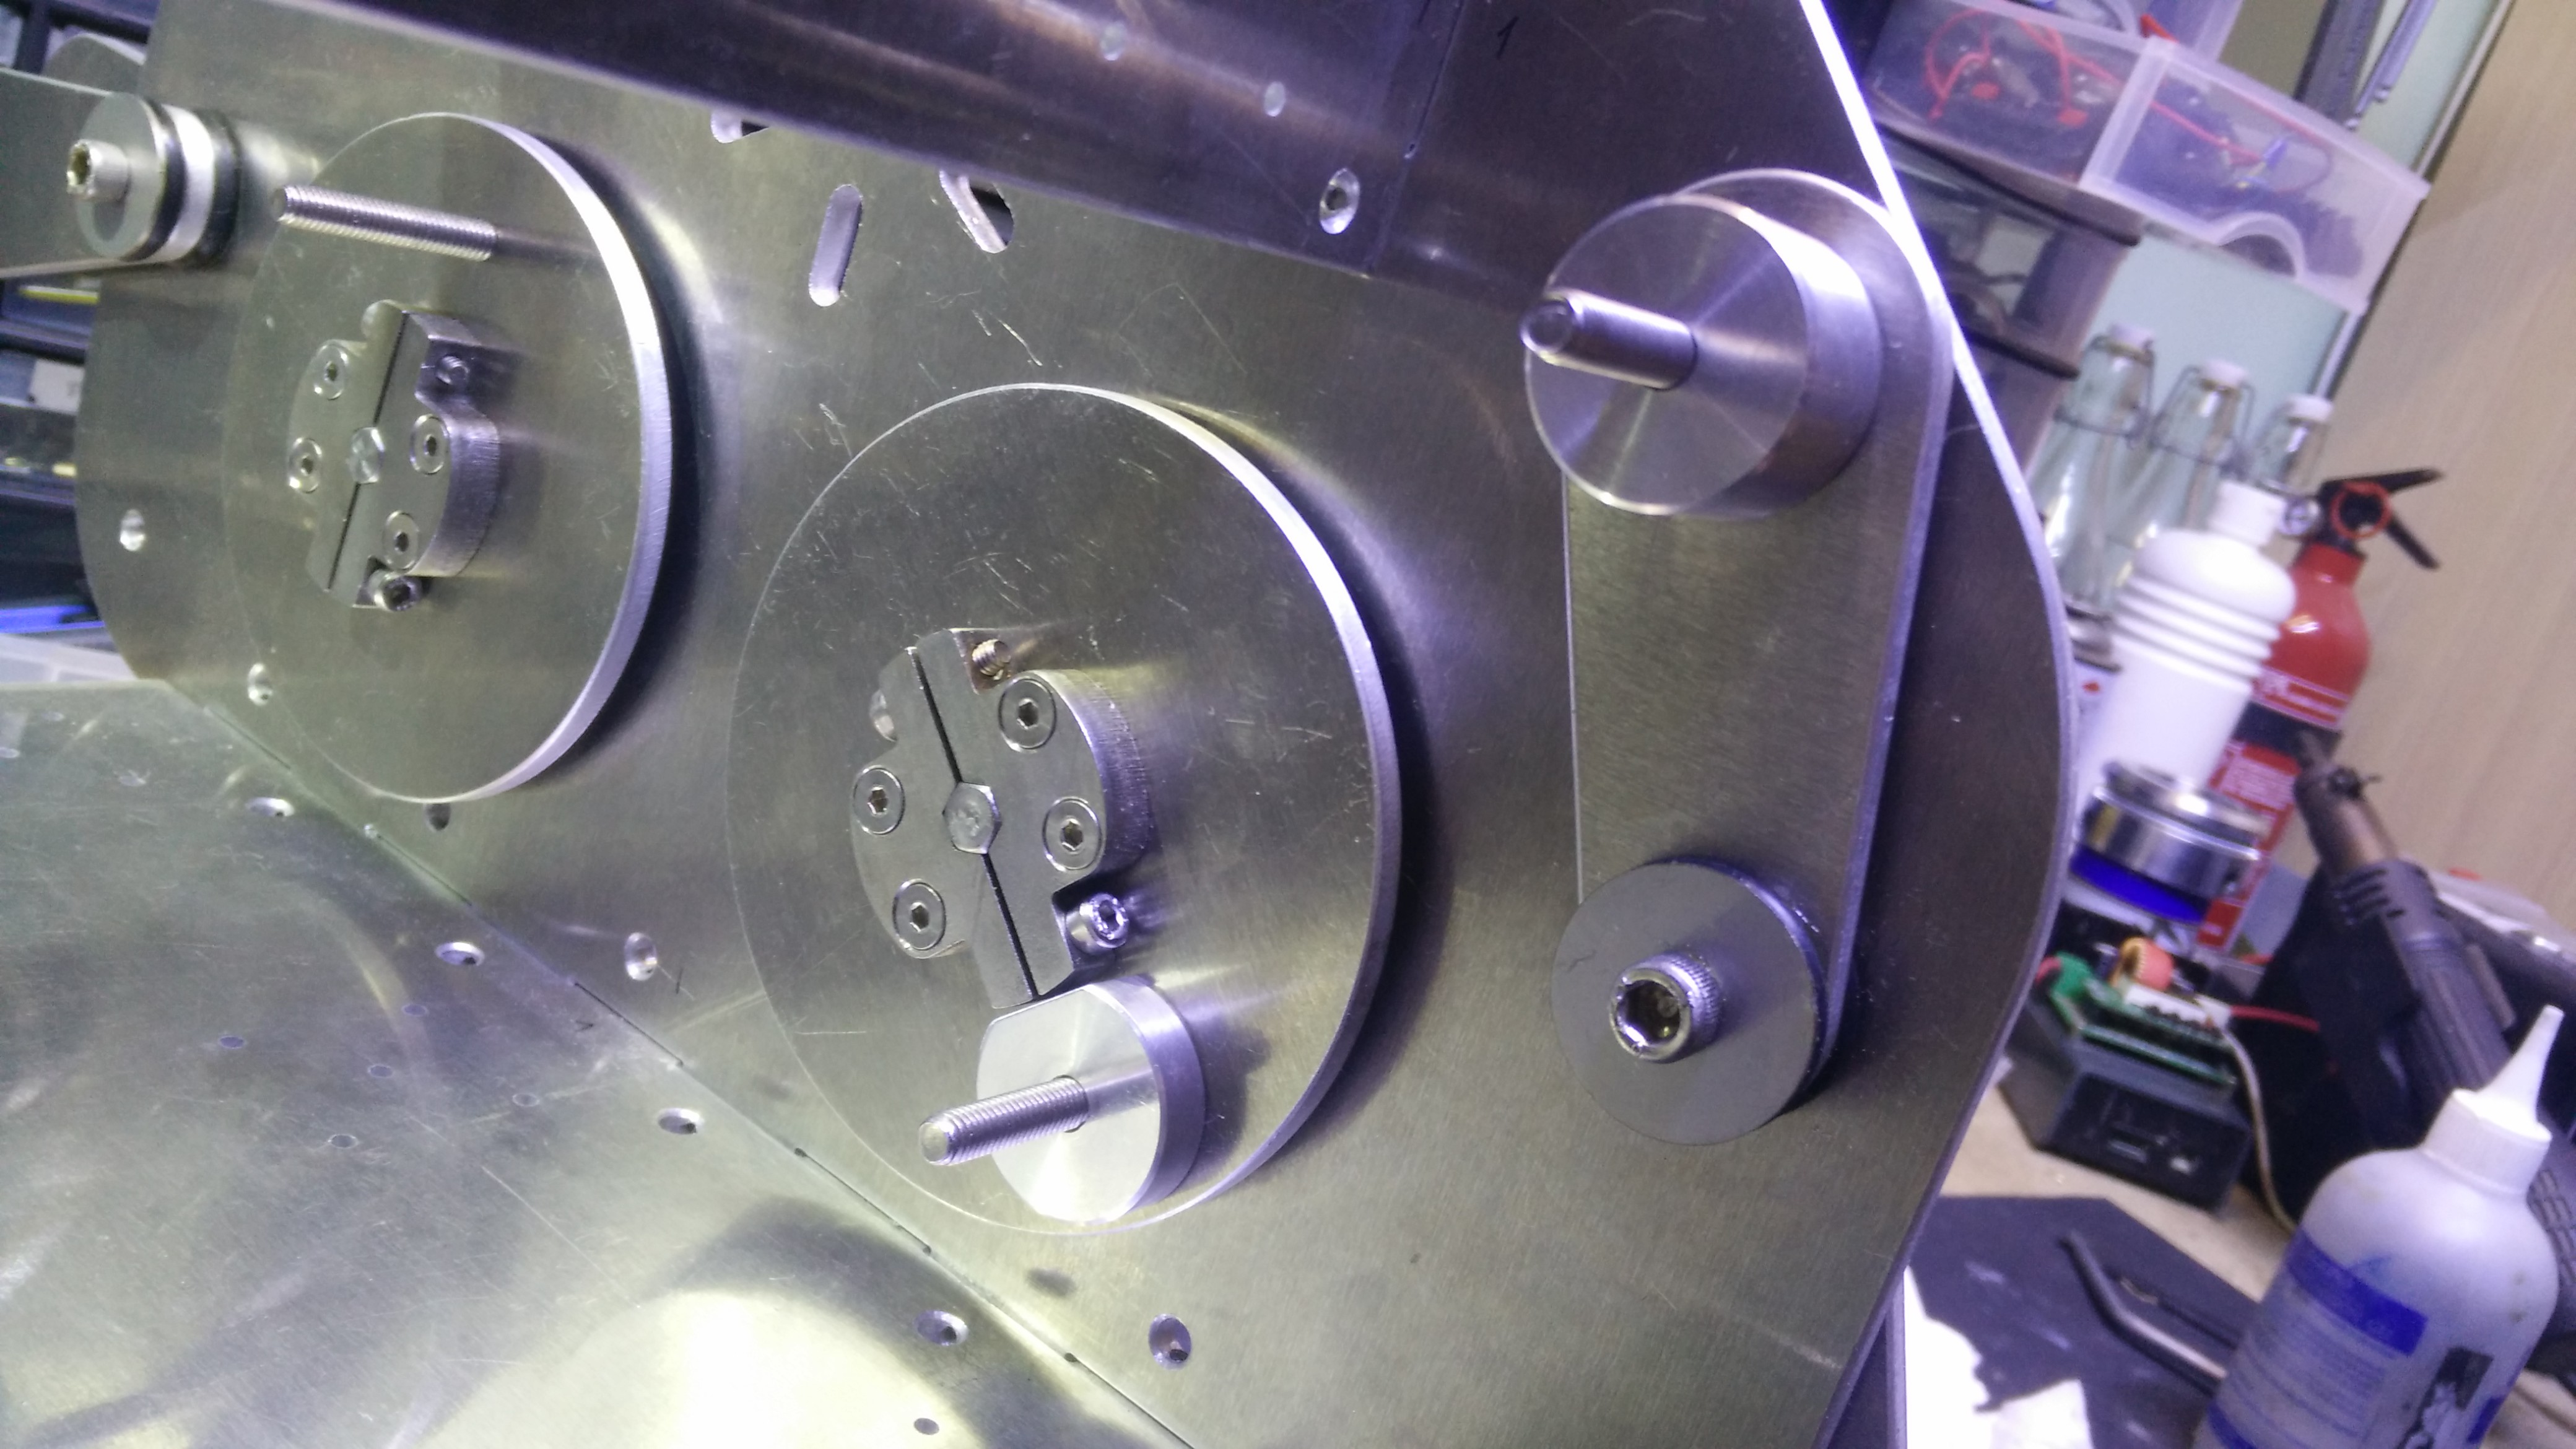
The 8mm and 17mm spacers are placed on their respective axles, followed by greased bearings and o-rings.
 The 26mm spacer is placed on the bearing for the lower pivot.
 The outer leg is slided onto the three axles (which have been greased beforehand).
 As with the inner legs, bearings and o-ring are placed on each bolt, and a washer and nylon-insert lock nut are used to finish the joints.
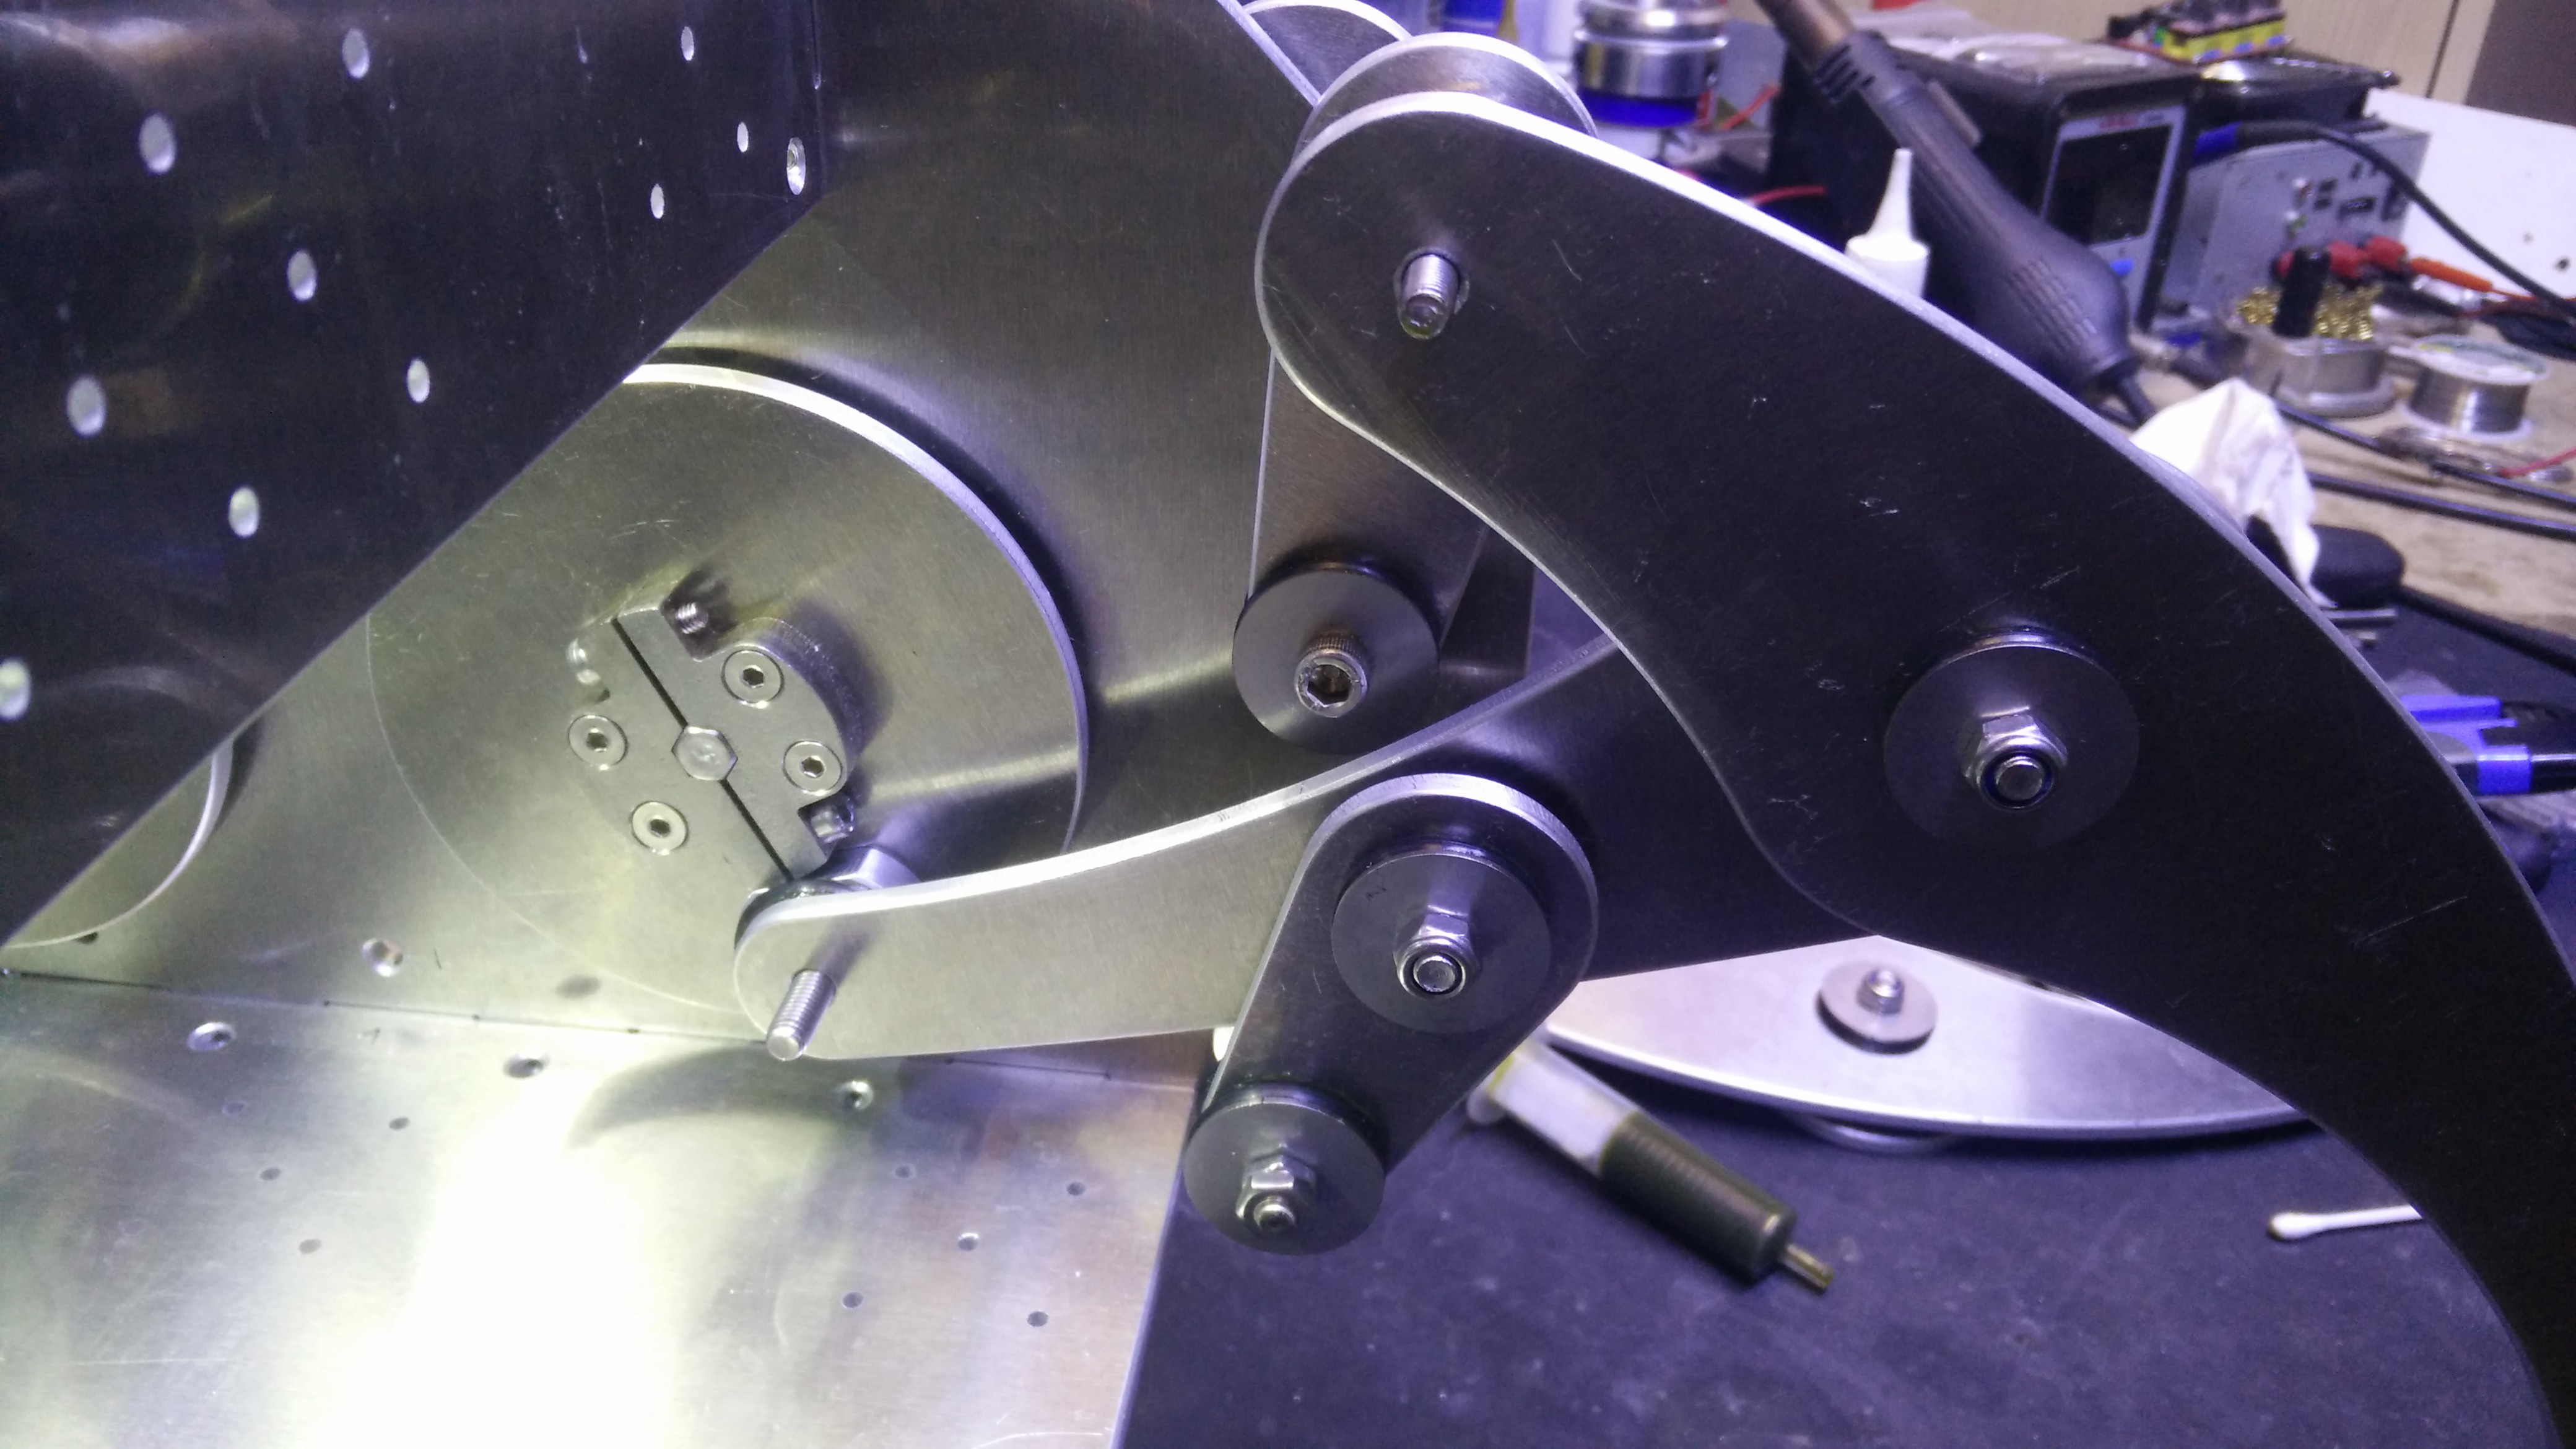
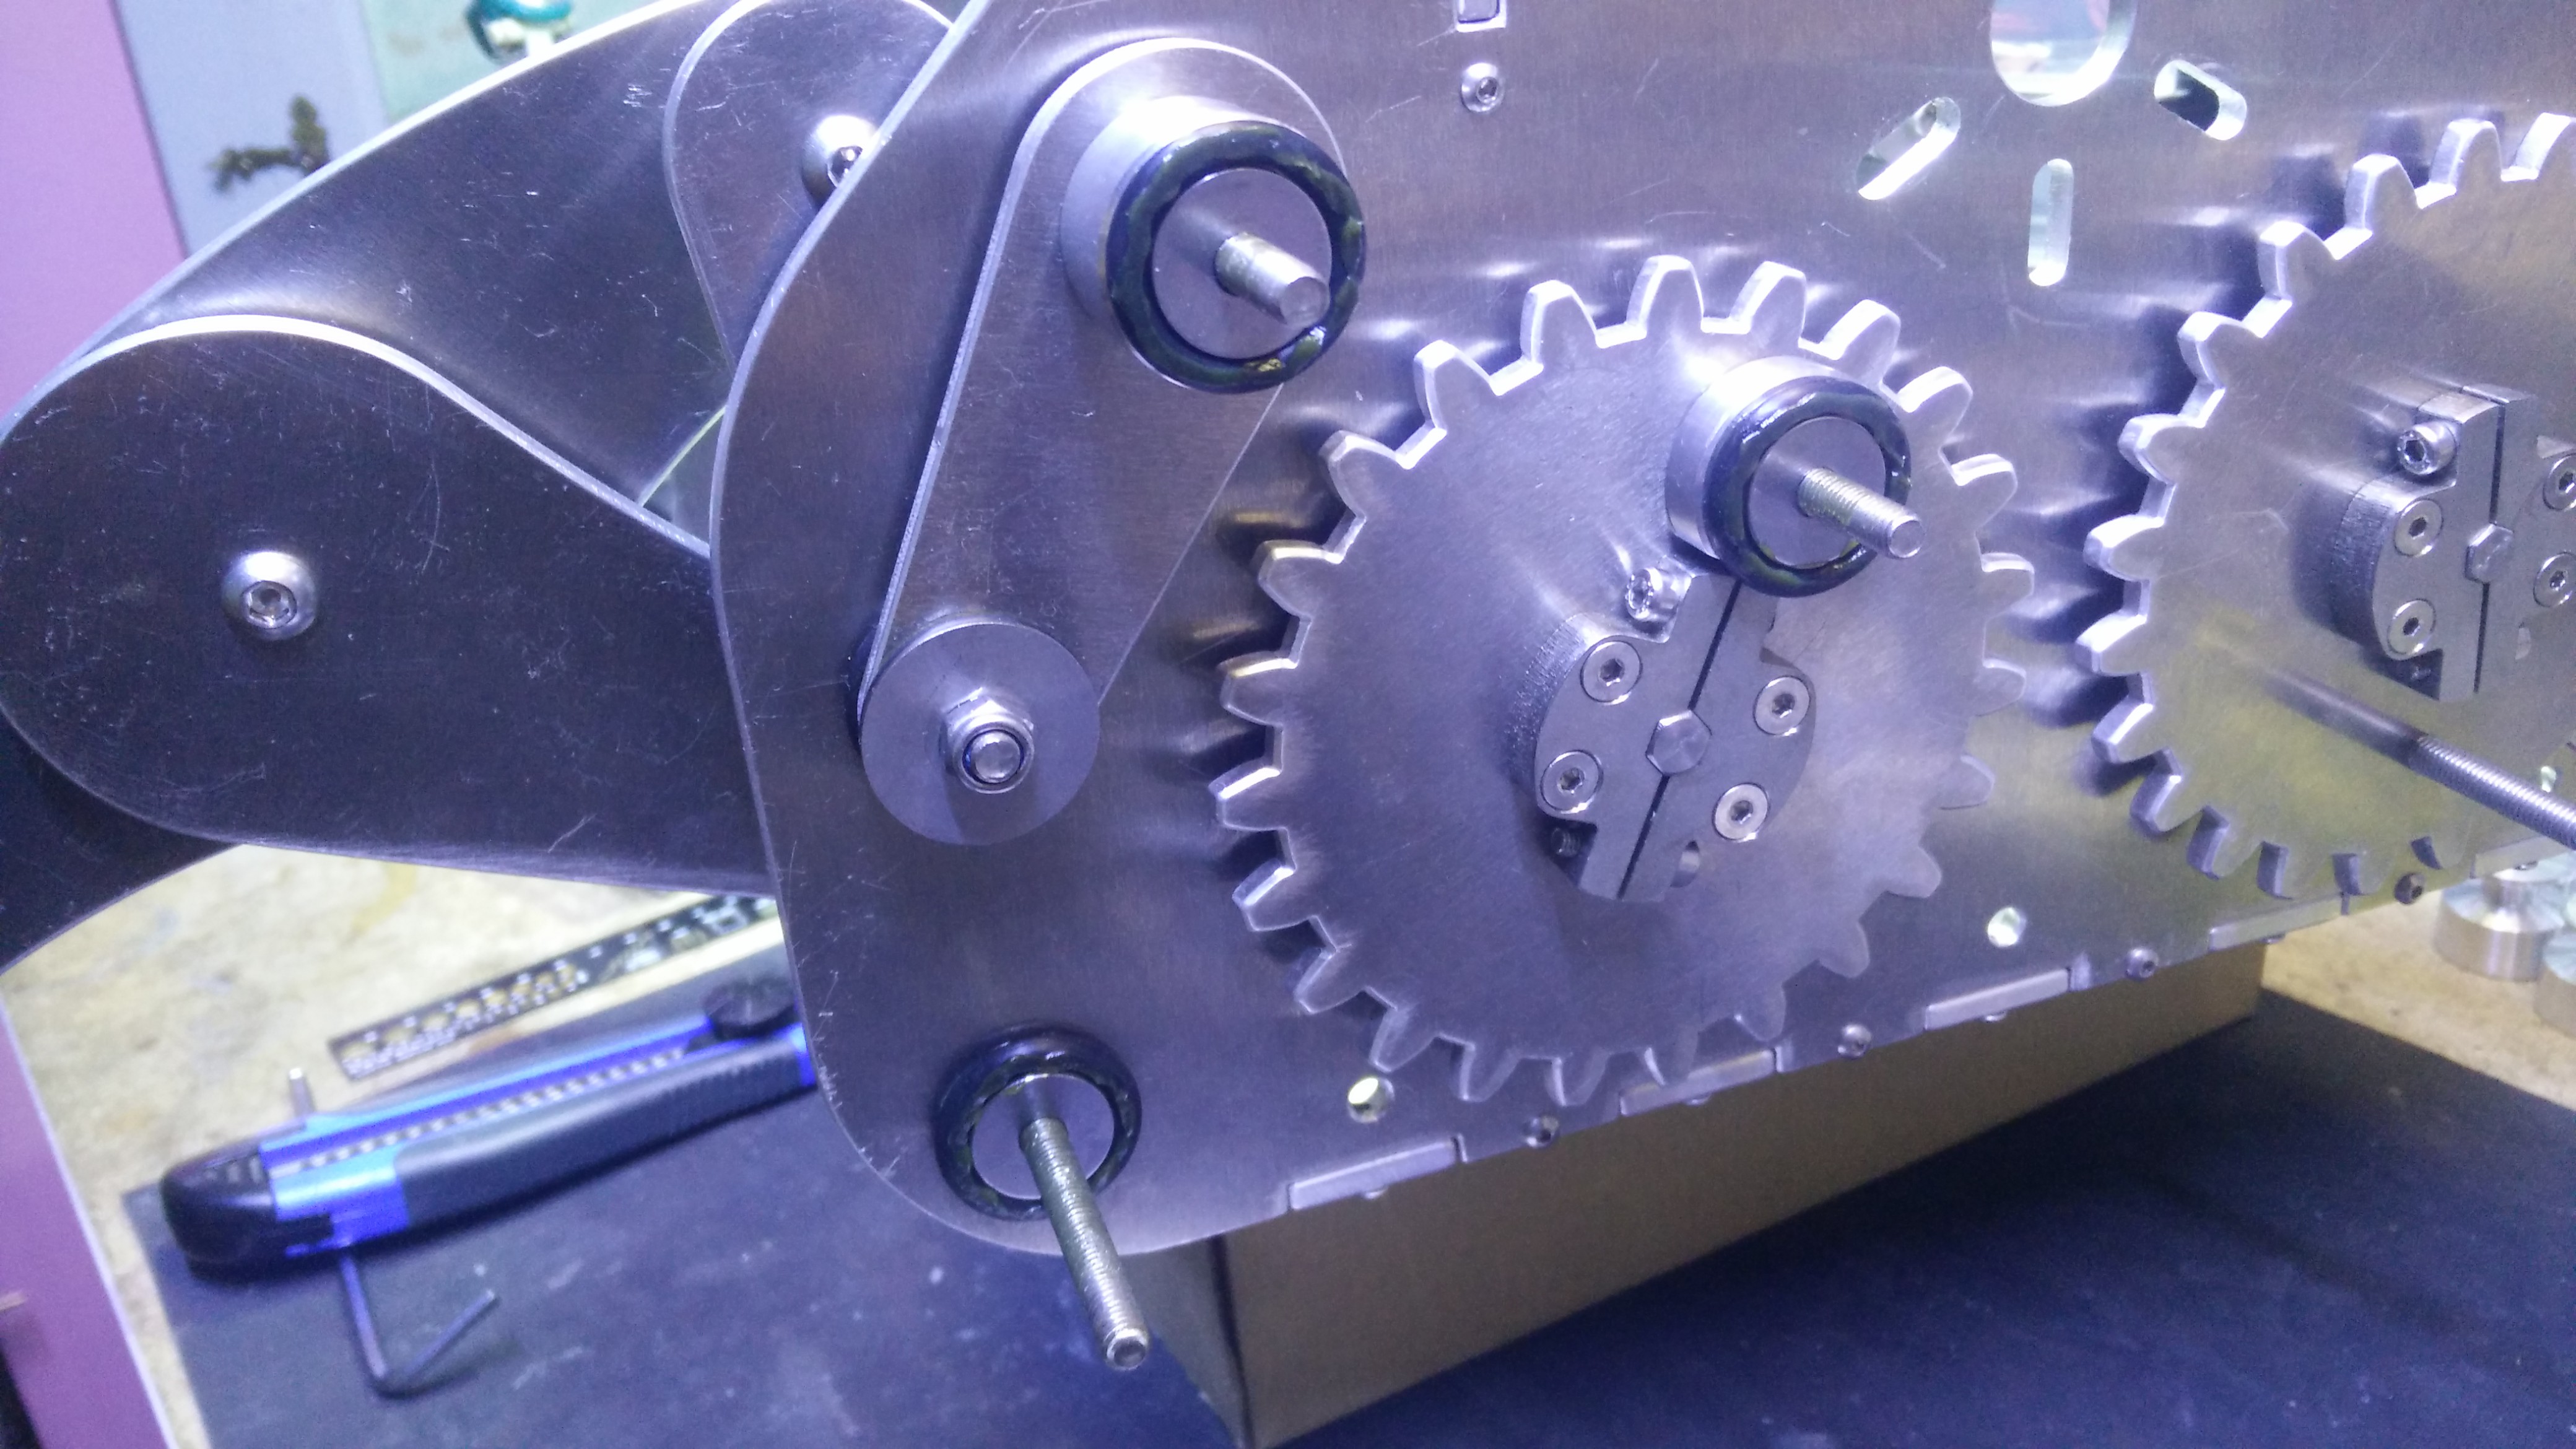
This is how the finished mechanism for a pair fo legs looks like from above:
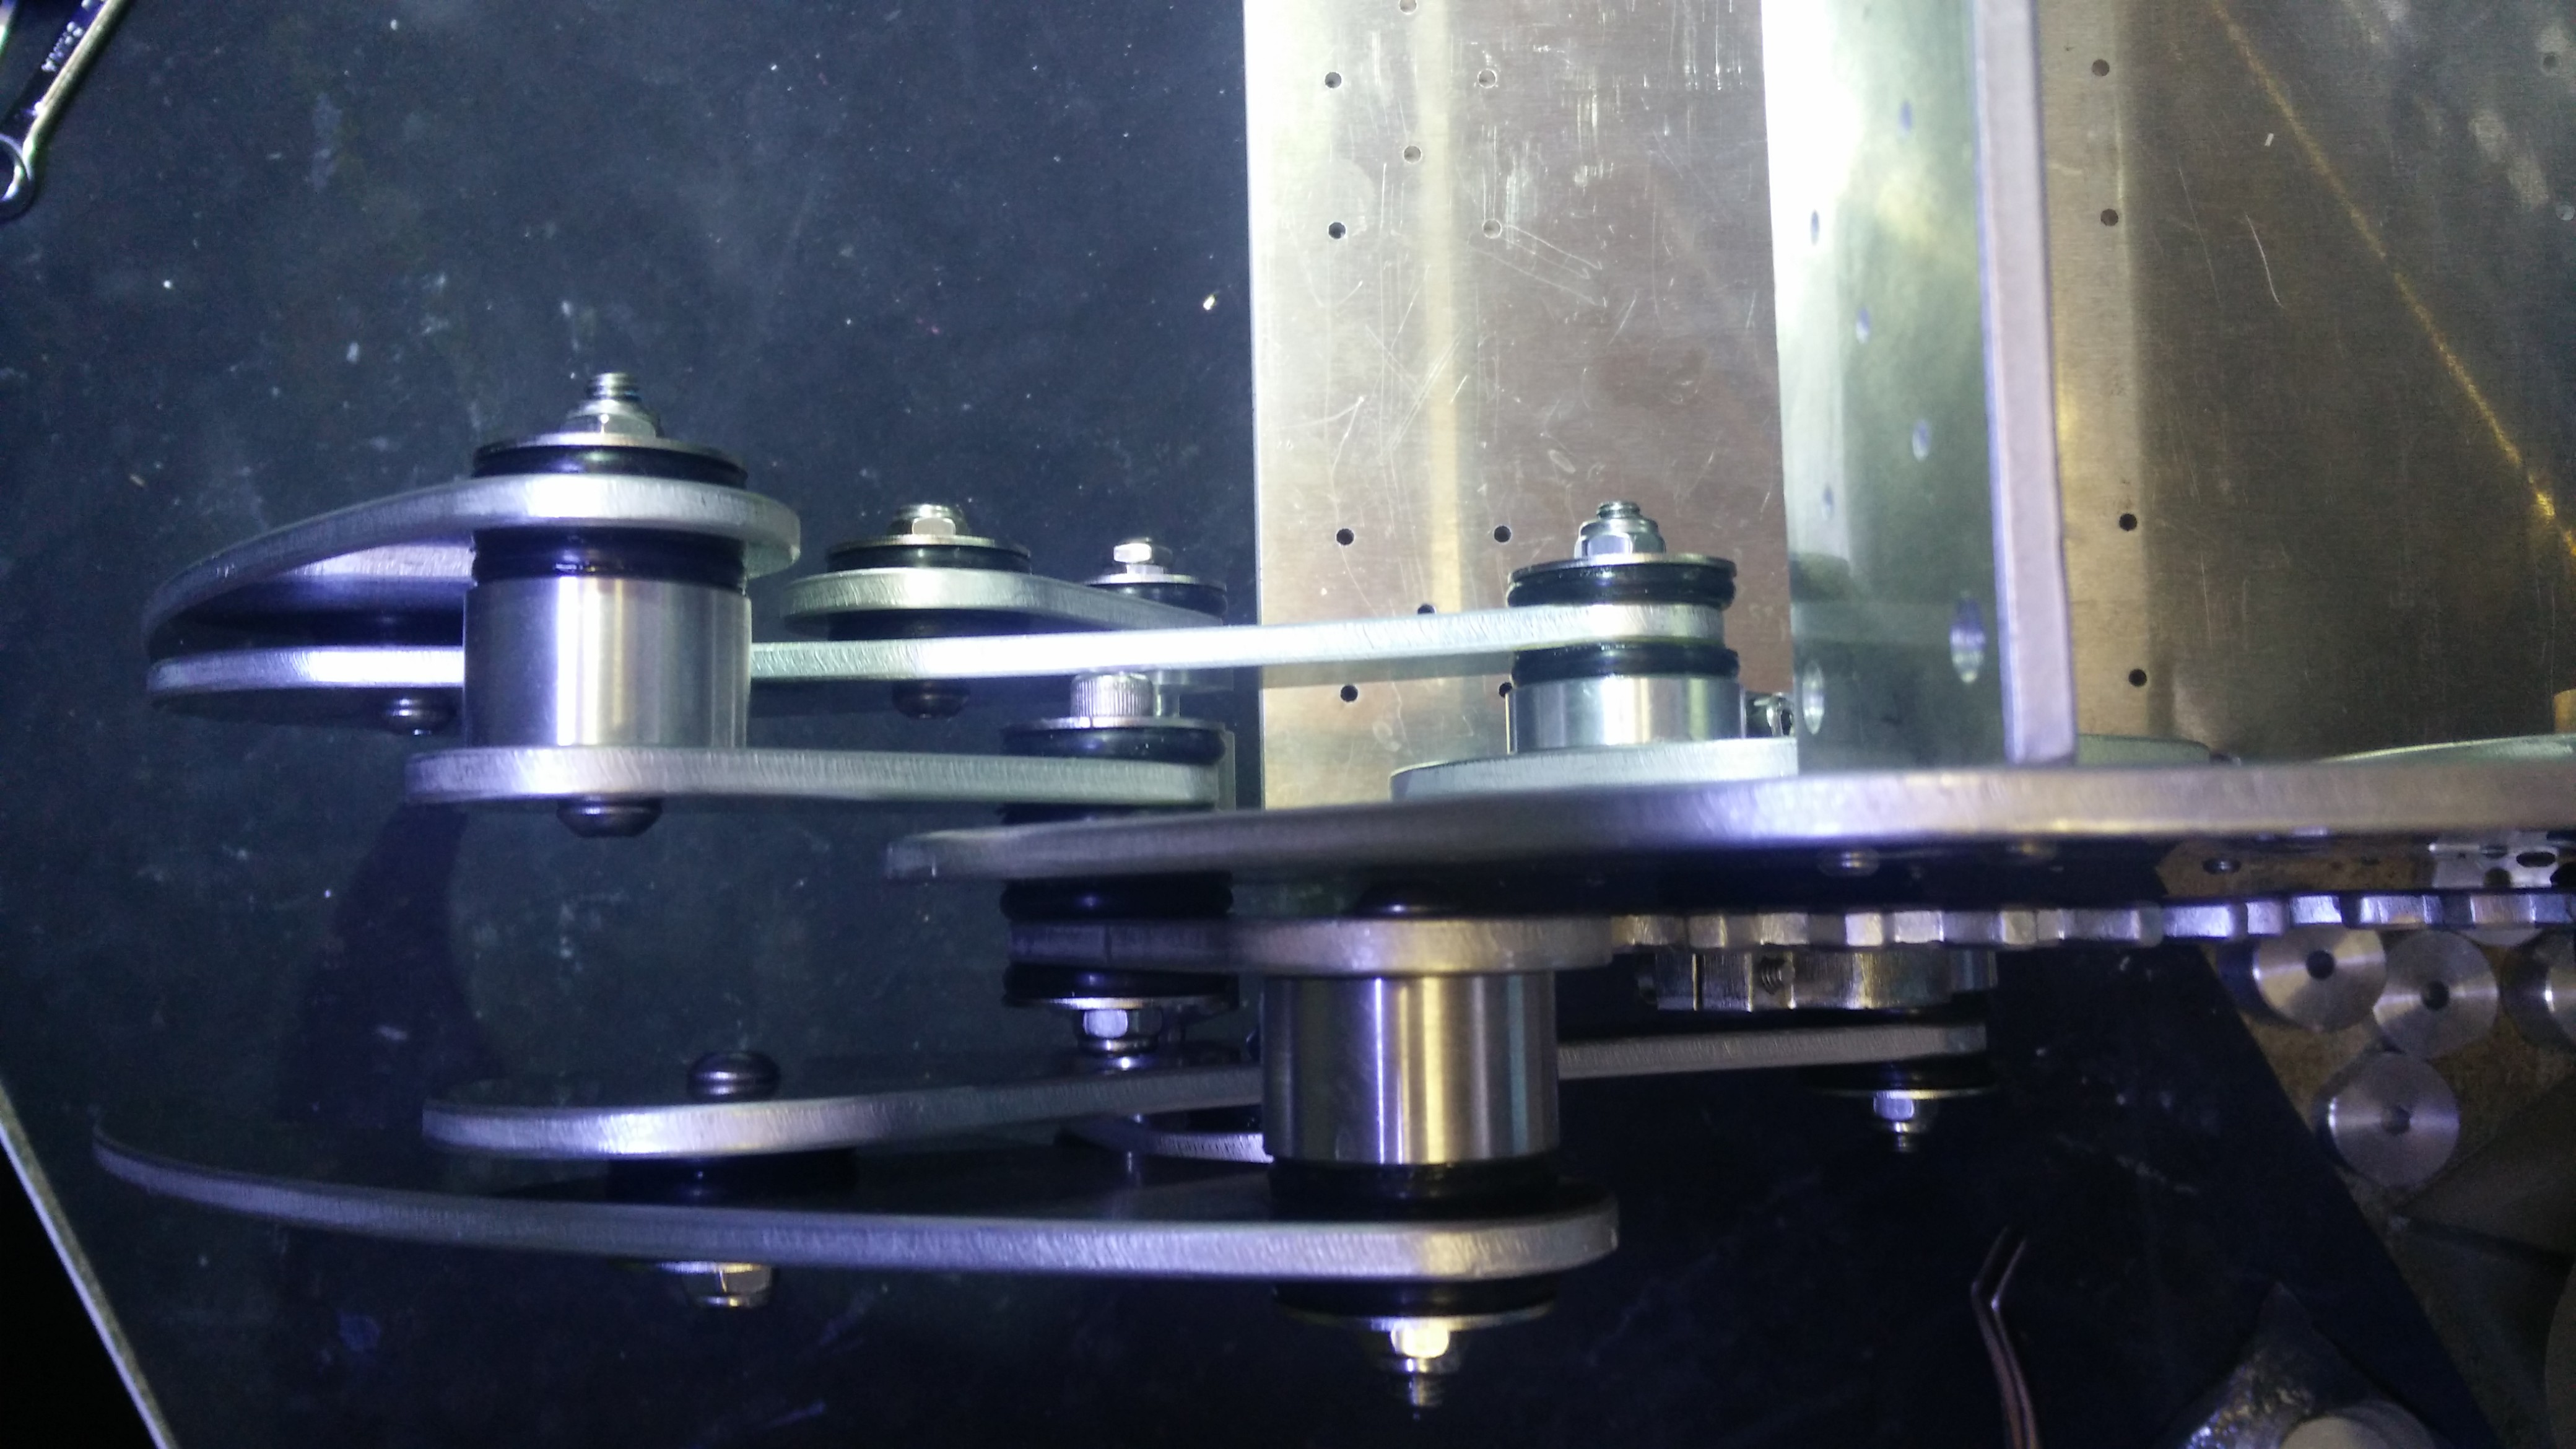
You can see that all joints have two bearings each (covered with o-rings) to rotate with very little friction.

The mechanism for the pair of legs is assembled mirrored to complete one side of the robot.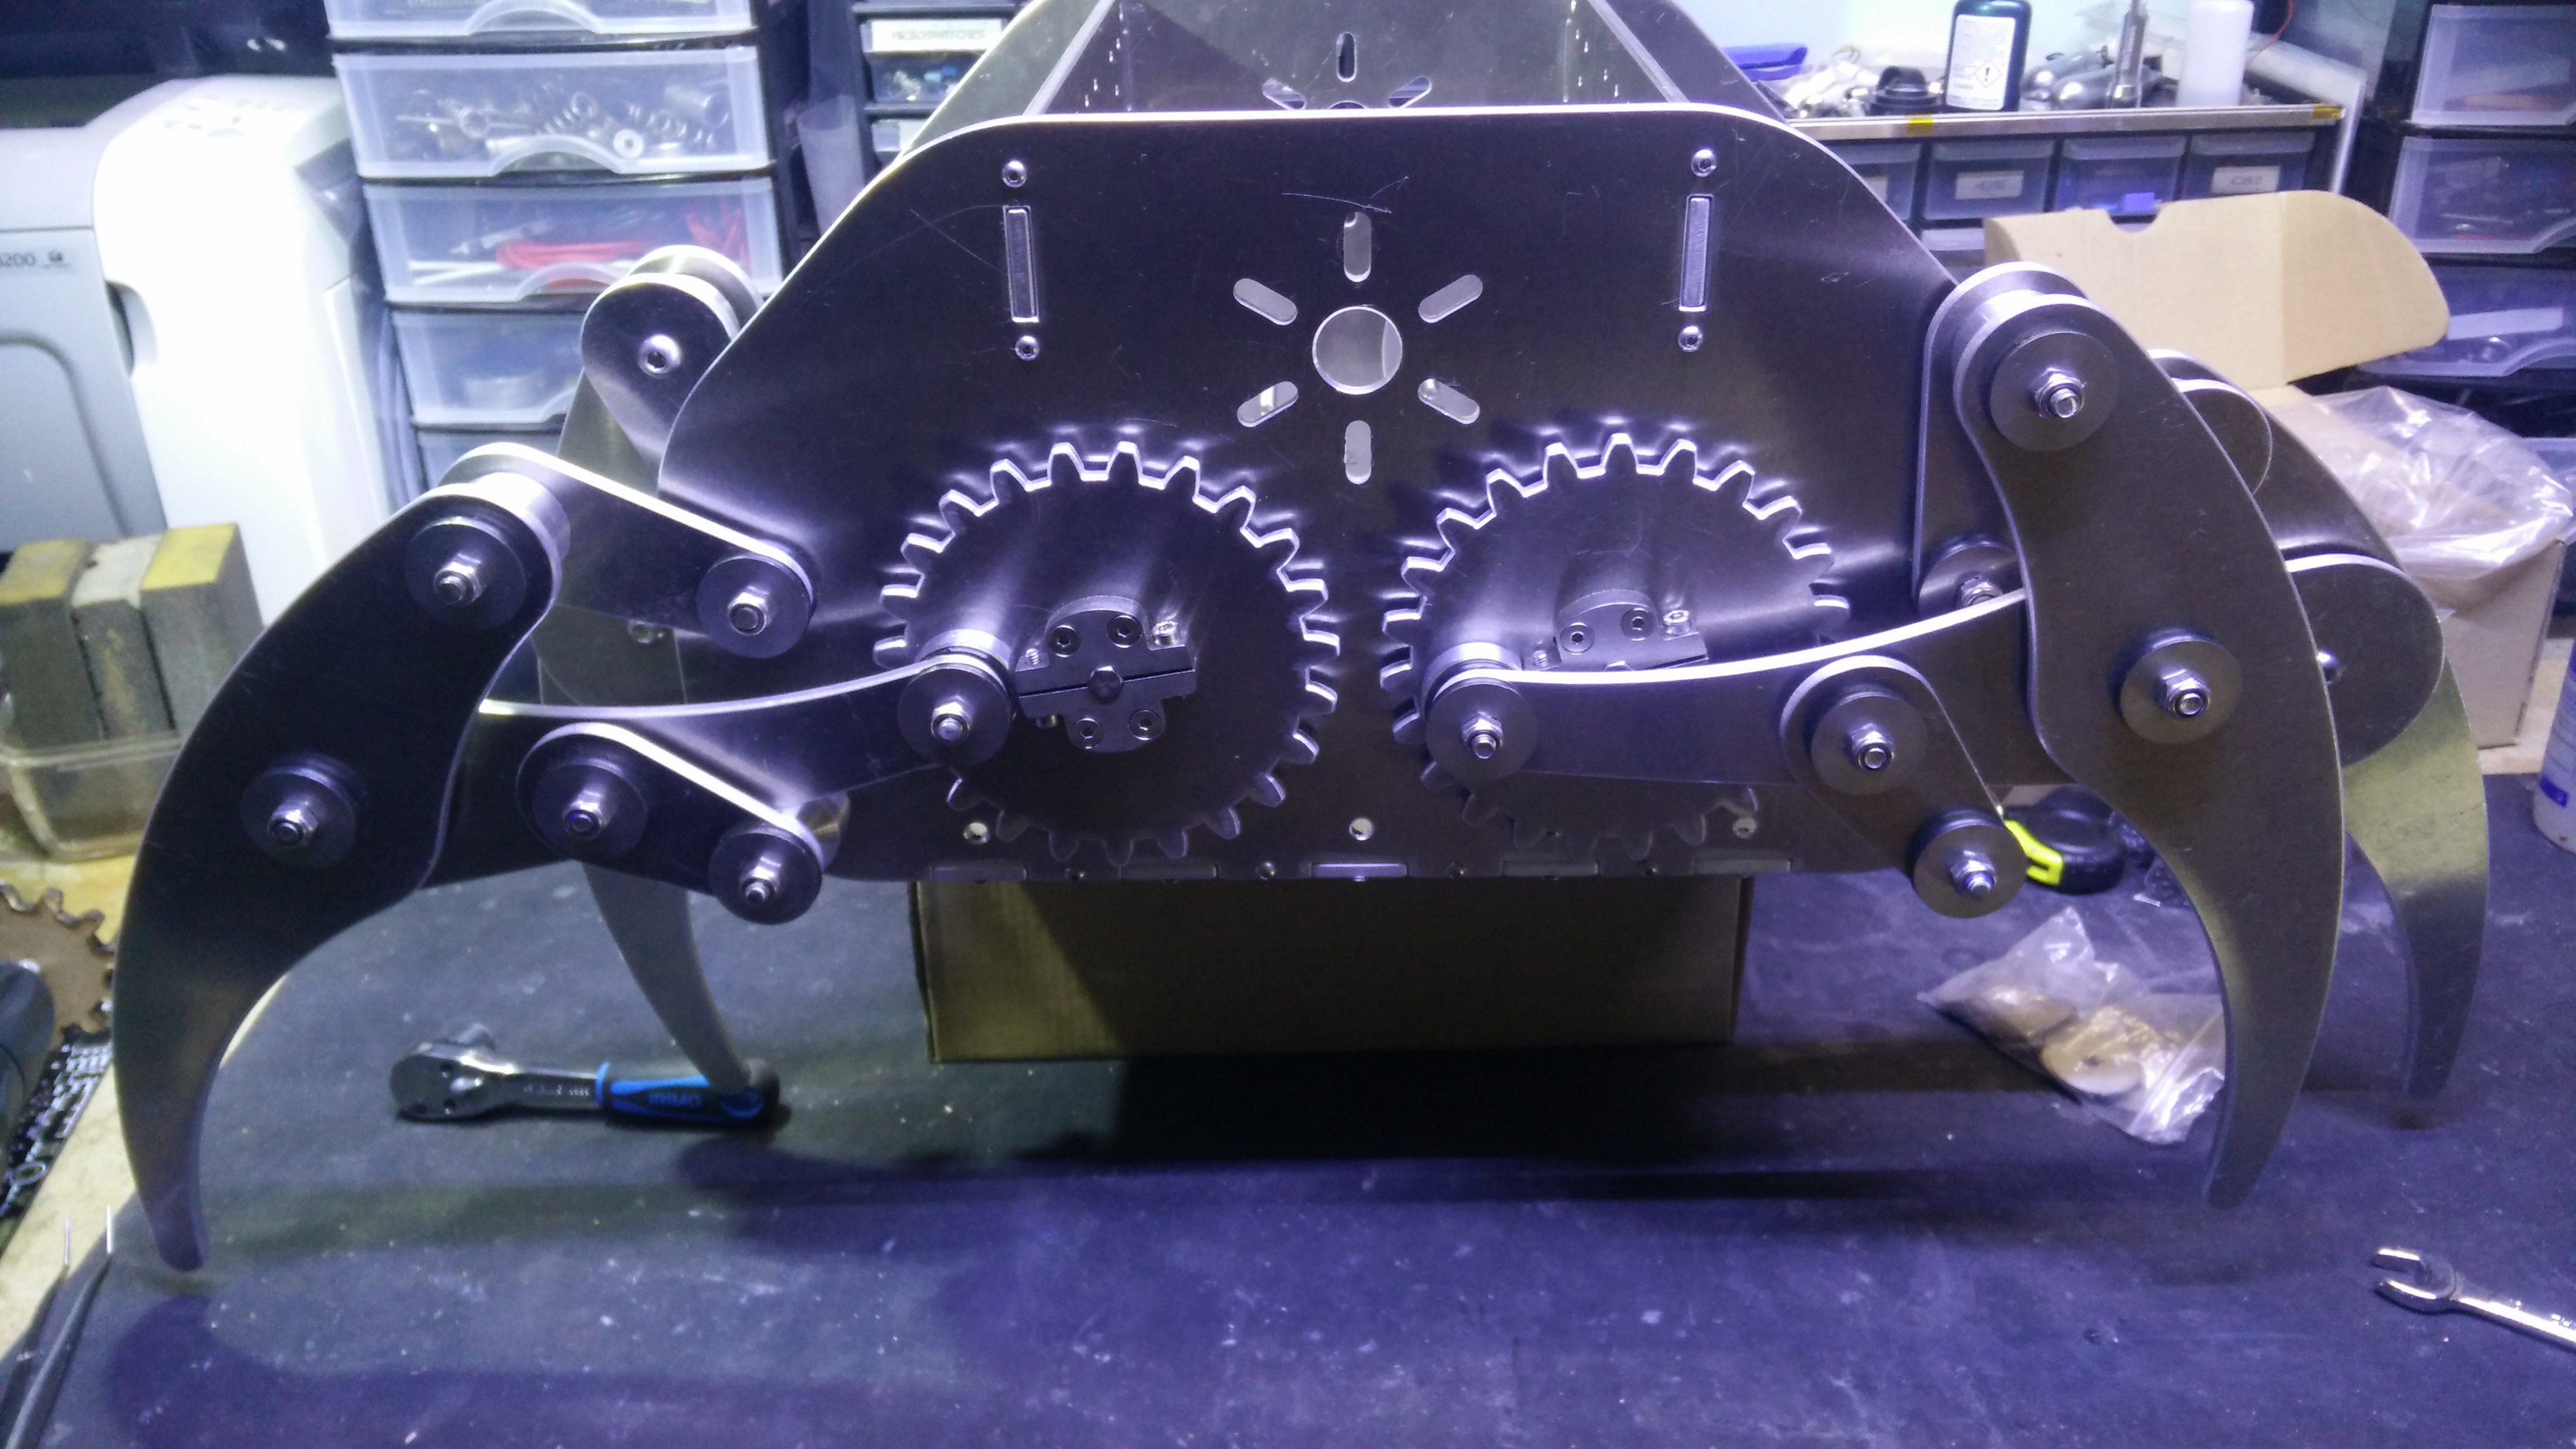
And done twice more on the other side. The whole mechanism is now completed, and the robot can now stand on its own for the first time.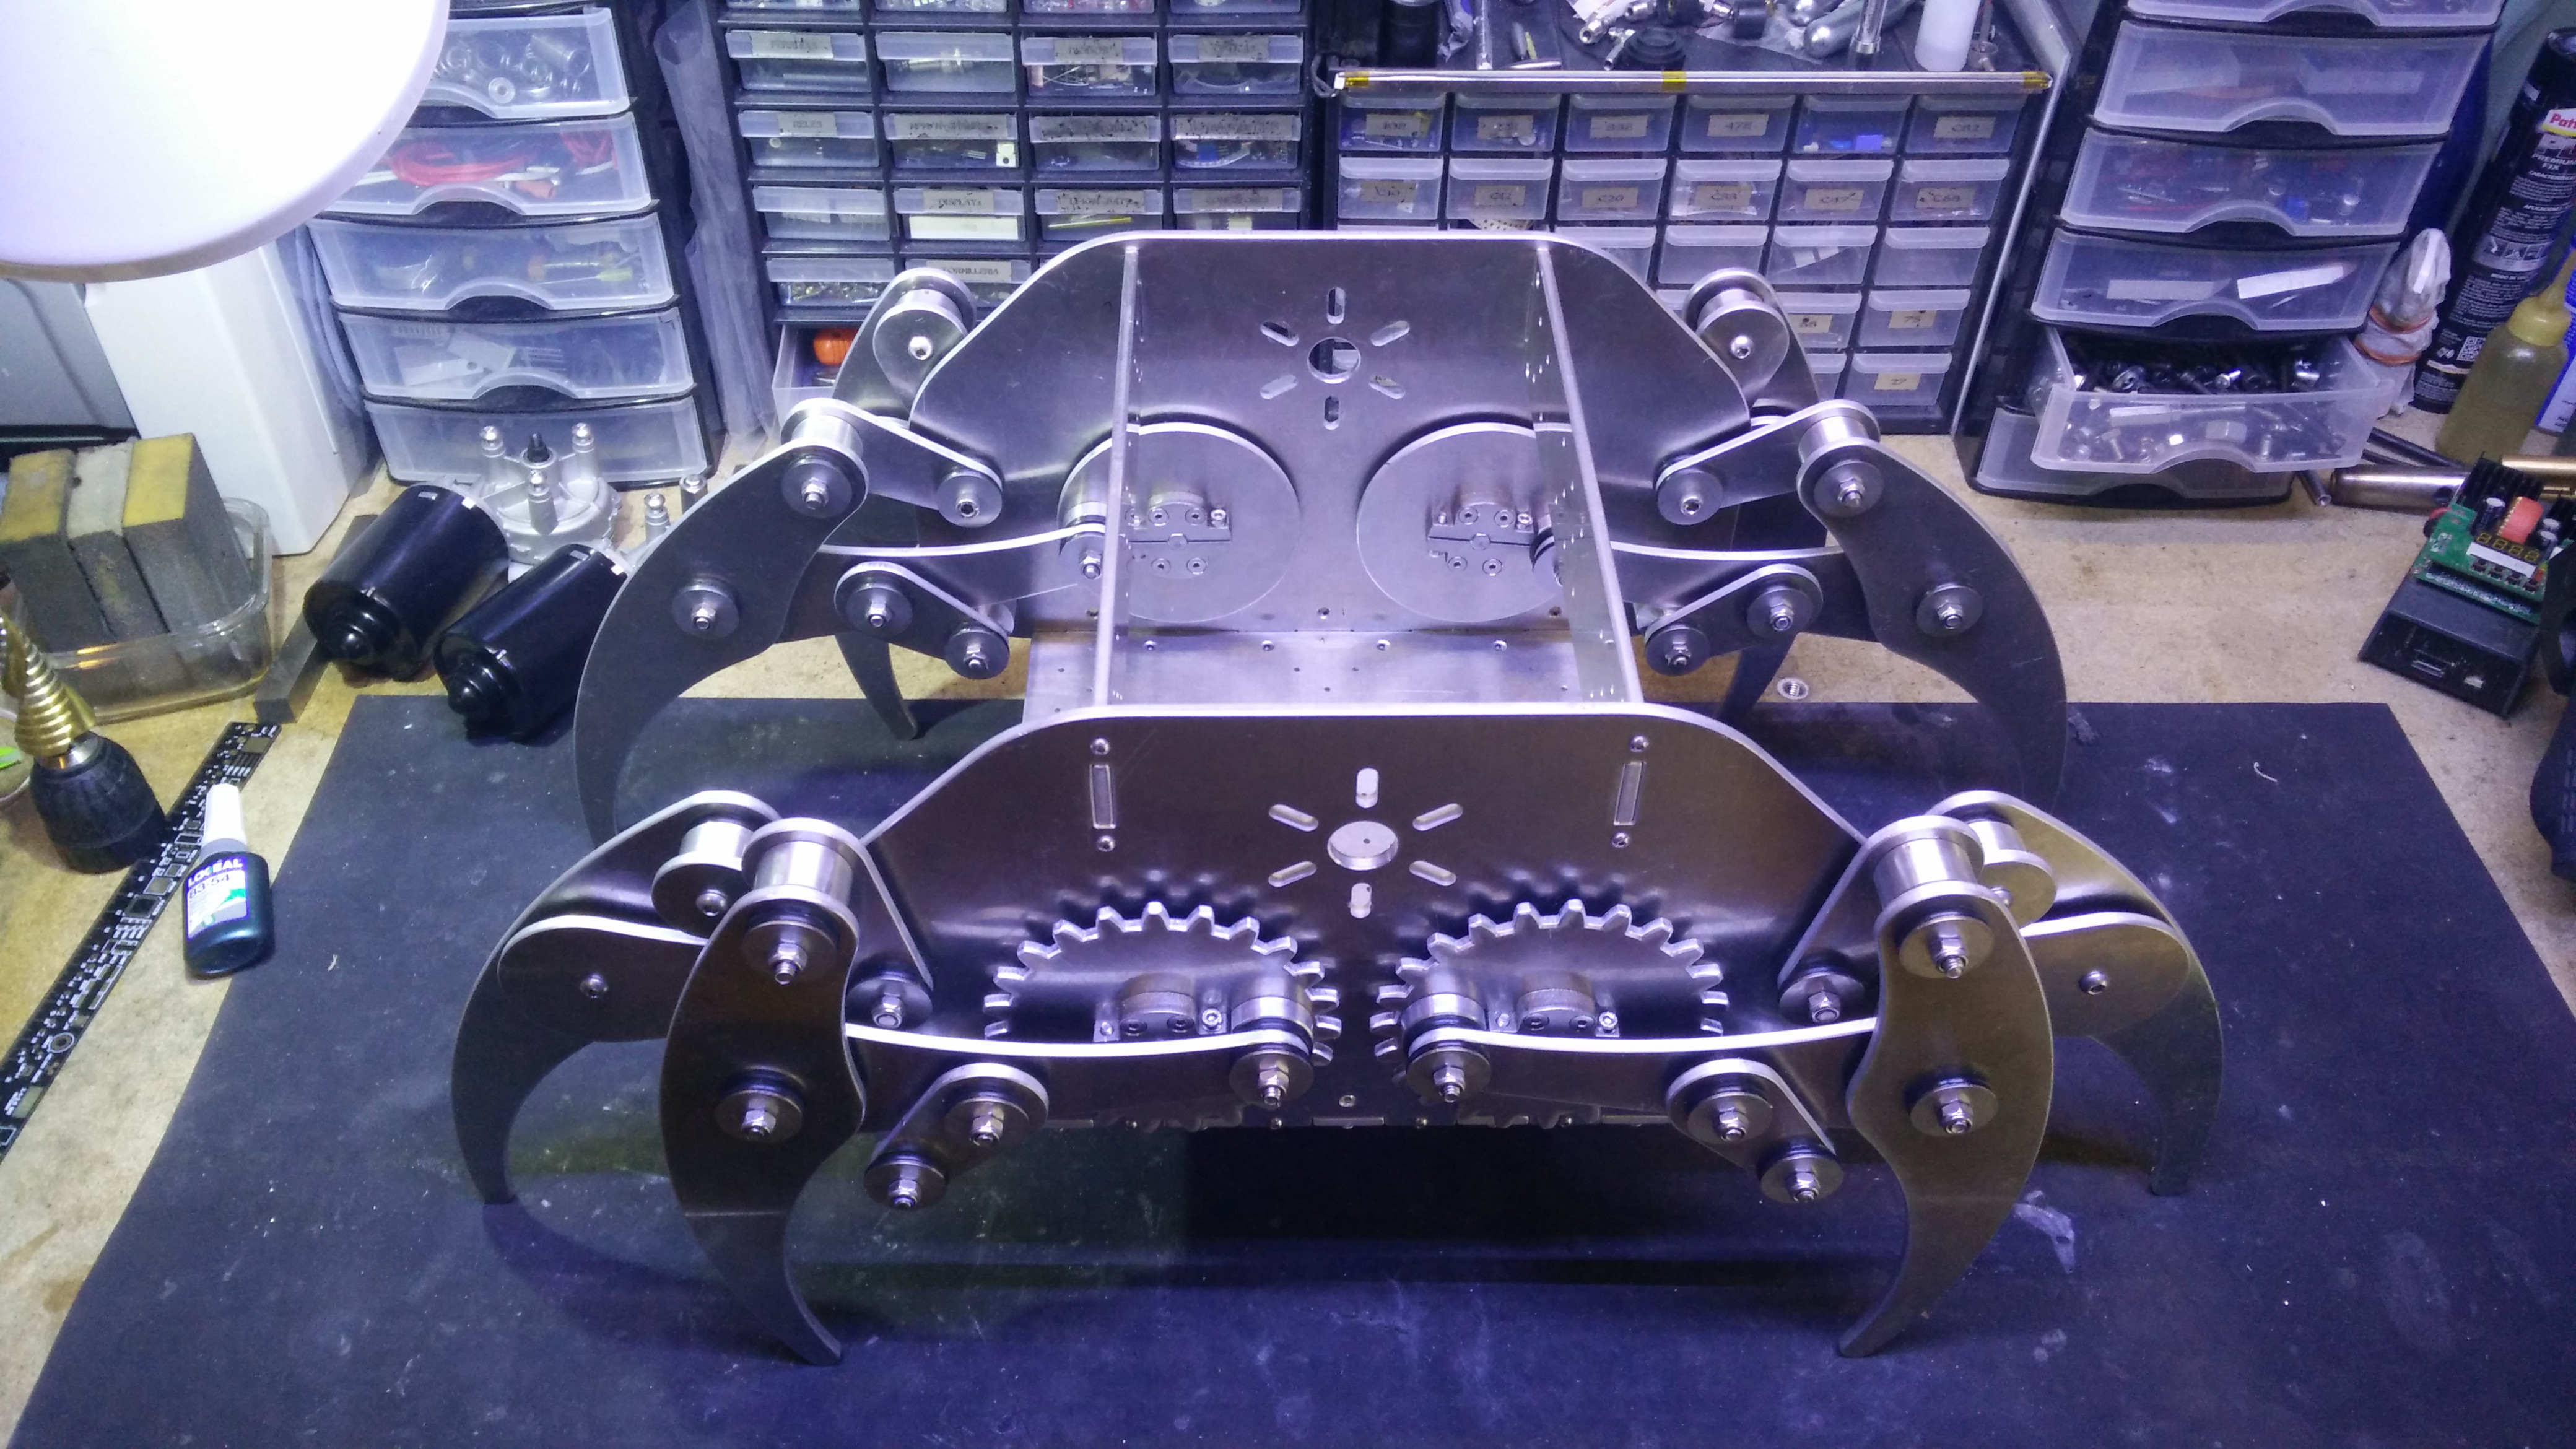
It's an impressive sight to behold, and even better that what i had envisioned.
Depending of the leg position, it is between 50cm and 60cm in lenght (just under two feet long). I can't wait to get this working.
It really would be awesome to walk into a park with this following you around with a crate of beers!
It would make for a badass baby stroller too. The possibilities are endless!
Of course this could be used for more useful purposes, like an exploration rover, or to carry supplies and instrumentation to help with disaster relief efforts...
The whole point of this project is to make a multi-purpose walking platform, so when it comes to applications, the sky is the limit [or a very steep slope, but you get the point].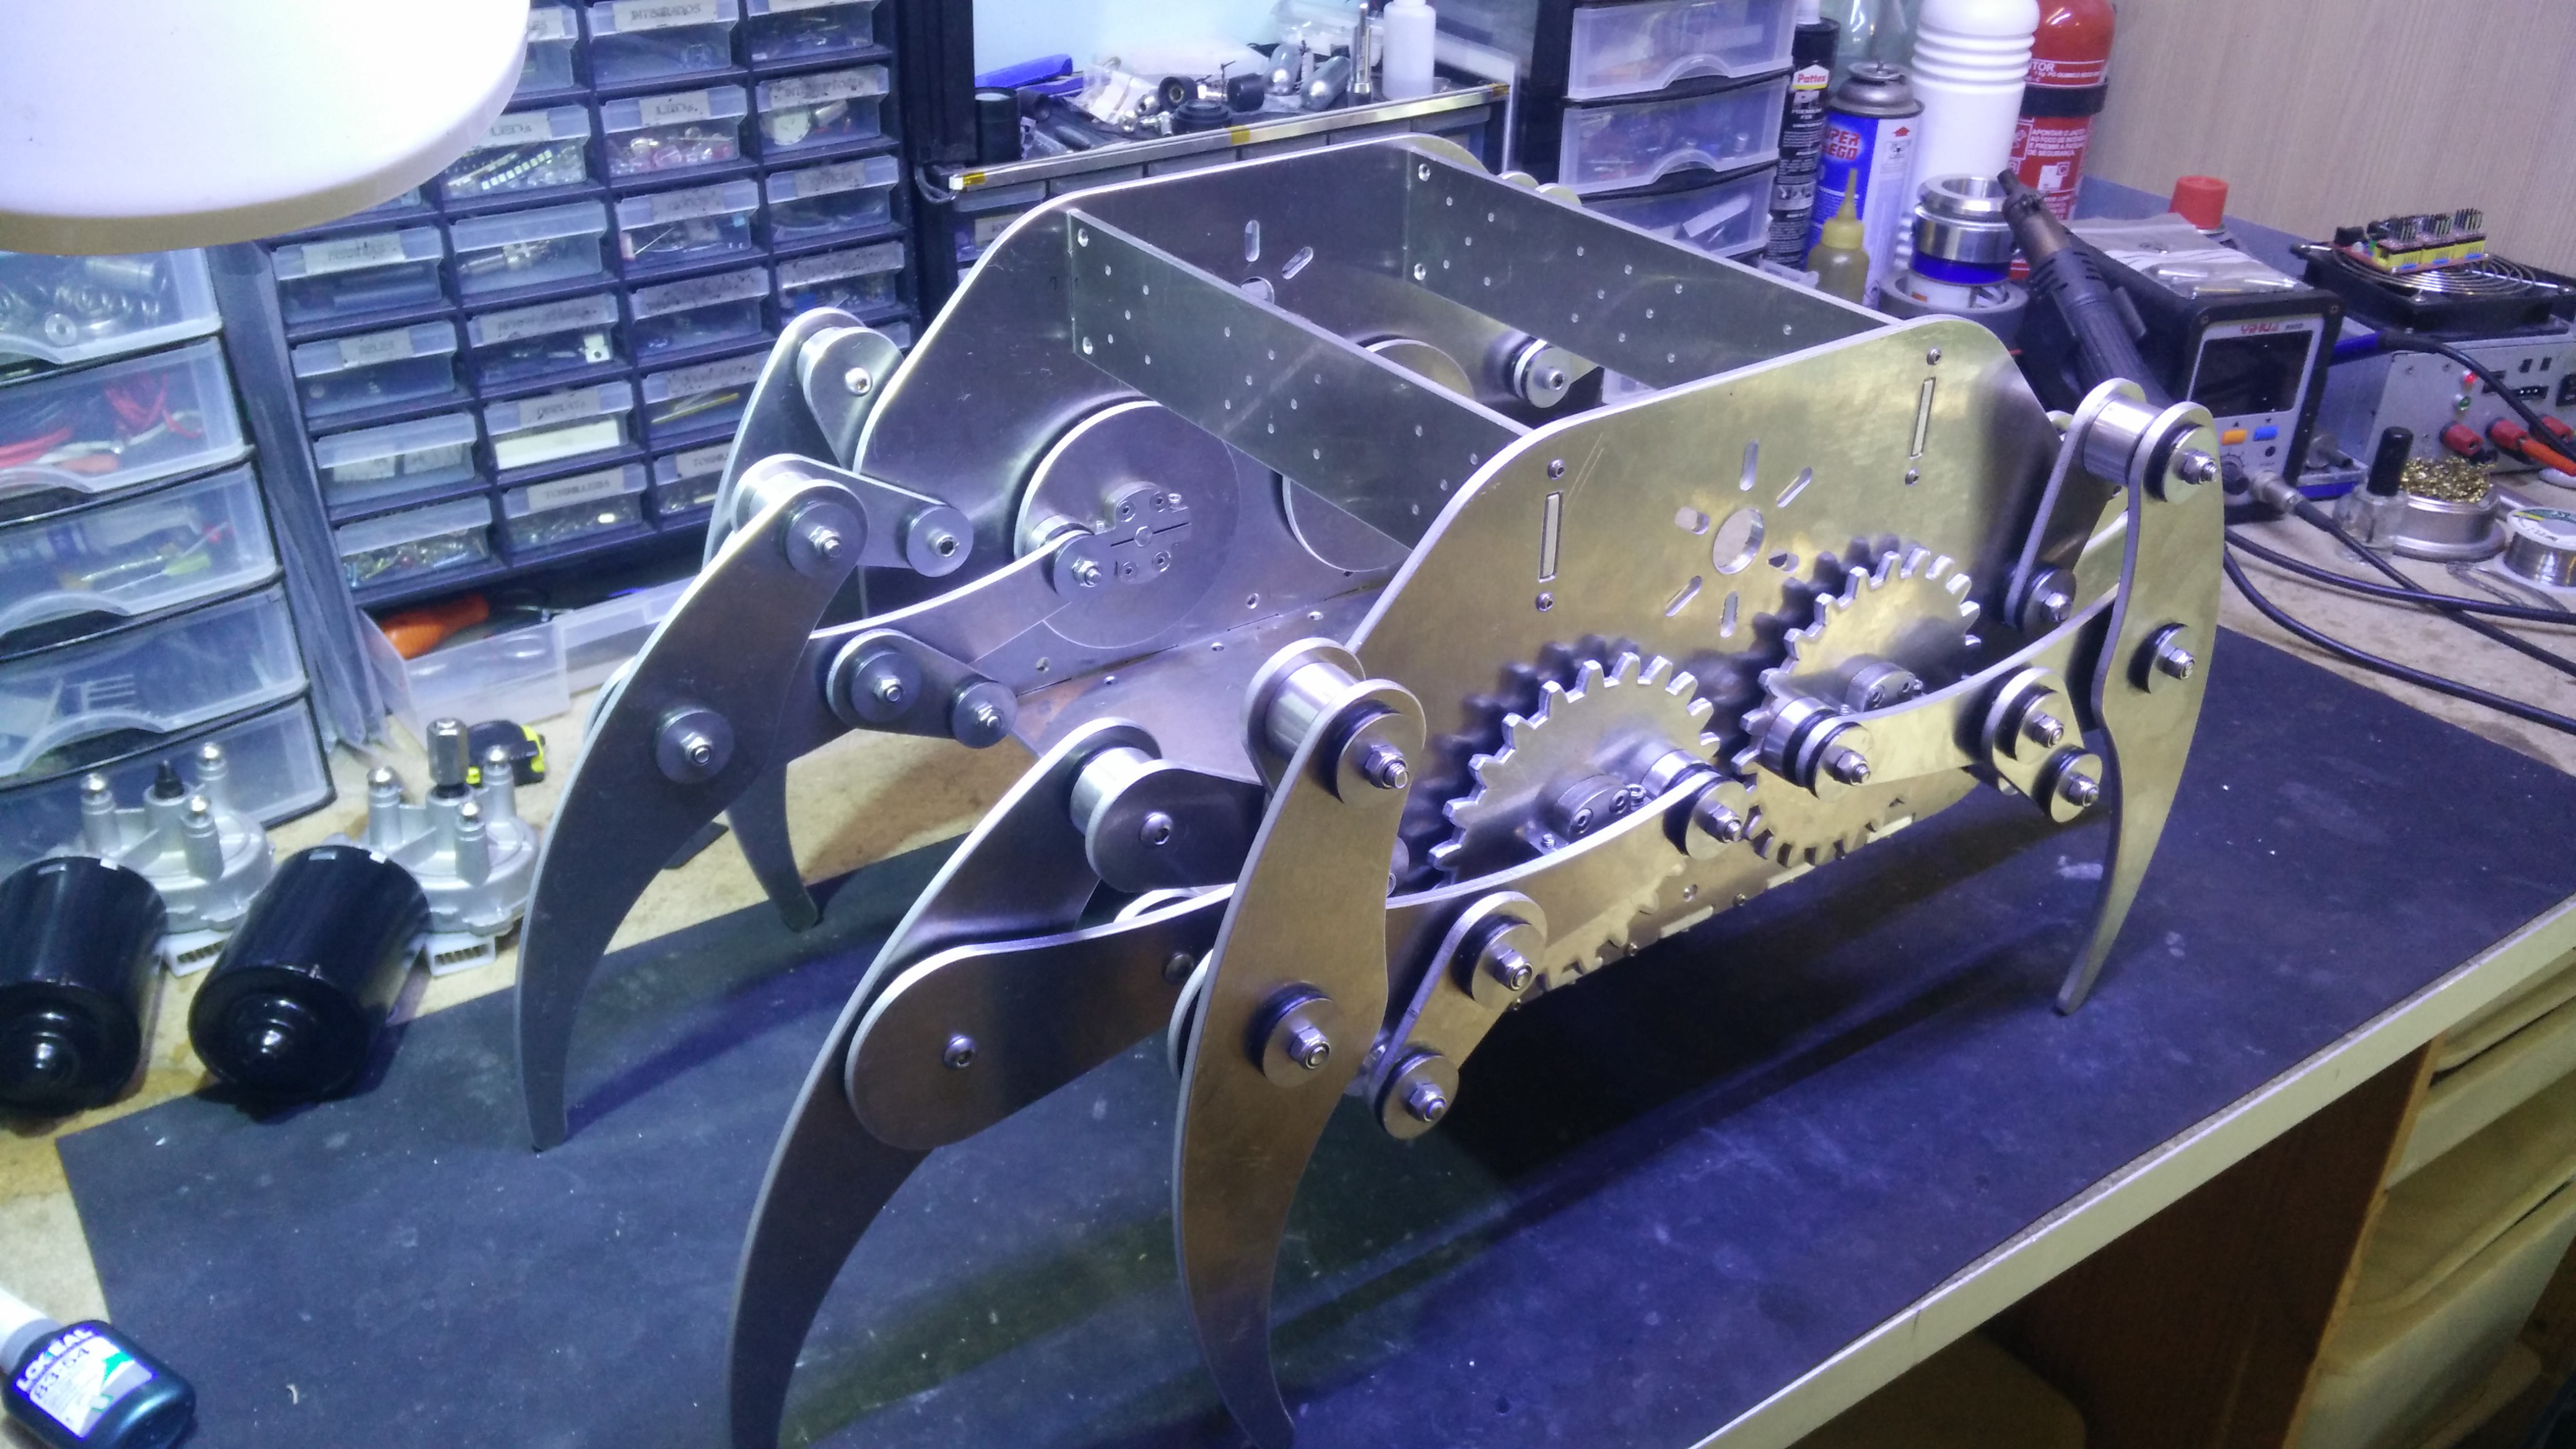 Next i'll be working on installing motors on the platform, and maybe try it on a variety of terrains to test its performance.
Discussions
Become a Hackaday.io Member
Create an account to leave a comment. Already have an account? Log In.