 Varun Suresh
PROBLEM :
Many industrial applications involve checking for flaws in places where worker cannot act due to immense heat, toxic gases & limited space. Hence it is essential to monitor such parameters in high value engineering sectors such as electrical substations and chemical sectors such as oil and gas power plant in order to protect human health and environment, and in certain cases preventing accidents.
Even though tools exists they at bulky, heavy and highly unyielding which consumes a lot of time and energy during an emergency. Also, there is a lack of thermal camera in our country and the existing ones are a bit costly (1000$).
In case, a fire accident occurs it would be very difficult for the fire fighters to locate the injured people in the plant.
EXISTING SYSTEM :
1. DAQRI Smart Helmet

Pro's :
- Augmented Reality based Thermal Vision
- Provides guided work information
- Wearable
Con's :
- Expensive in comparison to other solutions
- Difficult to reach critical areas
2. Electrical Substation Inspection Robot

Pro's :
- 360° pan-and-tilt positioner
- Autonomous Vehicle Control System
Con's :
- Detection of gas is not possible ( Requires additional system )
- Large size ( 54''x32''x62'' )
Background:
I, Varun, a final year engineering student from Chennai, India. I've always been into Robotics and combining electronics and Product Design.
Inspired after watching the movie ' The 33 ', I realized the hurdles and challenges faced by Industrial Workers in critical areas. Speaking to a Miner personally, I realized that they mostly require an assistive device to help them if the situation goes critical. Hence, I build up an AR based helmet for Miners to record the site Temperature and Gas content. While presenting this idea to Mr. Kshir Sagar, a Senior Manager in Fire & Safety Department at CPCL ( Chennai Petroleum Corporation Limited ), he gave a positive feedback and few ideas for making this better.
After seeing the unbelievable progress in Machine Learning for the past few years, empowering Industrial Workers with Machine Learning for fault detection and testing is my current goal. Along the way I've read statistics on number of fire accidents that occur in chemical power plants and hence I wanted to do my path. I've also been seeking help from industries to make this dream, a reality.
OUR SOLUTION :
SafeRanger
We propose a novel solution that could possibly enhance the current industrial safety protocol.
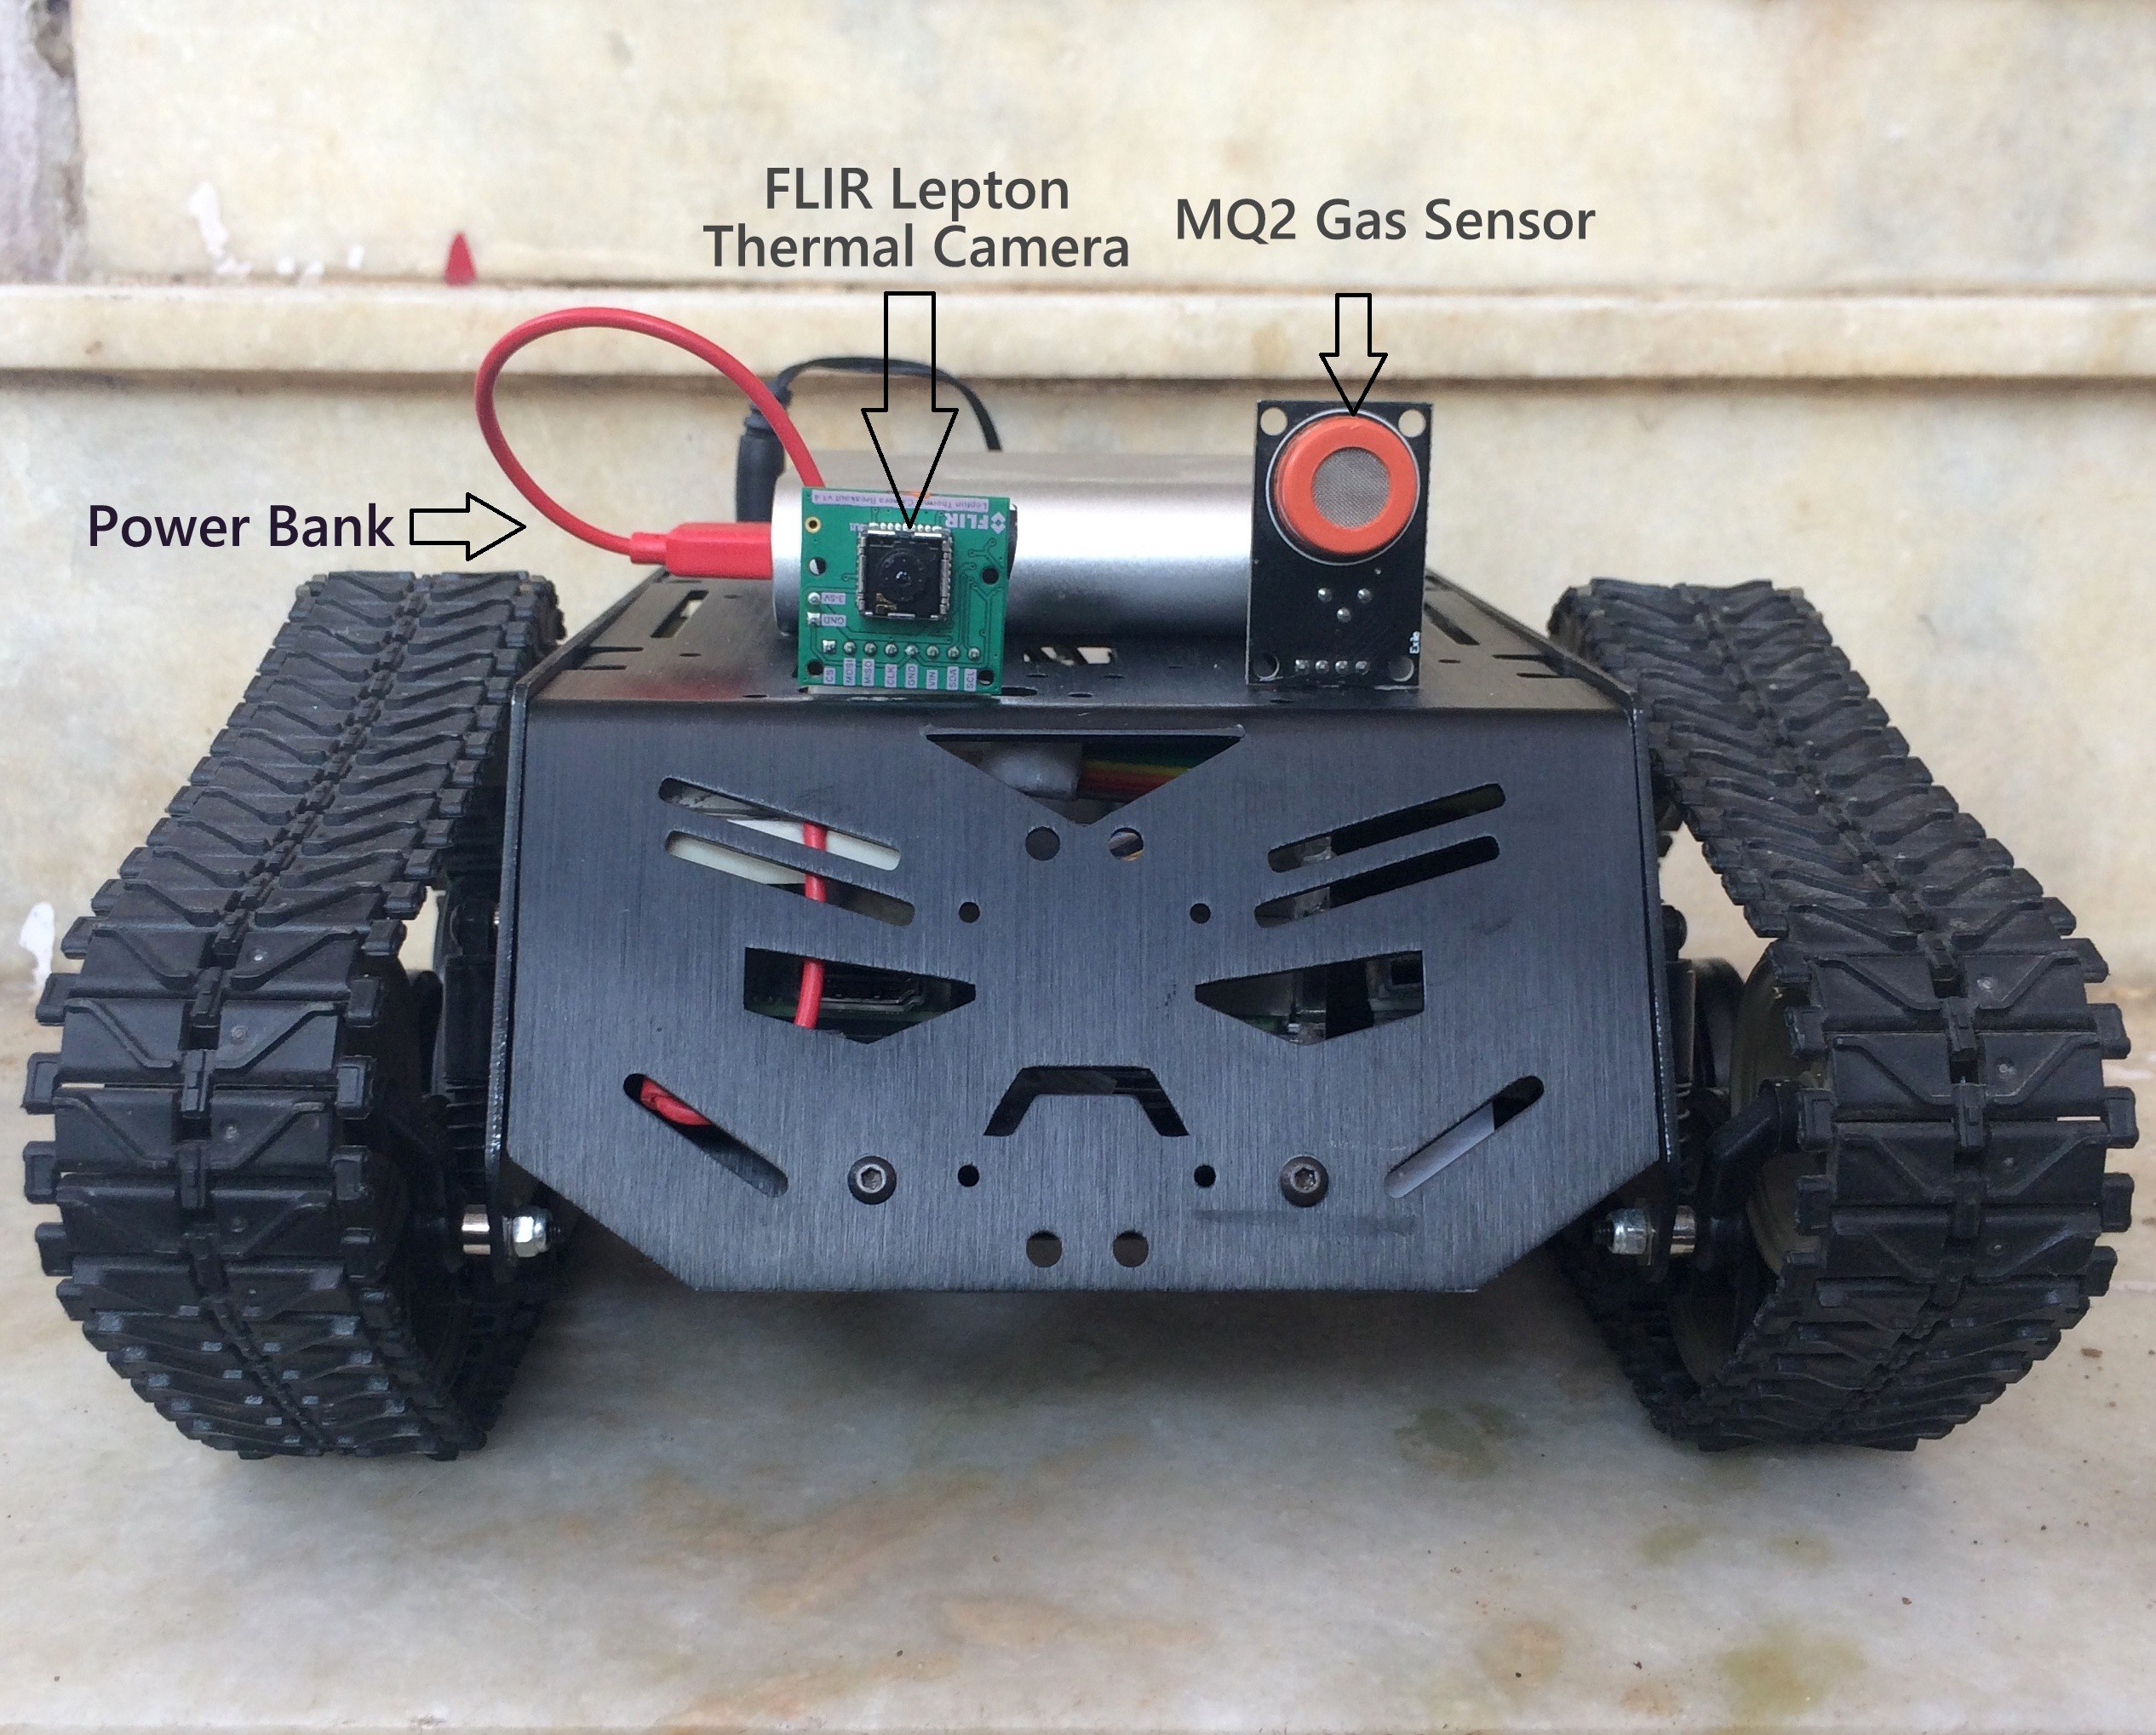
A semi-autonomous miniature multi-spectral diagnostic wireless controlled tank based rover which can monitor thermal characteristics of valves using Thermal Camera and monitor gas leaks in oil and gas power plants.
It is designed to be modular to add custom sensors with it. Currently, it houses a thermal, visual camera along with a gas sensors.
If an abnormal temperature is detected, the IR Image Processing system identifies an inappropriate heat which in turn sends the thermal data to the control centre through VNC, a Wi-Fi server with which alerts or guidance can be in turn provided to the technician, so that necessary steps can be taken.
Block Diagram :
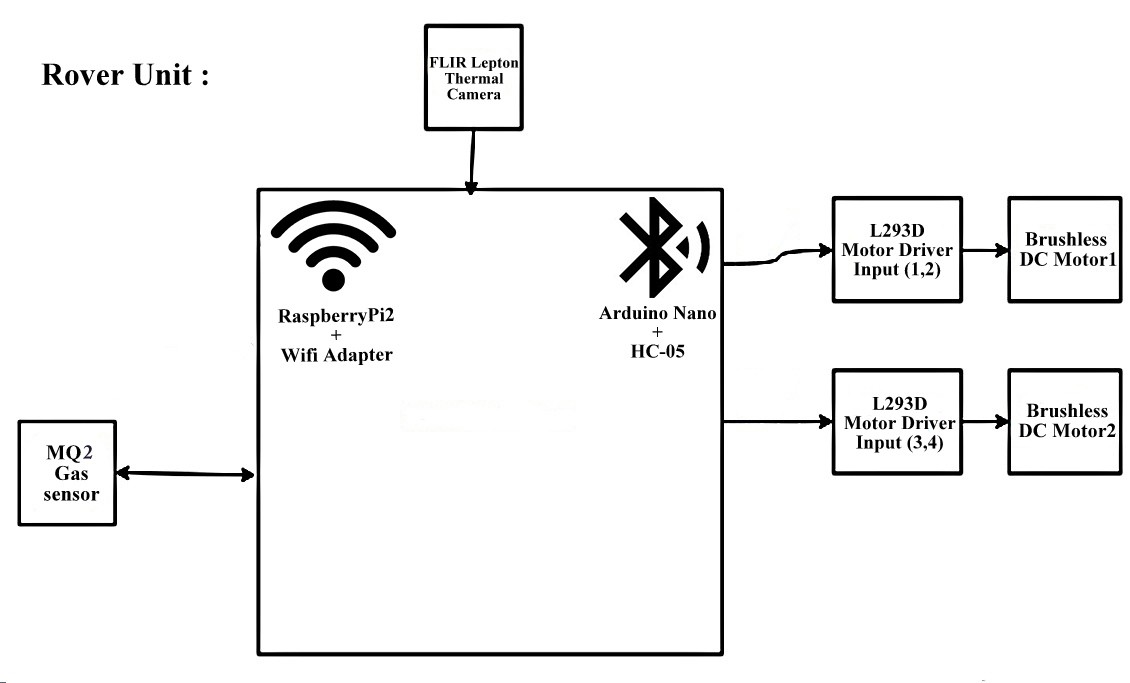
System Design :
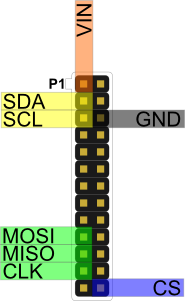
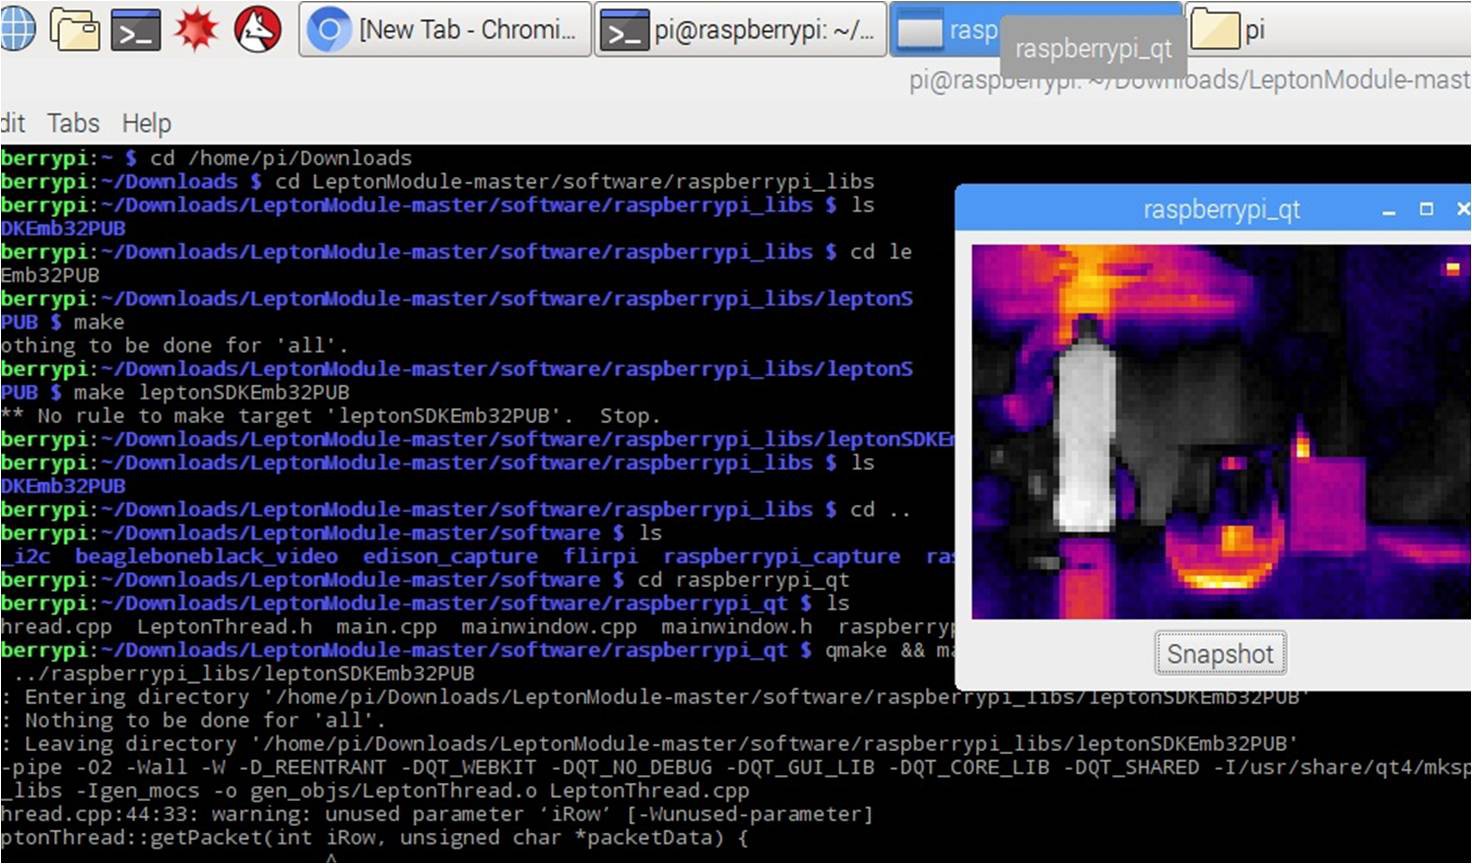
Setting up FLIR Lepton with Raspberry Pi
Once the connections are done, move to the software part :
- Install Raspbian OS from NOOBS on your Raspberry Pi
- Enable SPI and I2C interfaces
- Download and Install QT4 Dev Tools
- Go to the Pure Engineering and retrieve the raspberrypi_video directory
- Unzip the Raspberry Pi video directory ( LeptonModule-master ) and raspberrypi_video
- "make" Lepton SDK, so into the “LeptonSDKEmb32PUB” directory and run cd "make”
- Get back out to the “raspberrypi_video” directory and run "qmake && make"
- Type sudo ./raspberrypi_video in your command line
And, Voila :) Thermal images will start pouring out.
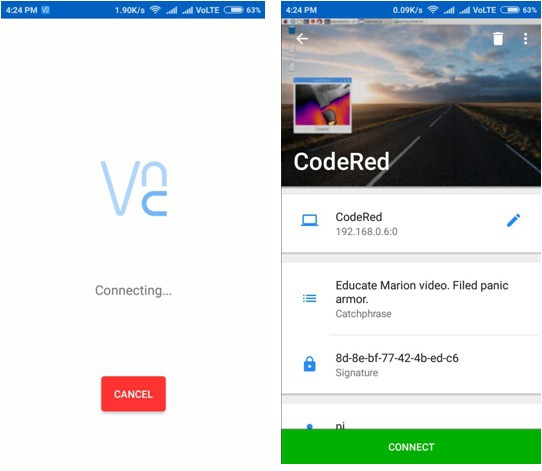
Setting up VNC with Raspberry Pi
Now, that's not over. In order to visualize the thermal data remotely, it is necessary to install VNC Server ( Virtual Networking ) in our Raspberry Pi.
I have used my Android phone for the ease of use.
The VNC Server
There are various guides for this online, most suggest using the TightVNC server software, here’s my summarised need to know version, run all commands from the command line:
- Install tight VNC: “sudo apt-get install tightvncserver”
- Run the program: “tightvncserver”
- Start a VNC session: “vncserver :1 -geometry 1024x728 -depth 24”
The VNC Viewer/Client
There are lots of VNC clients you can use, depending on your platform. I’m using Apple’s Remote Desktop software which is incredibly powerful (especially when administering Macs) but is overkill if you are just using it with your RPi. TightVNC has a free client application, there’s a native Windows version and a surprisingly good (but limited) Java version, which should run on any desktop/laptop system. A Google search should find you a suitable app for your own system.
To connect to your RPi:
- Get your RPi’s IP address by running "ip addr show”. The IP address with be shown as highlighted in the image below.
- Connect your client to the IP address obtained from 1.
- Use port “590x”, where “x” is the session number used in step 3 in the previous section. If this doesn’t work, enter the IP address followed by “:x”, e.g. “192.168.1.50:1”.
![]()
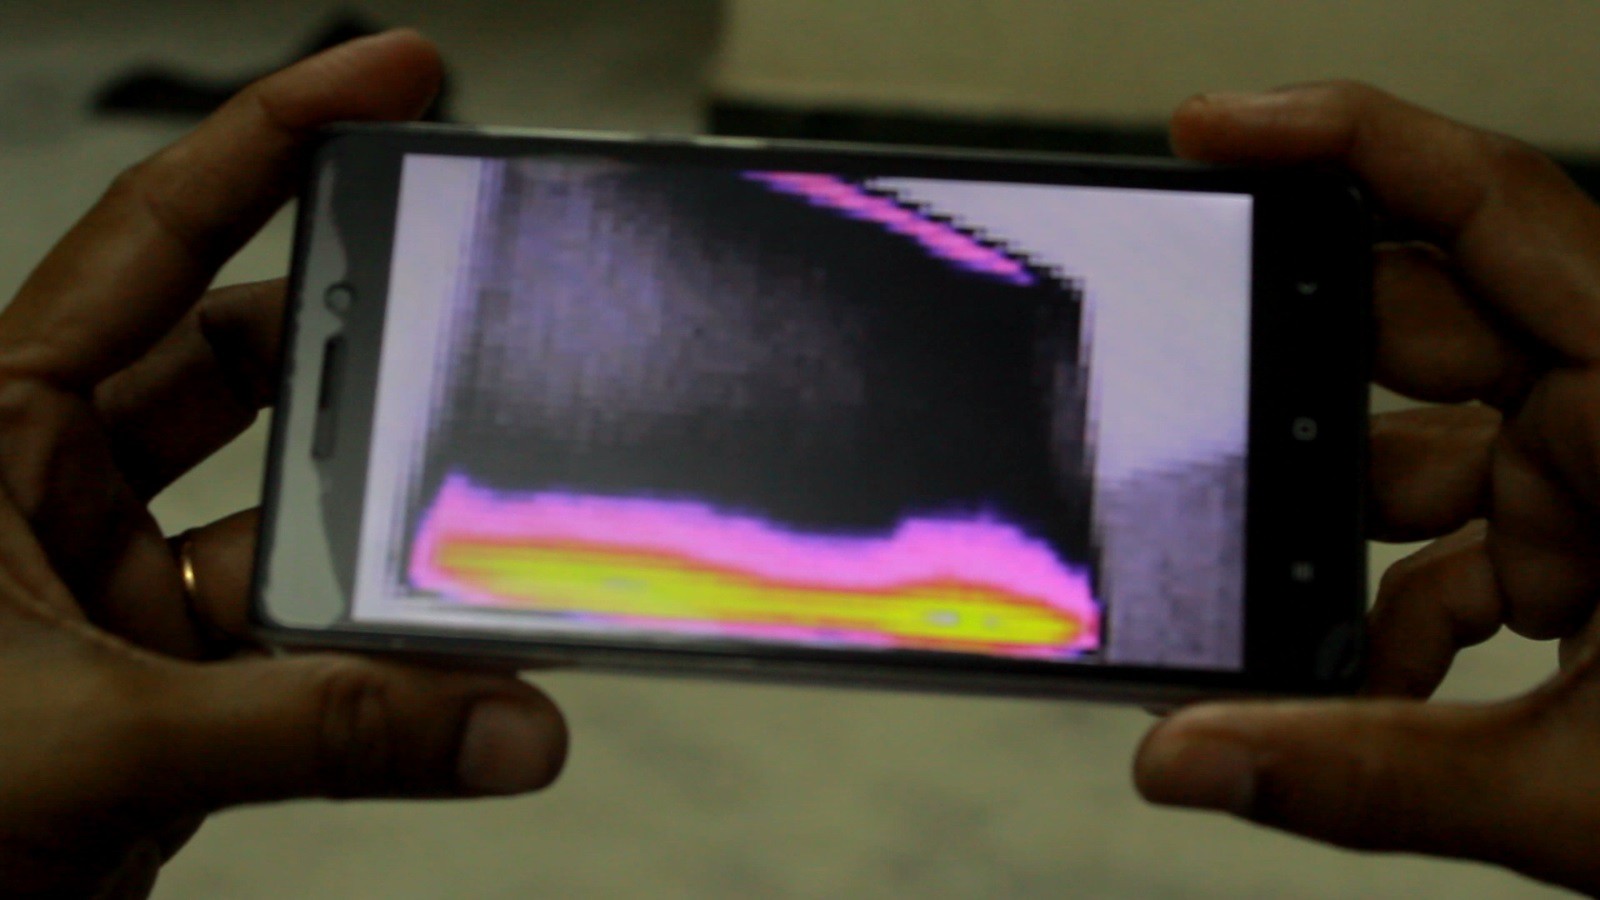
Analysis from the Thermal Image :
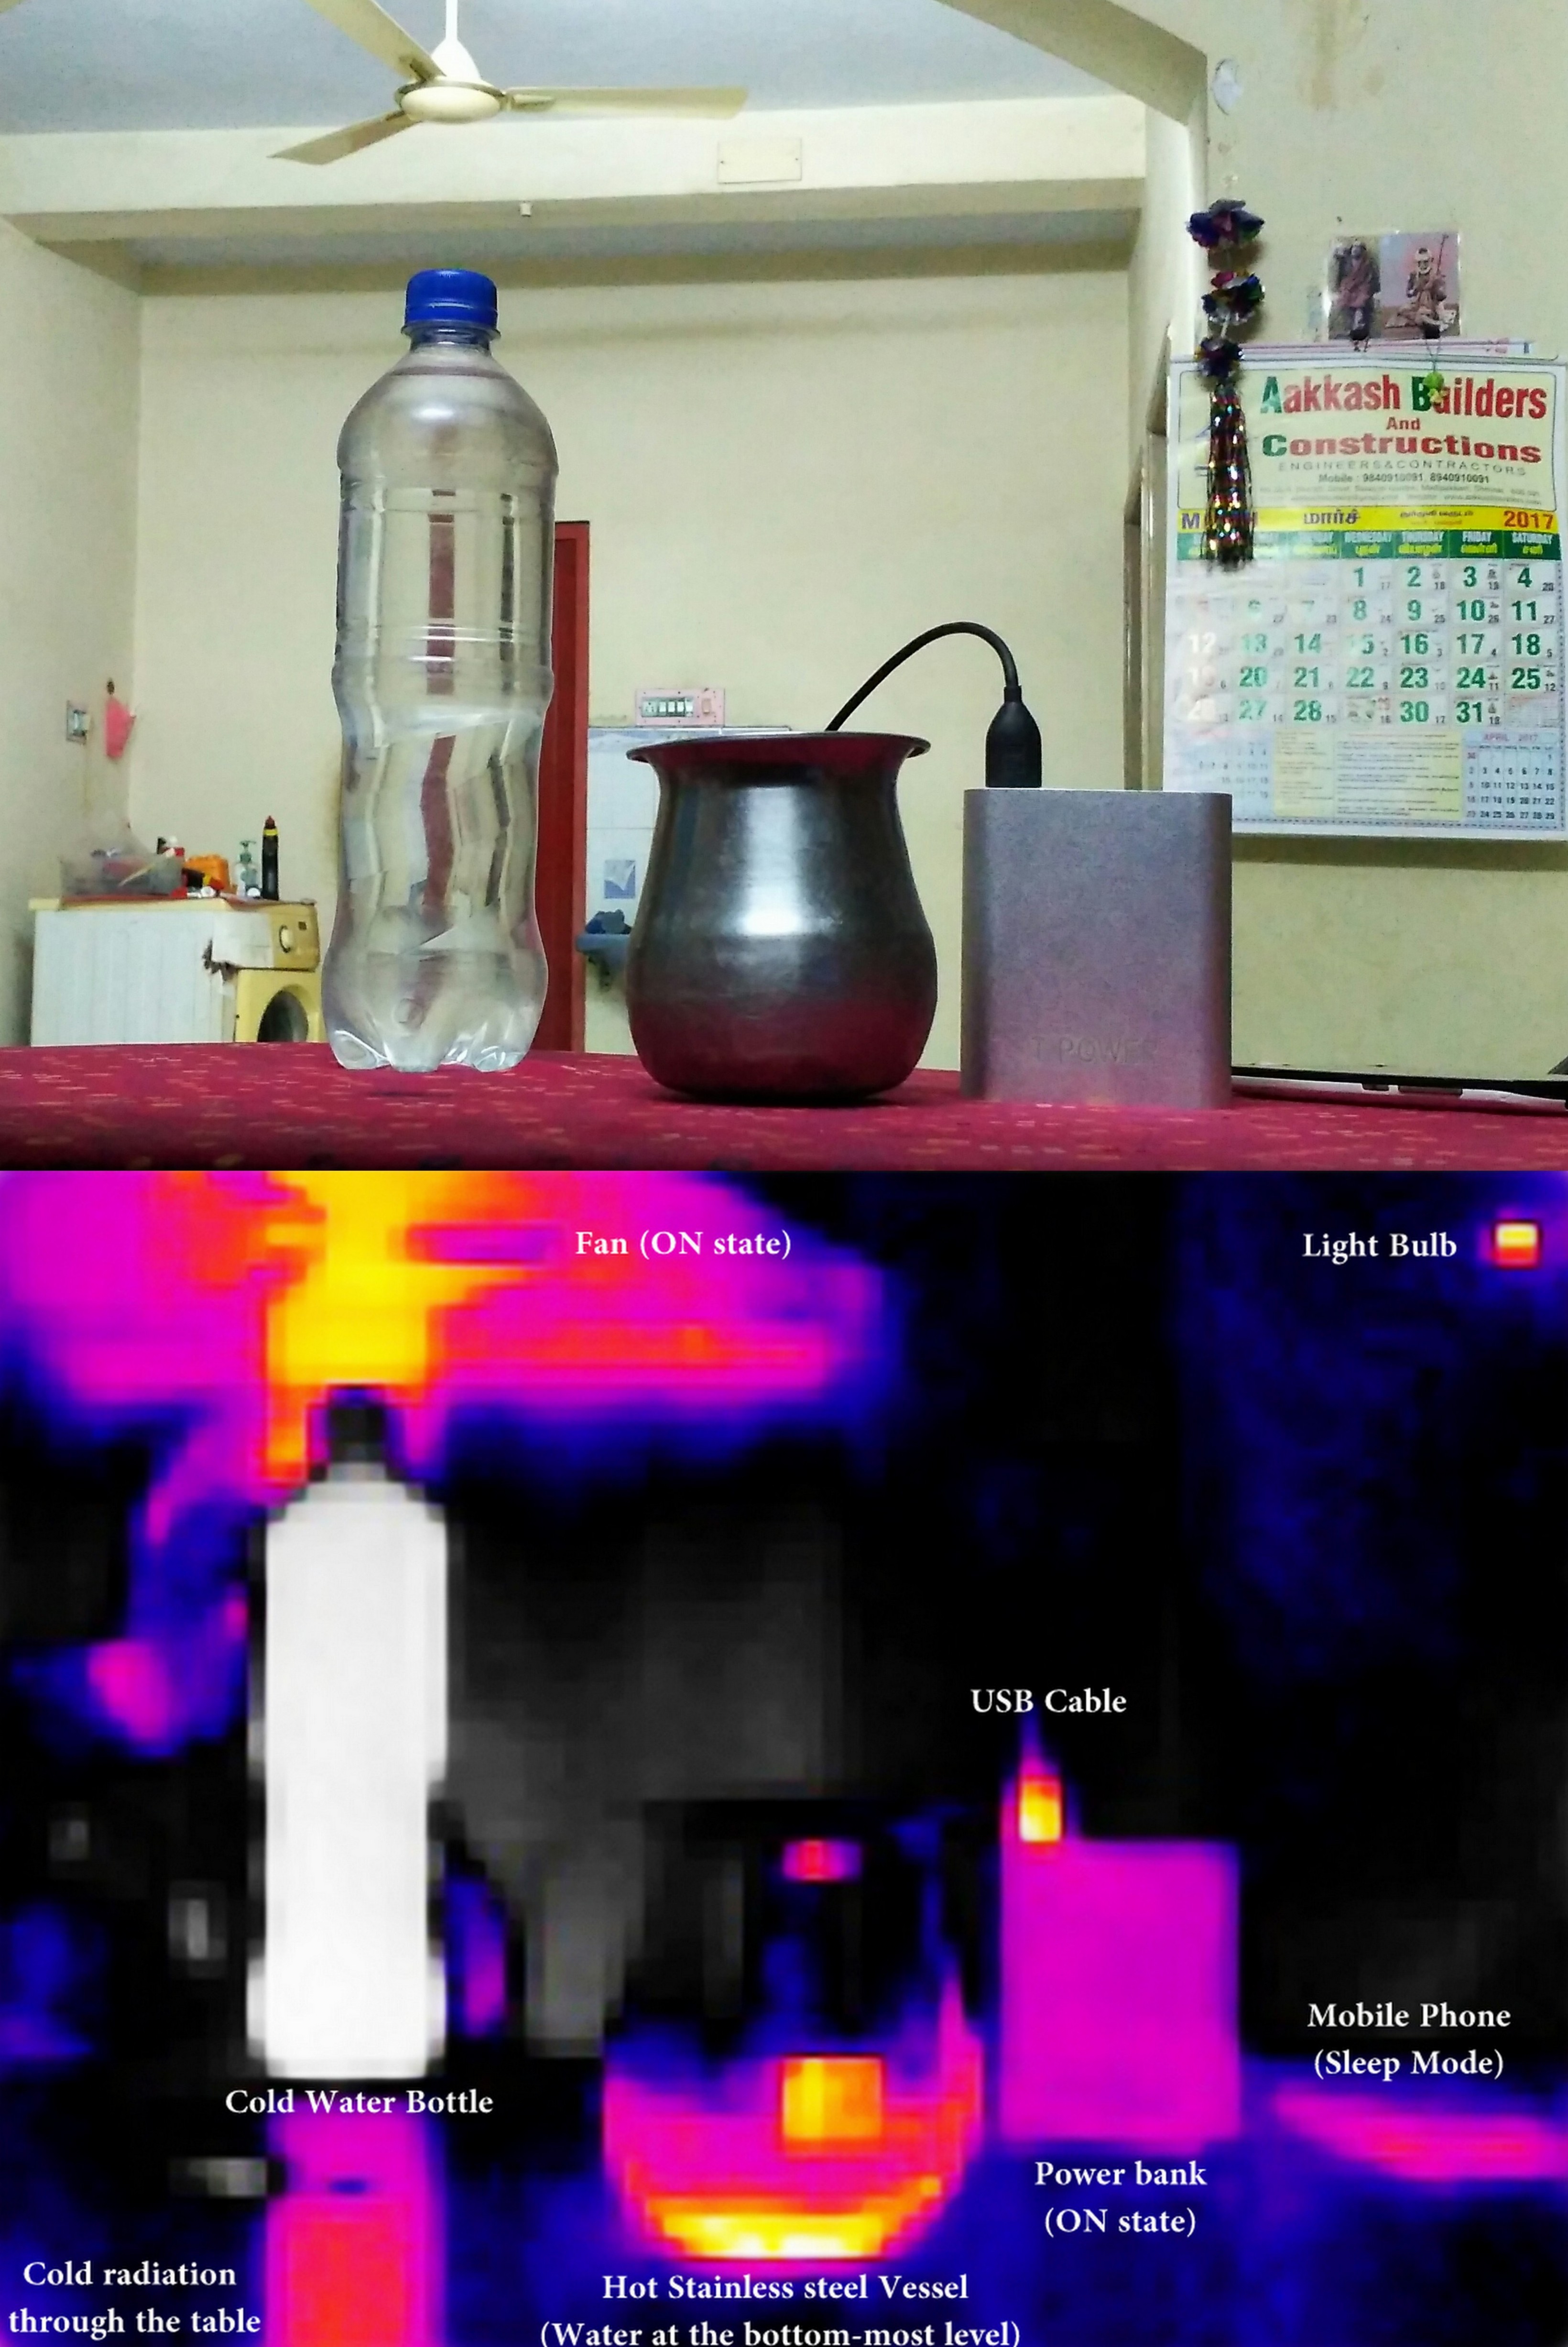
Thermal Image showing temperature variation
Thermal cameras do not actually detect color as the infrared range they operate in is way beyond the range of the visible light, instead they record thermal information and that thermal information is then displayed in a way that we can visually interpret it in the form of an image. To make it easier for people to easily analyze a thermal image visually, it is represented using a false colors representing the difference in temperature and the most commonly used color palette where white is for the coldest areas, then blue and purple for slightly hotter areas, hottest is usually red, orange and yellow and then going to white for the coldest parts. In thermal images using false colors to represent the difference in temperature there is no specific temperature representing specific color from the color palette used, the colors are just there to make it easy to distinguish the coldest from the hottest parts.
Setting up MQ2 gas sensor with Raspberry Pi :
In order to achieve this, we require an A/D Converter and her I use Adafruit's ADS1115 16bit ADC.

Once the connections are done, and the Pi is coded, the gas data such as LPG, CO and Smoke will be displayed like this.

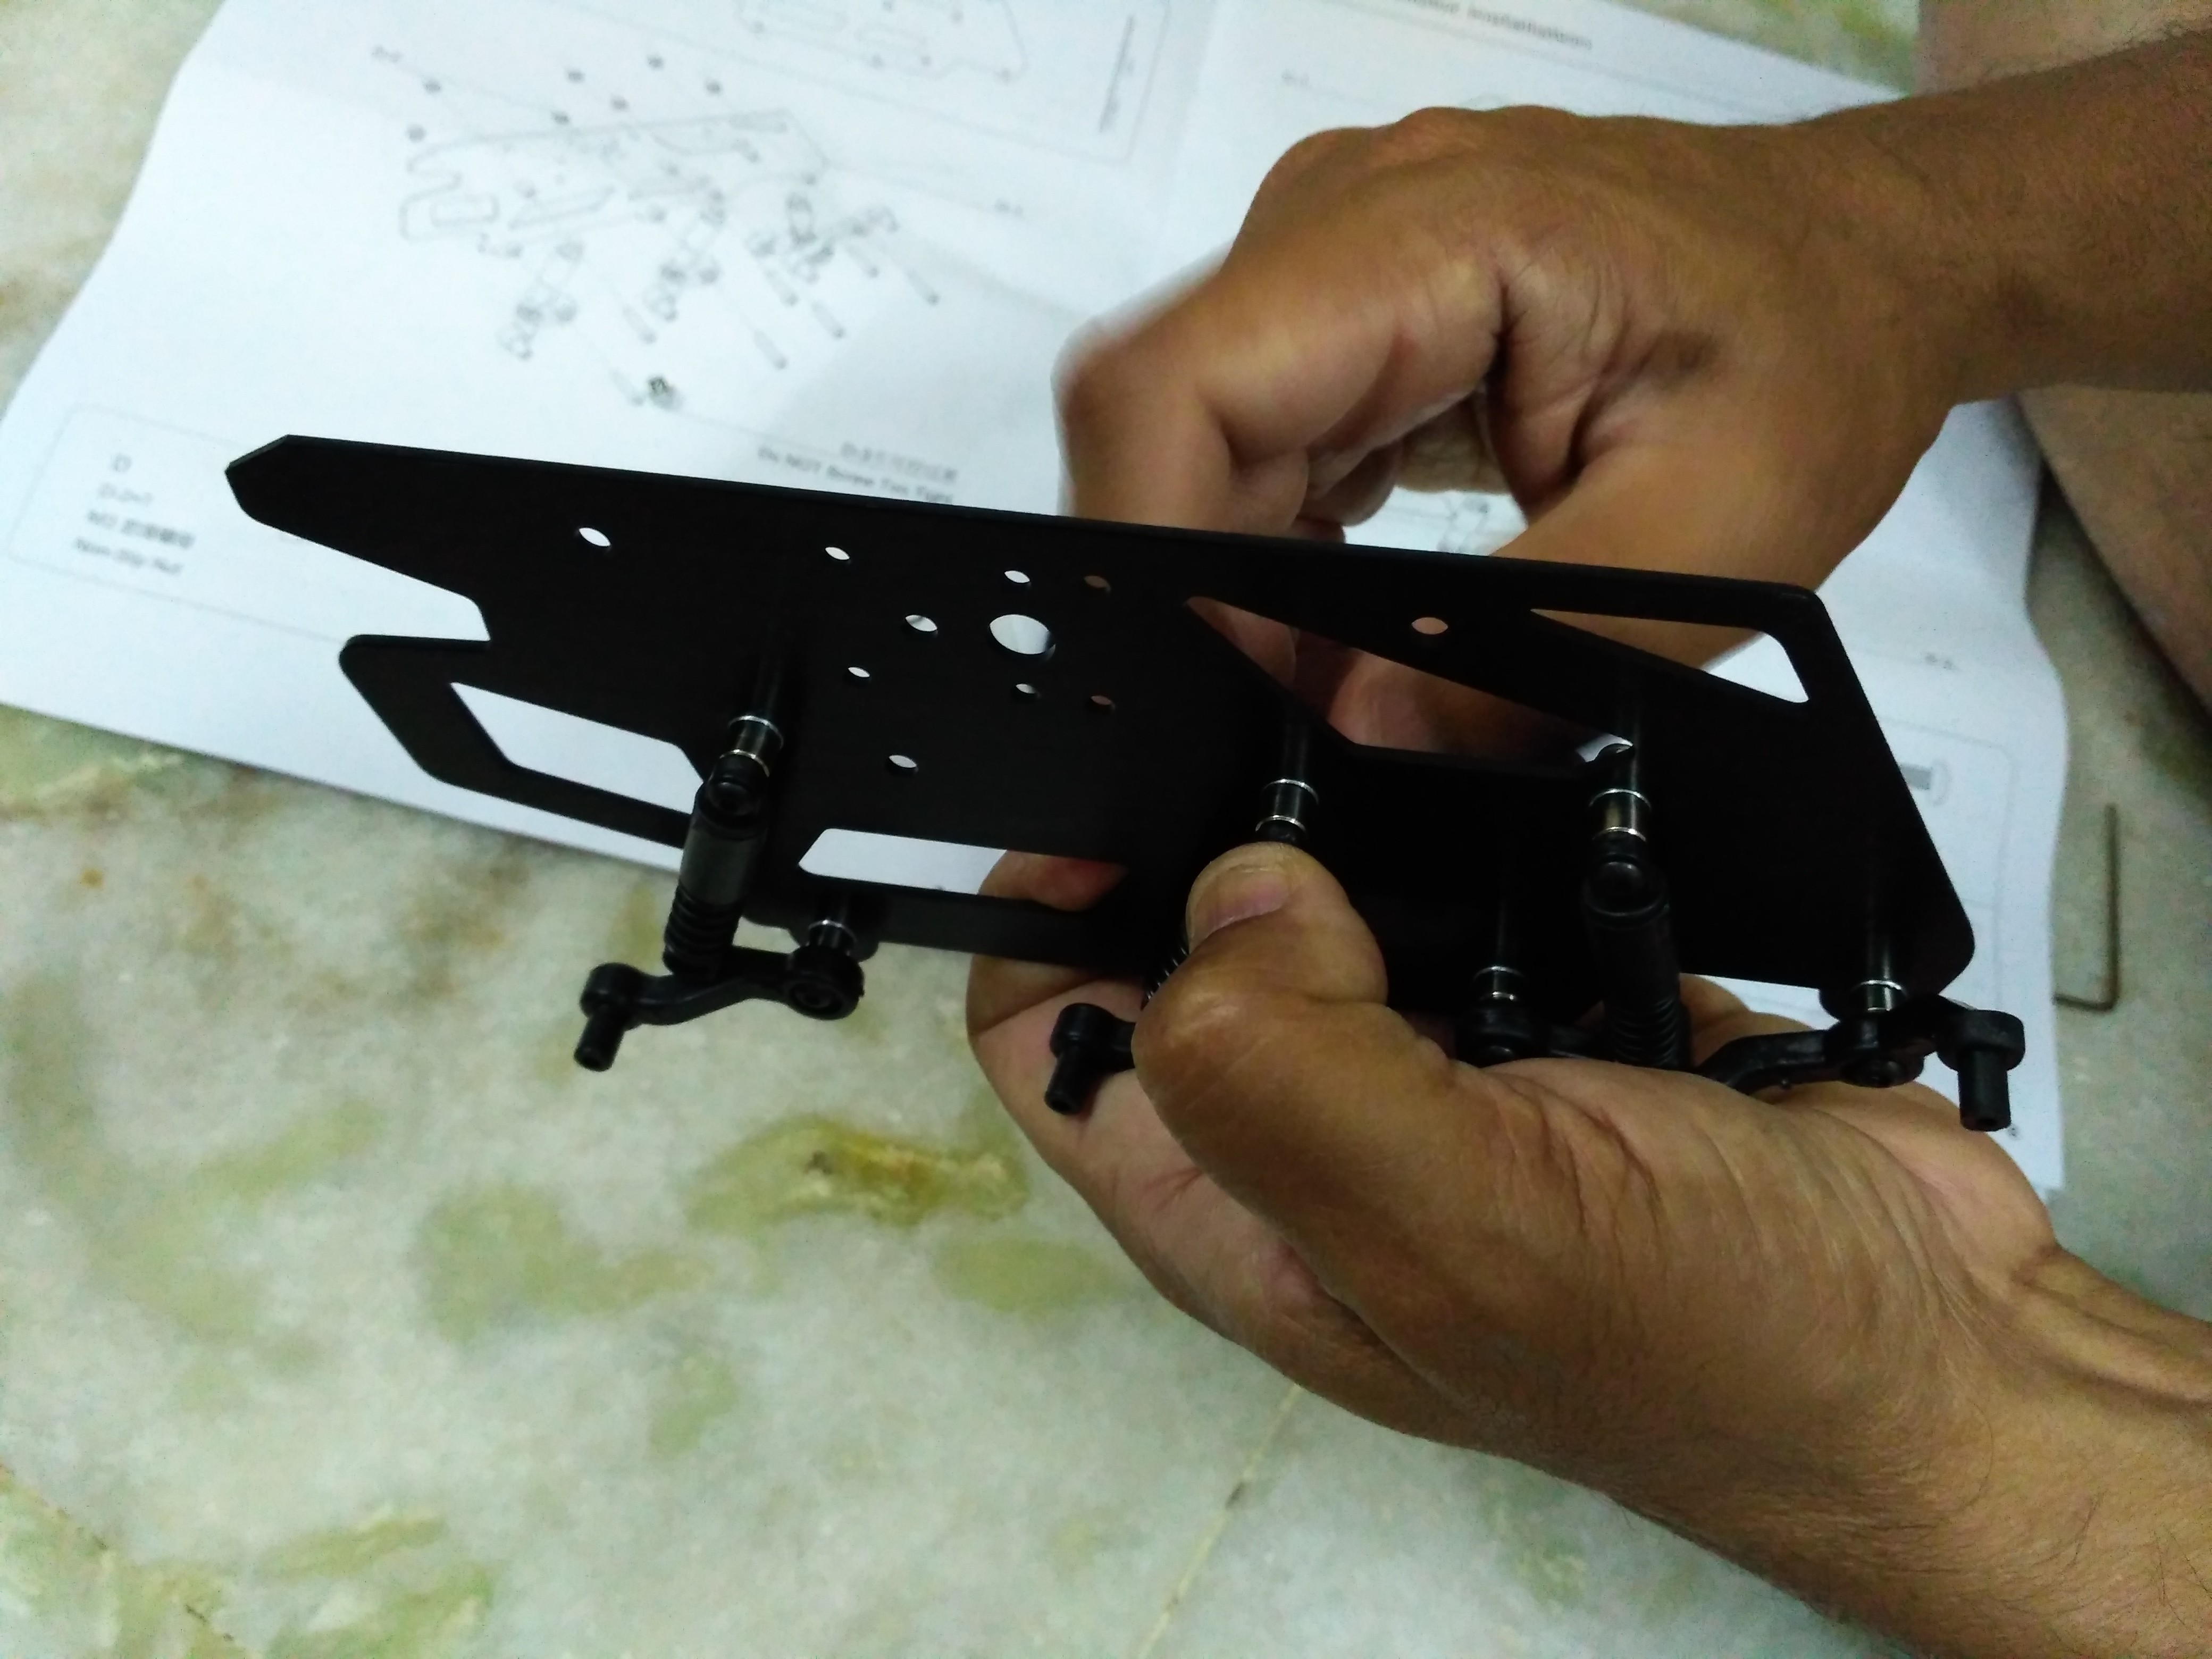
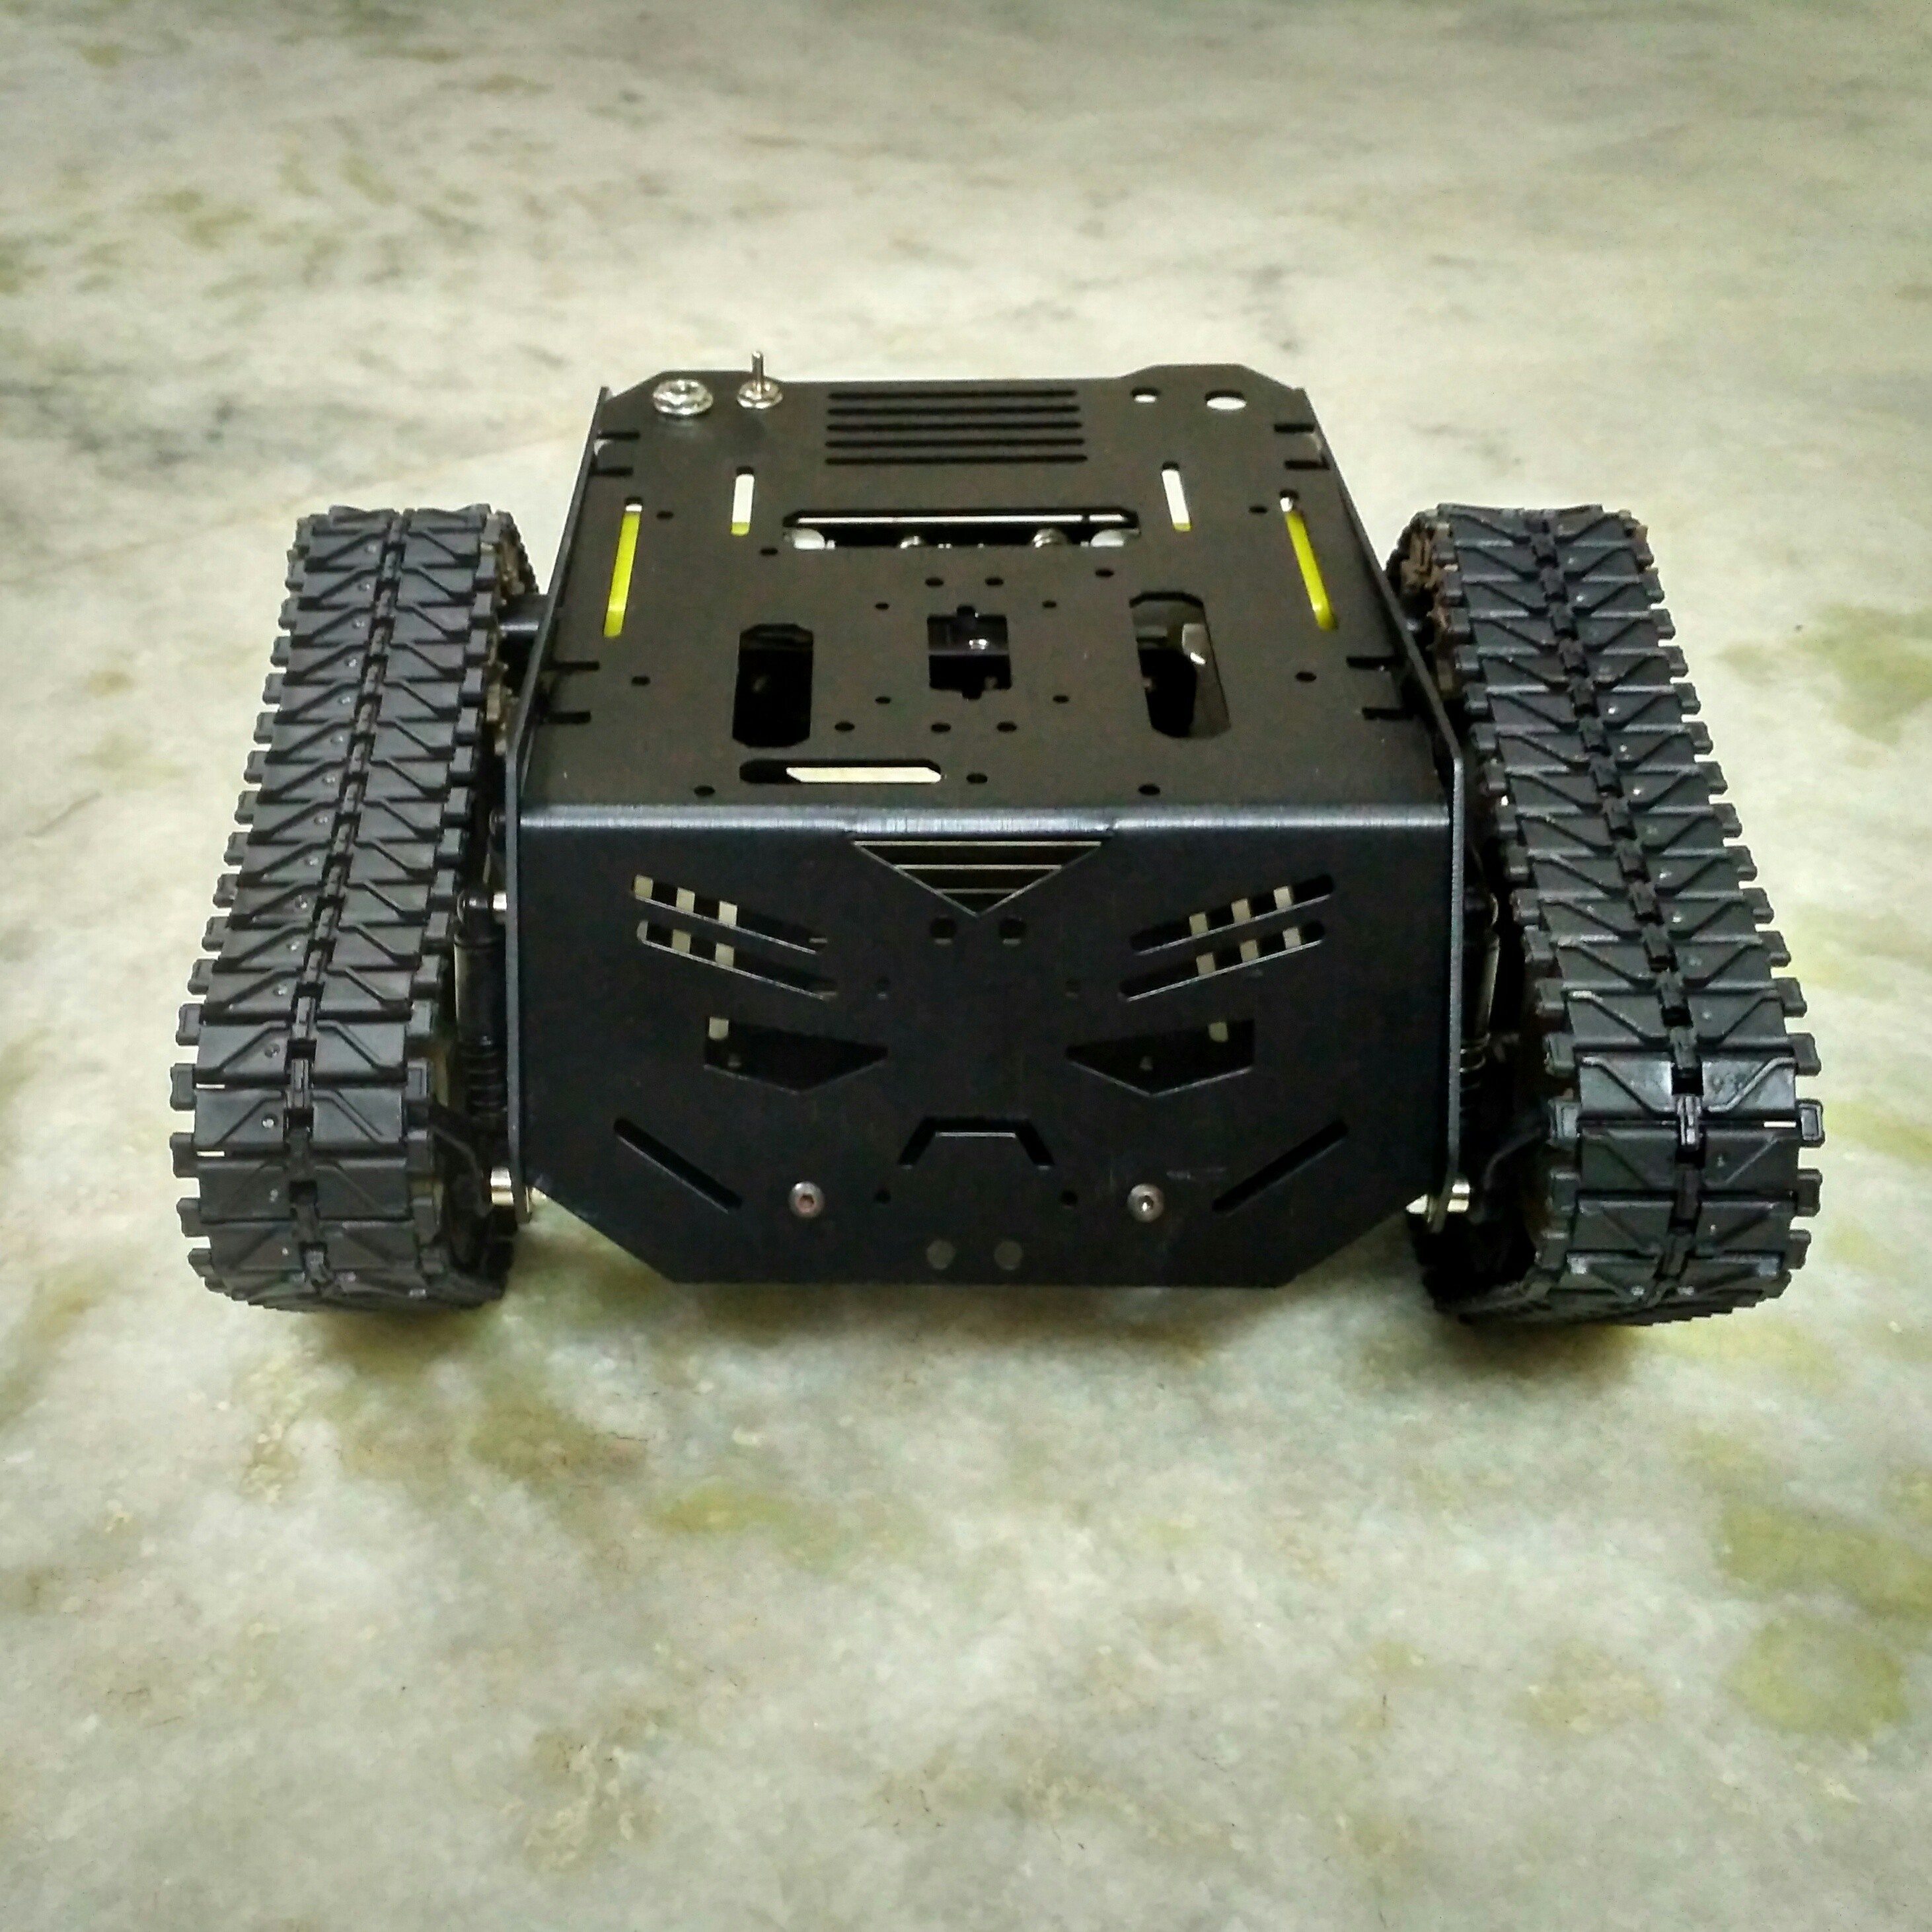
Rover - Motion Control :
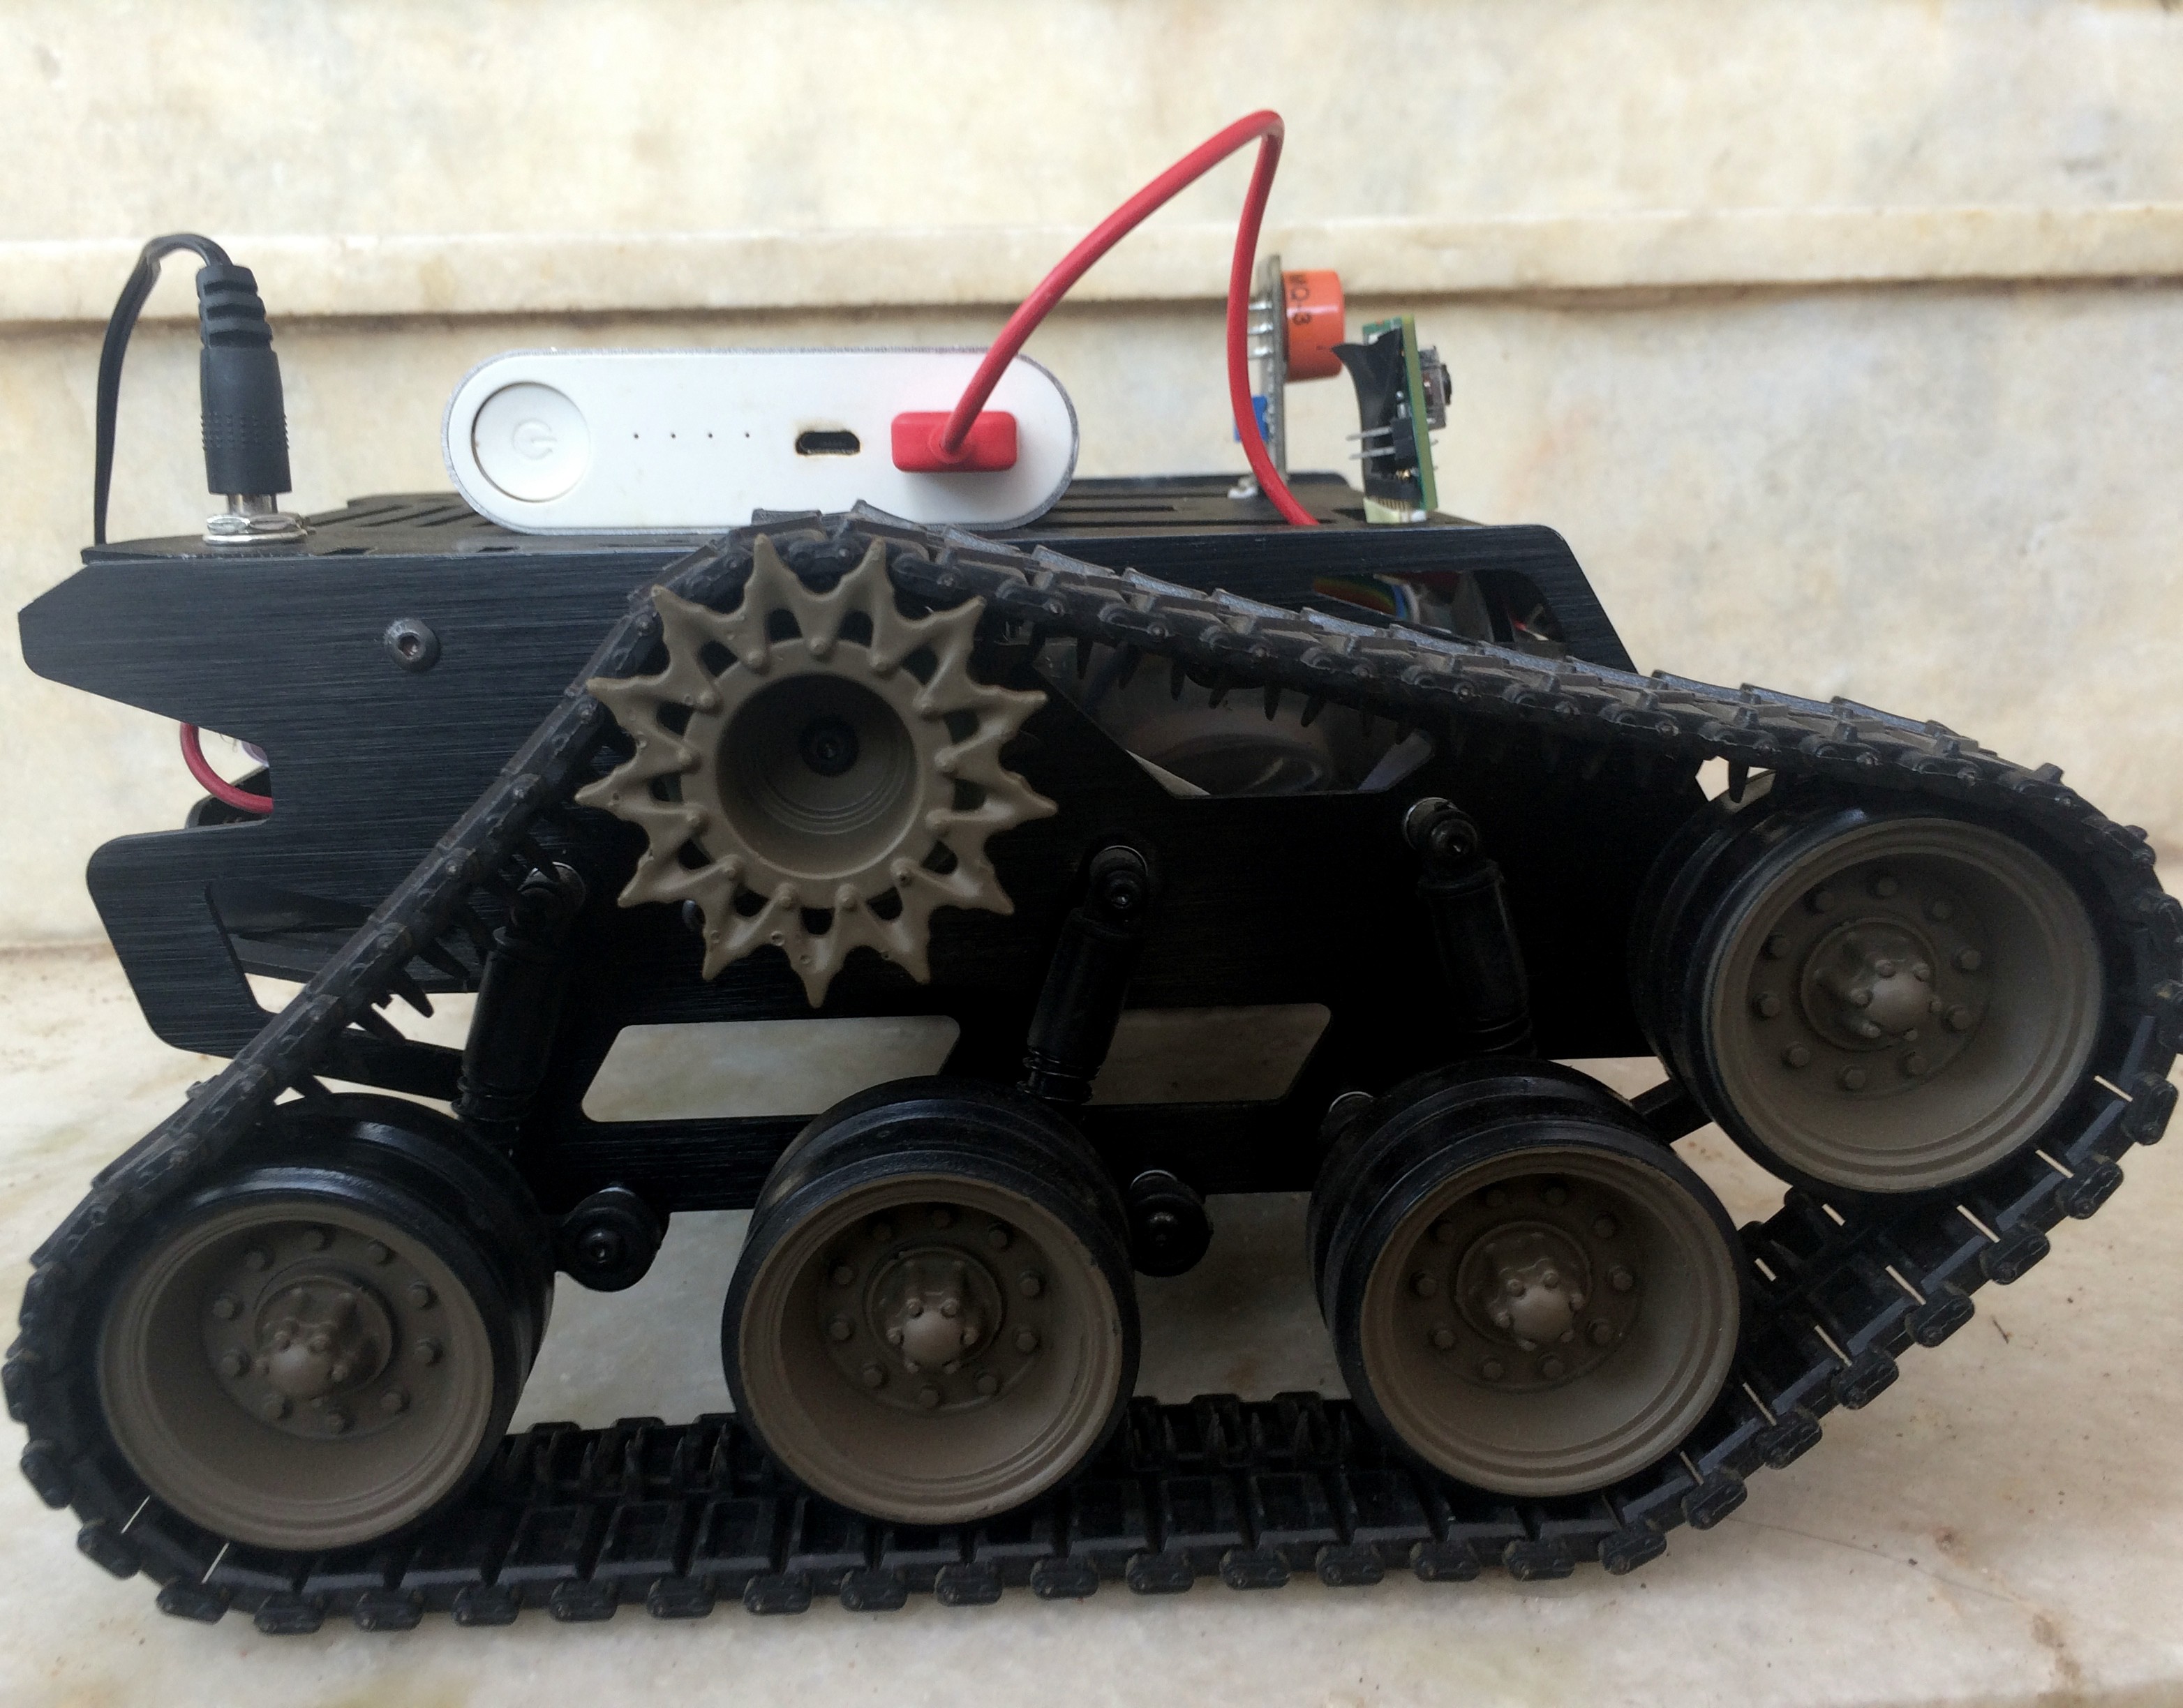
I brought this Devastator Tank Mobile Robot Platform from MG Super Labs at 92$. I have included all the details about assembly in Project files and Logs.
Once done, your rover will look like this !!
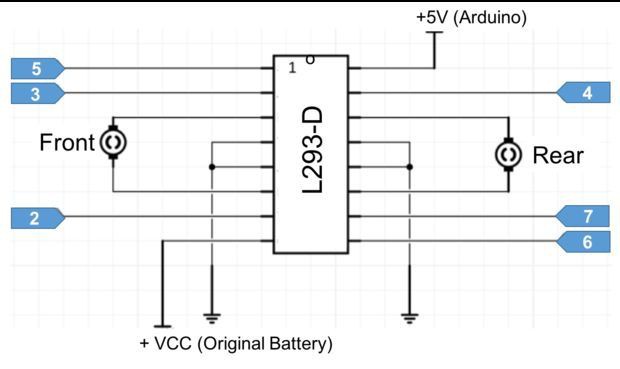
Motor - Driver Assembly :
I have used LM293D Module for controlling 2 DC motors using Arduino Nano. For the supply, 6 AA batteries are used for 2 DC motors as it has in build connection in my rover and same power bank for Arduino Nano.
Connection Diagram :
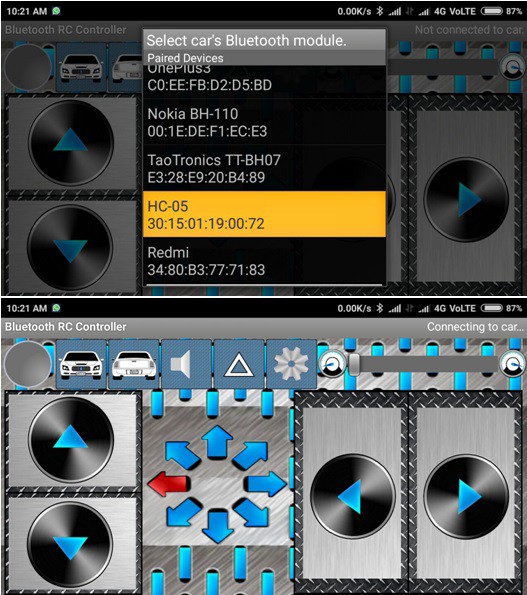
Controlling remotely with HC-05 :
Directional movement of the rover is controlled using an RC Controller application that is coupled through Bluetooth to the Bluetooth module HC-05. The controller used is an Arduino Nano which is programmed as required.
Testing :
Since the rover is tank-based, we plan to test it in rough terrains such as roads, pits and grass.
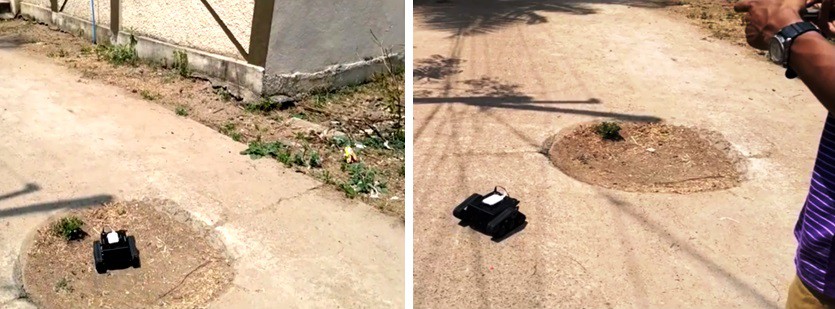
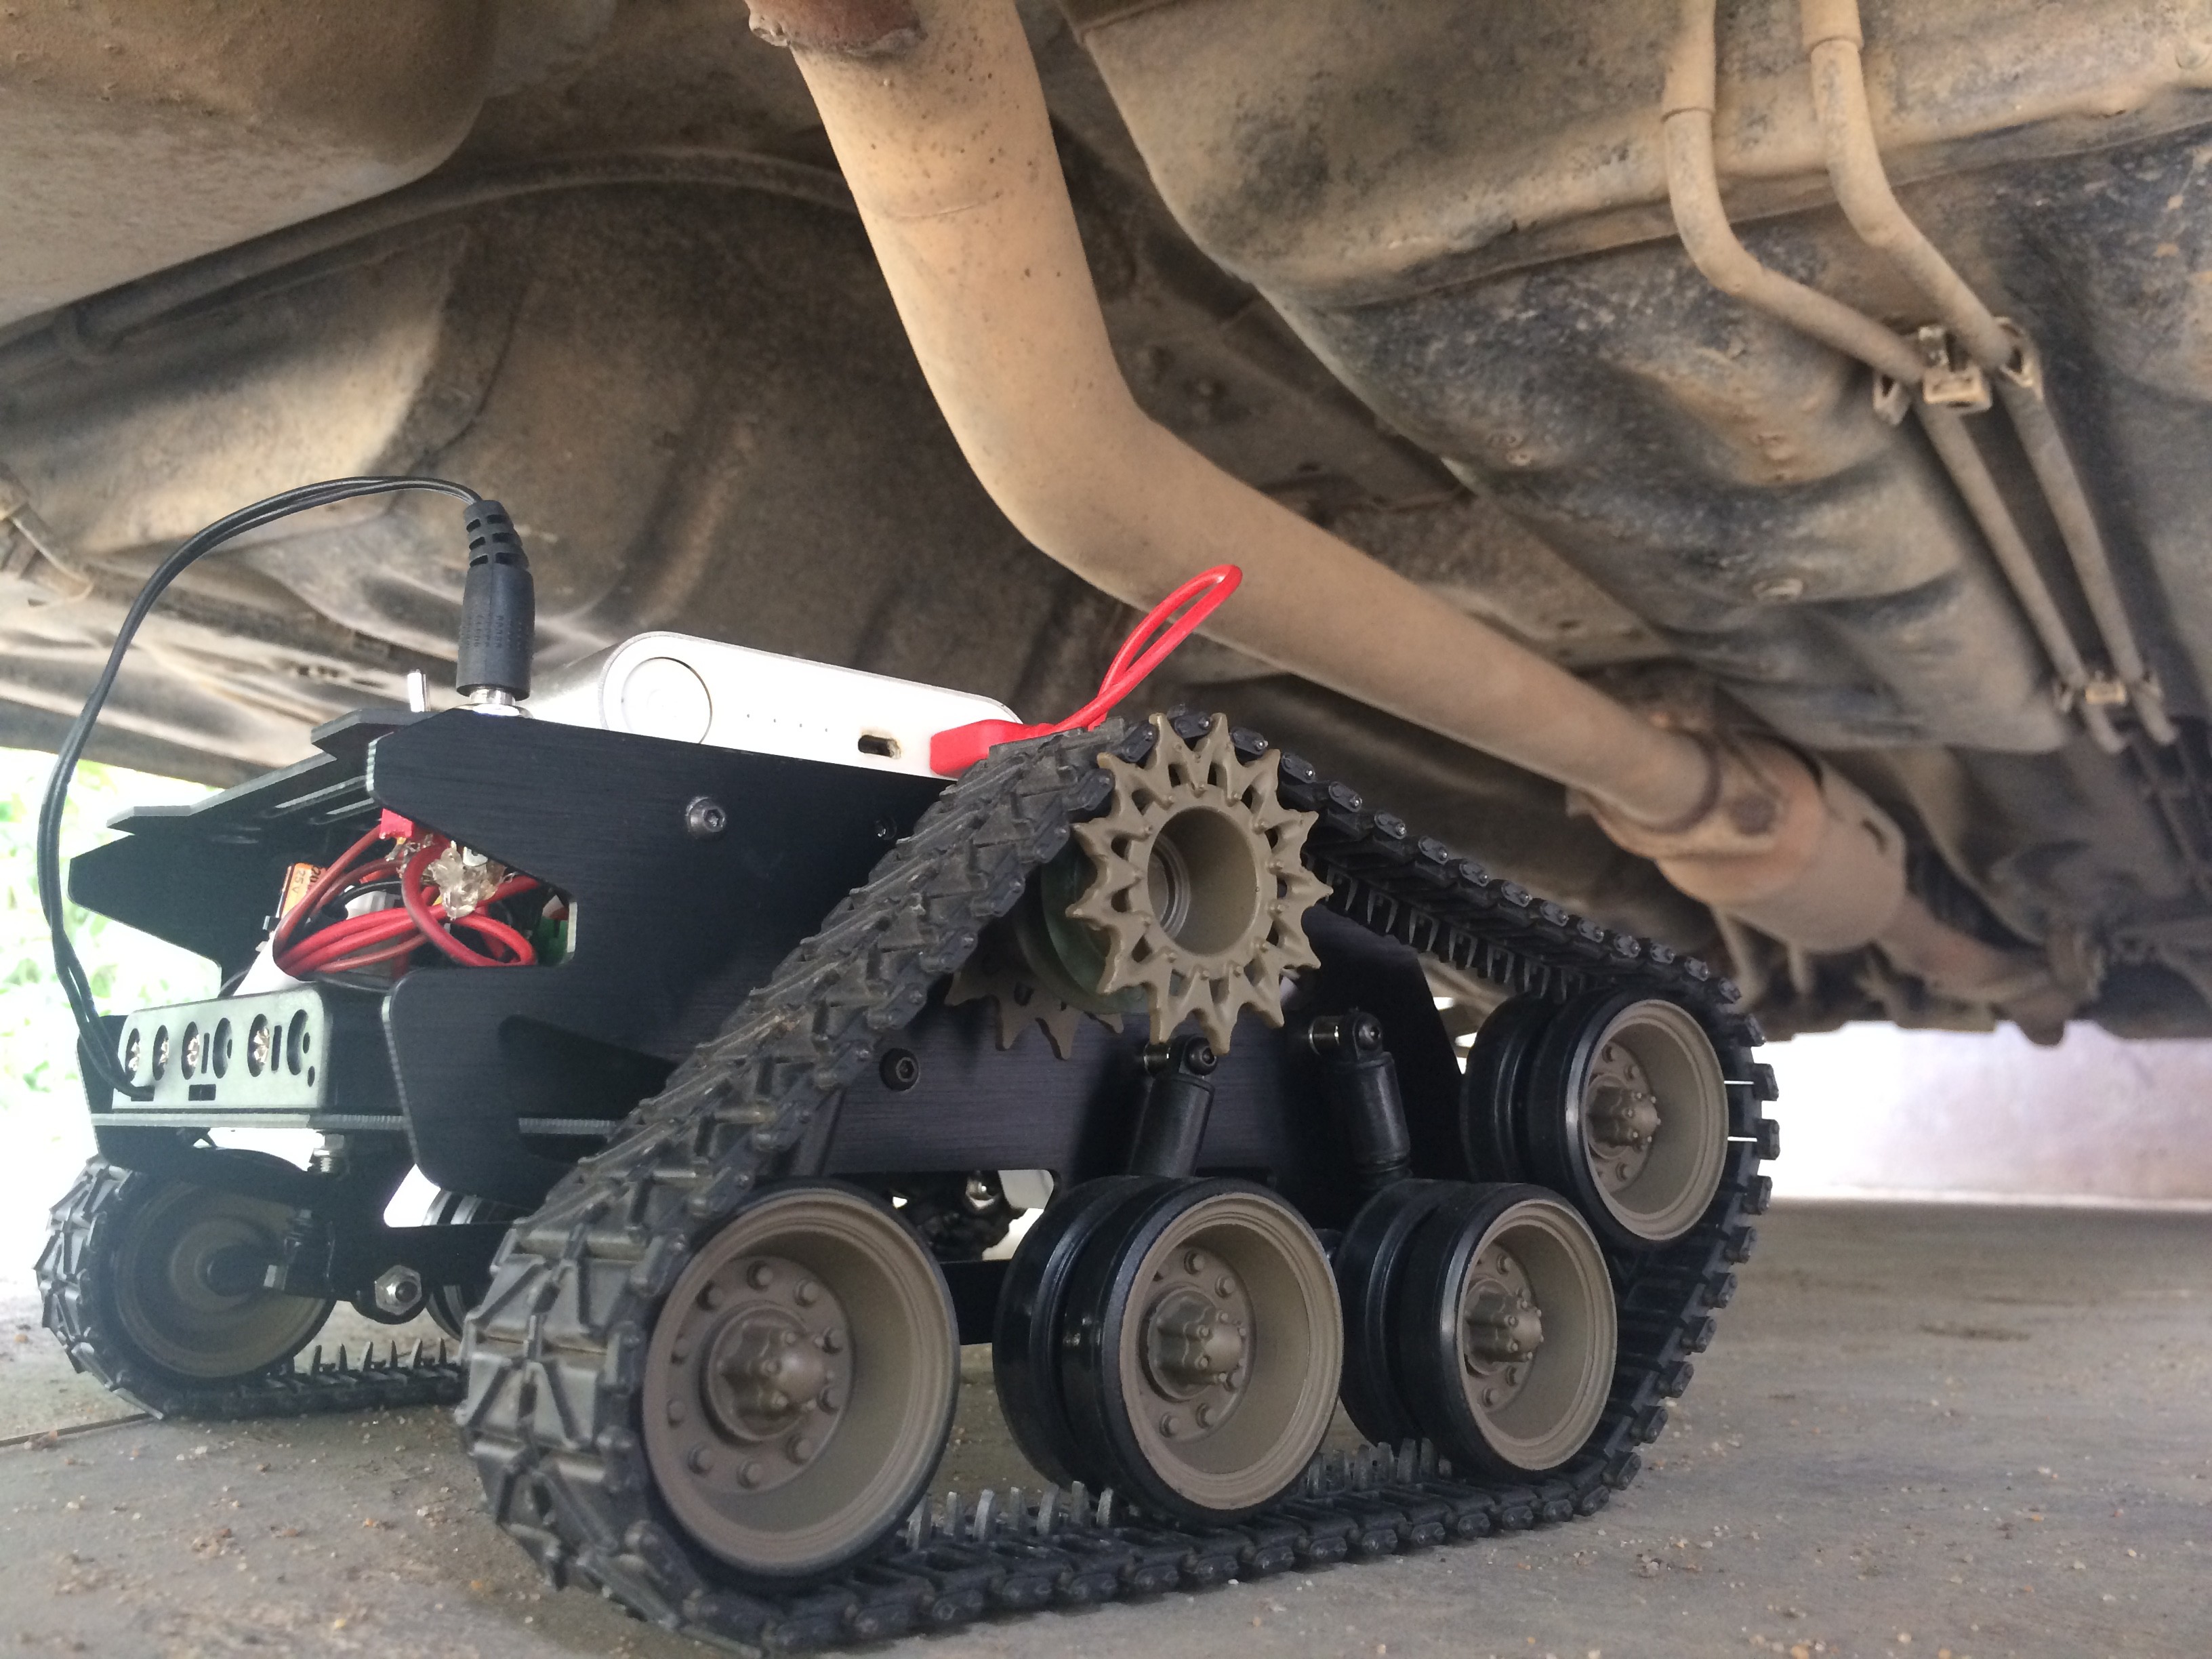
Due to its small size, it could able to crawl up under vehicles too !!
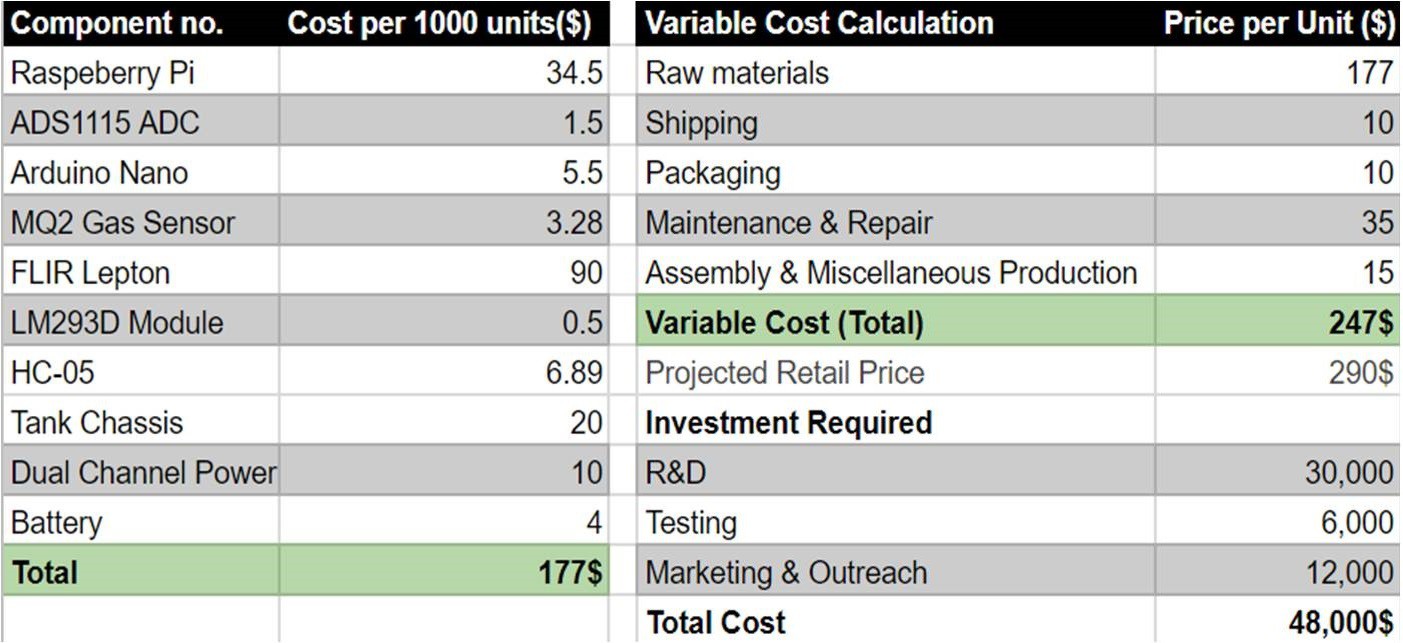
BOM & Business Plan Model :
Software :
I'm a EEE student lacking a lot on software and it's been the main difficulty in the project..
I'm using RC Car Controller and VNC Viewer from the Play Store as it's simple.
I will be moving to a custom mobile based app soon and posting a build instruction for setting up an individual app for integrating both the functions.
As of now, I have posted the coding and libraries that I used in my project in 'Project Logs'.
People who are interested in working for this portions are welcomed.
Please leave a like and a comment :)