 Varun Suresh
In order to mount the thermal camera on a autonomous rover, I decided to buy one instead making it.
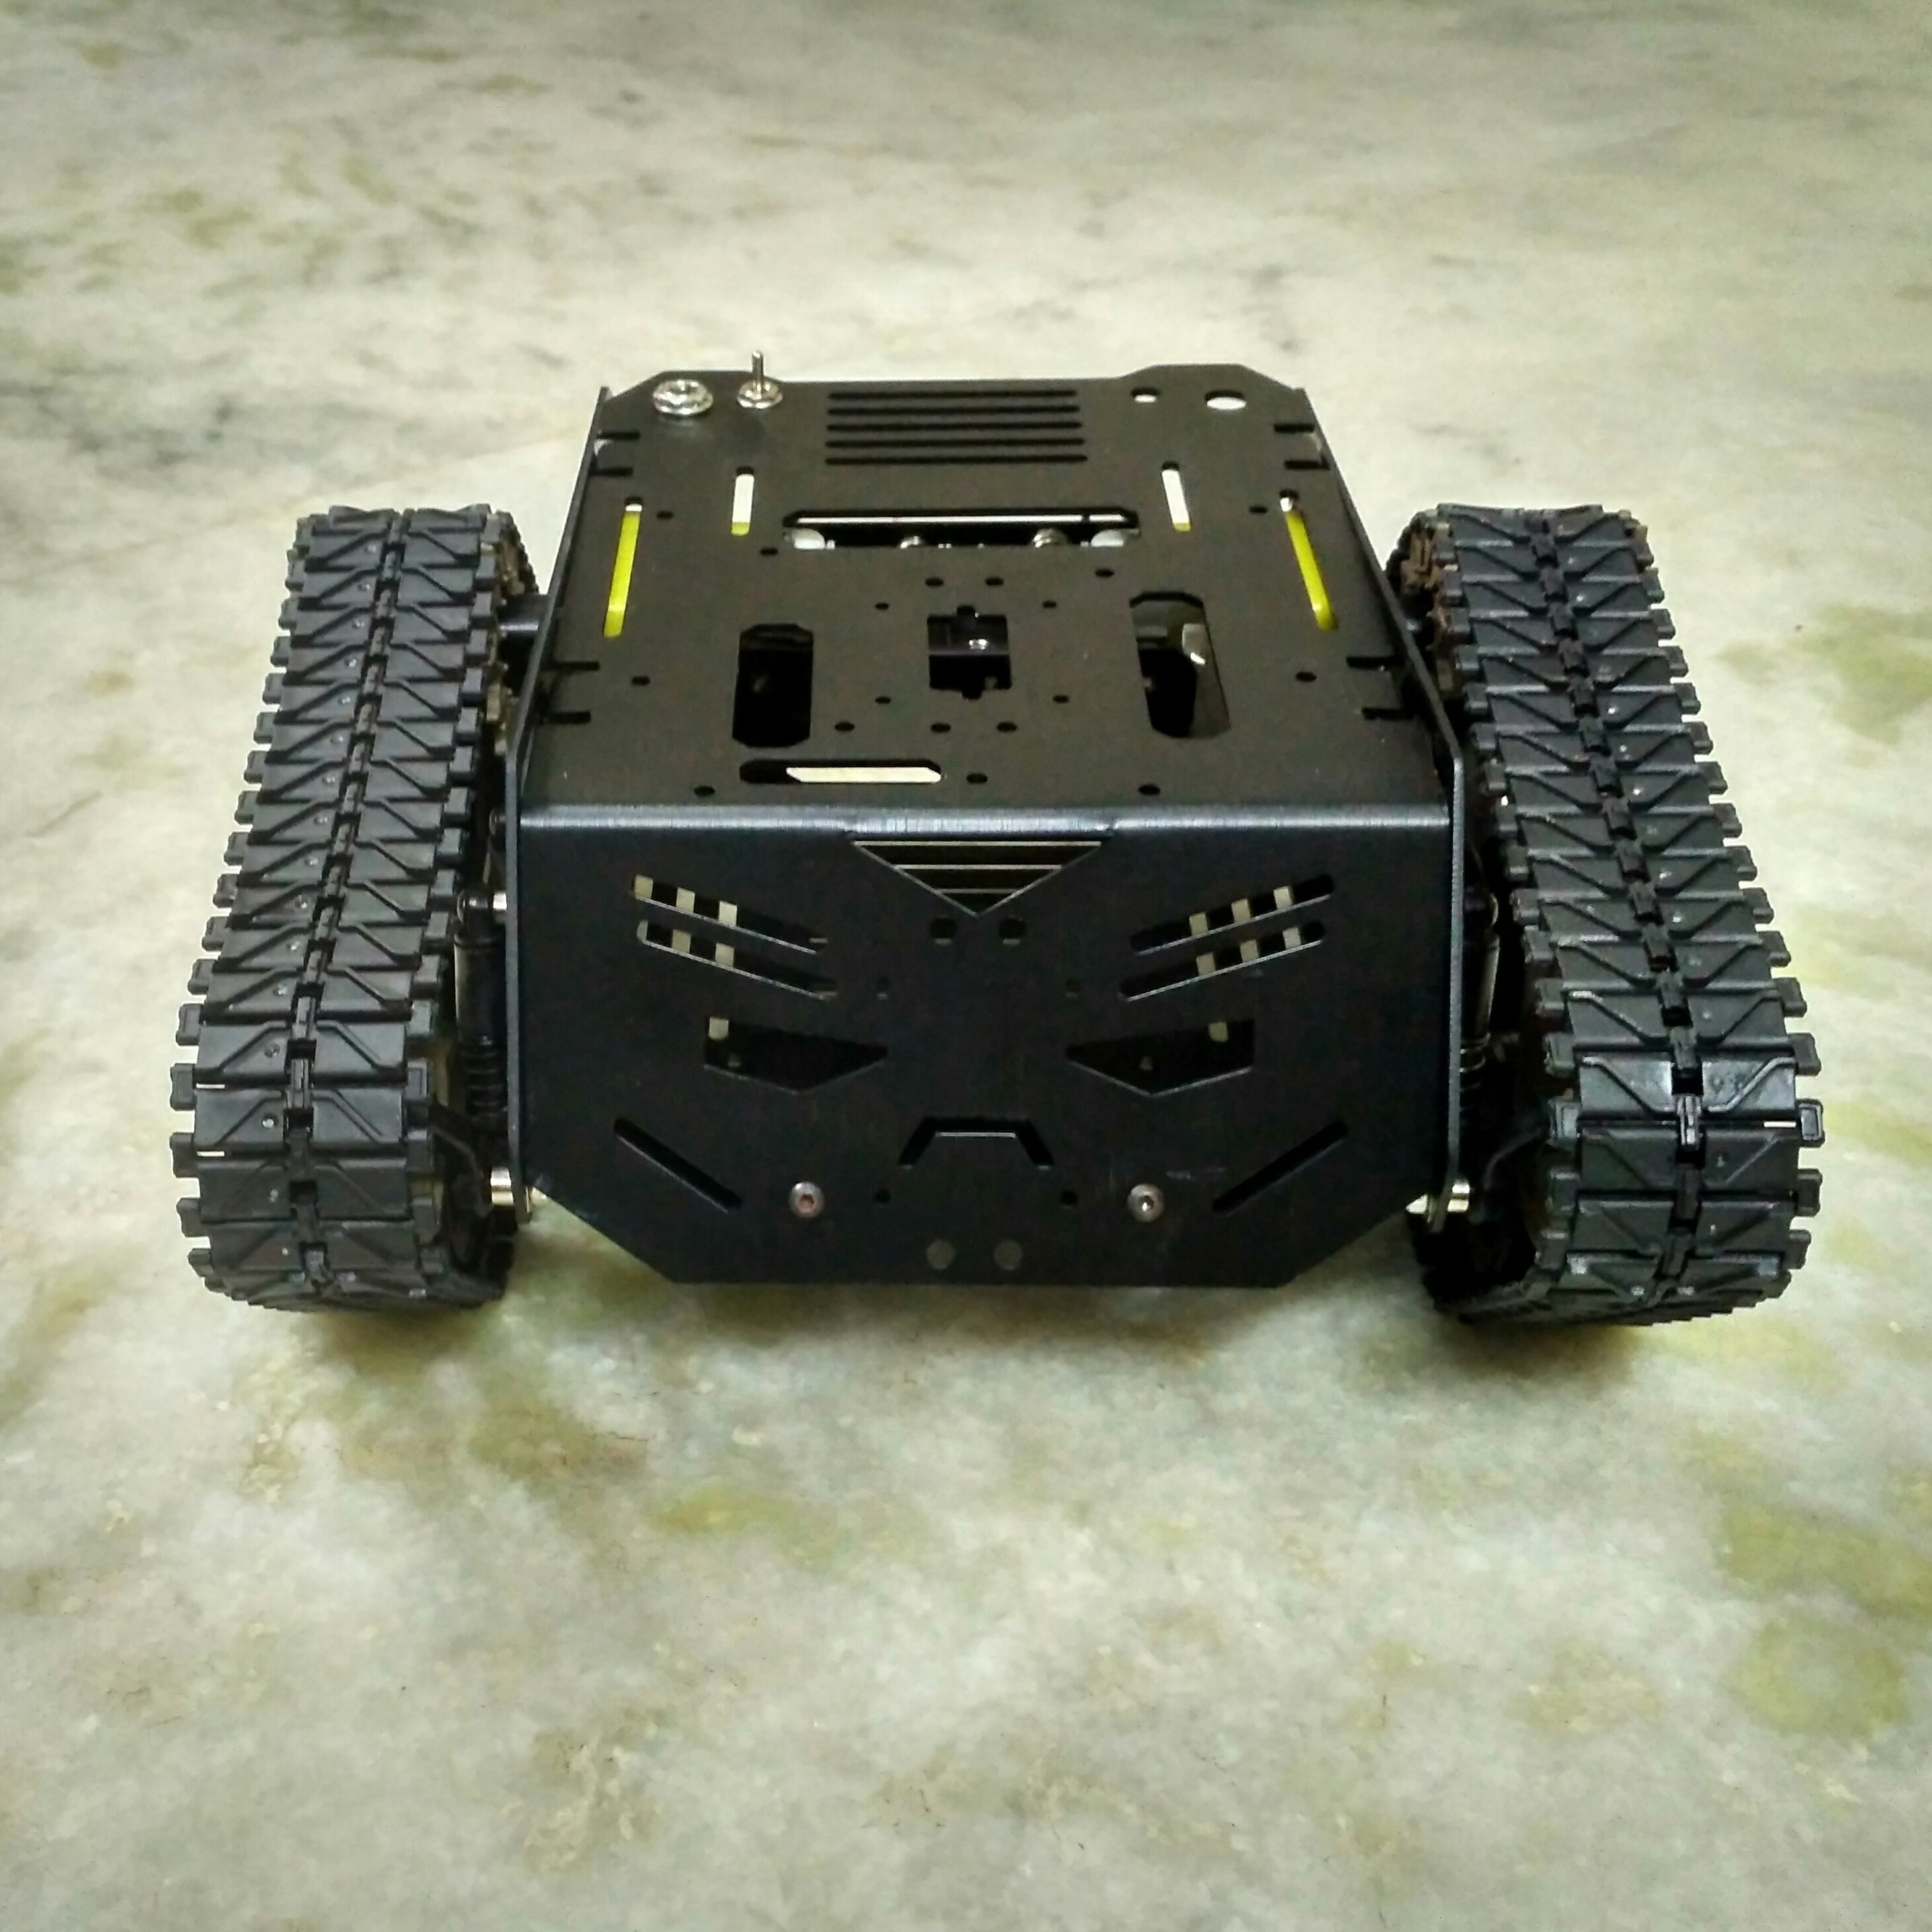
The rover that I want must be compact, powerful and be capable of running in all terrains in order to meet the problems that I work on. It must also crawl under some critical areas. Hence, I bought Devastator Tank Mobile Platform from DF Robot.
It is compatible with Raspberry Pi and most other popular micro-controllers like Arduino, Beagle bone and so on.
The Devastator uses high strength aluminium alloy which makes it extremely solid and durable. The high speed motors and premium tracks also allows it to move swiftly everywhere. Its high performance suspension, enjoys an outstanding mobility across even the toughest terrains.
It has 2 DC motors whose characteristics are given below :
- Operating Voltage Range: 3~7.5V
- Rated Voltage: 6V
- Max. No-load Current(3V): 140 mA
- Max. No-load Current(6V): 170 mA
- No-load Speed(3V): 90 rpm
- No-load Speed(6V): 160 rpm
- Net Weight: 45 g
It comes in individual parts and can be easily assembled in few hours. Once done, it will look something like this.
Motor Driver :
It uses L293D motor driver IC programmed using Arduino Nano.
The driver IC works on the concept of H-bridge. H-bridge is a circuit which allows the voltage to be flown in either direction. As you know voltage need to change its direction for being able to rotate the motor in clockwise or anticlockwise direction. Hence H-bridge IC are ideal for driving a DC motor.
In a single L293D chip there are two H-Bridge circuit inside the IC which can rotate two dc motor independently. Given below is the pin diagram of a L293D motor controller.
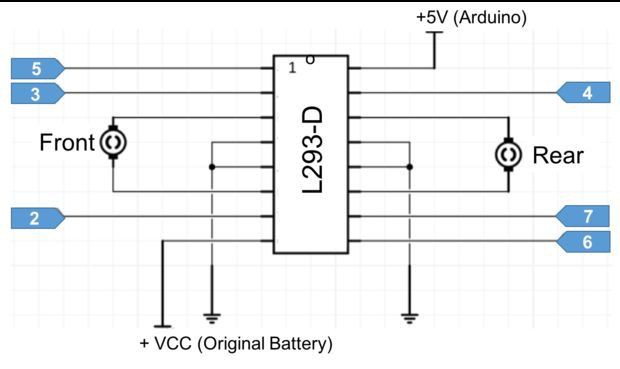
There are two Enable pins on l293d. Pin 1 and pin 9, for being able to drive the motor, the pin 1 and 9 need to be high. For driving the motor with left H-bridge you need to enable pin 1 to high. And for right H-Bridge you need to make the pin 9 to high. If anyone of the either pin1 or pin9 goes low then the motor in the corresponding section will suspend working.
I have explained the connection with regards to the entire circuit in the form of a sketch below.
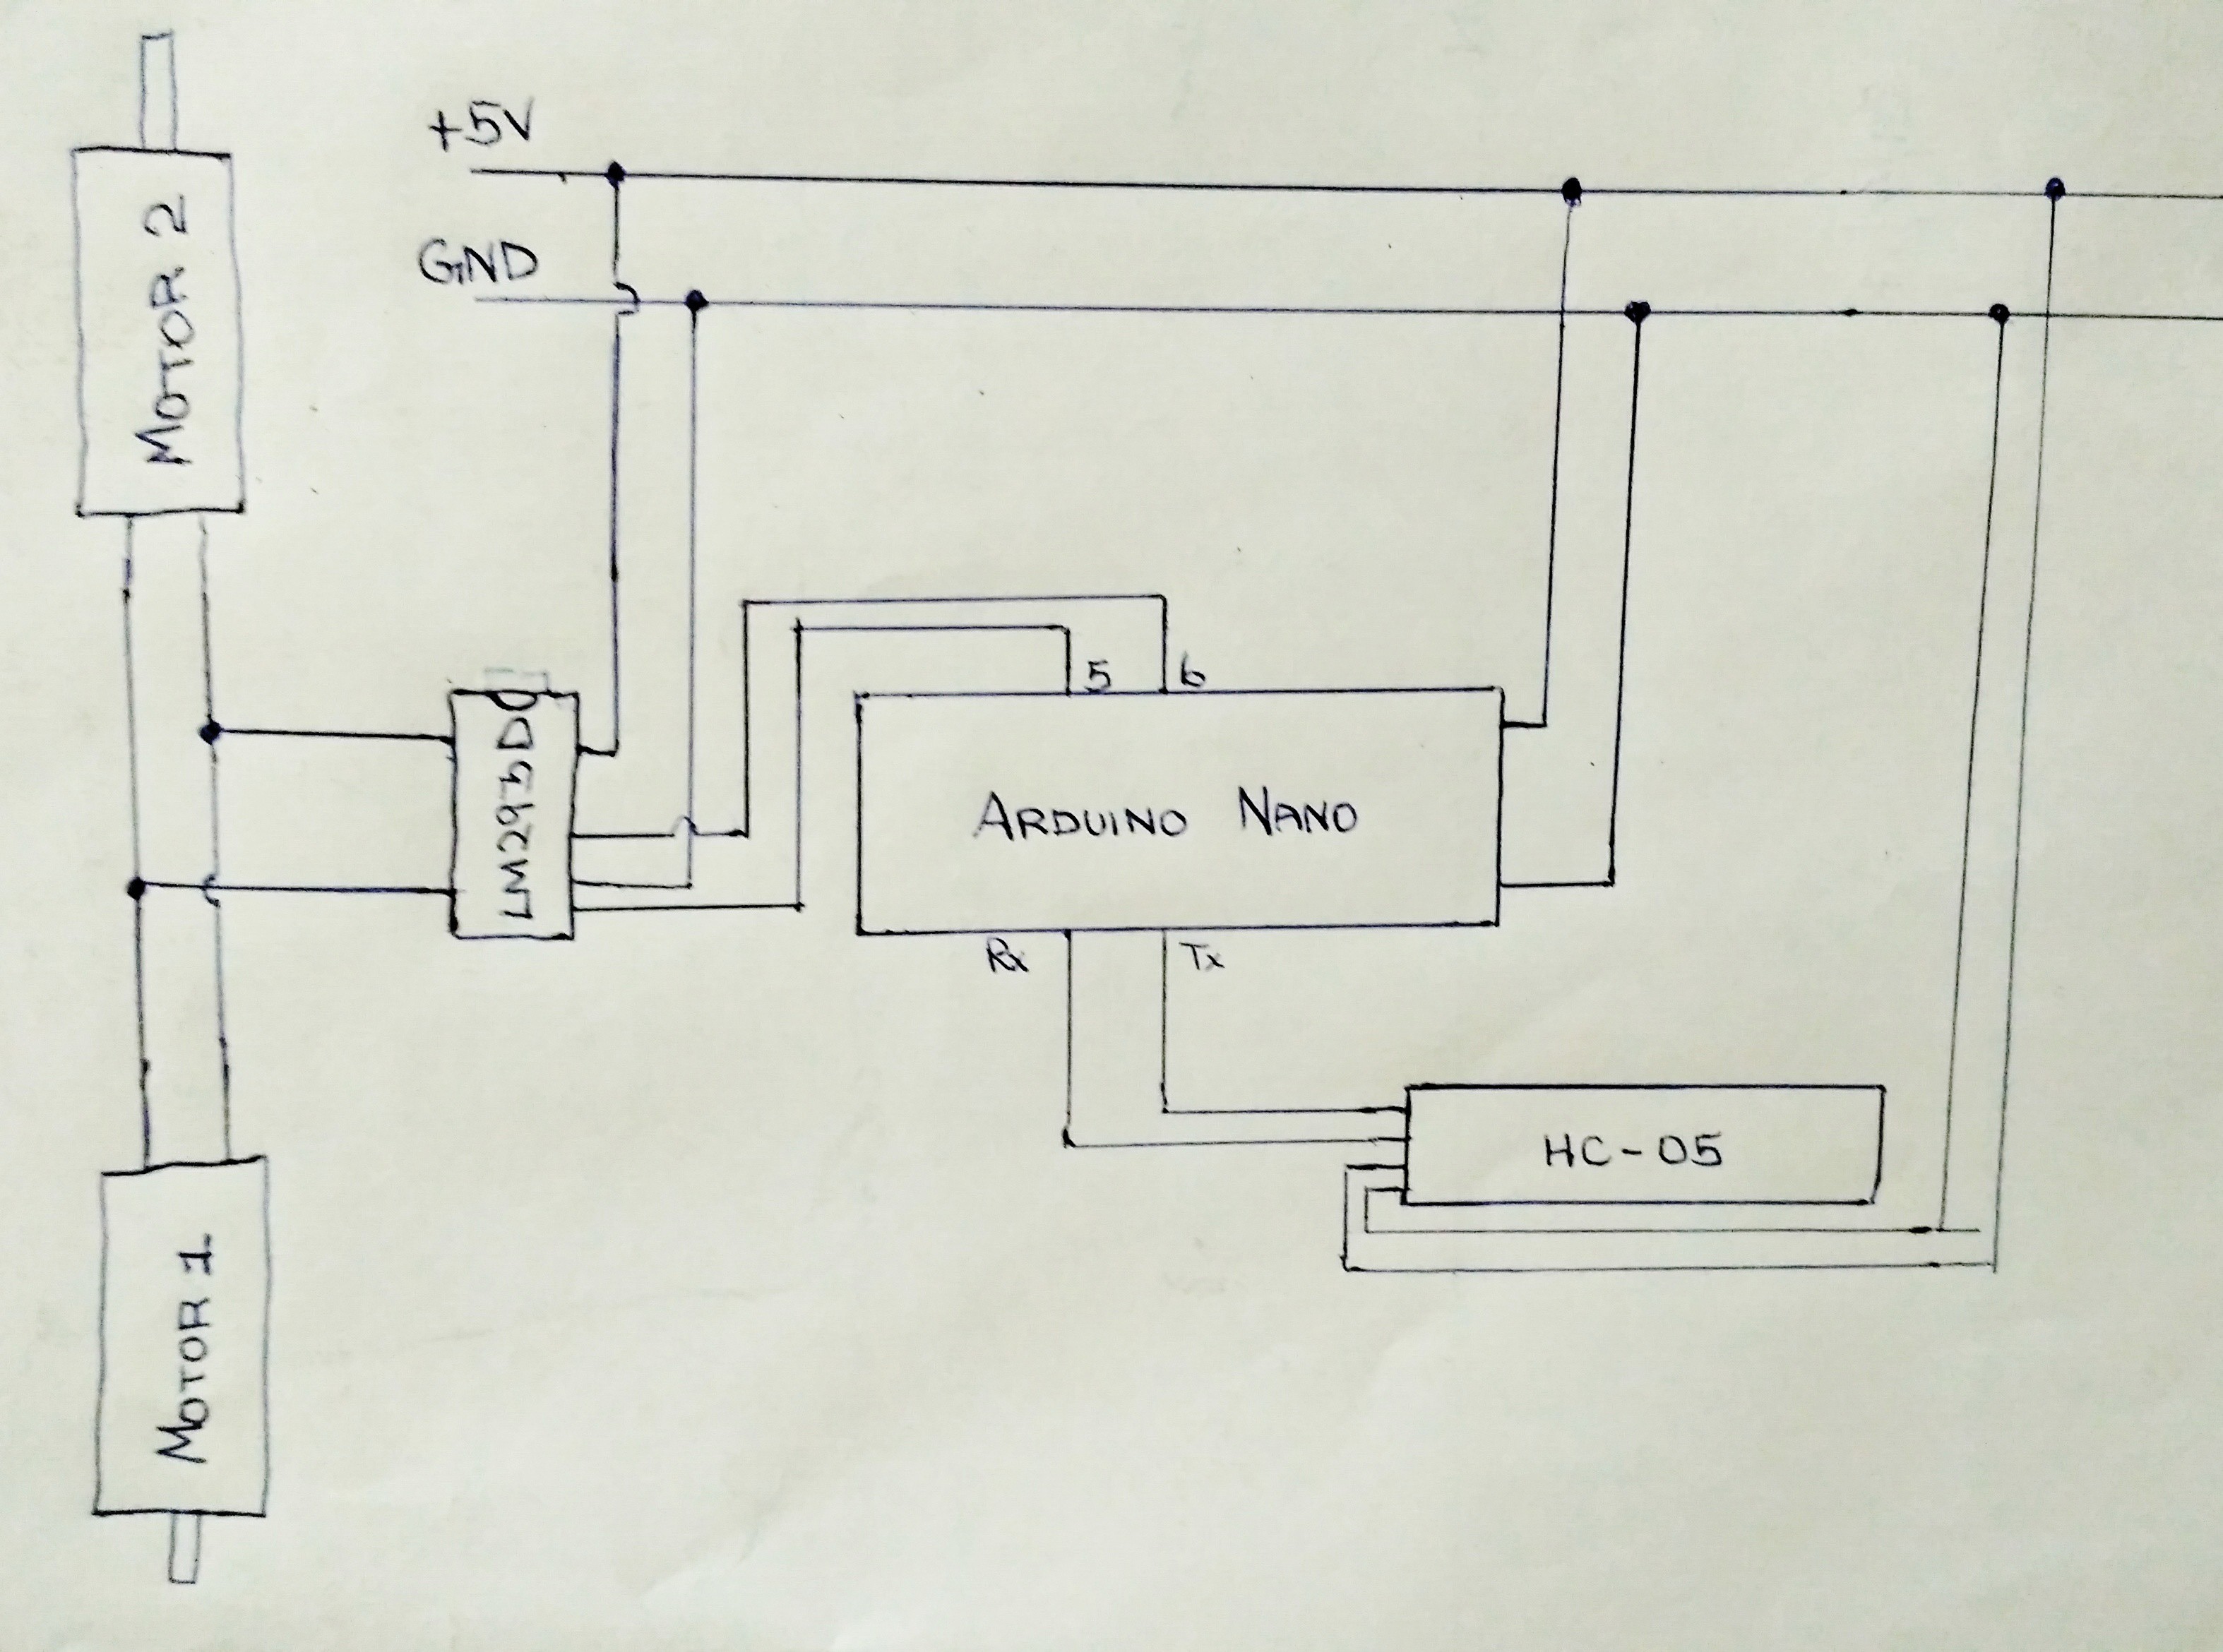
Once the connections are done, follow this link on my github repository for coding the Arduino Nano for Rover Control.
Discussions
Become a Hackaday.io Member
Create an account to leave a comment. Already have an account? Log In.