 Varun Suresh
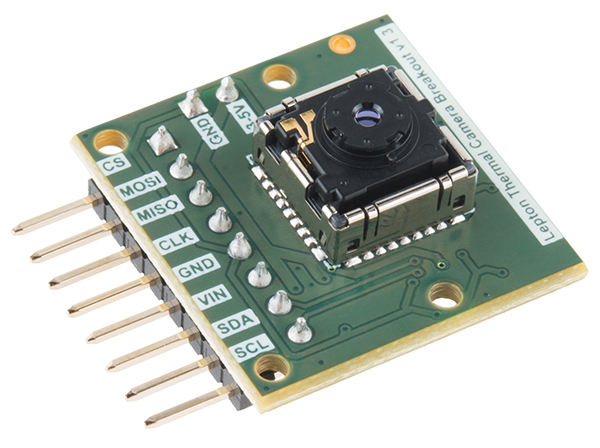
FLIR is the most expensive component used in our system. But it is a very vital element. The FLIR Lepton thermal camera is rather a new innovation which has brought down the cost of Thermal imaging by tenfold. This makes our vision of a normal tank-based mini rover, a reality.
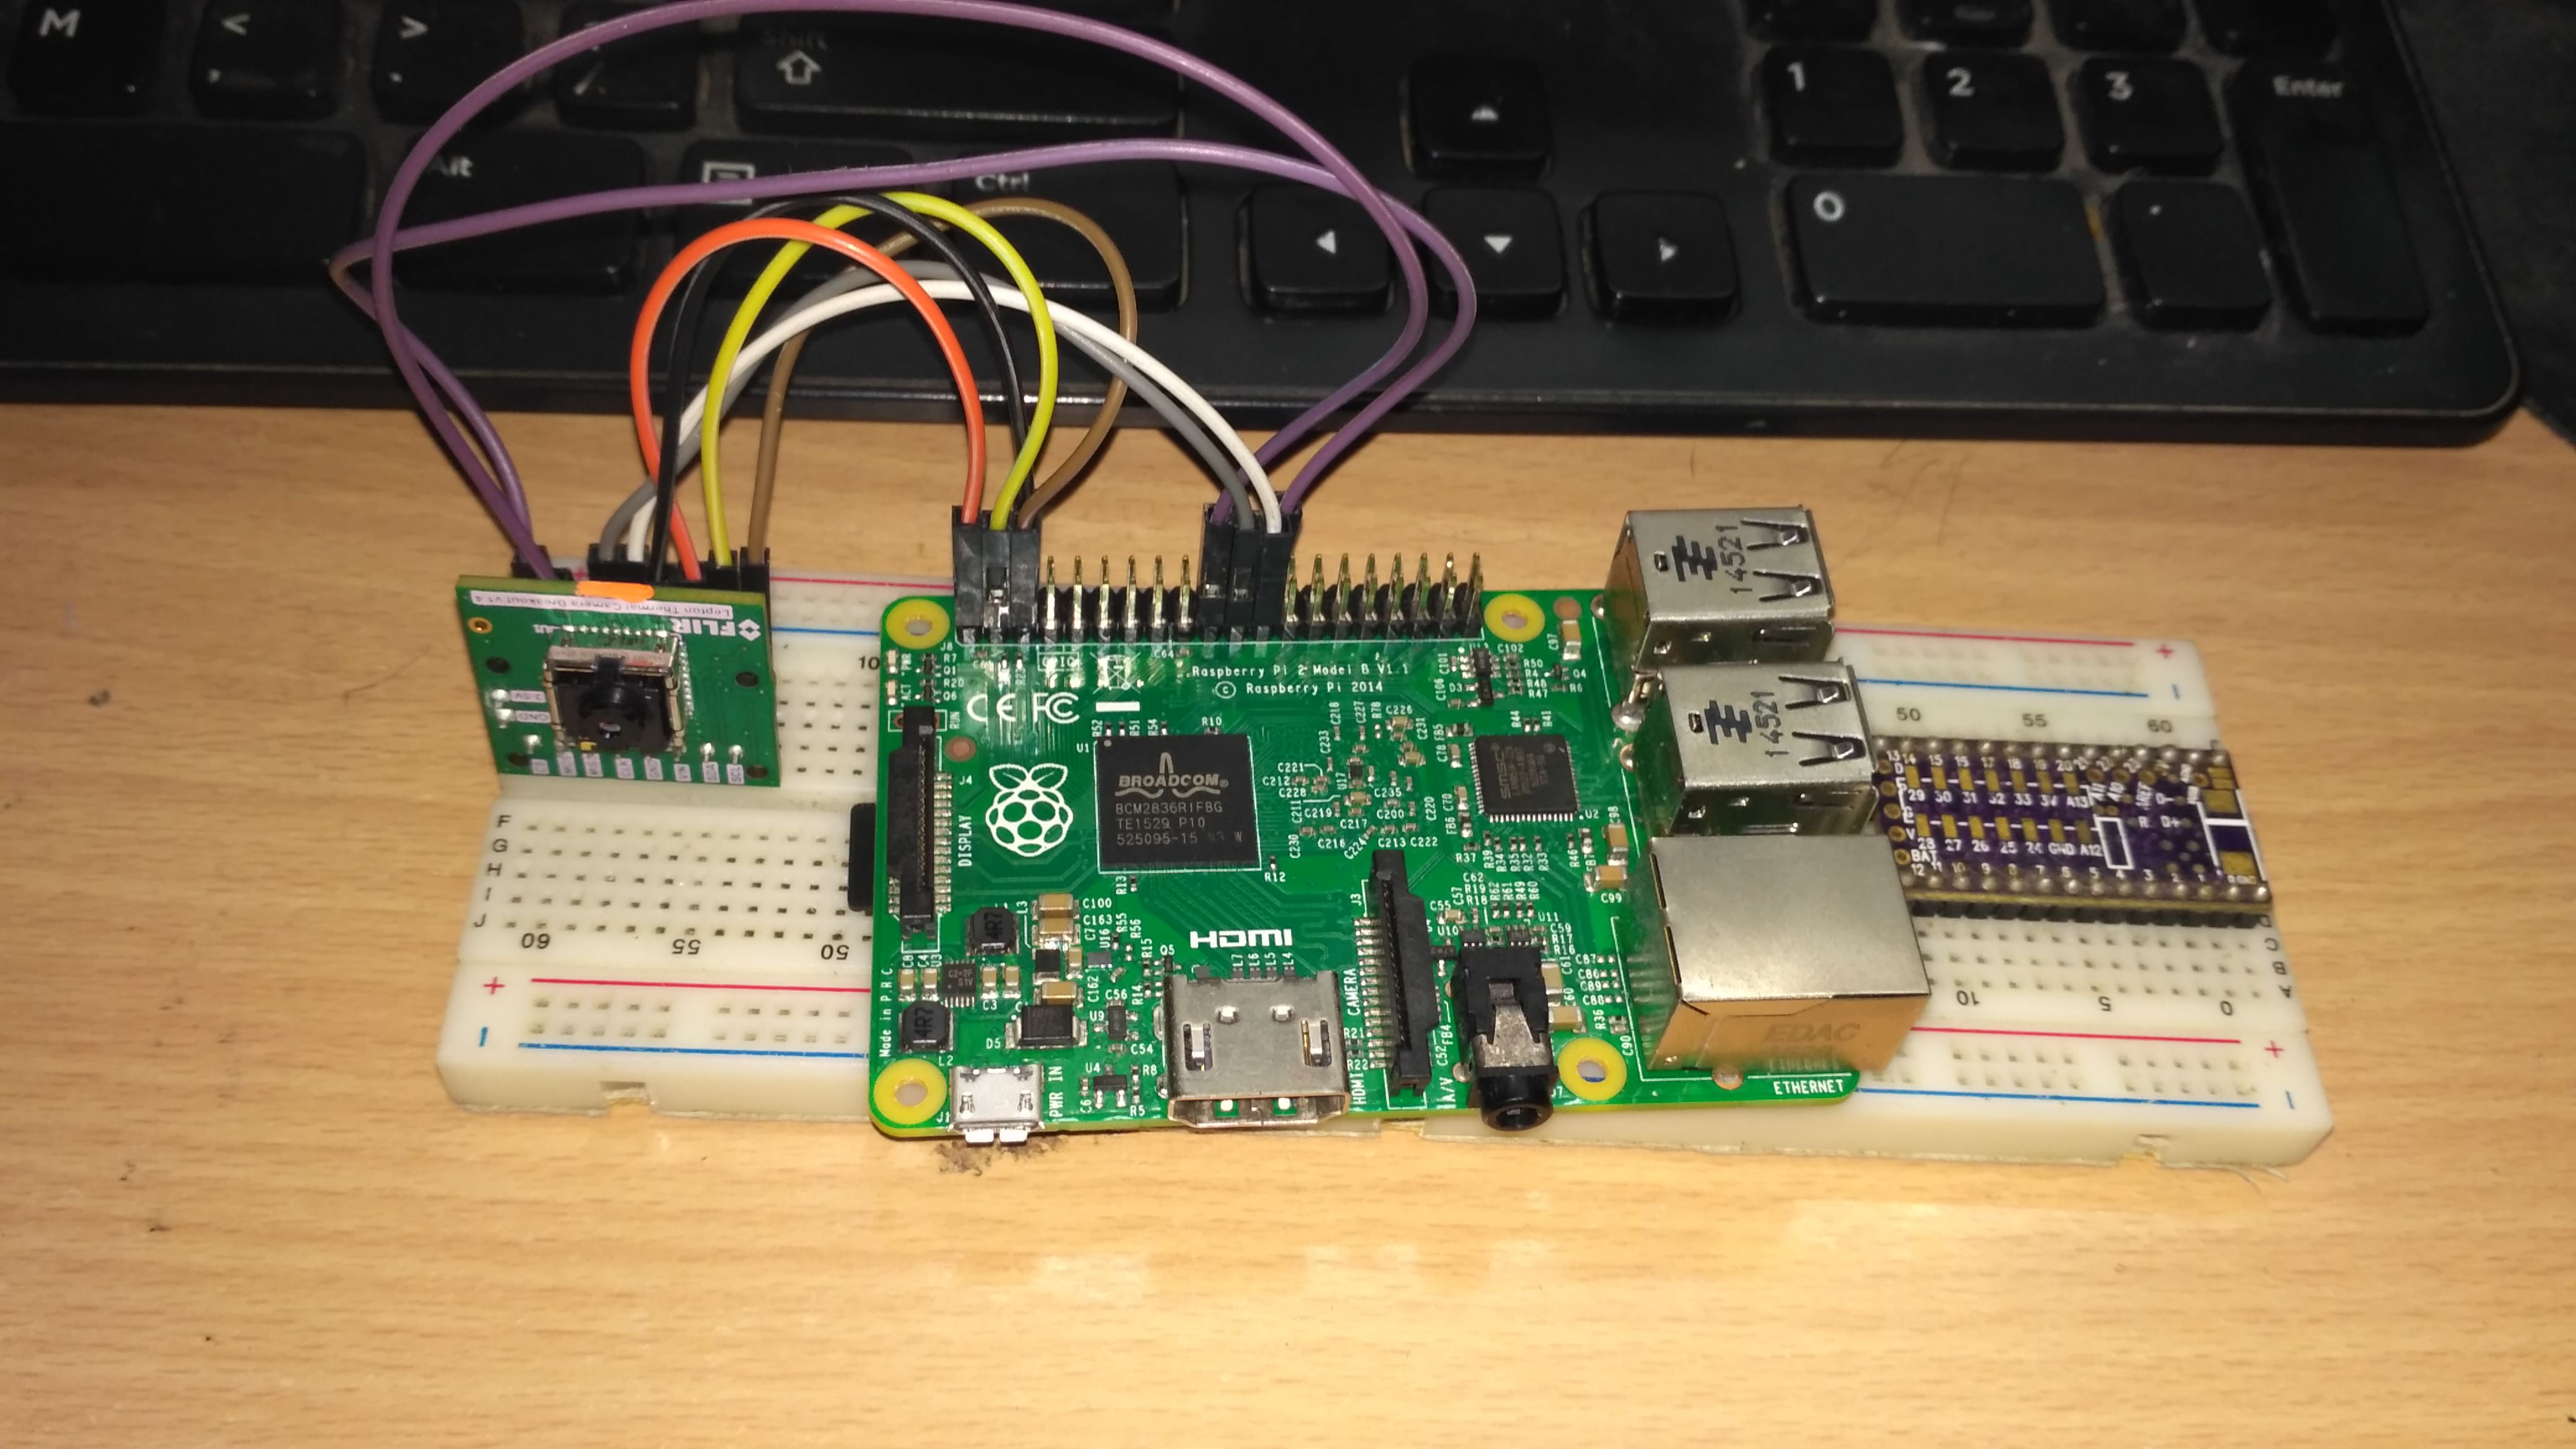
 Raspberry Pi is a core component of our system. I wanted to use the Raspberry Pi in this project because it is a miniature computer, designed for education which has more functions for a very reasonable price. I used Raspberry Pi micro-controller to program Thermal camera and Gas Sensor. FLIR Lepton Thermal Camera is connected to Raspberry Pi using I2C interface.
Connections: Connect SDA, SCL of ADC to the raspberry pi 2 respectively and Vin, Gnd to 3.3V and Gnd. Follow the instructions of the FLIR thermal module hookup instruction in Sparkfun.
Link : flir-lepton-hookup-guide
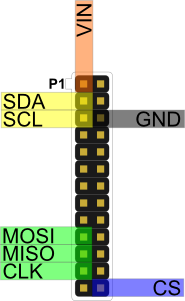
FLIR Lepton has 8 GPIO pins. As per the connection diagram, connect it with F/F jumper wires.
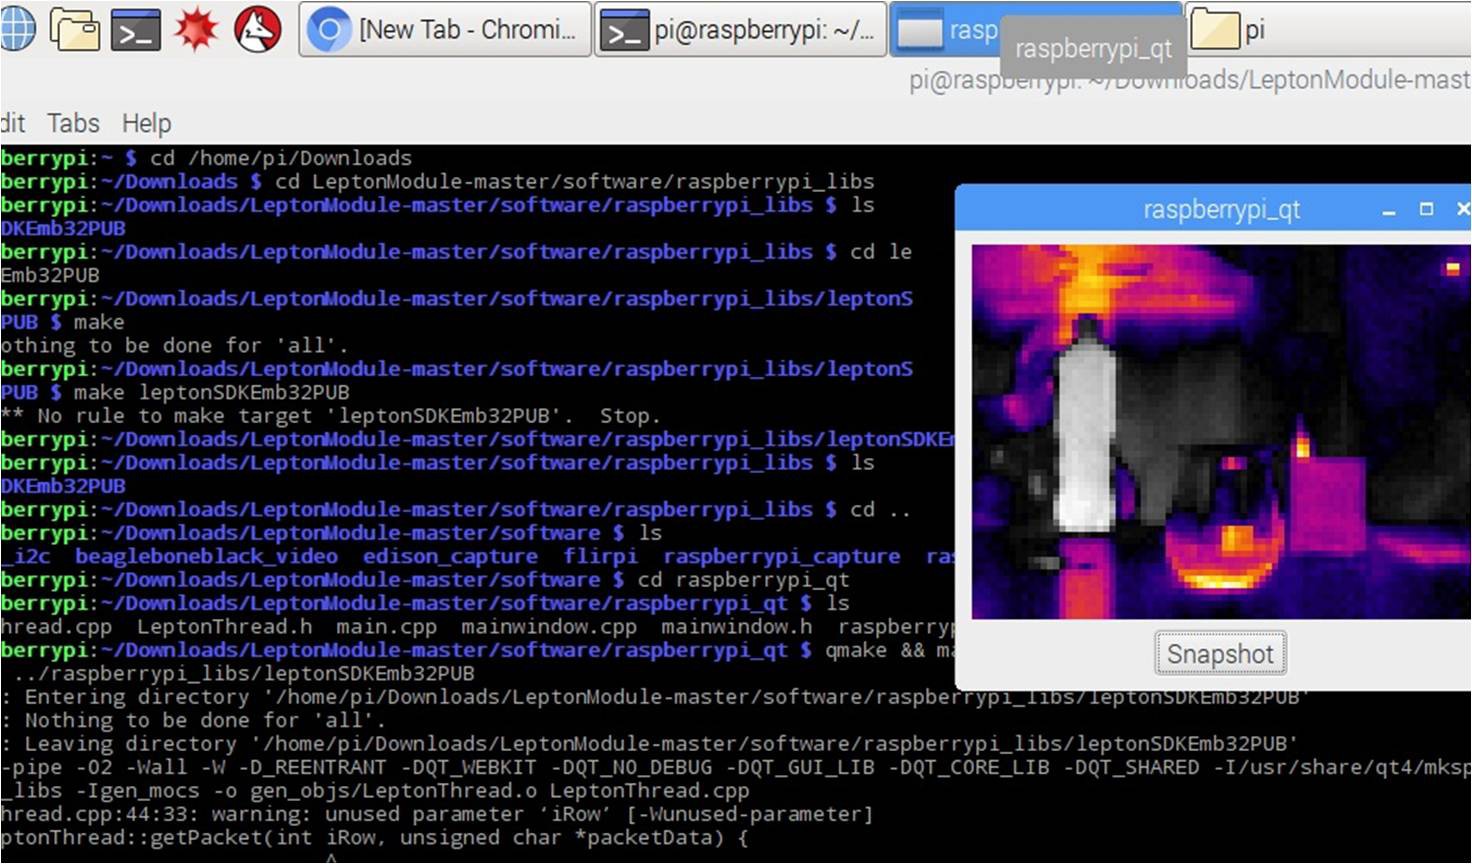
Software Prerequisites :
    1. Python 2.7
    2. Qt
    3. VNC
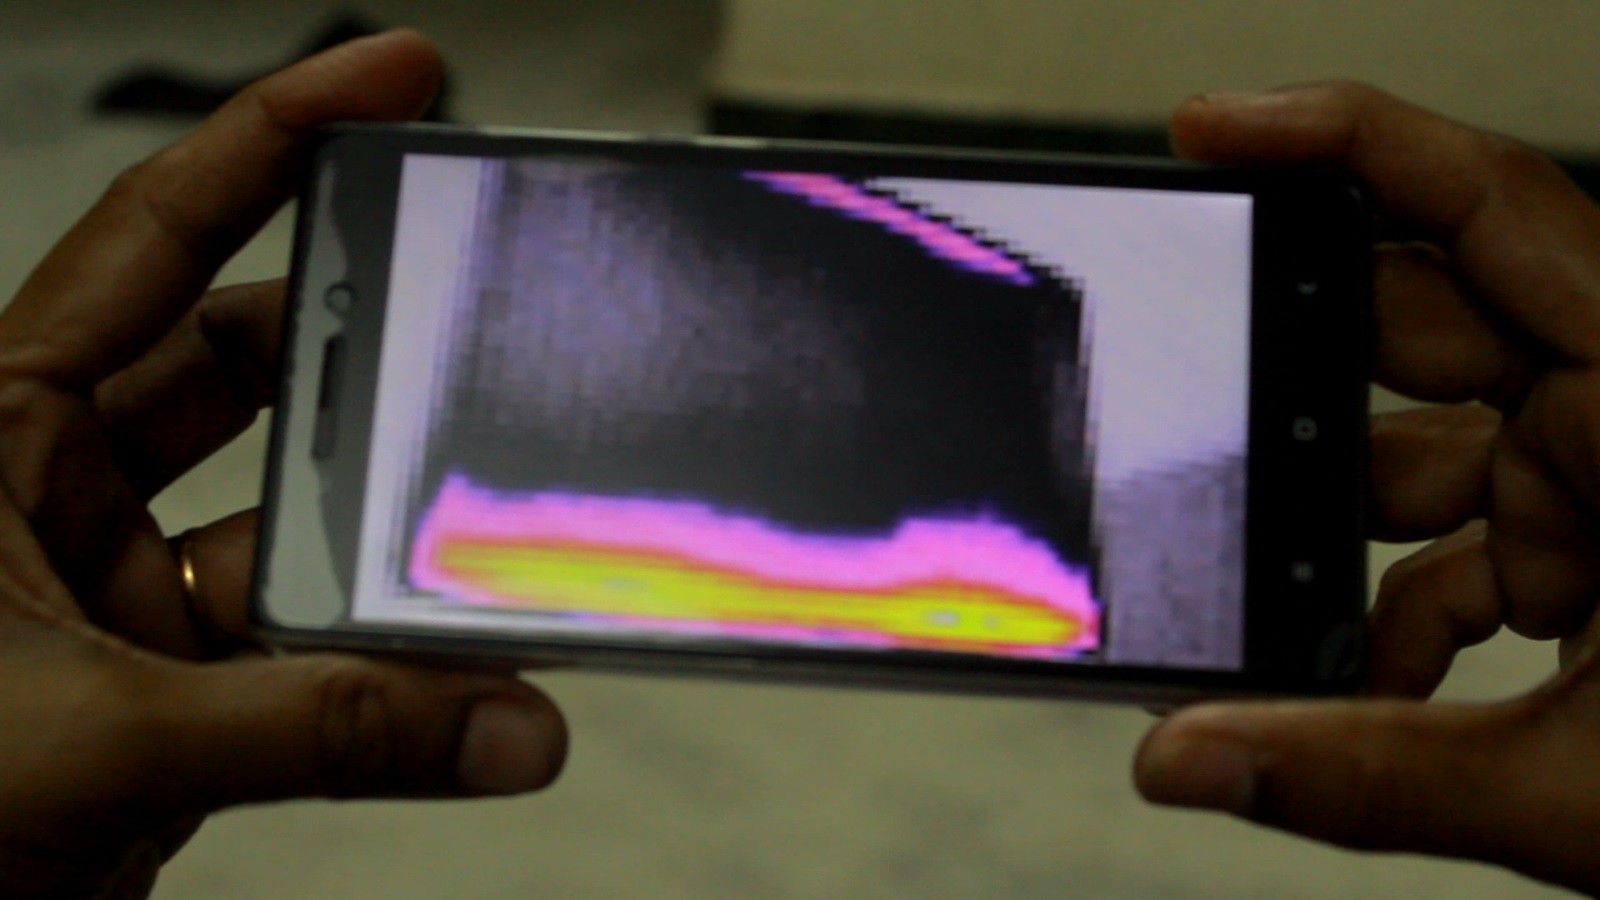
Once the coding part is done, a pop-up window displaying thermal image in 80x60 pixel resolution will be opened.
Unlike the mobile phone cameras, it has a bad resolution but the new models of FLIR are being launched with better price and better resolution.
 VNC :
VNC :
The current best way to record the video produced by the FLIR Lepton camera is to connect the raspberry to a PC or laptop. That is easily achievable using VNC (Virtual Network Computing). VNC allows a user to remotely control the desktop interface of another computer. Other advantages of using VNC with Raspberry are:
- There are many open source screen recorder programs
- It will allow the user to control the raspberry using linux or windows system
- The recorded files will be saved in the user’s computer, therefore, it won't be necessary to store it in the Raspberry memory card
- Using VNC we can easily carry the thermal camera system
Discussions
Become a Hackaday.io Member
Create an account to leave a comment. Already have an account? Log In.