 ArtBIT
It uses http://jasperproject.github.io for voice input, and I wrote several modules for it (https://github.com/search?q=jasper++user%3Aartbit&type=Repositories) including a MQTT client, which allows me to control other MQTT enabled devices in my home.
Total cost for this build is ~$100, and you can find the Bill of Materials document here: https://goo.gl/BRhm1L
See the promo video here:
Now that I've got your attention, see how the finished build works:
 Smart Technology
 Jon Hobbs
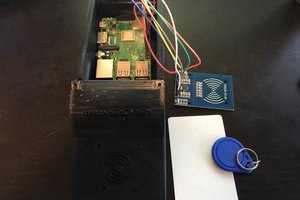
 T3rr0rByte13