0%
0%
Upgrading a Wilfa coffee grinder
Adding custom grinding presets to a Wilfa grinder, presented on a small oled display
Become a Hackaday.io member
Already have an account? Log in.
Just one more thing
To make the experience fit your profile, pick a username and tell us what interests you.
Pick an awesome username
hackaday.io/
Your profile's URL: hackaday.io/username. Max 25 alphanumeric characters.
Pick a few interests
Projects that share your interests
People that share your interests
 Calibrating rate of ground coffee
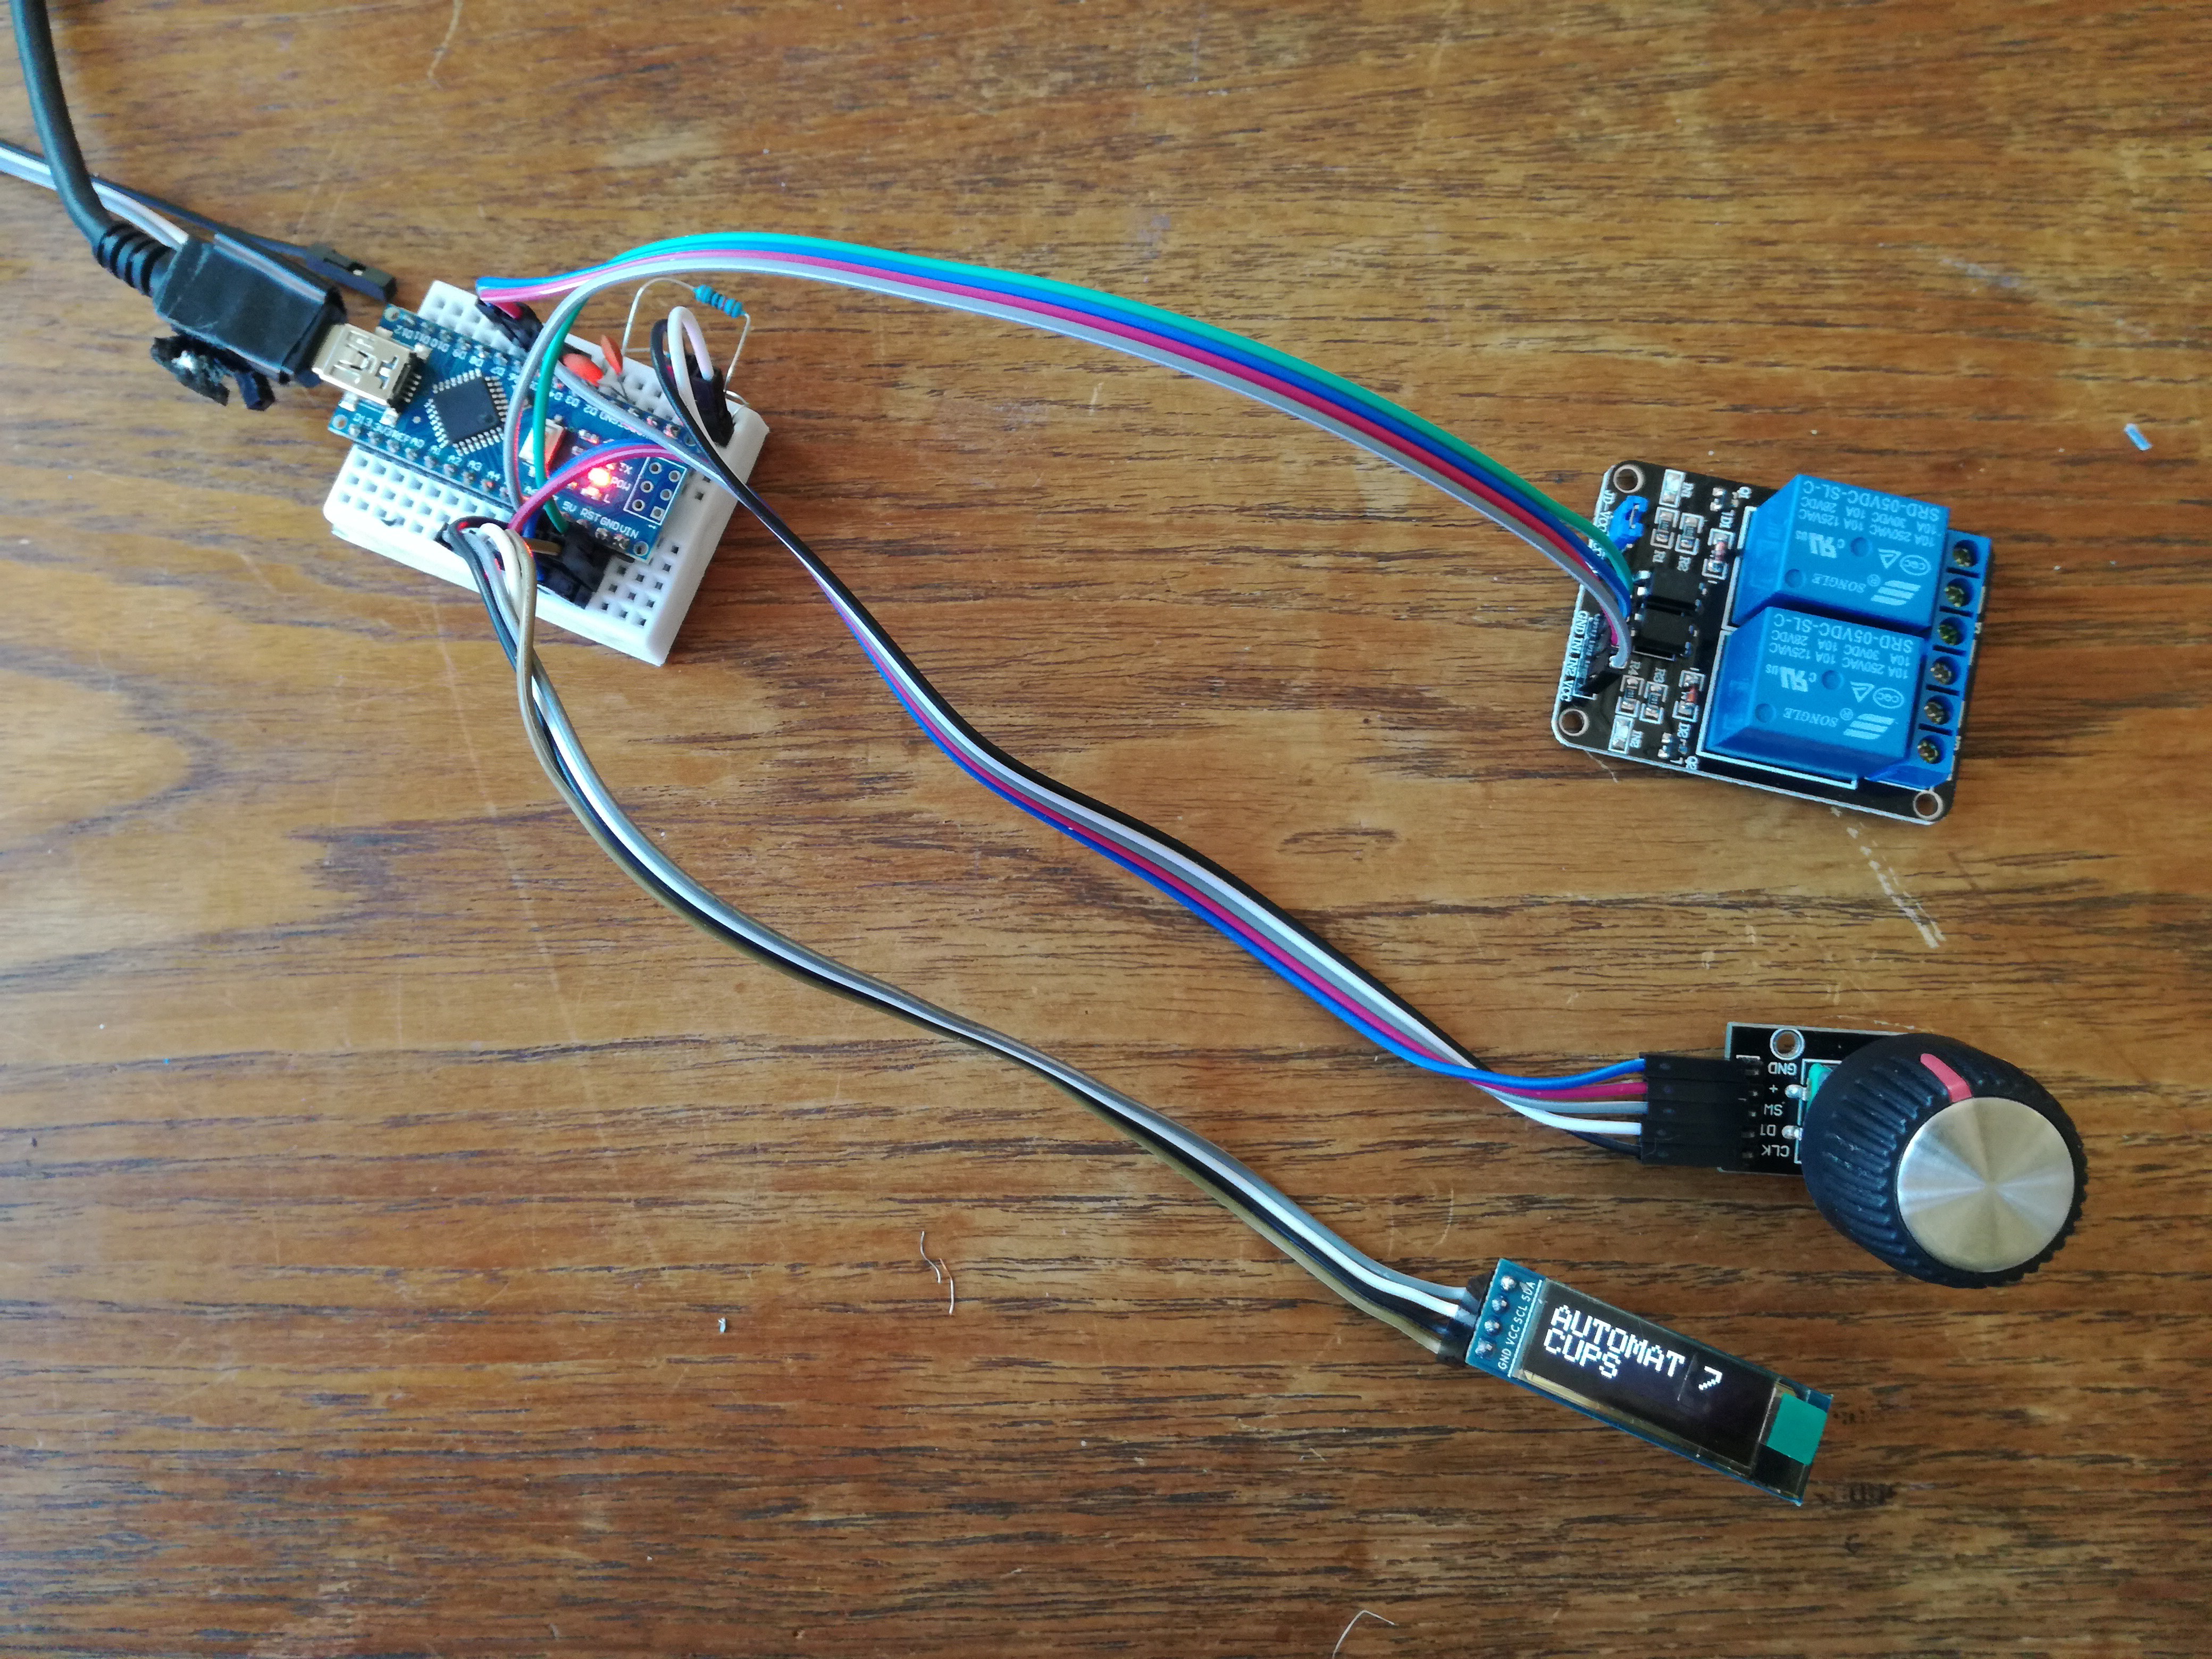
 Grinding mechanism is seen left in the middle. The black wire running around on the part is connected to different safety switches.
  Controller board for the grinder
 Justin Scott
 Kenji Larsen
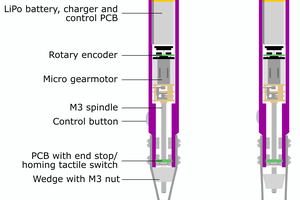
 M. Bindhammer
Brewing a cup of coffee with a Best Coffee Maker and a grinder is a perfect way to enjoy a flavorful and aromatic cup of coffee every morning. From saving counter space to having an integrated grinder for freshly ground coffee beans, single-cup coffee makers with grinders provide convenience and simplicity for coffee lovers everywhere.