In the prototype POD, control was shared, with a Raspberry Pi handling the user interface, image processing, and storage, and an Arduino Nano handing sensor data. It was designed to be a self-contained system for a fairly specific task.
The POD v2.0 is designed to be more versatile, and is based on the ability to either act alone or support other gadgets. Everything is controlled by an Arduino Nano, with storage handled by a micro-sd slot. On it's own, it acts as an environmental data logger. Connected to a computer by USB, it becomes a serial controlled sensor array. Or if photography is needed, it can control a camera, lighting rig, and motorised track with it's 3 mosfet outputs (opto-isolators would have been better but I had time and space limits).
The user interface consists of a mode dial much like a camera. This is based around a 4 pin gray code rotaty encoder giving up to 16 programs to choose from. When the power is turned on the mode dial is read once and the chosen program started. After this it is read each sensor sweep for diagnostic purposes but changes to the dial are ignored until the POD is next powered up or reset. Each program can be edited in the sketch, and as of sketch version 007, they include Serial (waits for serial commands via usb), Timelapse (timed sensor sweeps and photographs), and Security (timed sensor sweeps and motion activated photography).
In timelapse mode, sensor sweeps are timed so they happen at the start of each loop, before anything else triggers. This way, the sensors report a true ambient light level even if a bright light or flash is used for photography, the timing simply renders the light undetectable. The same goes for a motorised camera track for moving timelapses, the camera is moved between sweeps so the movement doesn't register on the accelerometer.
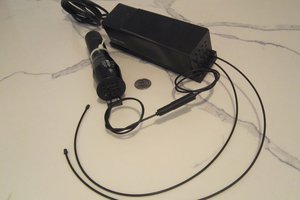
The 3d printed case could use some improvements in later models, but it's a step up from the dremelled project box used for the prototype. The power supply consists of a 5v dc-dc converter housed in a seperate section lined with aluminium tape in an effort to contain any interference (no clue if this works or is even needed). It can be powered by a 9v or 12v battery, or a dc adapter. USB power alone doesn't seem to be enough for all the sensors to work, it's possible the load isn't being spread as evenly as when the dc-dc converter is used.
In conclusion, there's still room for improvement, but I'm quite pleased with how the project is going and plan to start on the POD v3.0 soon.
 rand3289
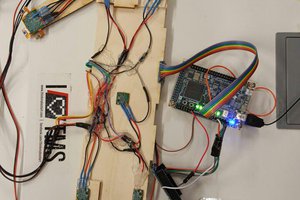
 Simon Trendel
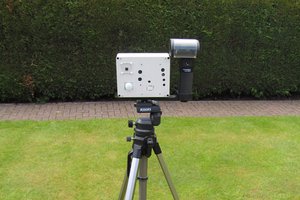
 Vignesh Ravichandran