NaranInc

The Internet of Things has made it easier than ever to set up a smart home in which you can remotely control your door locks, lawnmowers, lights, thermostats, vacuums, and even pet feeders, using your smartphone and an app. It's also made it very easy (and relatively affordable) to monitor your home from just about anywhere with a smart security system.
Depending on your needs you can go with a system that you monitor yourself, or pay a subscription fee to have your home surveilled 24/7 by professionals who will contact your local fire and police departments when alarms are triggered. Of course, the more coverage you have the more you can expect to pay. Smart security systems are highly customizable and are available as full-blown setups that include professional installation and monitoring. But they all come at a very steep and high price ( more than 100$ to up to thousands of dollars)
But today we wanna offer you to find a way to build and secure your precious stuff or house in a more easy and cost effective way. This DIY Alarm system can be easily made using the components and devices which you can easily find in your house or can buy from your electronic store at a very cheap price. Inexpensive yet effective system. Remotely monitor and protect your home or get notified for any movement in your house instantly.
And the best part, you can have all this in less than 50$ !!!
This DIY is really great for :
- People who want to secure their house but cannot afford to use really expensive systems.
- DIY enthusiasts who are enthusiastic to challenge their DIY skills into a new undiscovered world
- Tech geeks who want to discover home automation and want to explore their creativity on smart devices and DIY tech
Our DIY projects are specifically aimed to achieve these goals :
- NO PRIOR SKILLS NEEDED - START FRESH - We will guide you through each and every step in detail to ensure you can understand and implement it well.
- NO BIG EXPENSIVE PROJECTS, CHEAP AND EFFECTIVE - Depending on your budget. Use items which you have at home or buy them cheap, try to do all in less than $50!
- TIME FRIENDLY - Everything can be done in one hour !!
- ROOM FOR CREATIVITY - We always try to leave a room for some creativity so that you can customize this DIY as per your needs and use them effectively.
FEATURES OF SMART ALARM SYSTEM
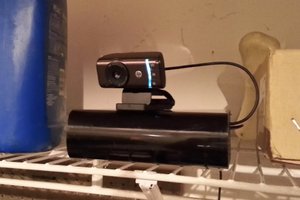
- Smartphone camera connected online for monitoring your house from anywhere.
- Get even the slightest motions in your house detected
- Smart hub that can sends you snapshots of your house when you request for a house view.
- Remotely trigger an alarm when intruders have been spotted in the house or if you want your pet to not go to a particular room
STEP 1: NECESSARY COMPONENTS
- Raspberry Pi 2 or 3 - 25$ ~ 35$
- 16Gb SD card - 8$
- An old web camera
- PIR or laser sensor + jumper wires - 9$
- An old unused smartphone
- Philips Hue - optional
STEP 2: SETTING UP YOUR PROTA SMART HUB
Prota OS is available on RPi B, B+ 2, 3. It can be downloaded for free from here. It’s only 3.8GB and easy to burn on a SD card (make sure to use a 16GB card).
Follow the instructions of Raspberry Pi foundation to write the OS image on your SD card. Extract the .img file from the zip in your SD card. Download and open Etcher, select the image and the drive and start the process.That’s it!
![Screen Shot 2017-08-04 at 10.33.41.png]()
Once Prota OS is burned on the SD card, you can follow this simple installation guide to set up your Prota hub (less than 1 minute!). You only need to define its name and password, your time zone and your email address and the rest is completely automatic!
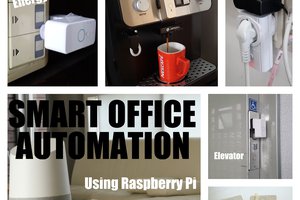
That’s it! Within 10 to 15 minutes and with no hassle, you transformed your Raspberry Pi into a Smart Office automation hub!

STEP 3: SET UP YOUR PIR SENSOR

As you can see, next to your sensor’s pins are small indications on what each pin is made for:
- OUT is for Data
- VCC is for the current connection
- GND is for the ground connection
Simply connect as in the picture below to set properly.

For the quick explanation, the RED cable is connected to a 5V pin (PIN...
Read more »
 DeckerEgo
 Kevin Van Ryckegem