 Kemal Ficici
Introduction
High Altitude Balloon missions are usually very risky, as there is a high chance of losing or damaging one’s payload during a mission. There are a lot of points of failure, and it is easy to lose track of your payload. Our Autonomous High Altitude Glider project aims to solve that issue. The glider deploys when it reaches a target altitude, detaches from the balloon, and navigates back to a predetermined location using GPS and Gyroscope/Accelerometer data.
This project originally began in 2015, but very little progress was made until it was put on the shelf until June 2017. We plan on finishing this project with at least one successful mission by the end of 2017.
Plan
The current plan is to deploy a fixed-wing glider at an altitude of 100,000 ft(approx. 30.5 km.), and navigate back to our launch site. Our flight path is as follows:
- Deploy at 100,000 ft
- Detach from balloon
- Dive until the glider reaches an altitude of 30,000 ft(In order to avoid strong winds and jet streams)
- Maneuver to predetermined location
- Spiral down and stall to kill speed and land safely
- Land
We are using Tarik’s “Sequioa” UAV design, a fixed-wing, plank-style glider. The glider is controlled via a receiver and an Arduino 101 linked with a raspberry pi. We are currently considering fiberglassing the glider to increase its durability and endurance.

Tarik Agcayazi's Sequoia Glider
To stabilize the aircraft and implement autonomous navigation algorithms, we used a PID algorithm to adjust the servos to react to the gliders position and orientation. This is used to counteract wind, as with a normal Proportional feedback loop, the glider would not be able to account for wind and counteract current. This would be undesirable, as we would lose control of the aircraft, and regaining control would be a very difficult task.
For our navigation algorithm, we plan on integrating weather patterns, GPS data, and accelerometer data to calculate the best route possible in real time. The glider is linked to our computers via a radio link, allowing us to monitor the glider, and the glider to receive weather data in real time. Route calculation is done on the fly (pun intended), and uses a set of maneuvers that we have modeled in simulations to prevent any errors with our PID algorithm.
For telemetry data and communications purposes, we will be connected to the glider via a radio link that provides us with sensor data, location data, status updates and errors, a live video feed, and a manual override option should any issues arise from our autonomous glider program.
We are currently working on pursuing sponsors, as we would like to add more cameras to our glider to obtain high altitude footage.
Goals & Deadlines
Our main goal is to develop an autonomous glider that can successfully return a payload from an altitude of 100,000 ft.
Risks
- Temperatures in high altitudes can reach a chilly -40 degrees Celsius, which would prevent our batteries from working properly. We plan on insulating our electronics, and possibly incorporating a heater into our control hardware.
- Wind – Wind blowing against the glider would prevent it from following its route. This is why we are working on incorporating weather data into our navigation algorithm in order to have our glider fly through the safest and most efficient zones possible. Our initial dive maneuver is mainly to fly to lower altitudes to fly in a zone that is less likely to have strong winds.
- Code – A lot of things can go wrong with our program, so we are currently doing our best to eliminate glitches and bugs in our code.
- GPS Cutoff – Most GPS modules shut off after reaching 20,000 meters as a safety measure, which would mean that the glider will have to navigate without knowing its location in its initial maneuvers. We plan on reducing the risks associated with navigating with no GPS by having the glider dive to lower altitudes and attempt to navigate using our flight estimations until it can receive GPS data....


 Davide Cagnoni
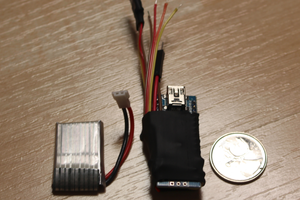
 vcazan
 Koen Hufkens
I was intreagued by the carpet, thought that was internal cardboard structure :D still a nice project, thank you for sharing!