 Shah Selbe
As with many electronics products, we started thinking about enclosures later than we probably should have. We had spent a lot of time thinking deeply about the design and style of the electronics, app, and website. Unfortunately, when it came to the case, we just made use of what was easiest. For much of its prototyping lifetime, FieldKit has made use of these commercially available ABS project enclosures that we would modify to incorporate things like buttons and cable glands.

There are plenty of benefits to using this COTS approach:
- Inexpensive unit cost and no upfront tooling or manufacturing budget impact
- Easy to find online, even with next day shipping through Amazon
- Modifiable if done carefully and correctly
- Discrete and boring looking, which helps when installing electronics in places where you would rather not have people mess with them
But this approach also leaves a huge amount to be desired. When compared to the amount of thinking that went into the design of the other parts of FieldKit, the act of putting the electronics in a box that looked like the one above felt uninspired. We had constant issues with the modifying of these boxes when adding cable glands, buttons, or adaptor plates. The worst part was the variability in the boxes, even when buying from a single supplier. They were different in color, consistency, hole patterns, and the plastic of the lid (transparent or opaque). They are fragile and crack easily. Finally, in my opinion, they are depressingly ugly and unimpressive.
Over the years, we have used a number of different off-the-shelf enclosures for our FieldKit (and other conservation technology) deployments. Some of the best to work with are the polypropylene copolymer protective cases like Pelican. They provide protection from impact, water, and allow for forgiving modification for cables and buttons. But they are expensive. So we started to take inspiration from those to think about what a custom-designed FieldKit enclosure would look like.
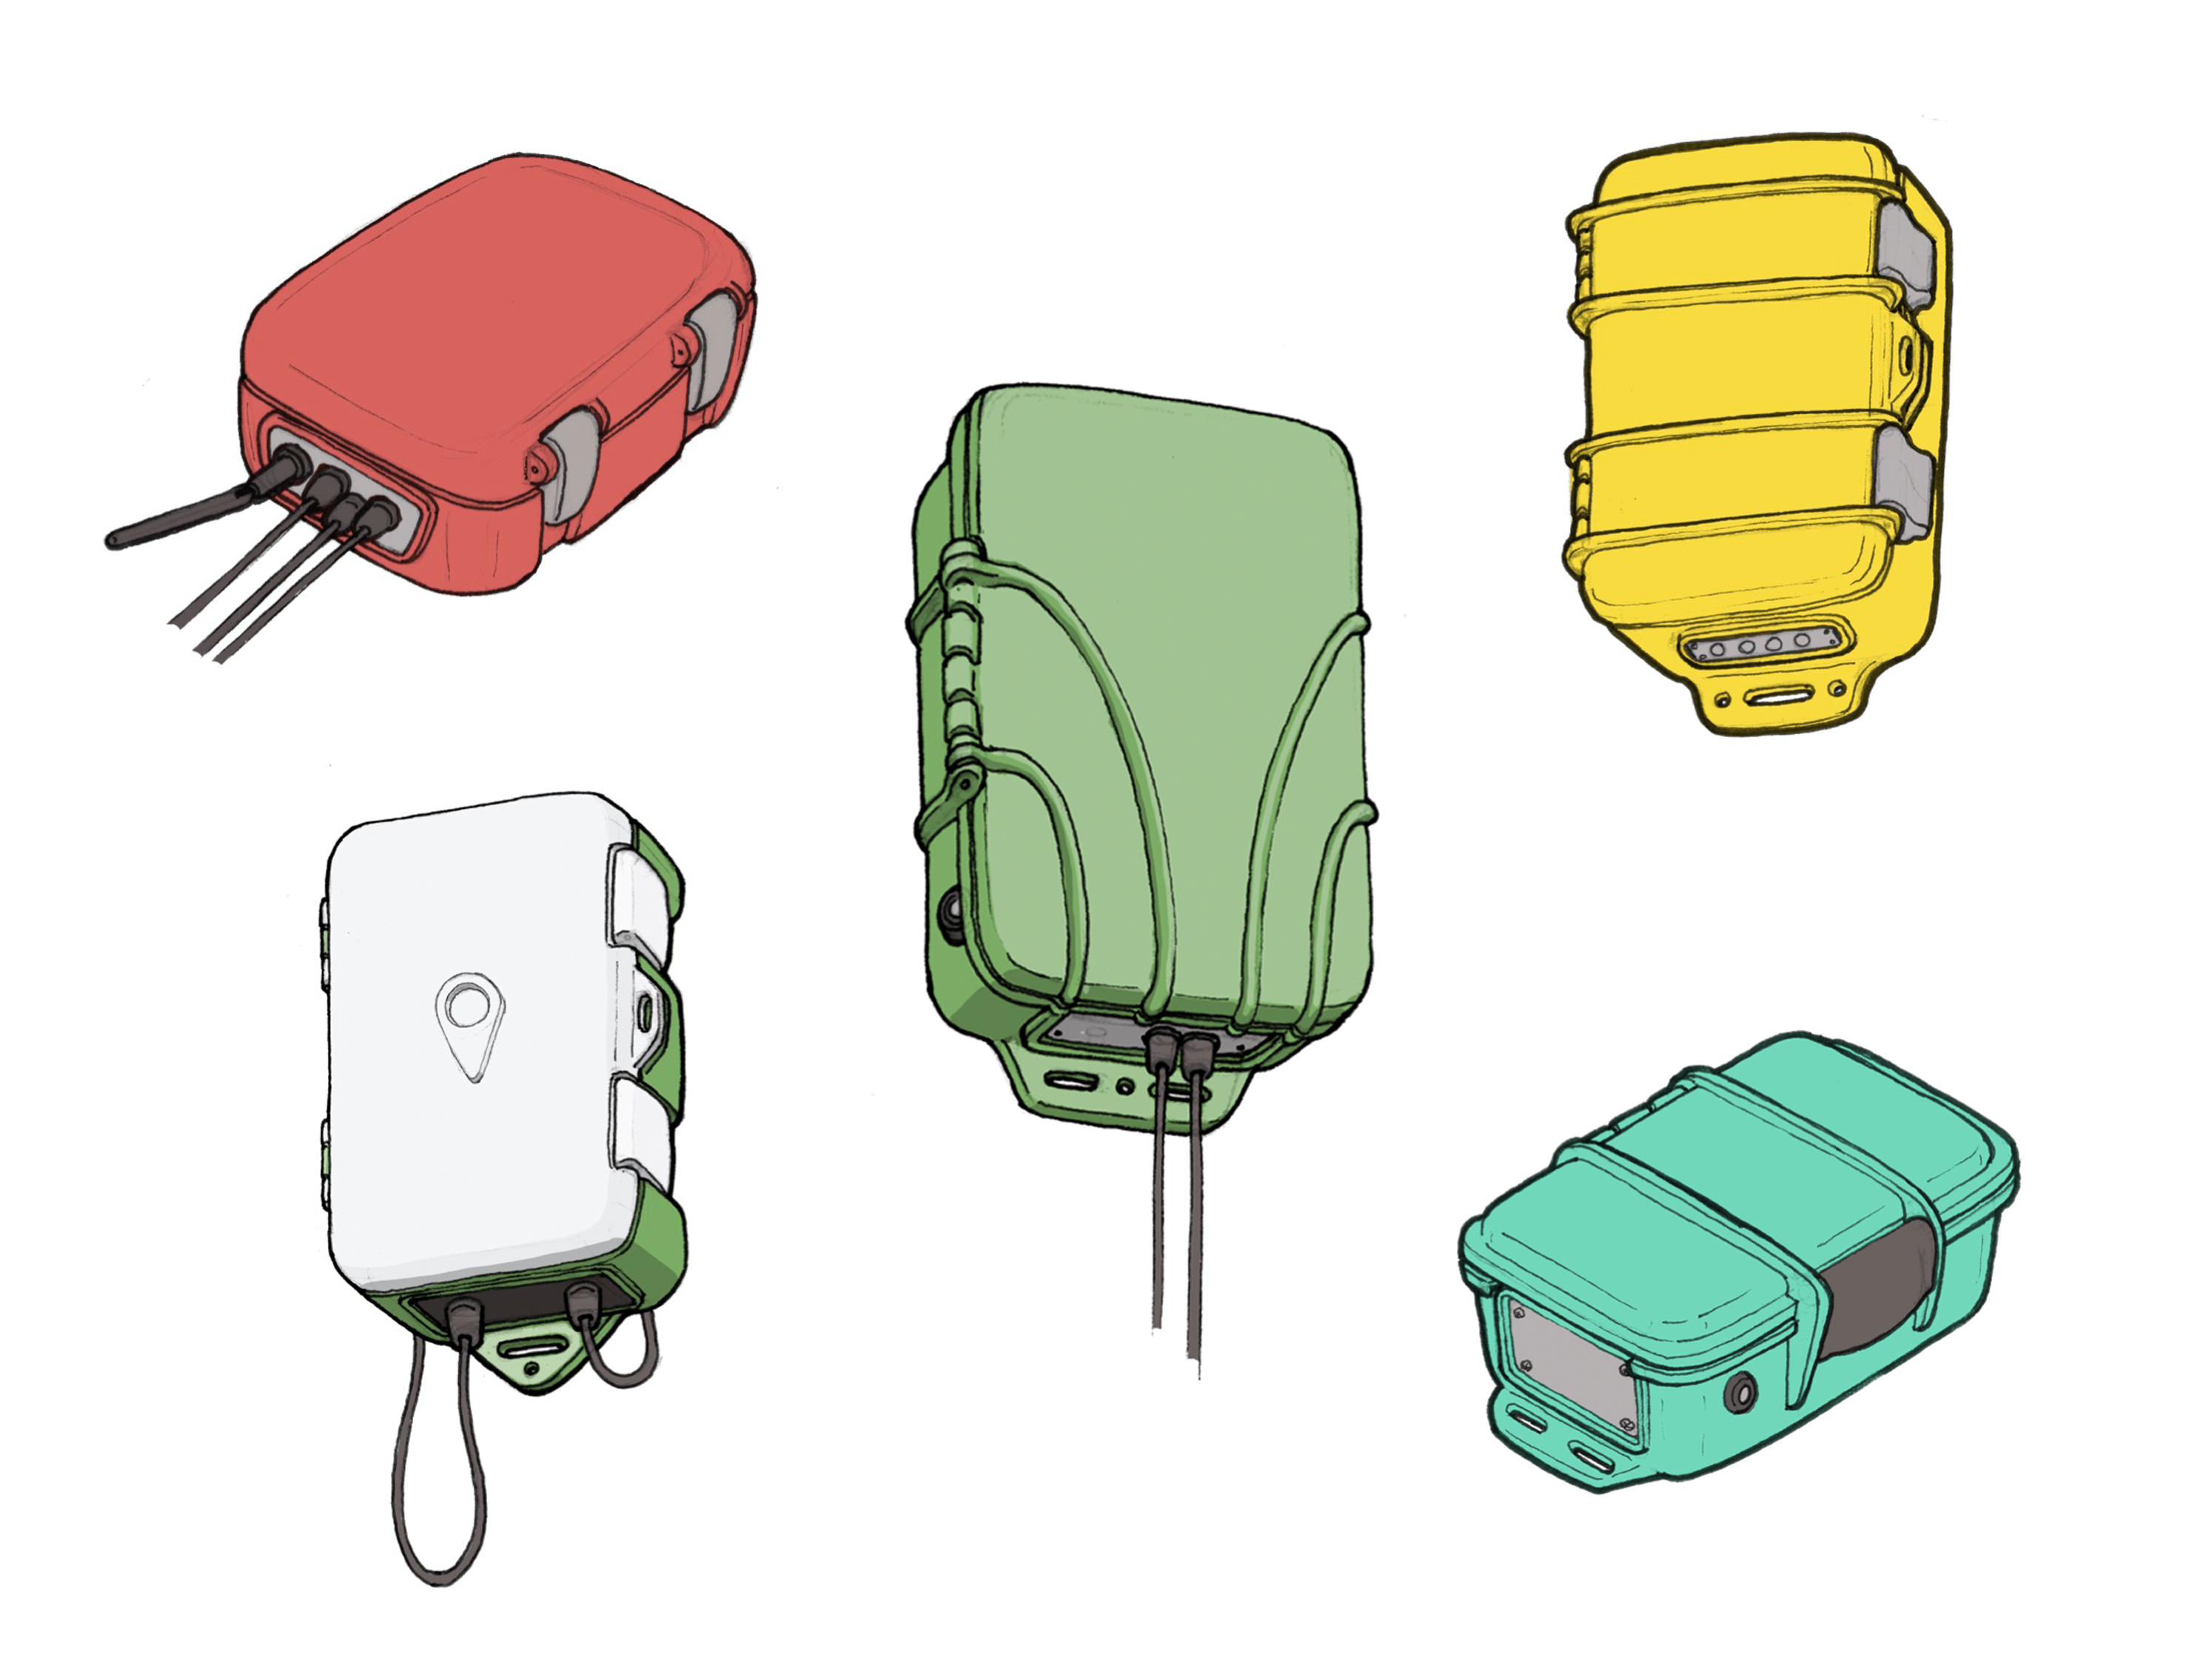
We wanted FieldKit to feel like it was at home in the wilderness, where much of this hardware was going, and like it was supposed to be a part of it. It needed to be rugged, deliberate, and inspire confidence in the user. We wanted it to be designed thoughtfully, both from an aesthetic feel (to go with the brand ideals we had with FieldKit) and a usability features perspective. We also wanted it to feel somewhat friendly, not intimidating, and not look like it was tactical hardware. There was a lot we were thinking about when developing the model.
So we started with the same mounting points as our previous COTS enclosure (both for standardization and to provide users options with what seemed to be somewhat standard in the junction box enclosure world) and build out some of the features we wanted. Our first prototype we had printed at Shapeways on an SLS printer to make sure we had the right tolerances and feel to the enclosure.
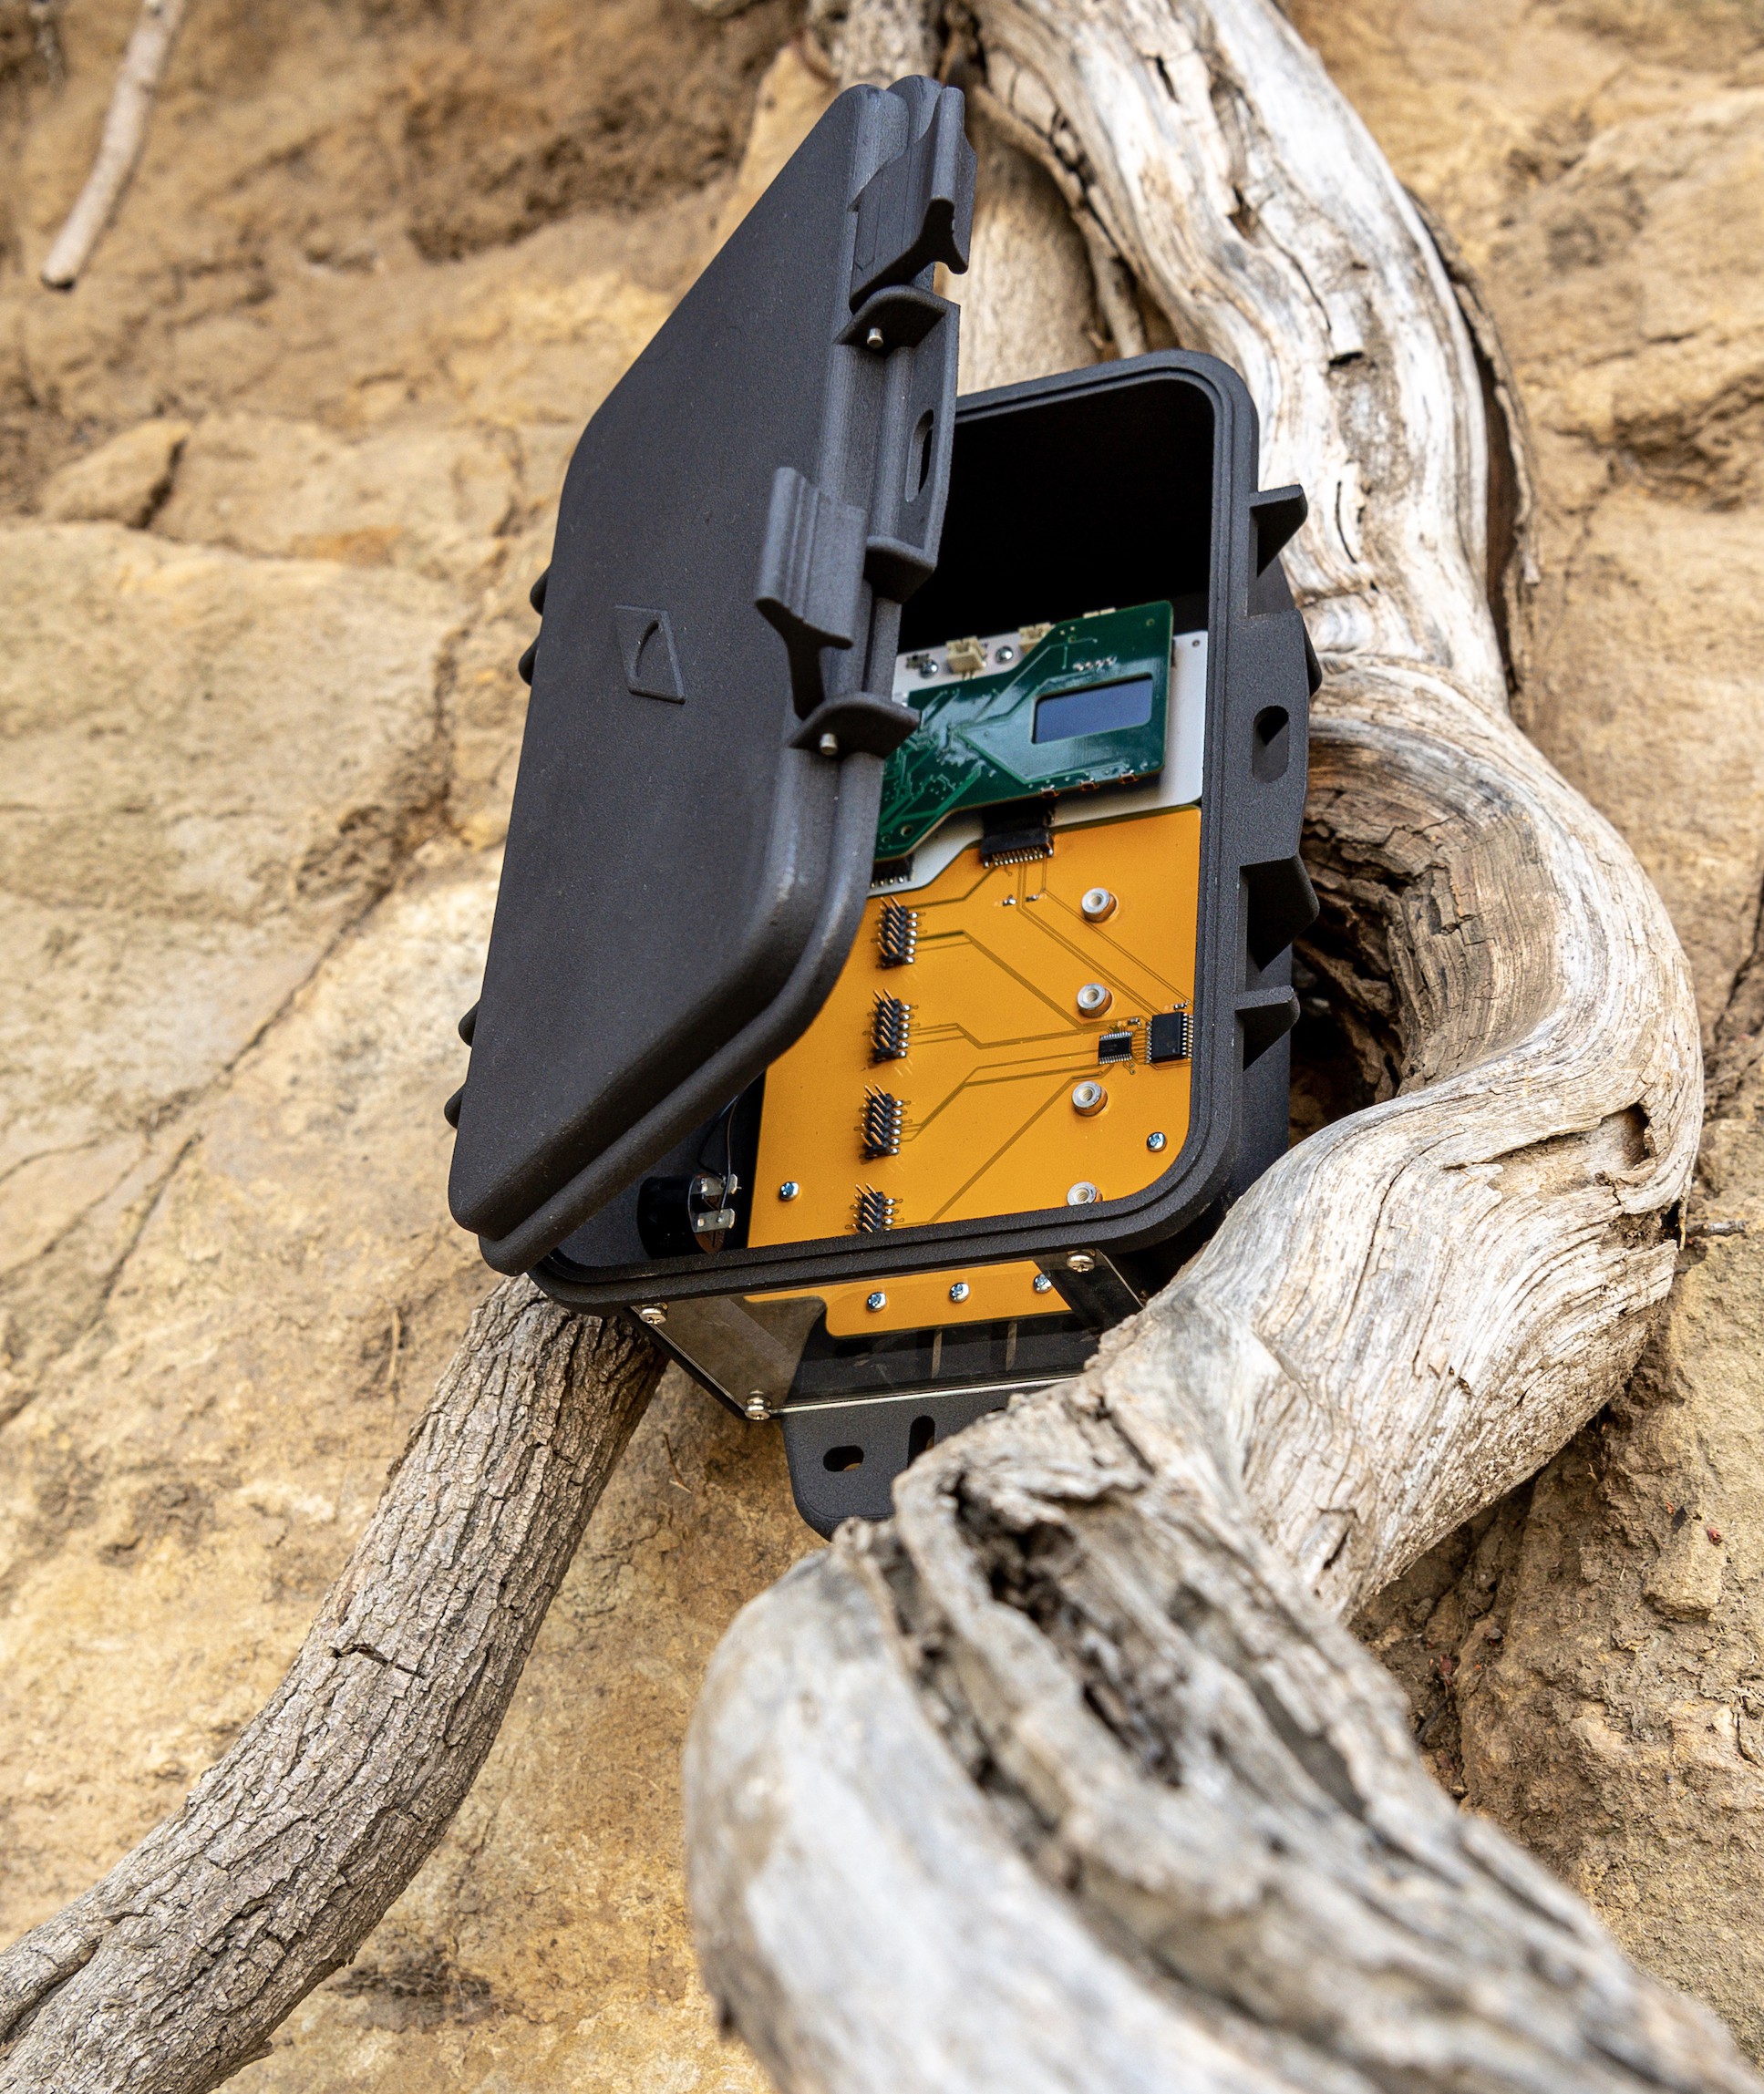
This design had a few design elements that we were very excited about. It included a replaceable bottom plate that could be custom configured for the necessary cable glands, antennas, or bulkhead connectors for a specific sensor module configuration. This means means there is no custom drilling or modifications needed, just laser cut a plate that suits your needs and screw it in place. We had beefy mounting flanges that could accommodate a number of different attachment methods. The lid had a locking mechanism to keep away prying hands.
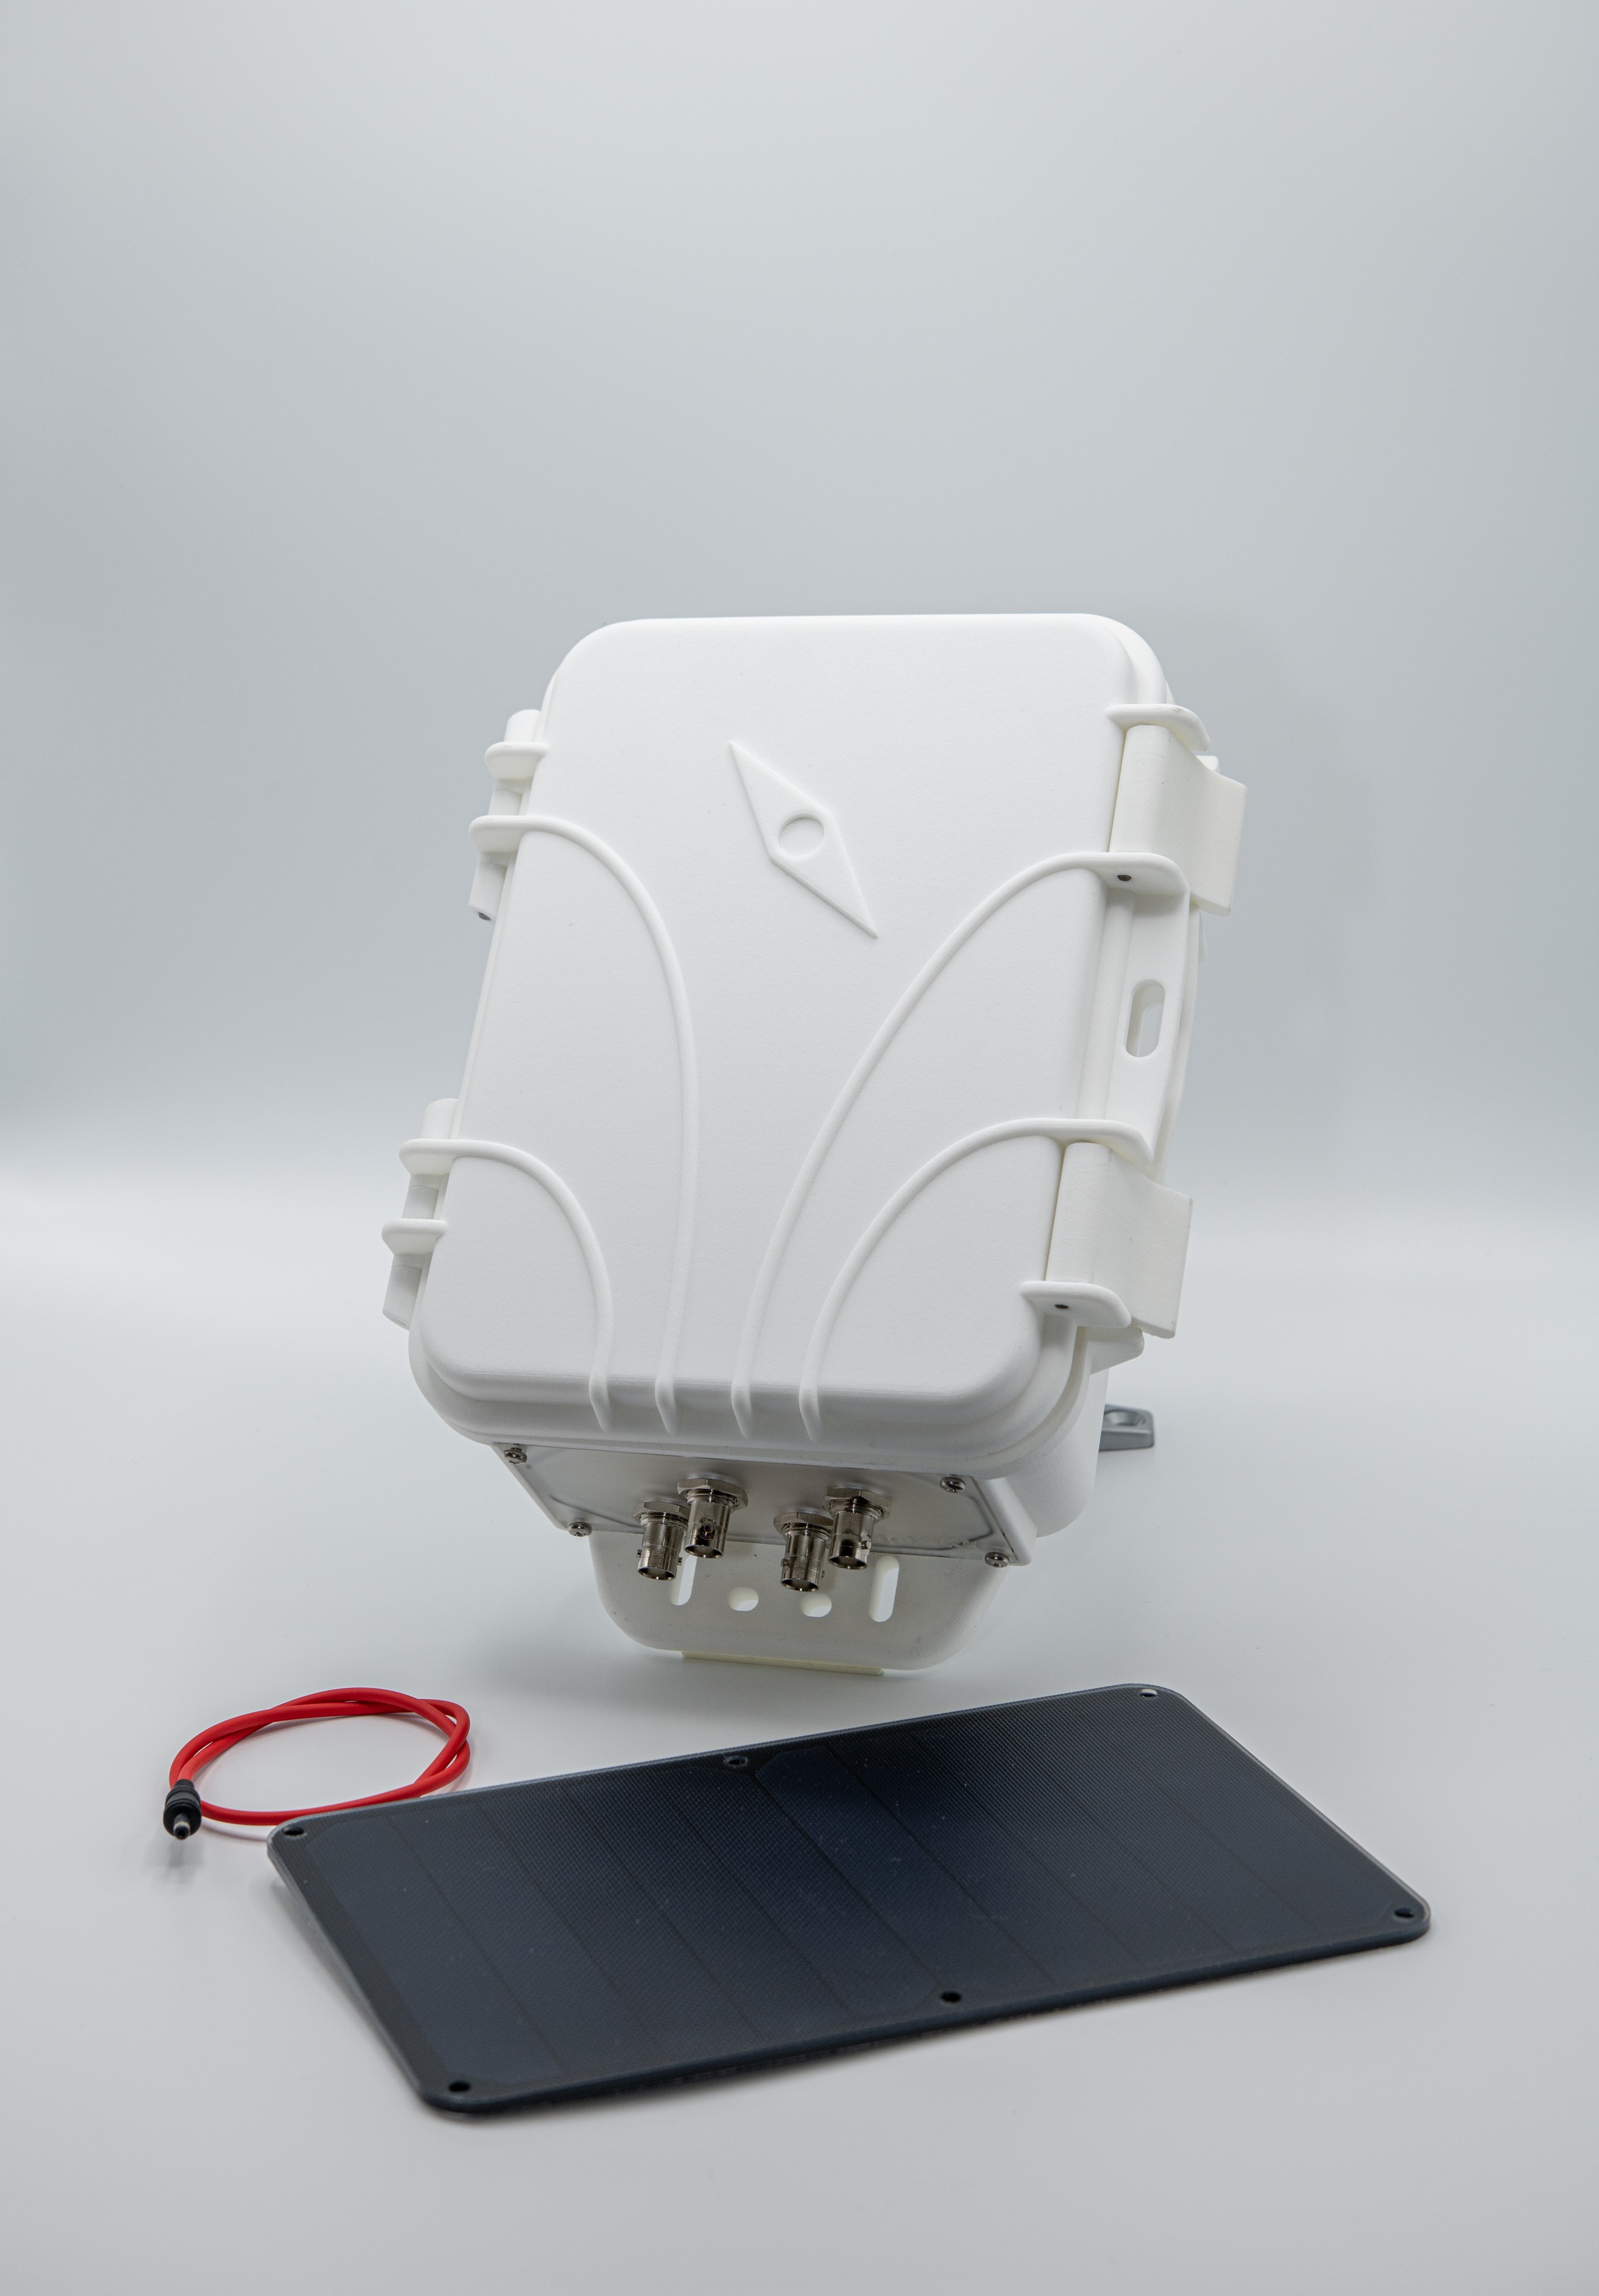
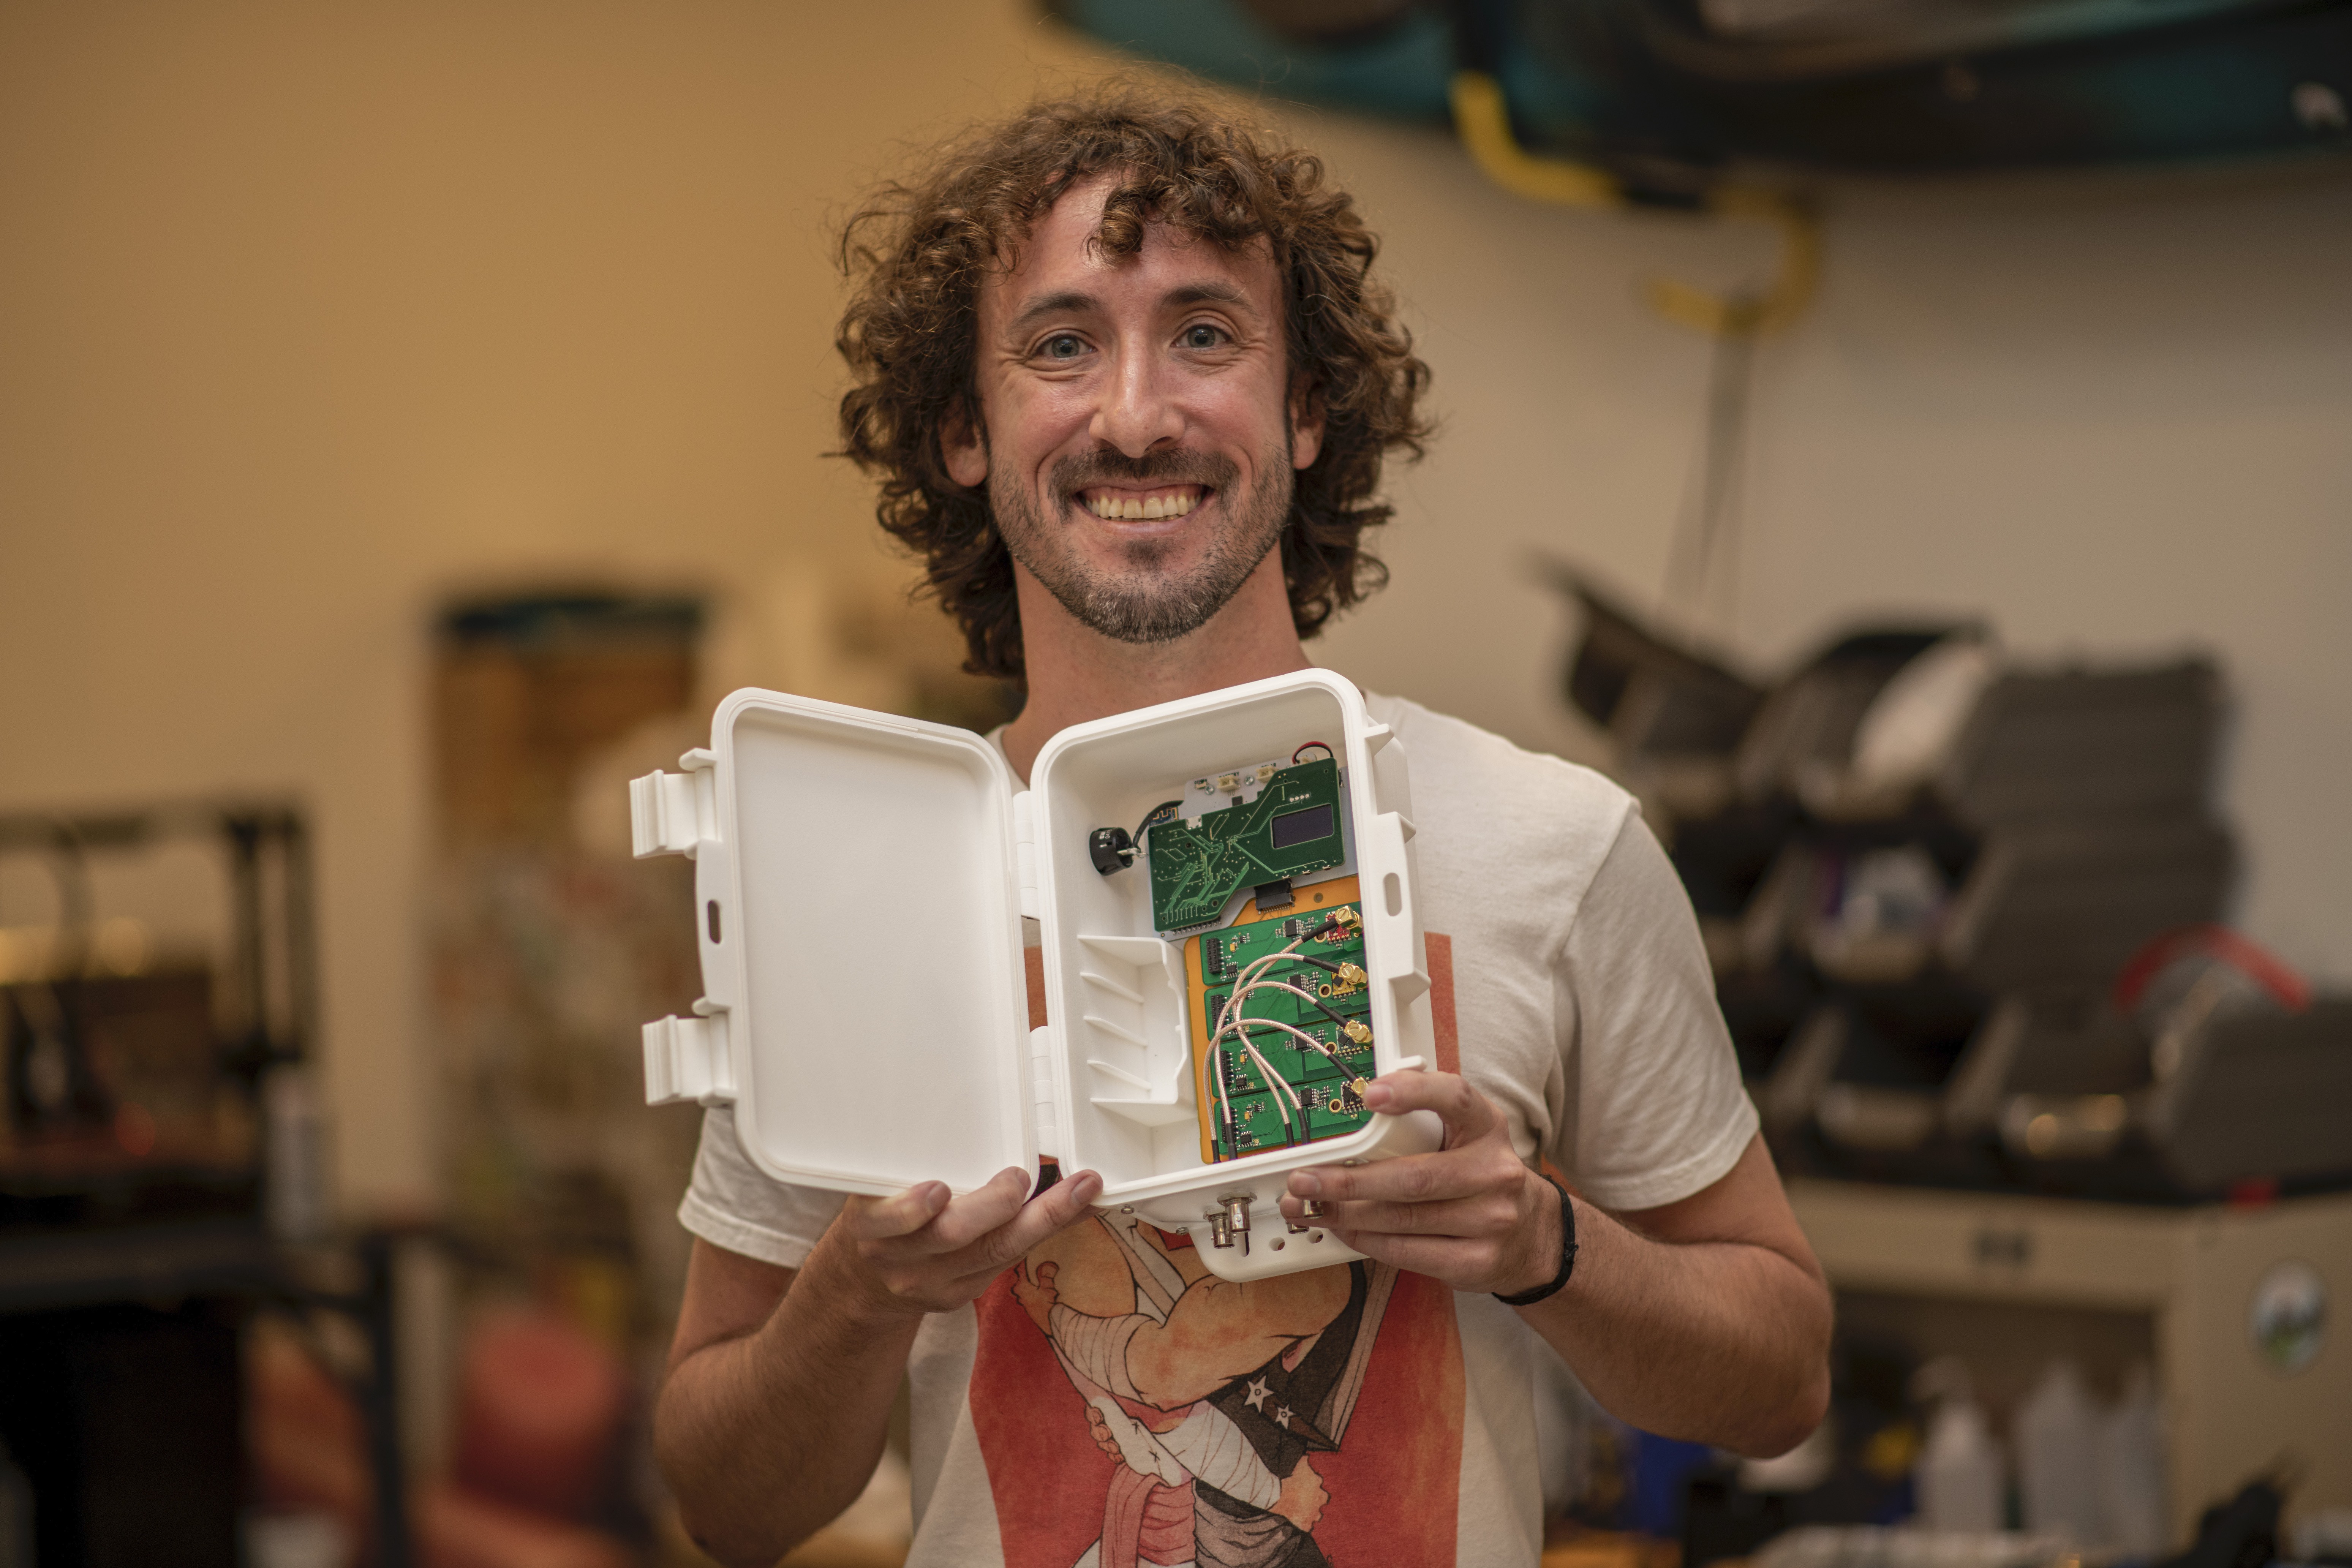
After considerable testing, we realized that there were things that we needed to change. The gasket channels were not quite right. The clasps could be updated to accommodate more finger types and allow for better experience in opening and closing. We wanted to add a battery holder for commonly found 18650 battery packs, which had implications for the backplane board. We wanted more texture on the lid to differentiate it from just another a generic case. We also wanted it to be easily 3D printable. We are going the injection molding route with this case, but we wanted to provide the designs to anyone who wanted to print their own.
The next version was much more beautiful and functional:


Discussions
Become a Hackaday.io Member
Create an account to leave a comment. Already have an account? Log In.