 G.Vignesh
In the previous log we had mentioned in detail about the usage and the advantages of the components. Now we have programmed the Since it is the beginning stage, we have used a simple 3-axis analog accelerometer and a flex sensor to measure knee movements and acceleration. Further we are aiming to use relatively low cost but highly precise low cost 9-axis accelerometer such as MPU-9250(https://www.sparkfun.com/products/13762) that could be vital for this project.
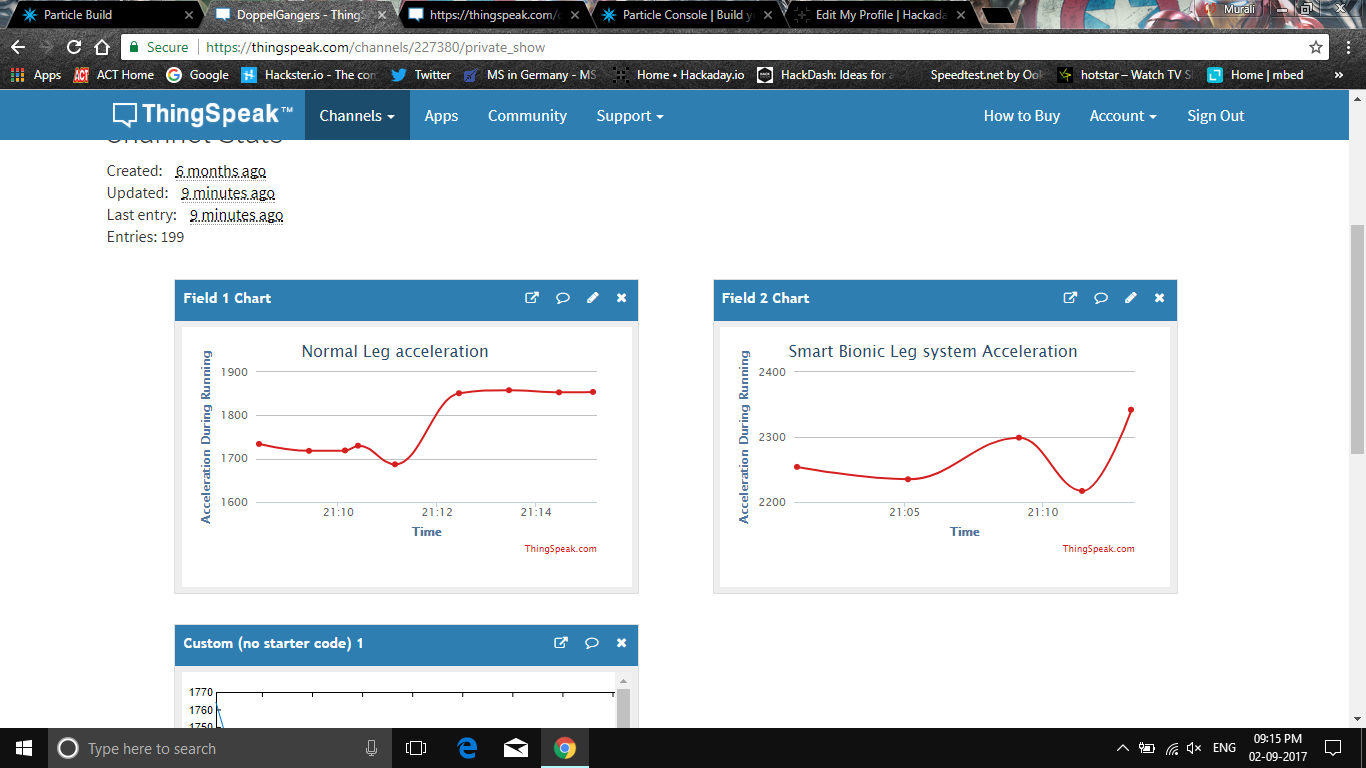
Using the data obtained from the sensors we can use it to analyse the readings of the normal leg and using those data we can train the amputated leg attached with smart economique bionic leg system.
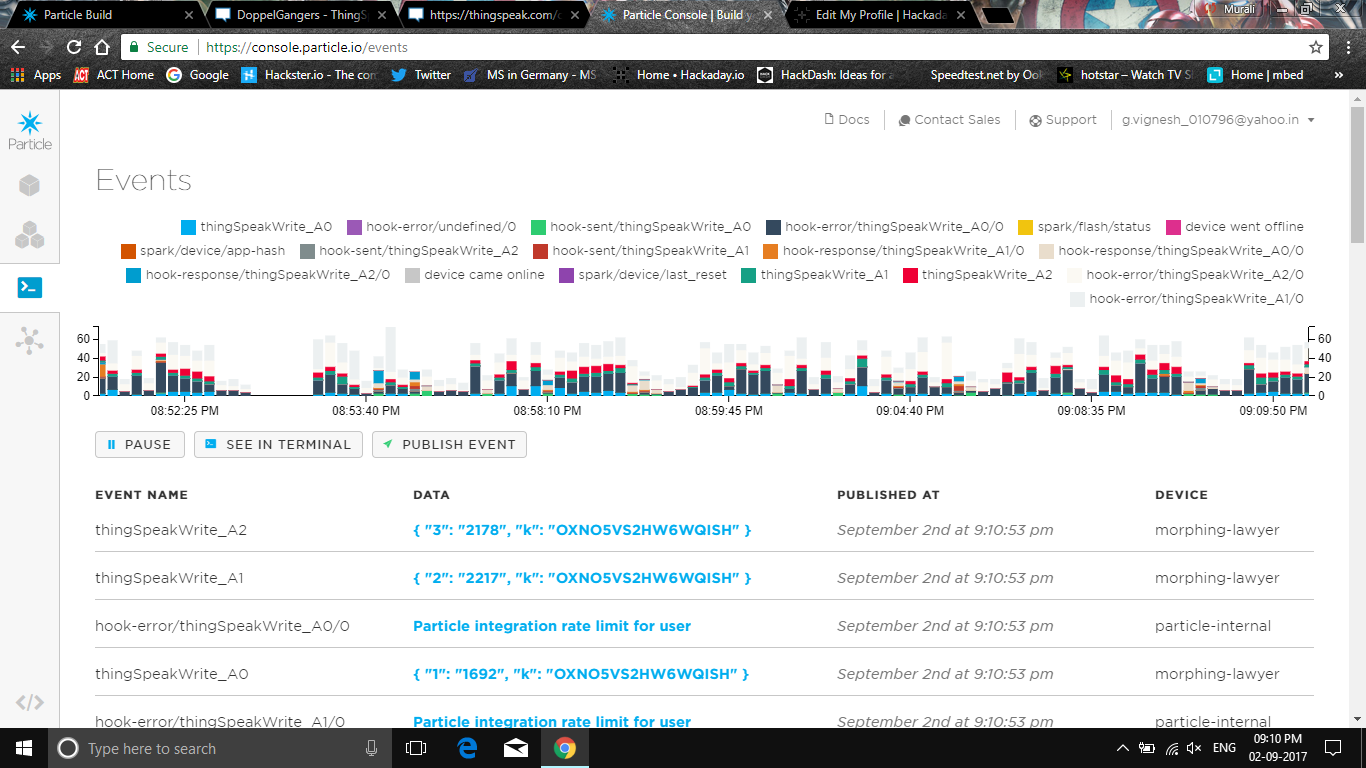
We have used particle photon and its dedicated particle cloud to visualize the data and events.
Using Particle IDE and Webhooks
Click the below mentioned link and sign up into particle.io
Enter the necessary details and attach your particle photon to a computer. Upgrade the firmware and open the code editor. Enter the code that I have mentioned in the github repository.
In order to connect Particle and ThingSpeak together, we need to setup a webhook on Particle. This will make a secure connection from Particle.io to ThingSpeak so that data can be passed back and forth.
You have two options for settings up the webhook. You can use the Particle CLI Tools or IoT Debugger.
IoT Debugger
- Download a copy of IoT Debugger
- Open the index.html file in a web browser tab
- Select Particle
- Enter your Particle Access Token into the Access Token field
- Click on "Create Webhook"
In the Content (JSON) field, enter the following file:
{
  "event": "thingSpeakWrite_",
  "url": "https://api.thingspeak.com/update",
  "requestType": "POST",
  "form": {
  "api_key": "{{k}}",
  "field1": "{{1}}",
  "field2": "{{2}}",
  "field3": "{{3}}",
  "field4": "{{4}}",
  "field5": "{{5}}",
  "field6": "{{6}}",
  "field7": "{{7}}",
  "field8": "{{8}}",
  "lat": "{{a}}",
  "long": "{{o}}",
  "elevation": "{{e}}",
  "status": "{{s}}"
  },
  "mydevices": true,
  "noDefaults": true
}
Using Thingspeak
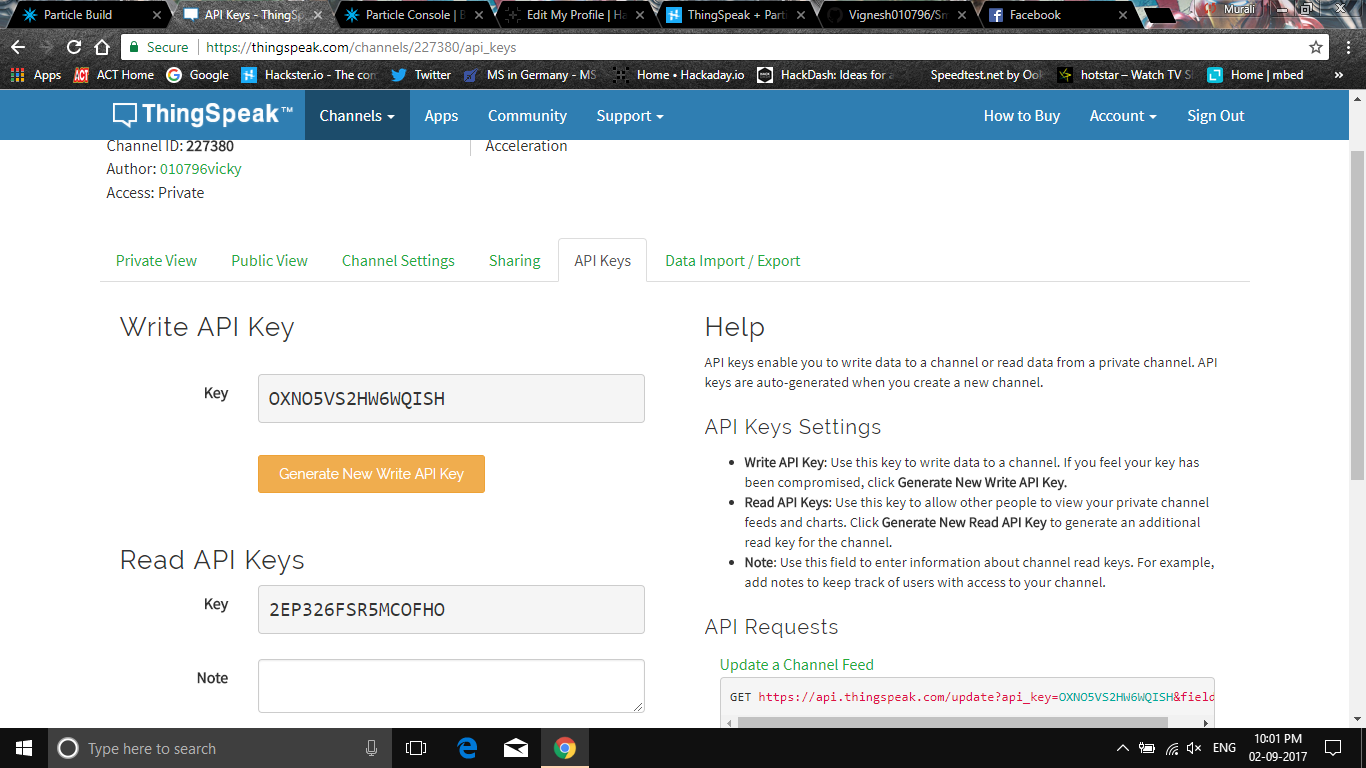
Go to ThingSpeak.com and Sign In. Select Channels and then My Channels. Create a new channel. Click on API Keys and note the Write API Key and Channel ID.
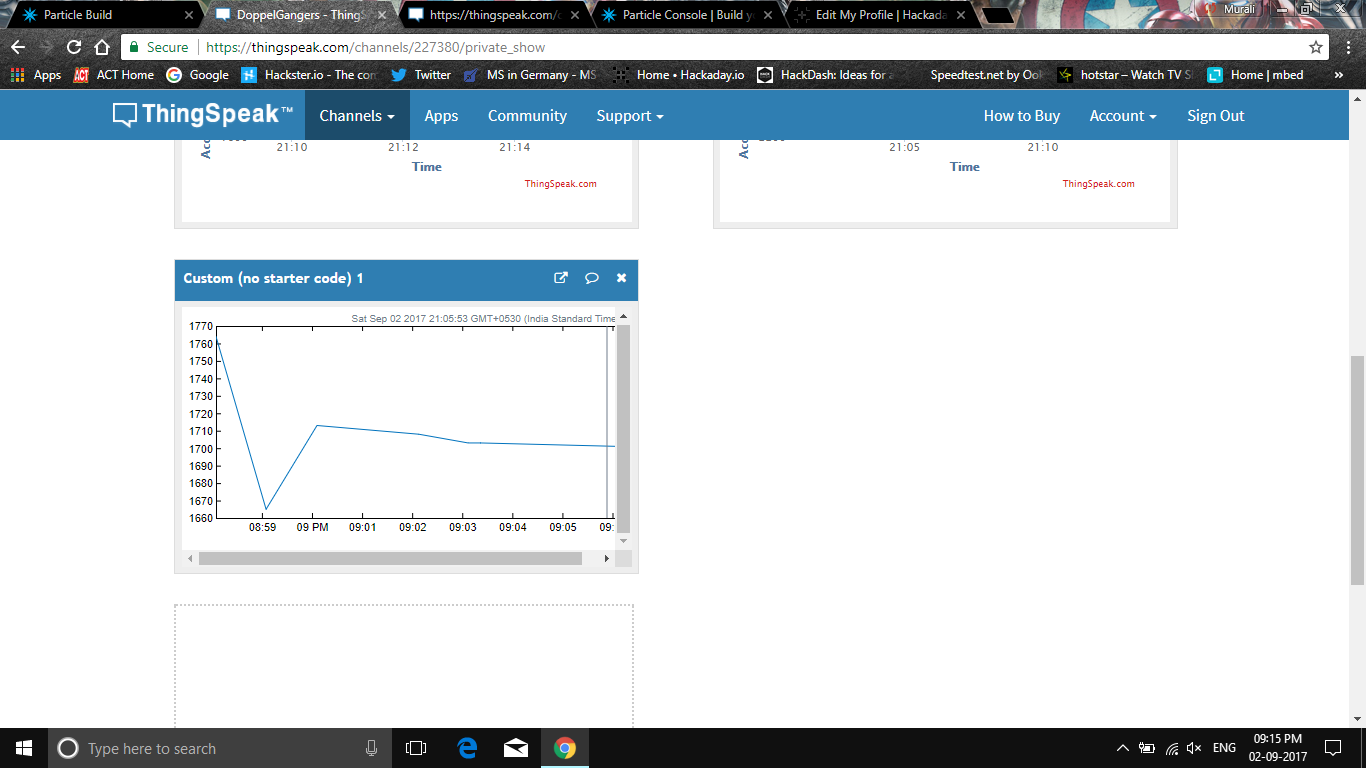
Using the general empirical formula make sure that you calculate average acceleration and use it for calculating displacement using MATLAB also.
avg.acceleration = sqrt((x^2)+(y^2)+(z^2))
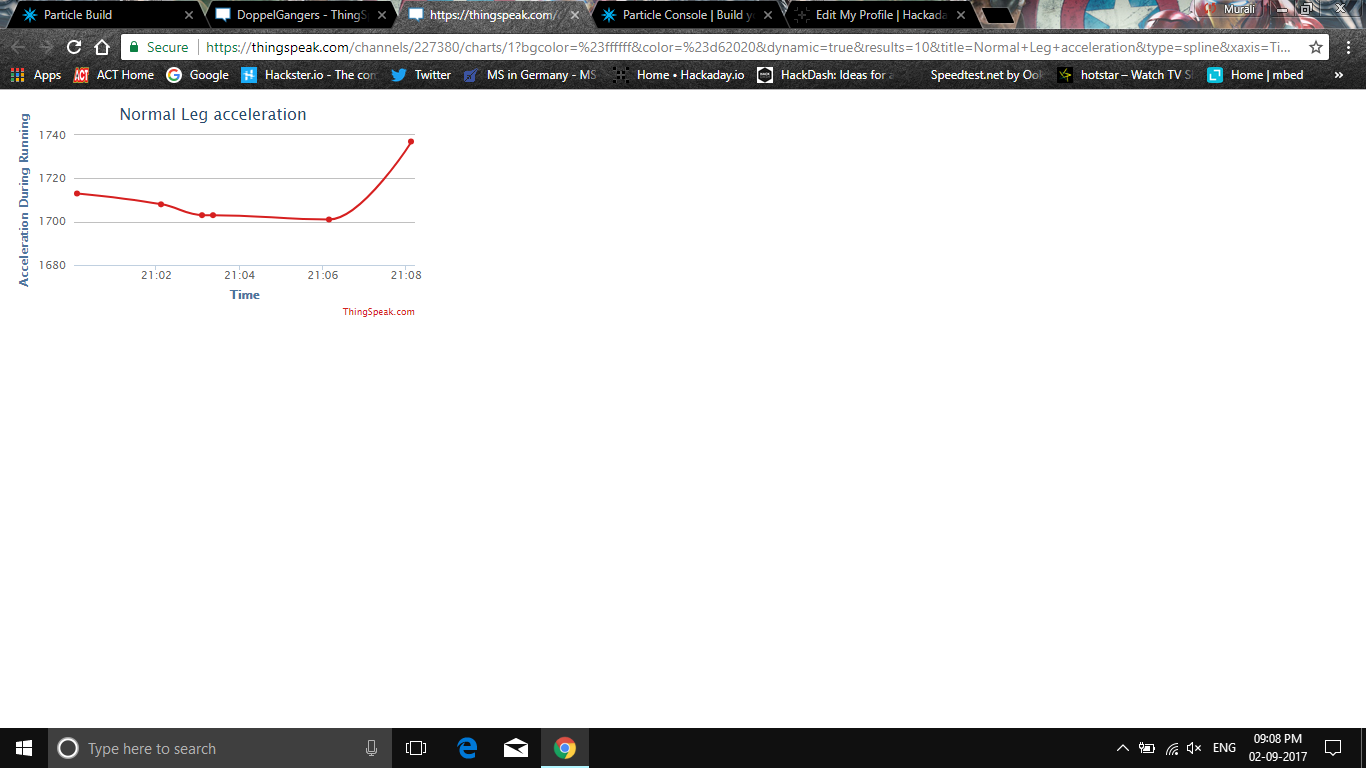
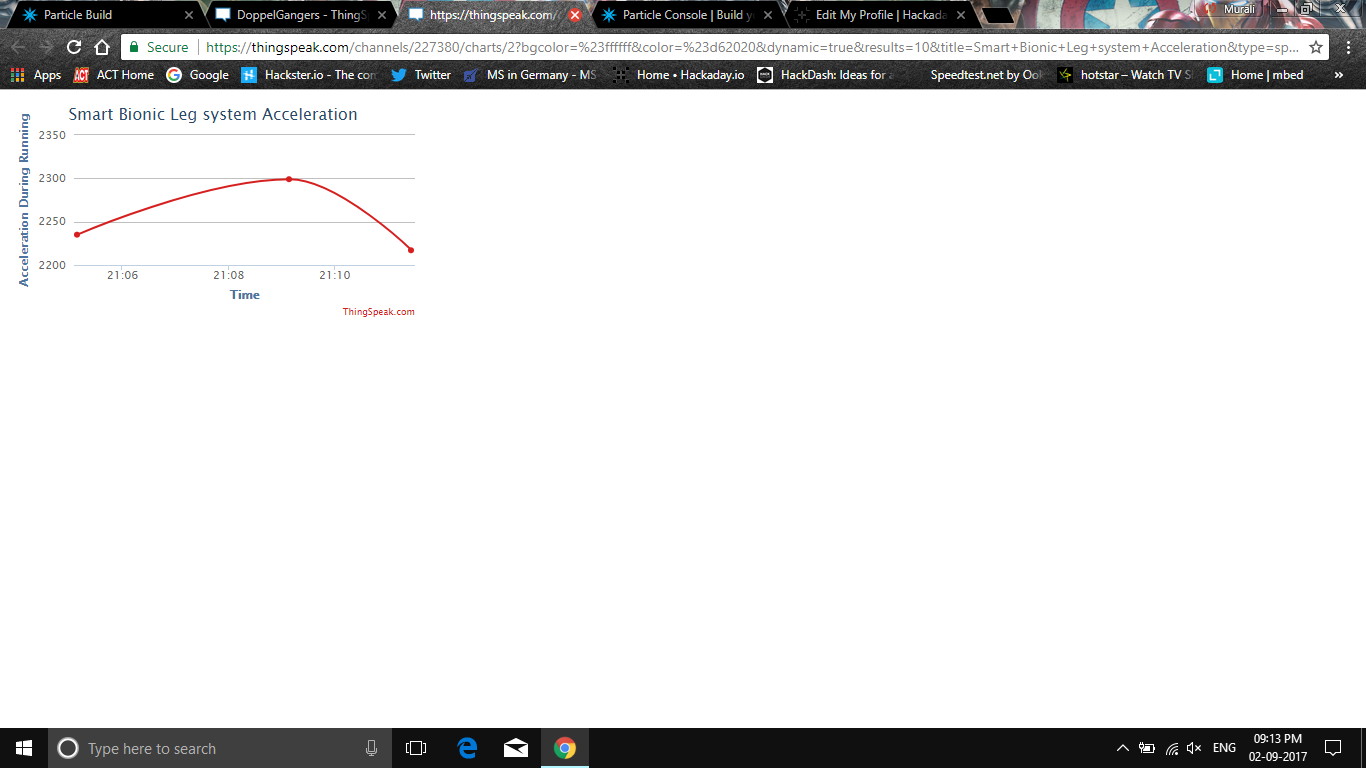
Below image represents a small MATLAB analysis of displacement data integrated twice from the aceeleration values.
Your data is on ThingSpeak you can see this data on ThingSpeak using the MATLAB Visualization. On ThingSpeak, select Apps and then MATLAB Visualizations. Click "New", select "Custom (no starter code), and click "Create".
Enter the following MATLAB code
readChannelID = 227380;
fieldID1 = 1;
readAPIKey = '2EP326FSR5MCOFHO';
%% Read Data %%
[data, time] = thingSpeakRead(readChannelID, 'Field', fieldID1, 'NumPoints', 10, 'ReadKey', readAPIKey);
%% Visualize Data %%
thingSpeakPlot(time, data);
Discussions
Become a Hackaday.io Member
Create an account to leave a comment. Already have an account? Log In.