 Poltorak Serguei
Z-Uno was designed to allow people to make their own IoT devices for their Smart Homes. Many times we were asked "Is there a pressure/radiation/water level/.../whate ever sensor in Z-Wave?" and we found that it would be cool if people can make their own Z-Wave enabled sensor or actuator like they do with Arduino. After two years of development we made Z-Uno!
Compared to other existing Z-Wave devices on the market Z-Uno gives you the freedom of development. Compared to other Arduino-like boards Z-Uno makes the built-in RF communication simple like it never was. Z-Uno is a unique mix of Z-Wave and Arduino worlds.
Unveil your imagination to create:
- battery powered in-wall remote switch
- rotary dimmer control
- temperature/soil humidity/luminosity/voltage/distance or any other sensors as well as dry contact sensor or tick counter
- low voltage switch
- IR blaster
- LED driver
- motor driver
- battery powered keypad
- converter from any protocol to Z-Wave (using SPI/UART/I2C/1-wire bus)
- ... or any other device you dreamed about
Hardware specification:
- 28 kB Flash memory for your sketches
- 2 kB RAM available
- Z-Wave RF transmitter at 9.6/40/100 kbps
- 26 GPIO (overlaps with special hardware controllers)
- 4 ADC
- 5 PWM
- 2 UART
- 1 USB (serial port)
- 16 kB EEPROM
- 1 SPI (master or slave)
- 4 IR controllers, 1 IR learn capability
- 1 TRIAC/ZEROX to control dimmer
- 3 Interrupts
- 1 Timer 4 MHz
- I2C (software)
- 1-Wire (software)
- 8x6 Keypad Scanner (software + hardware interrupts)
- 2 service LED, 1 service button
- 1 user test LED
Power modes:
- USB 5 V, external 5 or 3 V, external 7-18 V or battery 3 V
- always on, sleeping or FLiRS (Frequently Listening)
Z-Wave supported features:
- Z-Wave Plus compliant
- all Z-Wave frequencies (check availability)
- out of the box support of AES 128 bit Security
- upgrade via USB or radio (Z-Wave OTA)
- Multichannel (up to 10 channels)
- Up to 5 Association groups
- controls switches, dimmers, door locks and scenes
- works with gateways and/or directly with other Z-Wave devices
Channel types:
- Binary Switch
- Multilevel Switch
- Binary Sensor
- Multilevel Sensor
- Meter
Dimensions:
- L×W×H: 39×20×16 mm (PCB dimentions with all compinents)
- L×W×H: 39×20×7 mm (PCB dimentions with PLS and battery connectors removed)
- Antenna lenght: 81-86 mm (84-89 mm with isolation), can be bent to better fit your dimensions
- Wigth: 7 g
Antenna:
- Antenna type: wire antenna 86/82/81 mm for 865-870/908-915/921-928 MHz
- Alternative antenna: optional u.fl connector can be soldered (to RF2 pads)
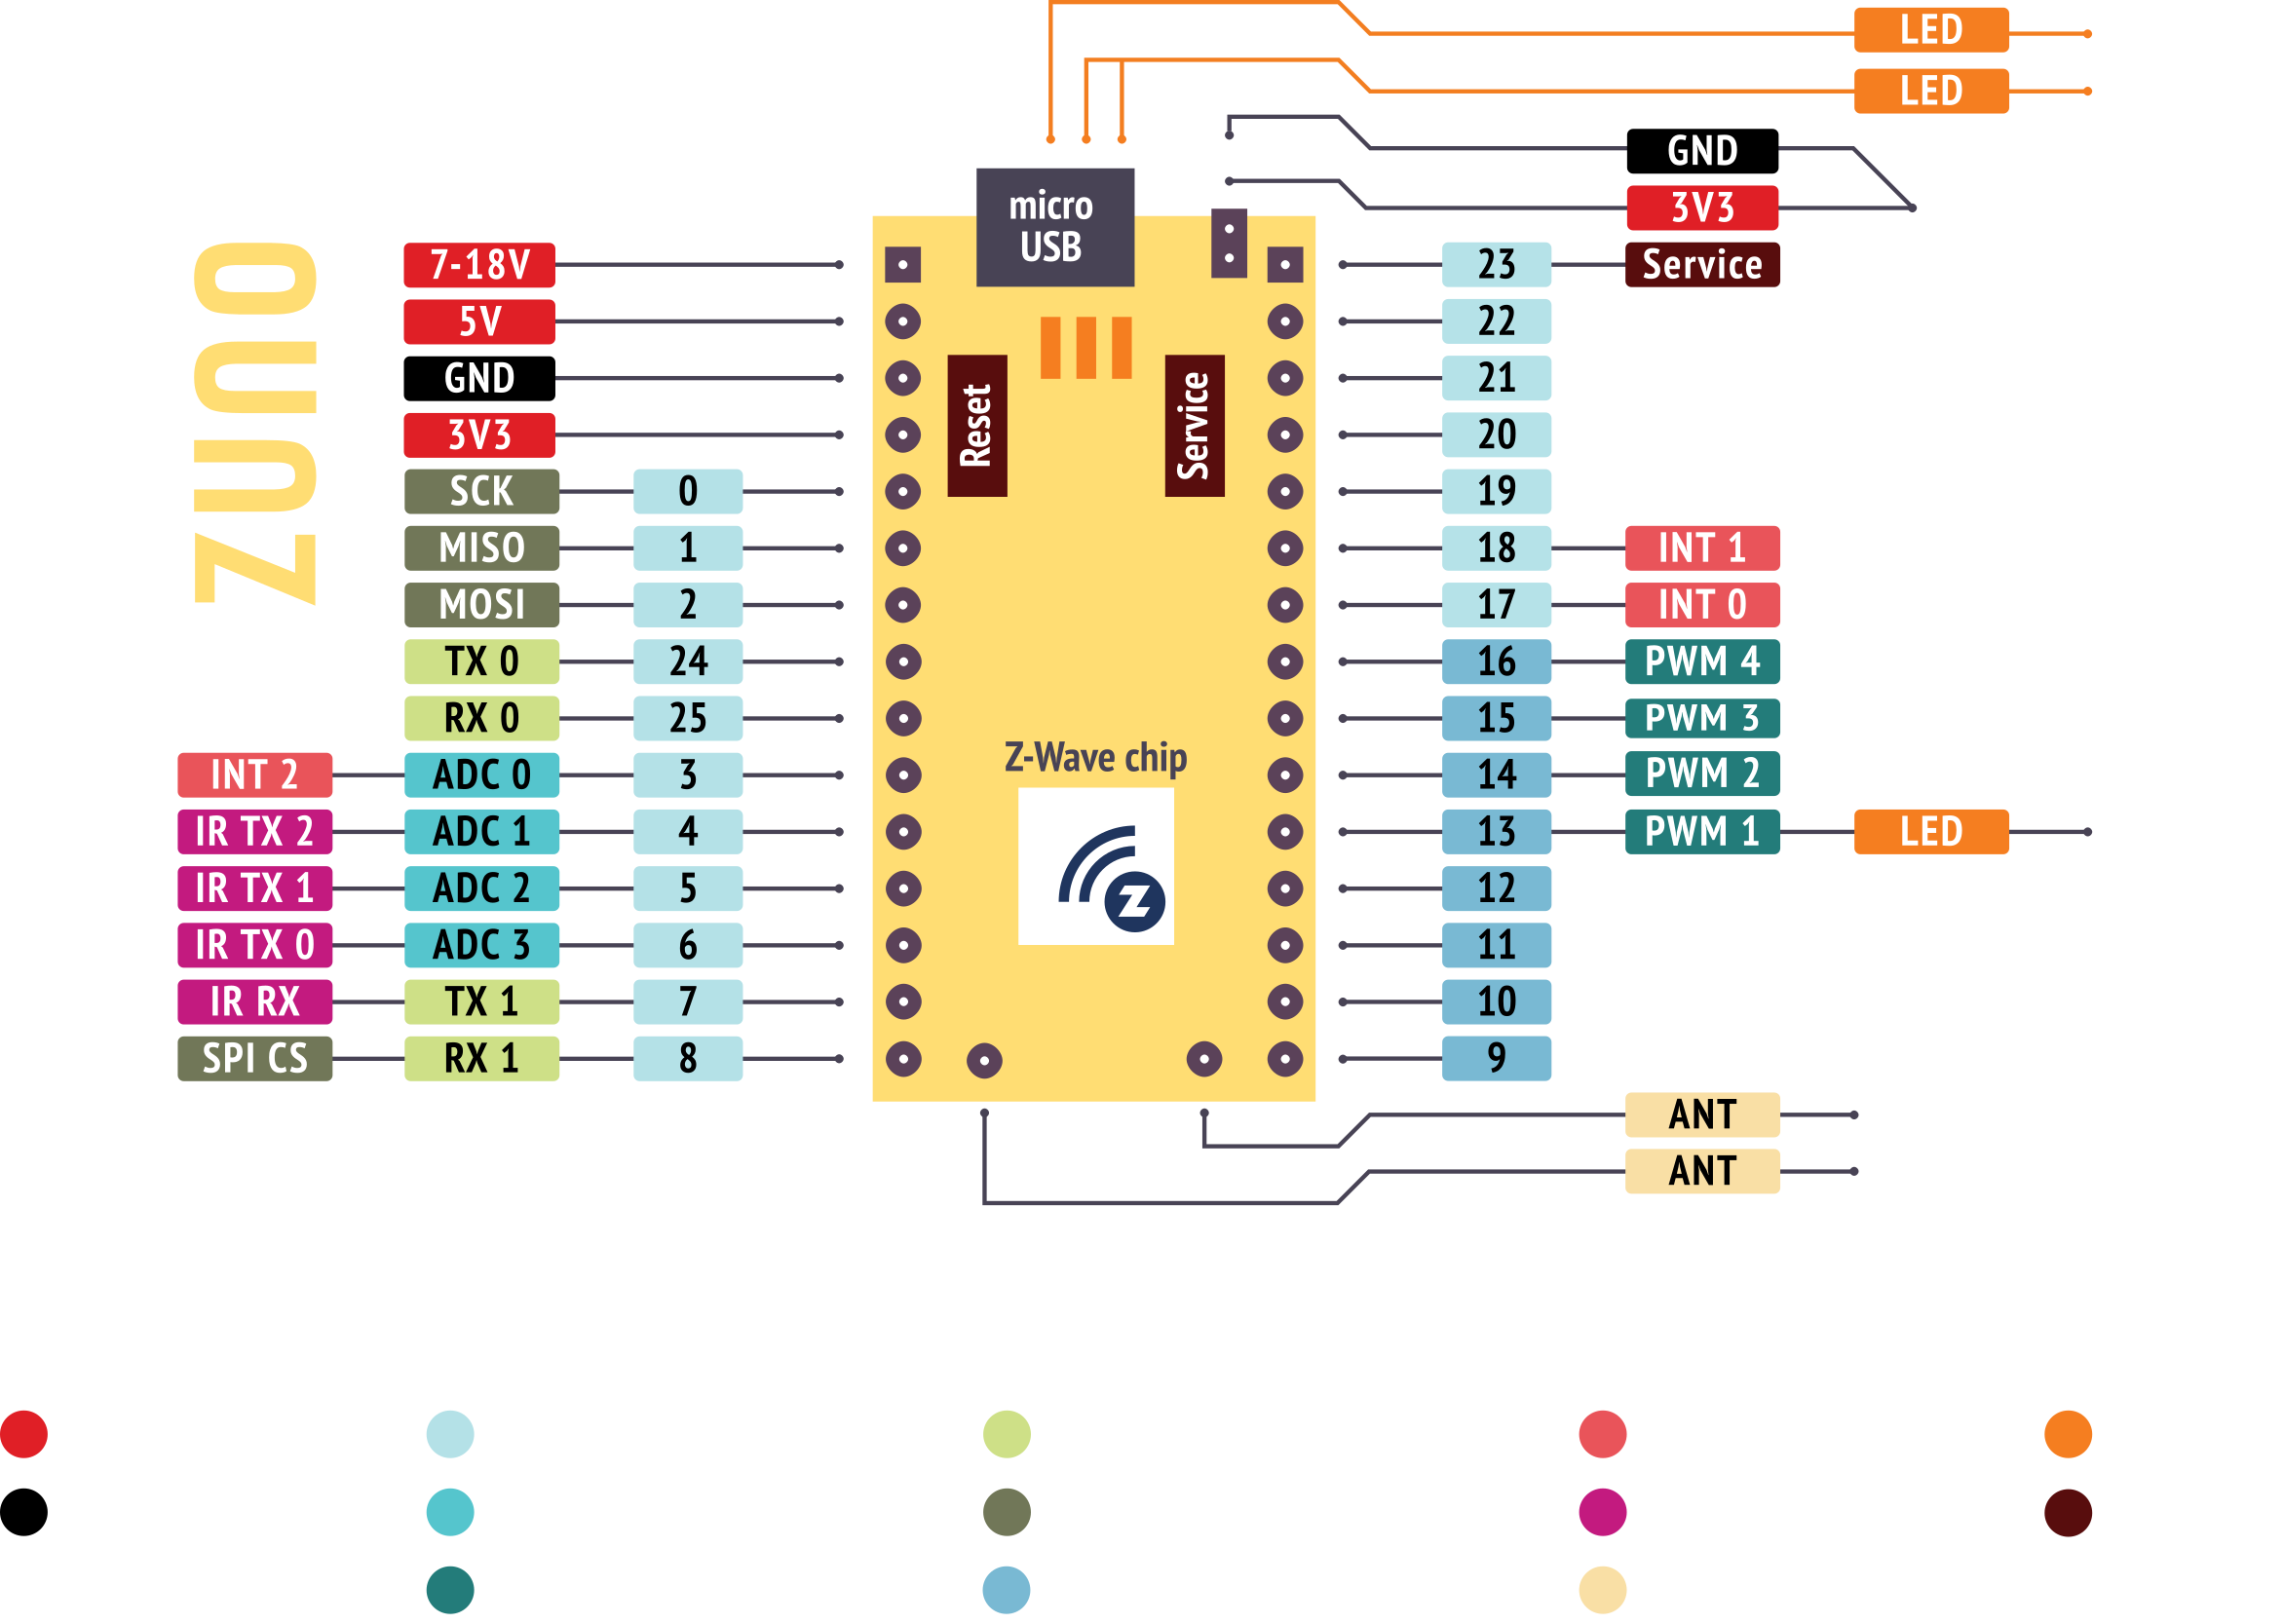
Pinout:

 Microscope inspection of Z-Uno PCB before mounting
 SMD assembly test points check on the production line
 Z-Uno soldering quality inspection in X-rays

 Eric Tsai
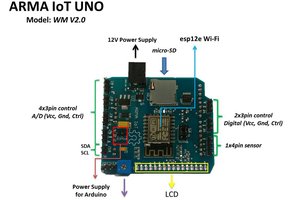
 Mektrasys
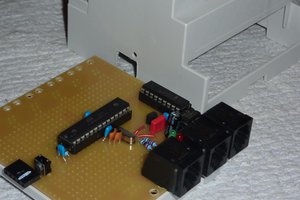
 Jens Geisler
 Dhrupal R Shah