Daren Schwenke
-
I say, what's the time?
01/31/2018 at 07:31 • 0 commentsJust to let you know what you've tuned into here...
I believe today was the first day since mid December when at least one person in my household was not ill with.. something.
There was the mystery Caribbean cruise derived illness we all got, followed by what seemed to be a normal but seriously draining cold that seemed to hit you at least twice, and then right after that, the flu.
I would like to start my life back up now please...
The plus side here is that during our collective extended downtime I developed 3 different designs for the pick and place head, but I have also started over that many times as I was not really satisfied with how any of them turned out.
Last night I literally dreamt up a new one which has me kind of excited.
Imagine CoreXY, but for pick and place head. Just two motors could control 4-8 nozzles for both part selection and part rotation. I think this one is probably beyond what I'd want to 3D print as a prototype though unless I can simplify it. I was just aiming for one nozzle with a flying bottom looking camera.
Anyway it's been a fun exercise here, but my sincere hope is to abandon pnp for the time being and get back to assembly and calibration of the base design. I wanted to be able to do that with my son though, which has been impossible until... today.
Soon.
-
Getting started with Machinekit
12/13/2017 at 06:18 • 0 commentsGetting Machinekit up and running with Debian Stretch on the BeagleBone Black was a little hard, so I did a write up about how to create a Machinekit image with Debian Stretch for the BeagleBone Black on my blog. Check it out if you want to get started quickly.
-
Visions of luer lock tip changers
11/30/2017 at 18:08 • 0 commentsThanks for 100 likes!
But... the next few weeks around here are going to be nuts and we still have some holiday related hacking to accomplish. This project is going to have to wait.
Alexander and I did have some interesting conversations about how the C1 might perform as a Pick and Place machine though..
- The entire assembled end effector, minus the 3D printing related cruft, weighs in at just 28 grams
- XY resolution is 0.02 to 0.07mm for the build plate area
- >3000mm/sec2 acceleration
- >300mm/sec top speed
That would be a pretty kick butt PNP machine.
We still have yet to see how some of that plays out in the real world of course, but plans for automatic luer lock tip changers and lightweight 9g hobby servo part rotators are already dancing in my head.
Happy Holidays.
-
Heated bed work
11/27/2017 at 02:20 • 0 commentsRather than excessively dilute this project with how I made the bed, I made it it's own project. Minus the instructions editor not cooperating, it's done.
-
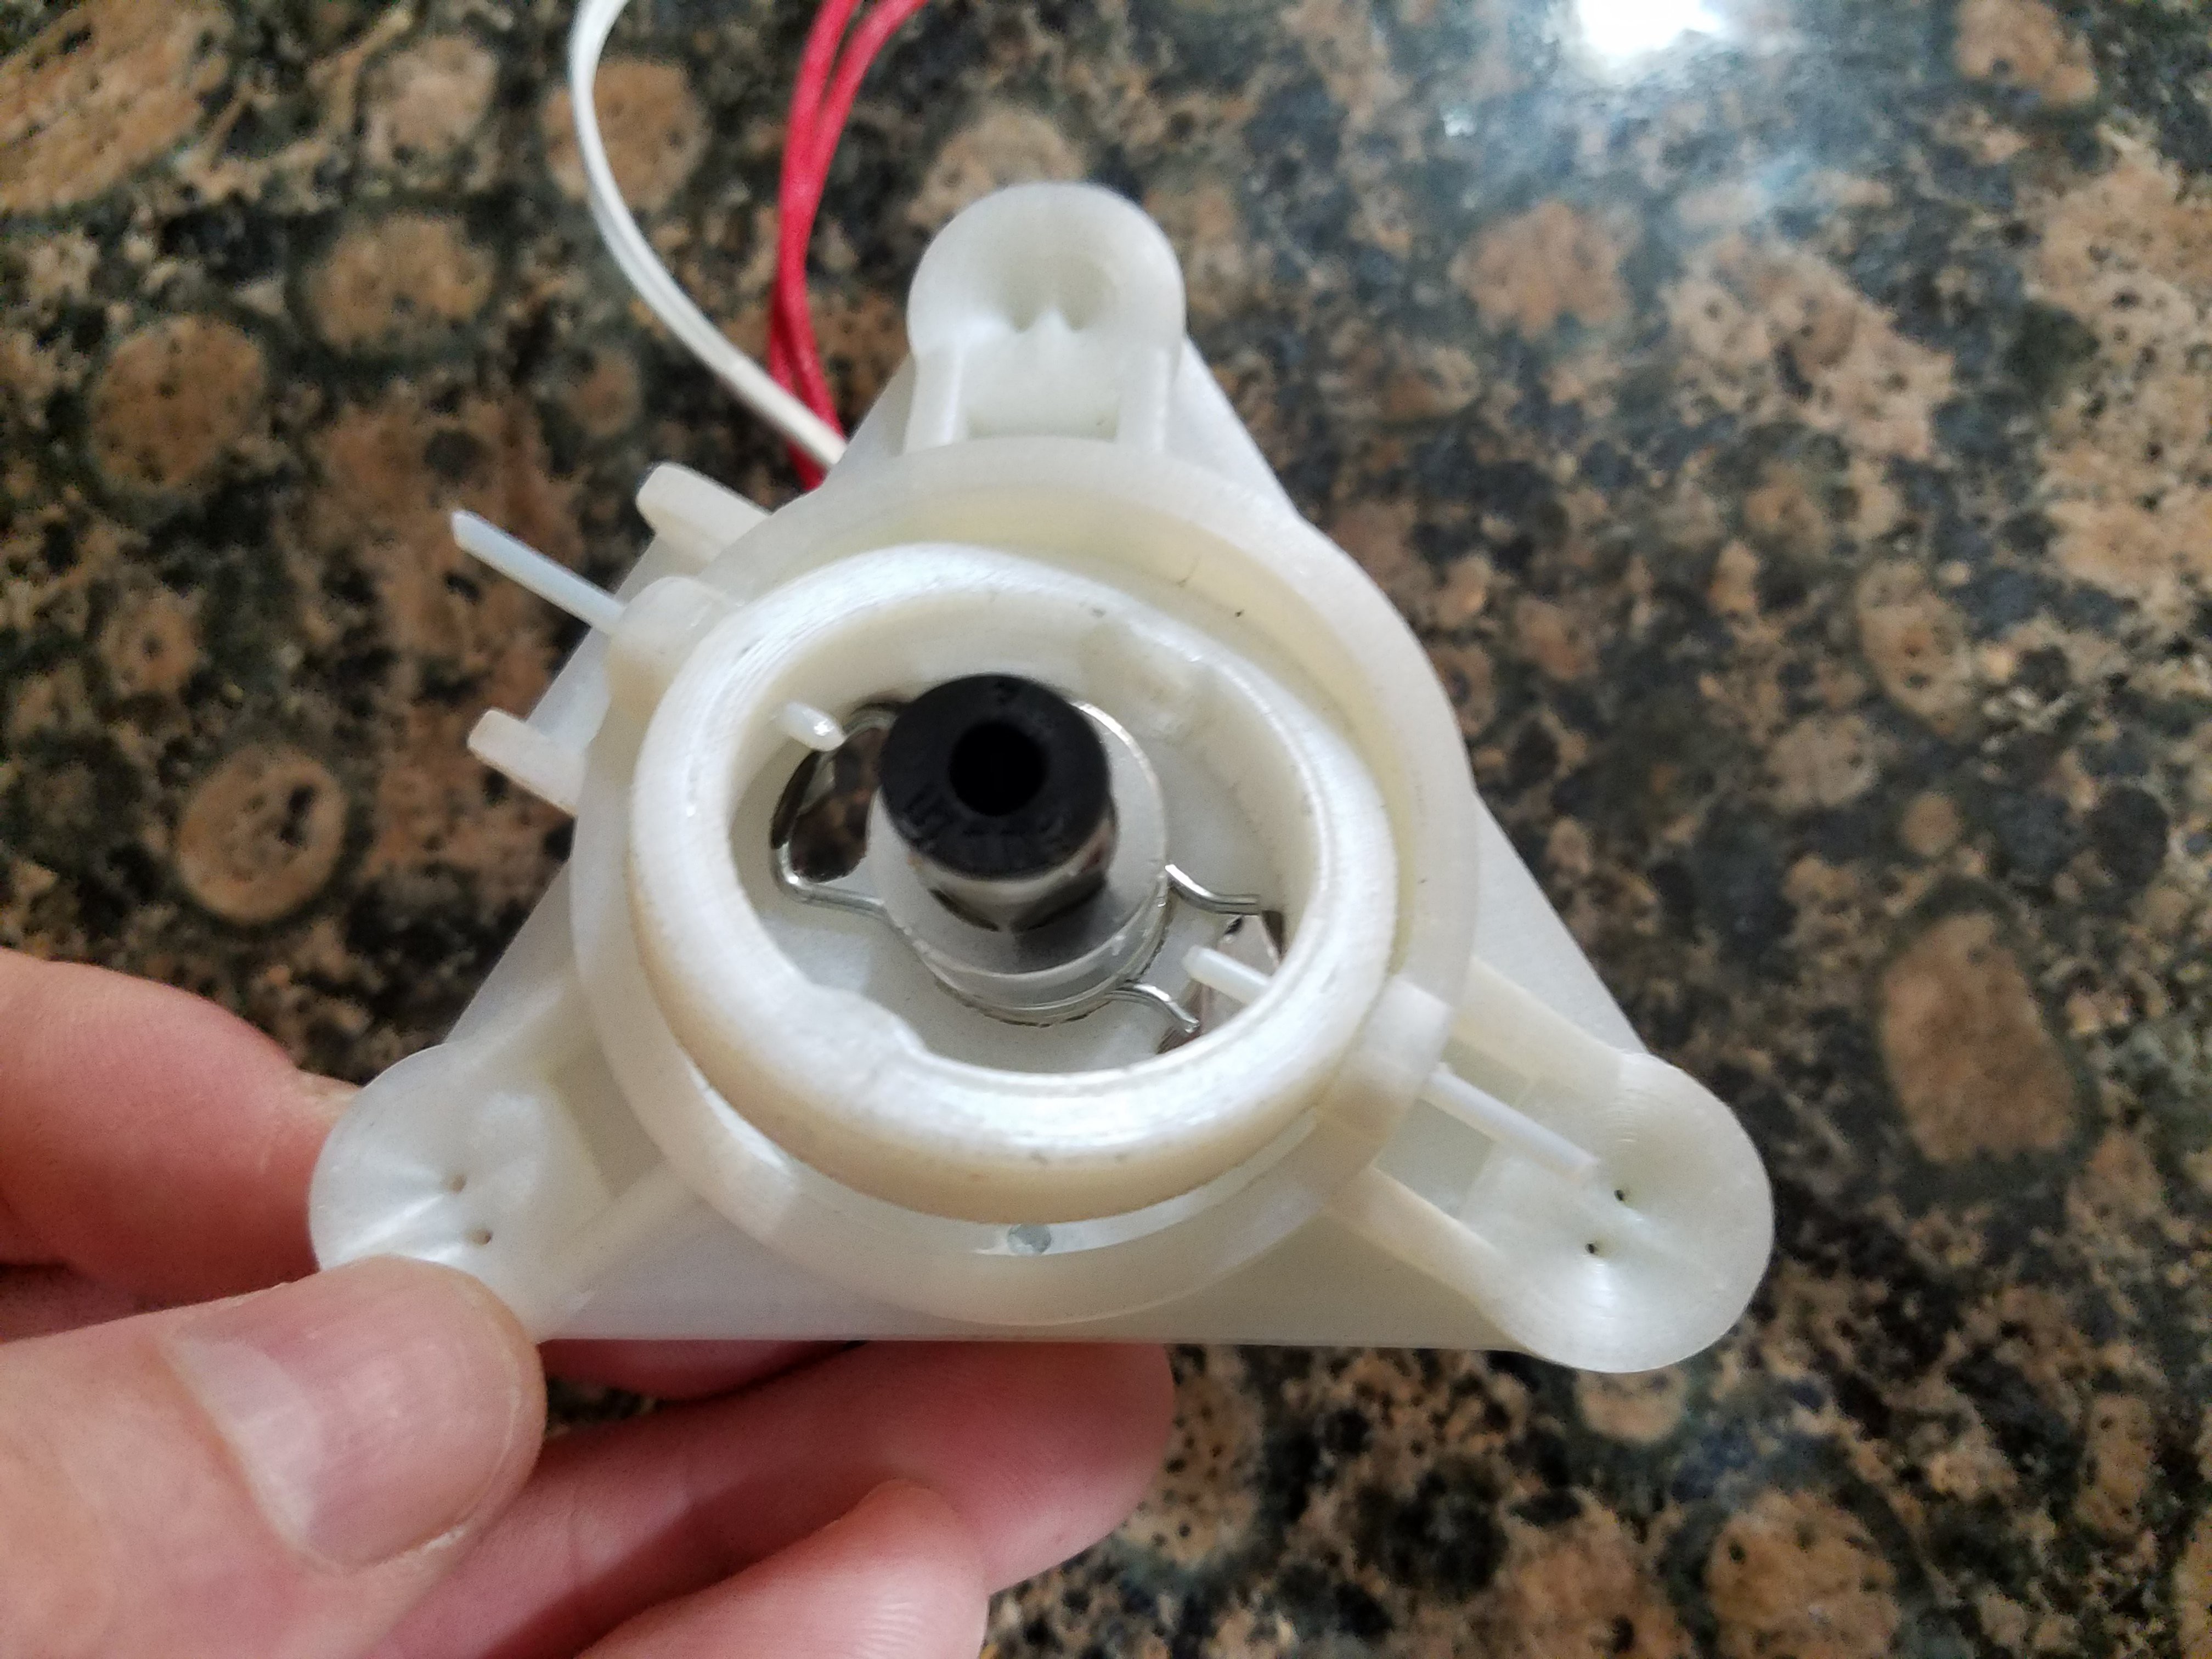
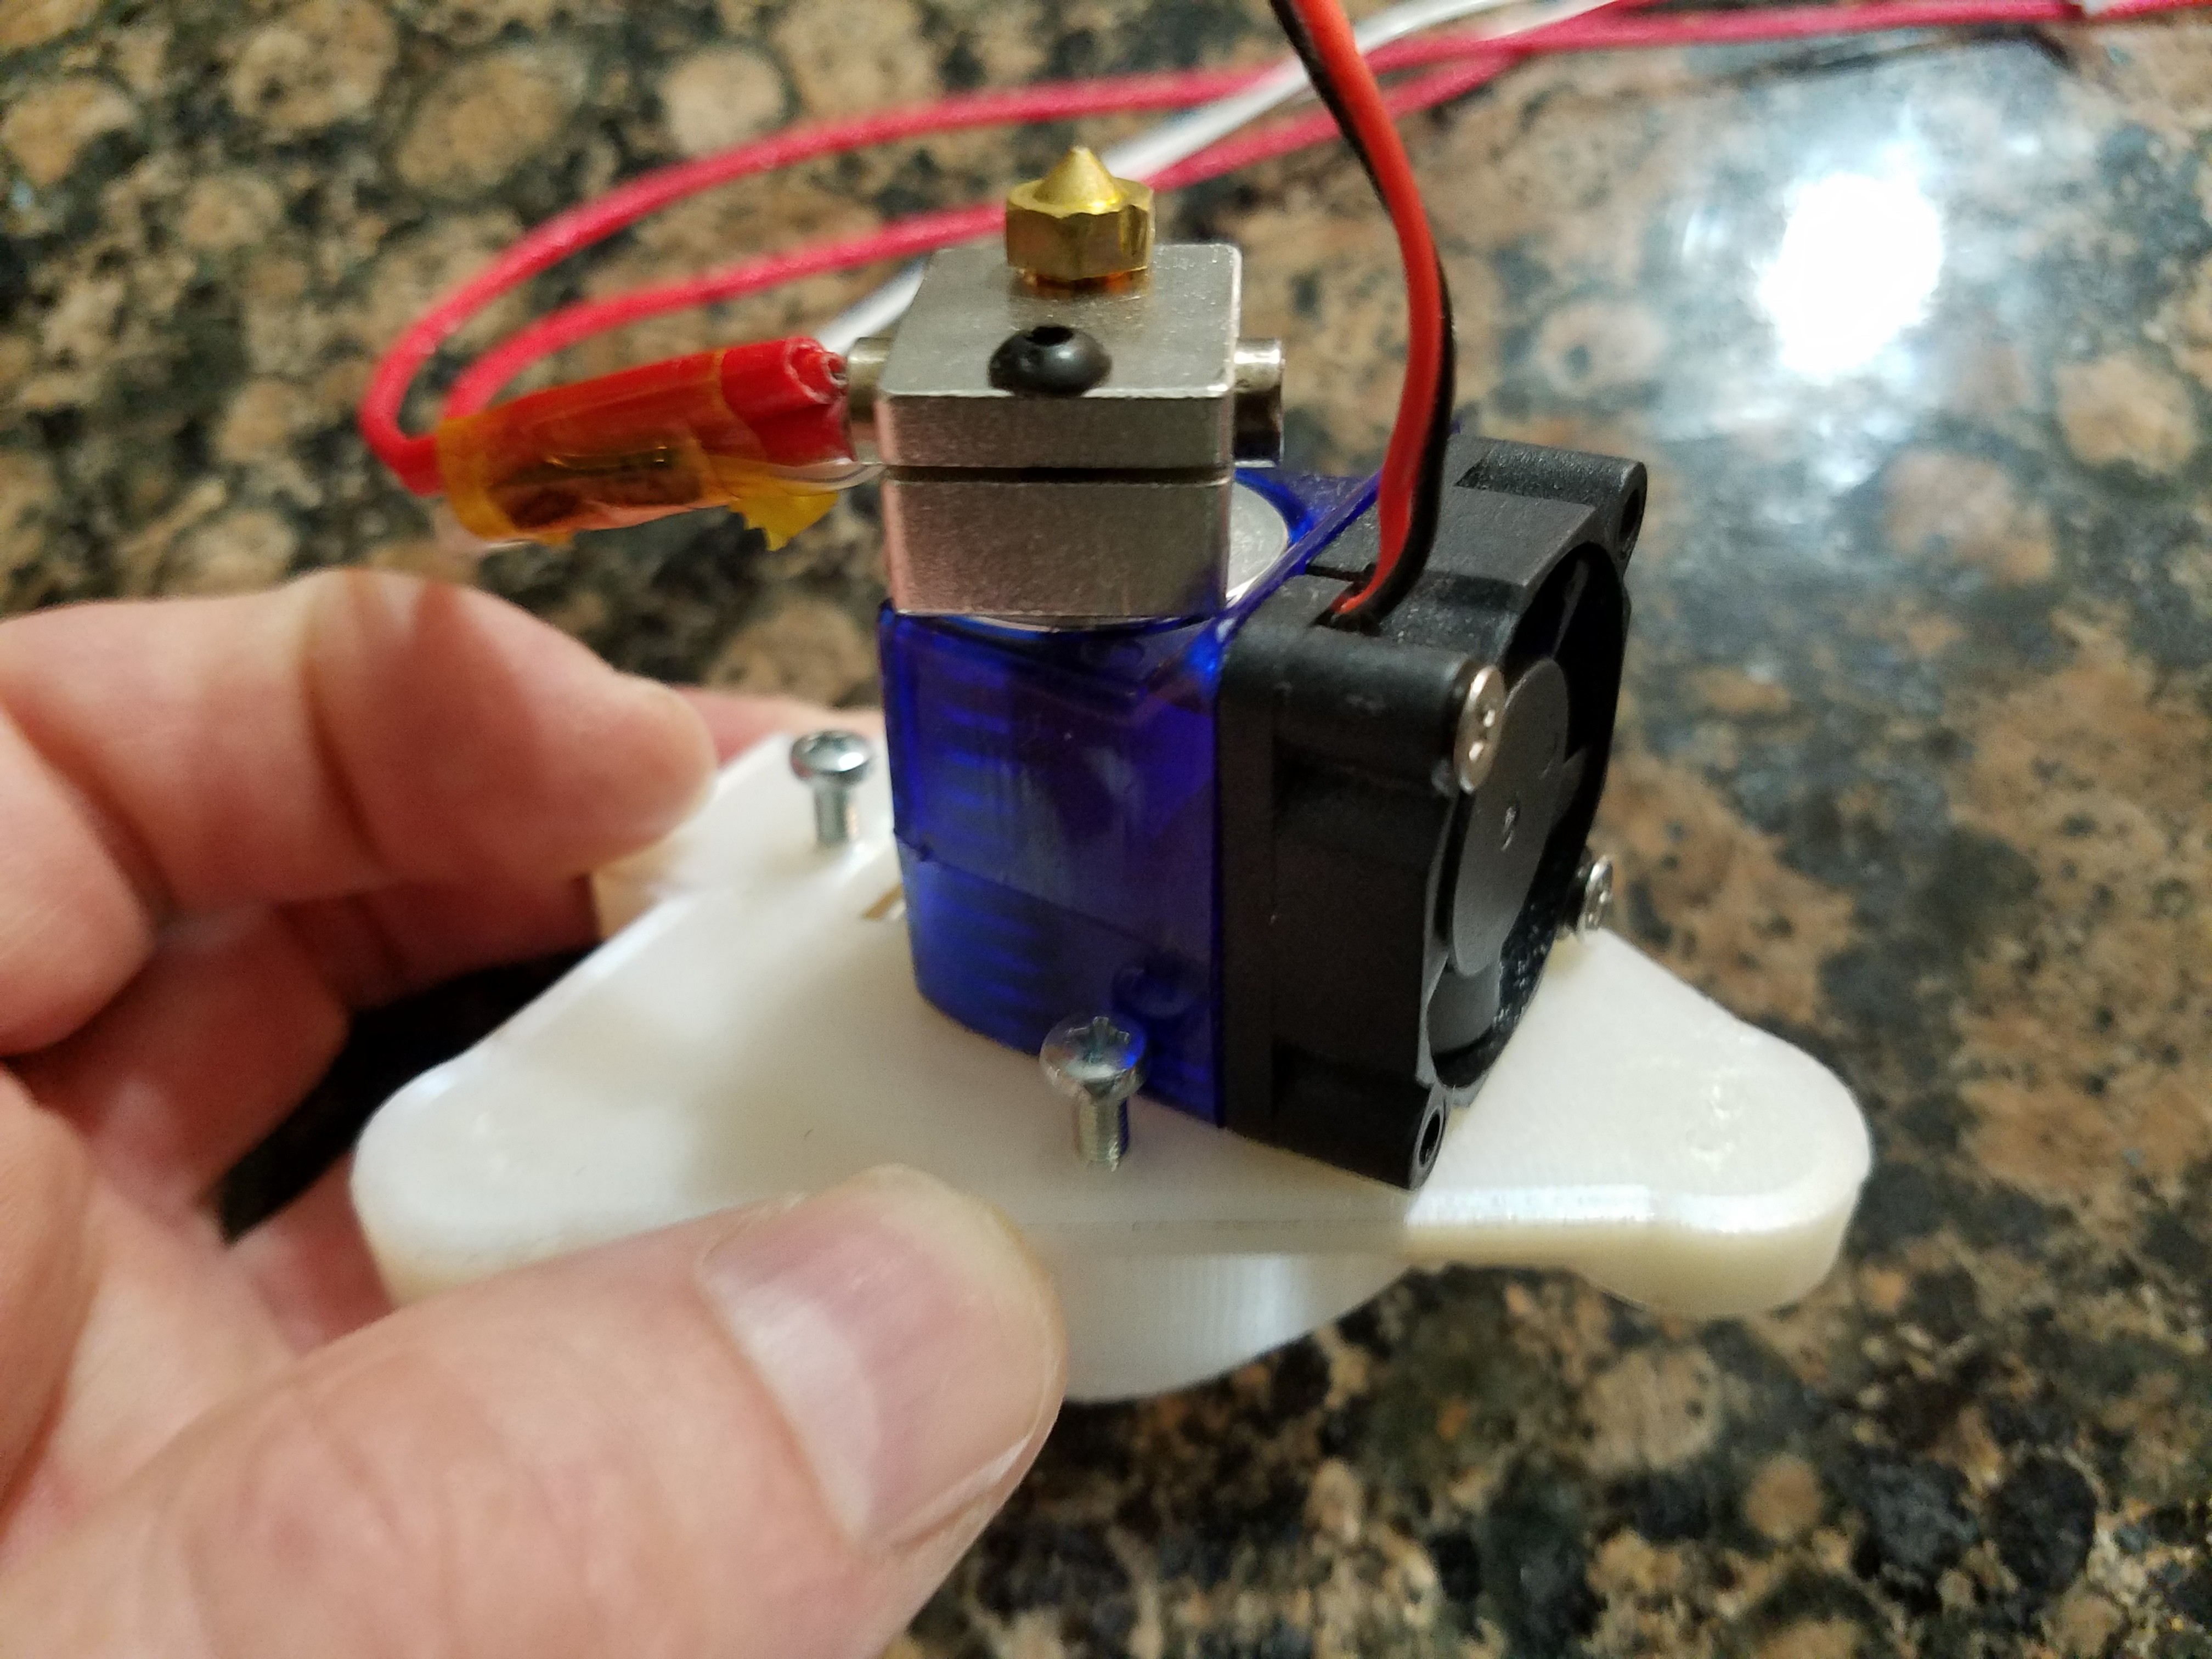
End effector v4.2 assembled
11/26/2017 at 02:39 • 0 commentsFinished assembling the end effector.
Showing my changes to the fan duct including a small stainless steel heat shield, and moving the hot-end up inside the end effector.
I'm still marveling at how well annealing and dyeing the nylon worked.
I think this will last at least as long as the tensioned lines will.
Iteration has cost me the last of my spectra line, so I picked up some cheap fluorocarbon line on Amazon I'm going to try out.
This stuff is billed as 110lb (49kg) test. I'm hoping that means it is more resistant to stretching, but we'll see. The braid on it is more pronounced, but that shouldn't matter as I'm not using any eyelets in this design.
-
End effector v4.2, annealed and dyed nylon
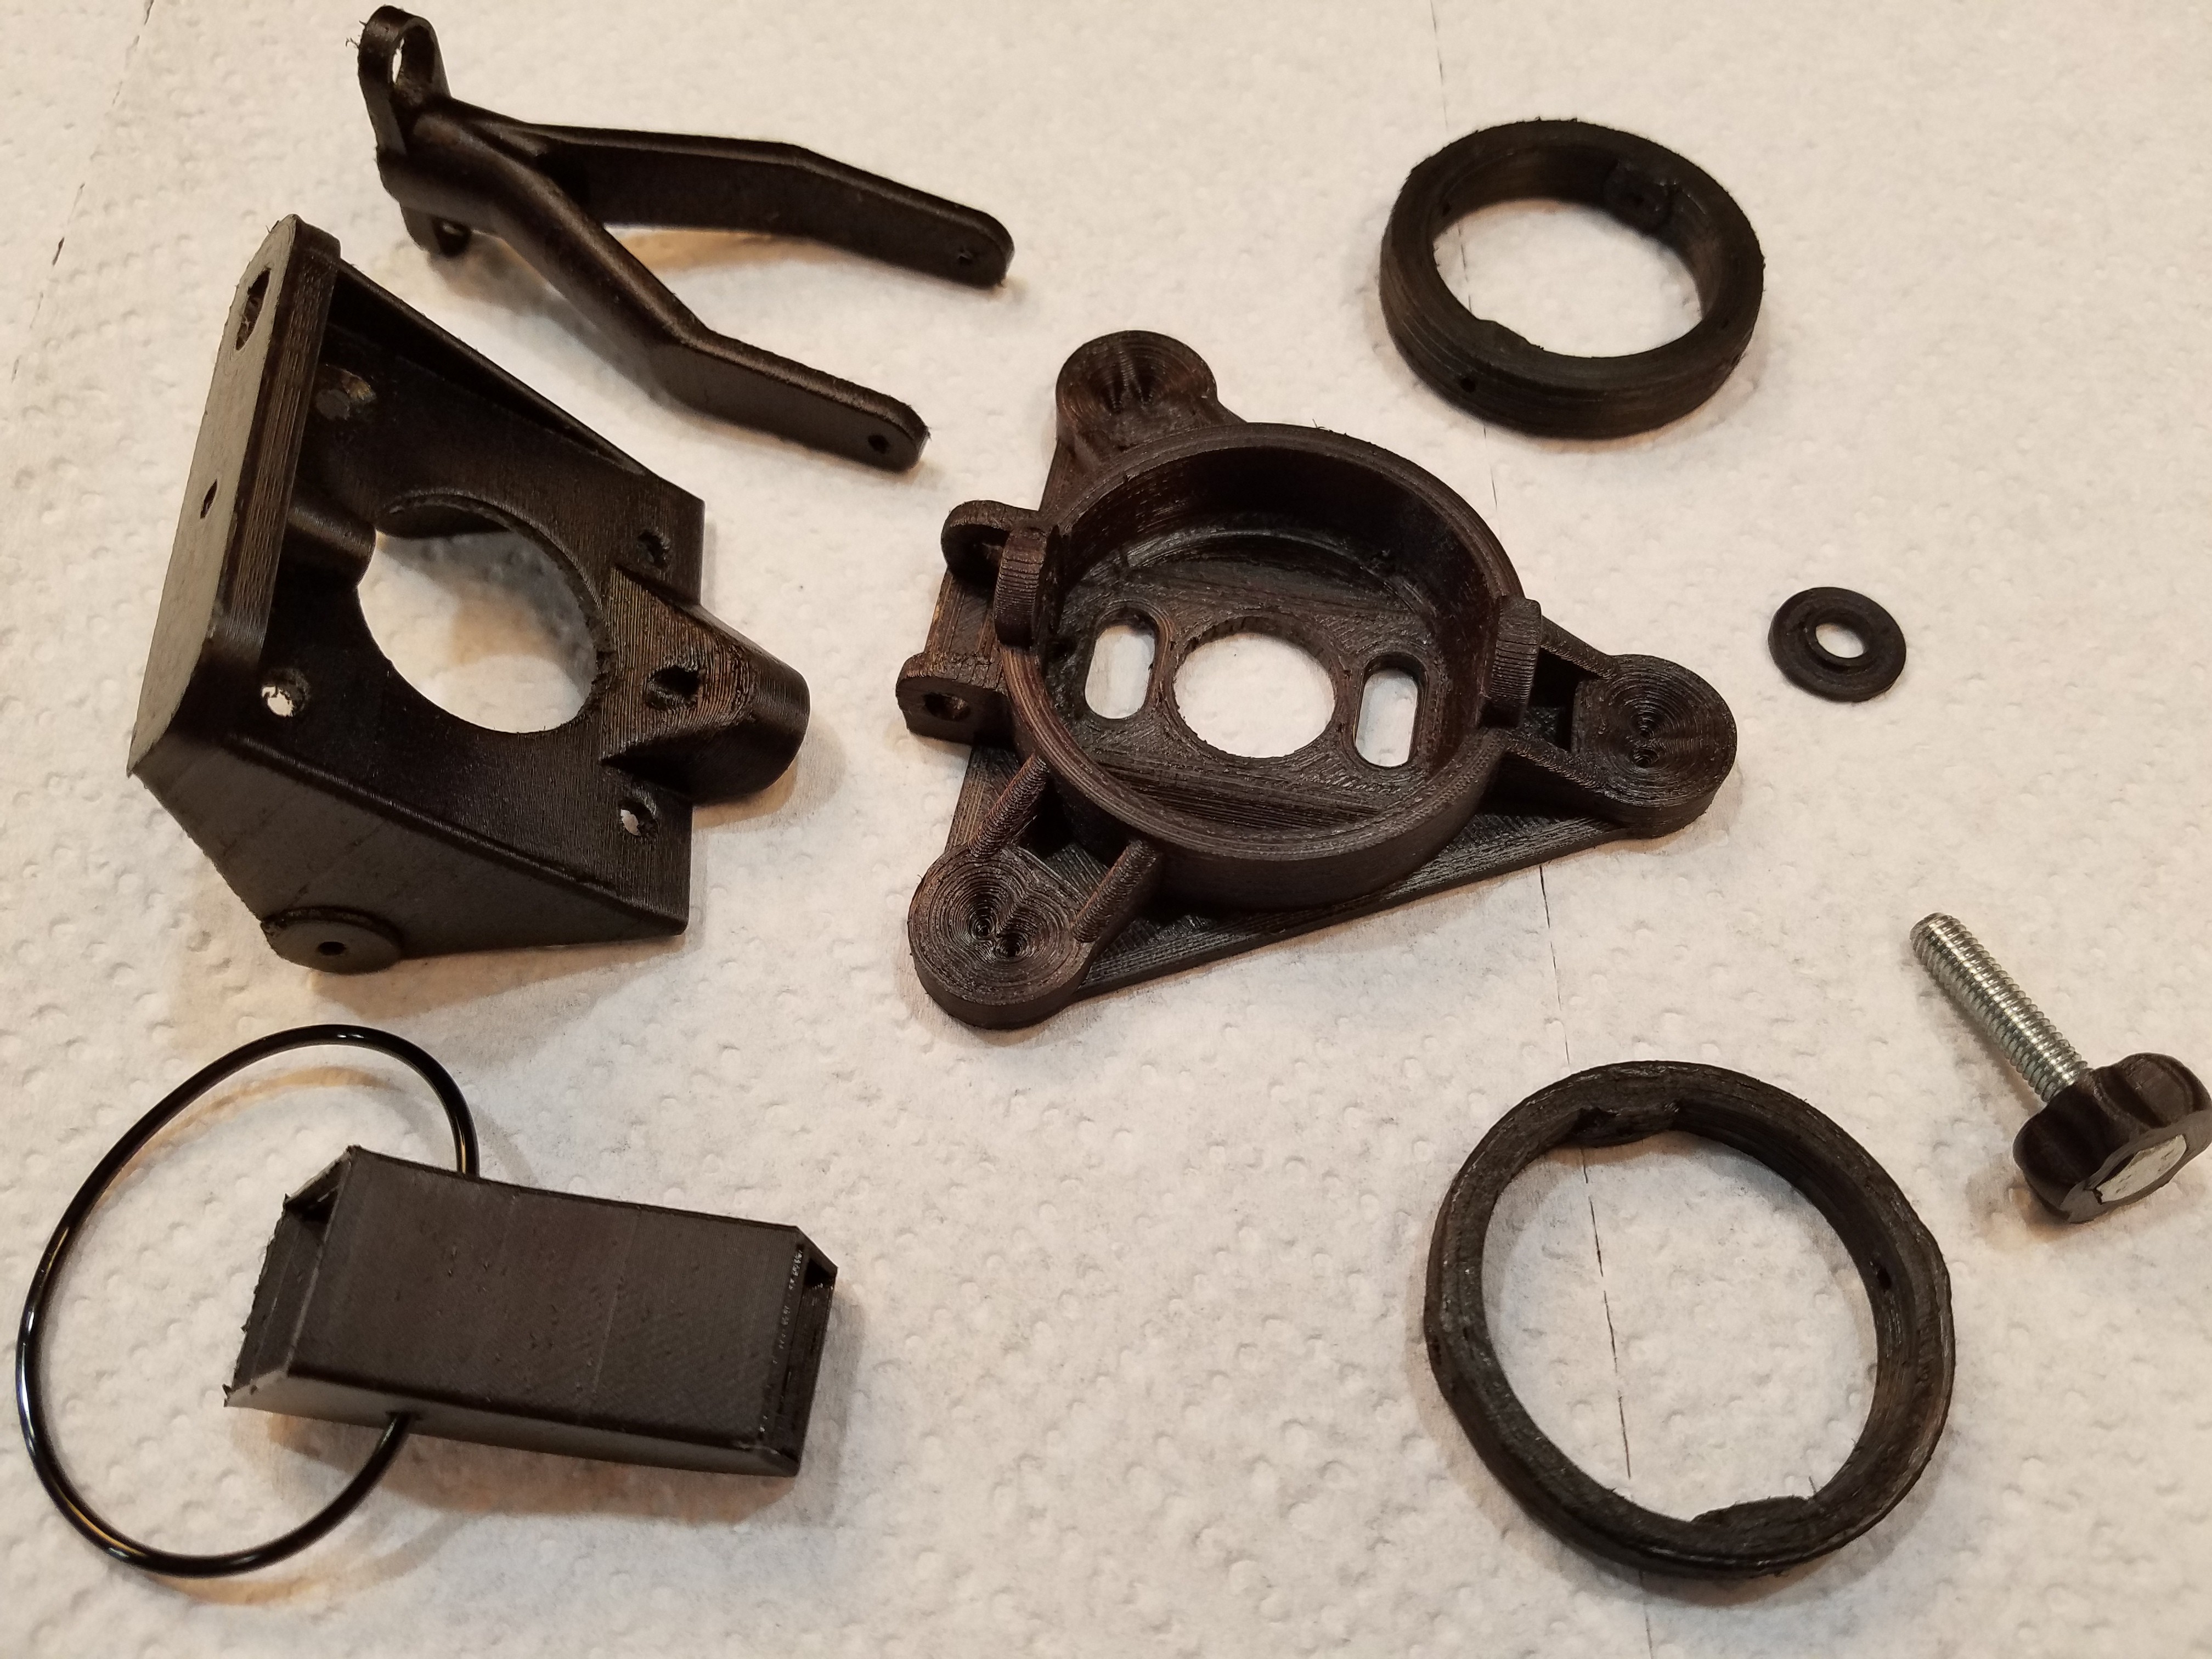
11/25/2017 at 06:46 • 0 commentsBroke v4.1 when it fell off my desk and I rolled over it with my office chair, so I took the chance to fix a few things.
The push-rod hinge is wider now, and the fan mount is thicker and larger diameter.
I also thought I would give annealing the nylon a try. I wanted to make sure the parts were perfectly dry anyway for the next step and annealing will make them tougher.
Annealing the parts
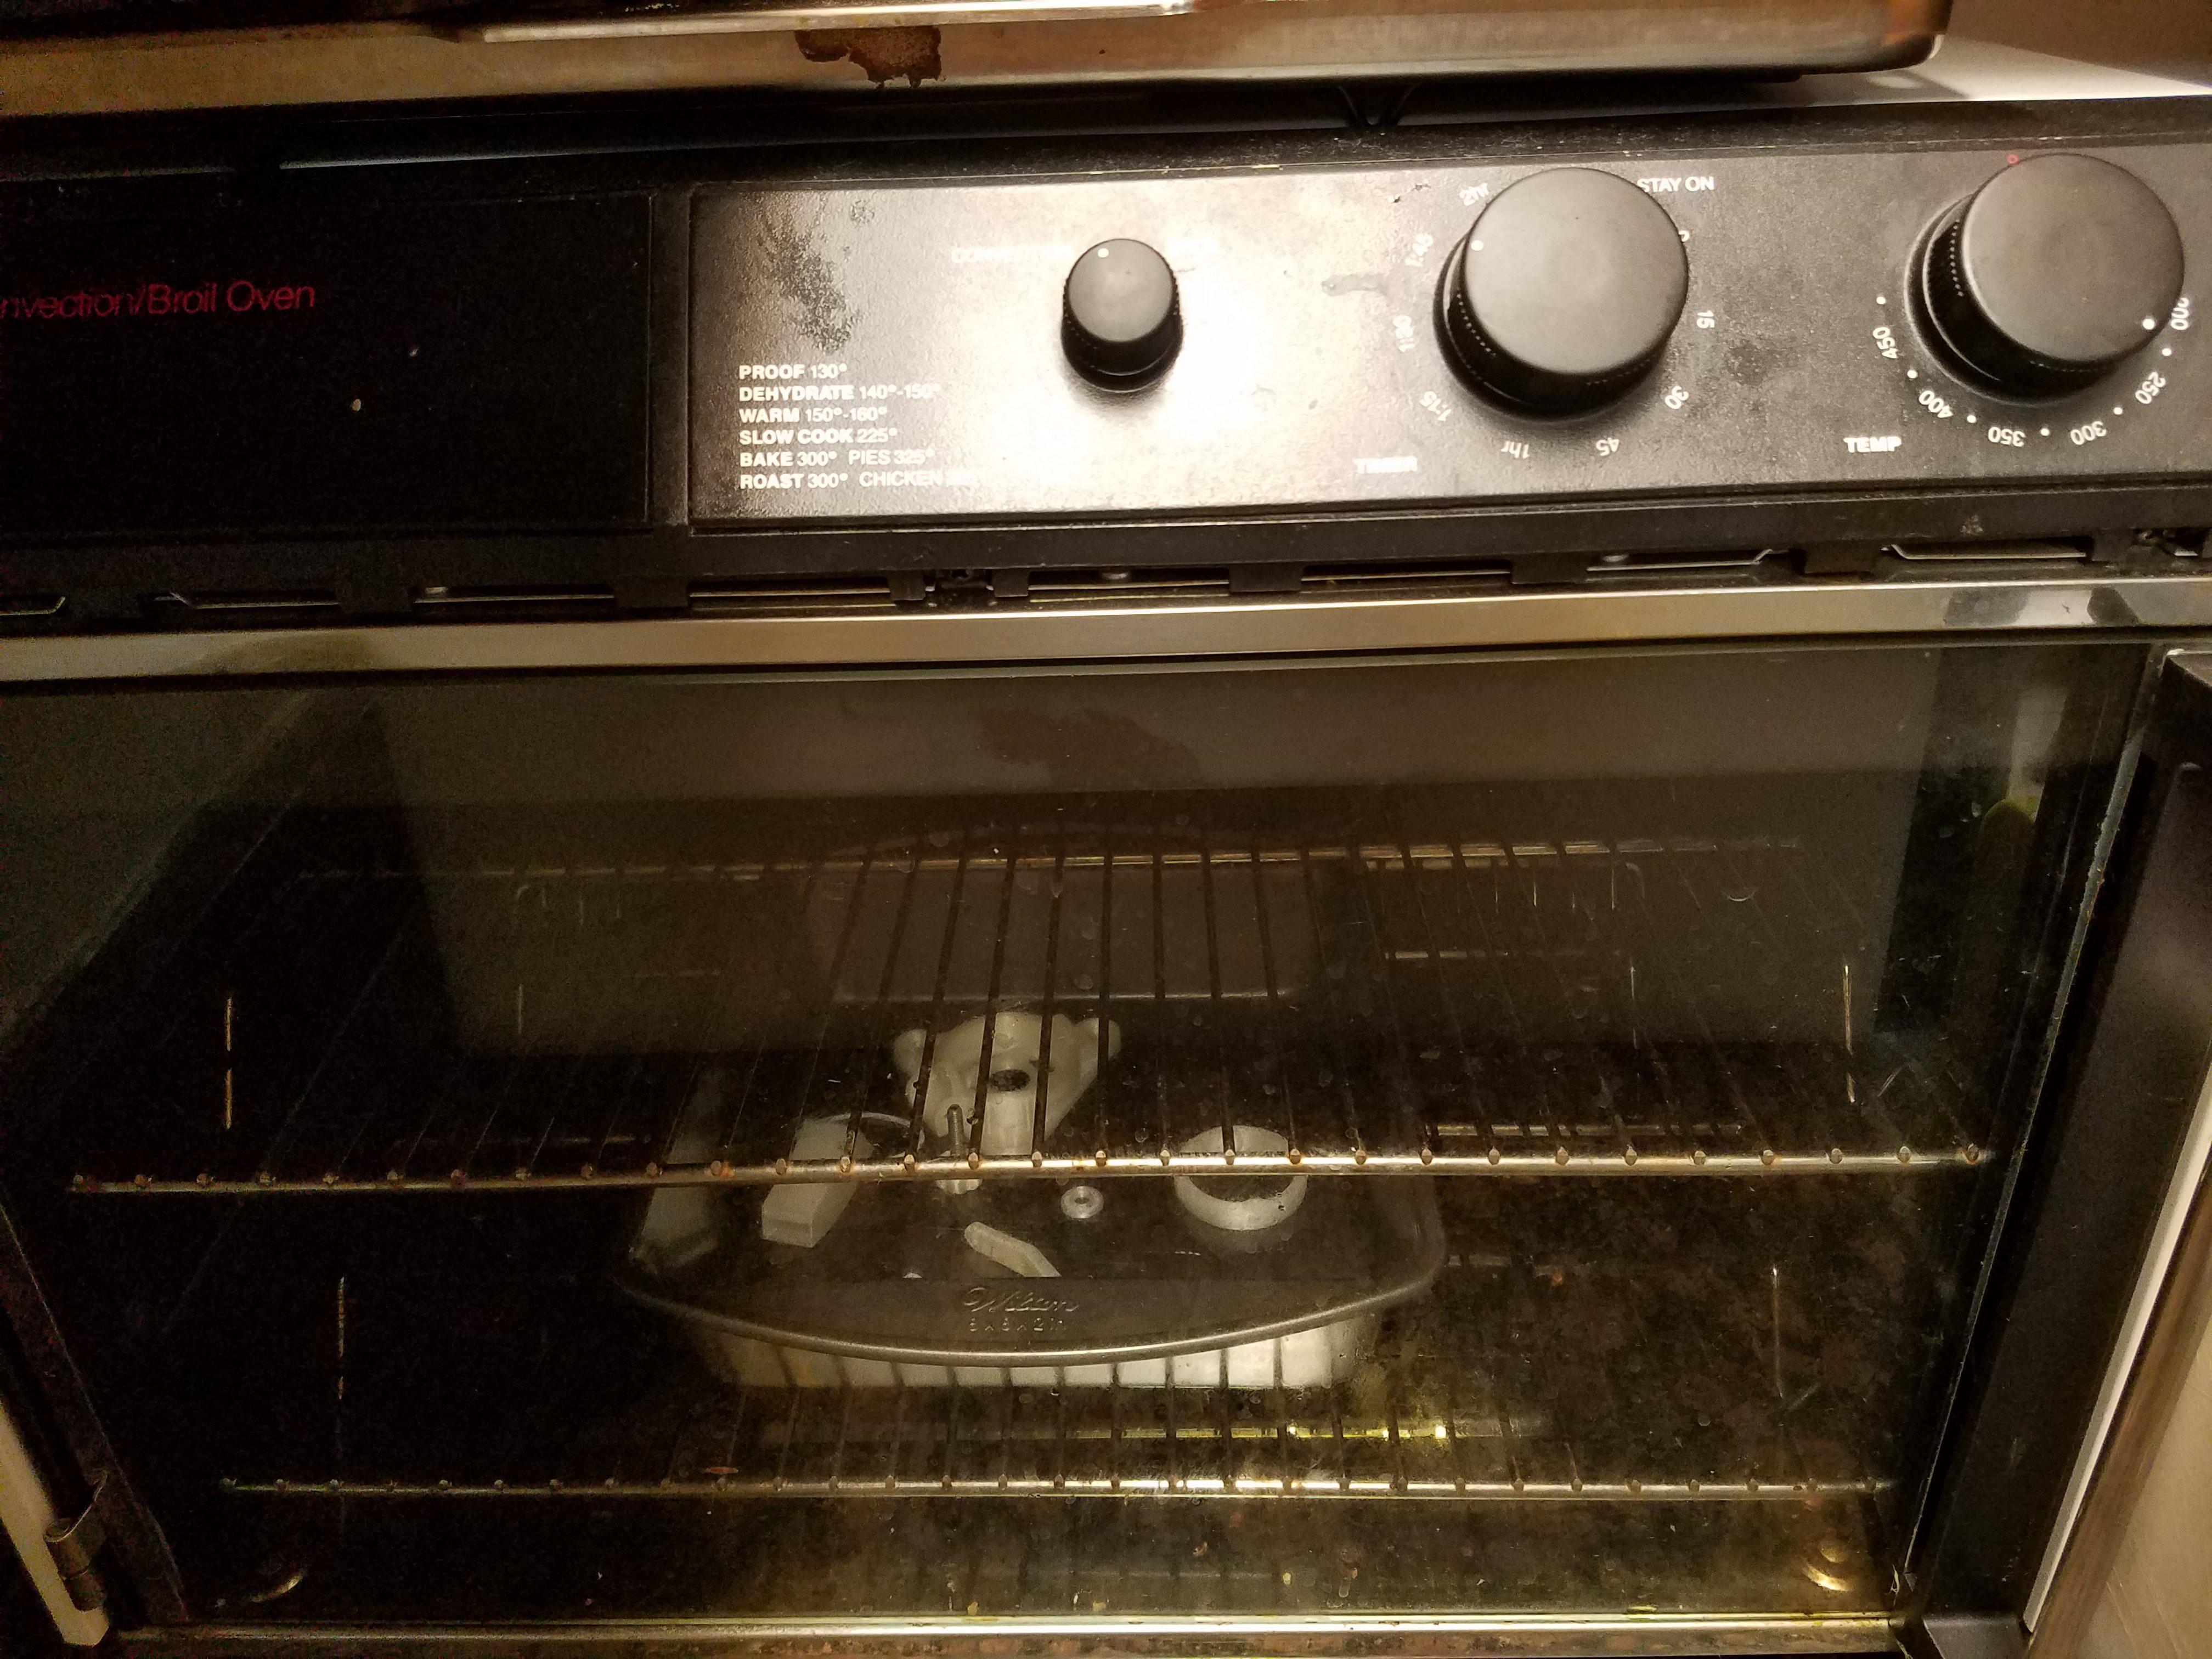
I have a rather unusual convection toaster oven which is just about perfect for this. It heats only from the top, but has a fan to keep the air moving inside. So putting my parts at the bottom meant they were heated with just air and not radiantly.
![]()
Simplified steps for annealing nylon:
- Bring the oven up to temperature without the parts in it. Electric ovens only!
- Put the parts in and bake for 2 hours at 135C (275F). Avoid directly heating the parts.
- Turn the oven off and leave the parts in the oven until cold.
The annealing works to relieve the internal stress which has built up as you were printing the parts, and allows the polymer chains to relax forming larger crystalline structures when they cool. Basically it gives you harder and tougher plastic with less weak spots. According to the site I linked above, this also results in some minor dimensional changes with the parts shrinking 2-5% in XY and growing about 2% in Z. I didn't measure this.
Annealing yellowed the parts a little, but that won't matter in 5 minutes and the nylon is seriously hard and tough now.
![]()
For the other end effectors I opened up the single layer thick bottom cable holes with just a pin. This time I had to drill them out as I just could not get the pin through. Impressive.
Dyeing the Parts
Next I wanted to try dyeing the parts. I theorized that since nylon quickly absorbs moisture from the air, starting with dry parts first would make them absorb the dye more readily.
I picked up some Rit dye for synthetics. Regular dye also works fine for nylon, but this stuff will do polyester, acrylics and a couple more plastics too. I imagined since it was designed for plastic it would work better on the nylon. I was not wrong...
![]()
Simplified steps for dyeing nylon:
- Fill a small stainless steel sauce pan with enough water to cover the parts.
- Add a teaspoon of vinegar.
- Add some dye. I used 5 tablespoons. This was way... way.. too much.
- Bring to a boil, then reduce the heat to just under boiling.
- Add the parts and stir gently for a couple minutes.
- Remove them and rinse in cold water until they stop bleeding.
And this is why I said 5 tablespoons was way too much. It worked ridiculously well.
My purple parts are basically black after a total of 5 minutes in the dye.
![]()
Man o man, those are some pretty parts.
It's not just the surface either. The dye penetrated a good half a mm in 5 min. I think next time I'll use a lot less dye, and leave them in a lot longer to see if it will penetrate more.
I could barely contain my enthusiasm.
- Bring the oven up to temperature without the parts in it. Electric ovens only!
-
Brittle nylon?
11/23/2017 at 04:55 • 0 commentsMost things with v4.1 of the end effector are working out well.
The thickness of the inside surface was tweaked so a binder clip spring holds the hotend firmly in place by slotting into the groove below the groove mount.
![]()
So now the heatsink sits flush on the bottom.
Added the three screws you see for leveling.
![]()
But printing the push rod joint, which was working well before, now is bumpy and brittle.
![]()
Lost the settings I had used before, so experimenting.
My nylon filament has the perfect moisture level (12% on a humidistat) and is printed right from its own dedicated airtight container so that's not it.
Printed it at 250 to 265C, bed starting at 80C, .4mm nozzle, .1mm to .2mm layer height, 15mm/sec to 80mm/sec.
If you have any advice to lend here, feel free to drop it in the comments.
EDIT: I think I may need to go hotter. Printing fast seems to work better for the layer adhesion which I think is the result of having more latent heat in the part.
Drying my filament again just in case, and I'll give that a try.
EDIT: Raised the temp to 280C and with dry filament all my issues went away. Contrary to popular opinion though, cooling was needed to go fast. It took 30% fan at 72mm/sec with 10 second layer threshold.
-
End Effector v4.1 - Finally, a decent print
11/22/2017 at 02:36 • 0 commentsAfter 3 more false starts I got tired of wasting filament and looked at my model more closely.
- Corrected a few dimensions so they are multiples of my nozzle size.
- Offset the small bottom holes so they start at the second layer.
- Changed to 50% infill for a couple of the base layers.
- Slowed down to 45mm/sec. I normally run it at 60-80 for structural parts.
Printed perfectly first try.
Pardon my dirty print-head. It works for a living.
Other changes:
Changed the part cooling blower mount from going through a channel in the end effector to simply mounting by one of the screw holes. This will be more universal, siting lower so the cables won't impact it for a wider possible printing arc. I'm not using the entire printable area here so not an issue for me, but someone might.
![]()
Redesigned the cooling duct so it now snaps on the blower supported by a strand of TPU filament so it can break-away without breaking.
Added screws holes so the leveling can be done by twisting a screw, maybe. If not, it gives me a way to hold it in a position without gluing it down at least.
<rant>
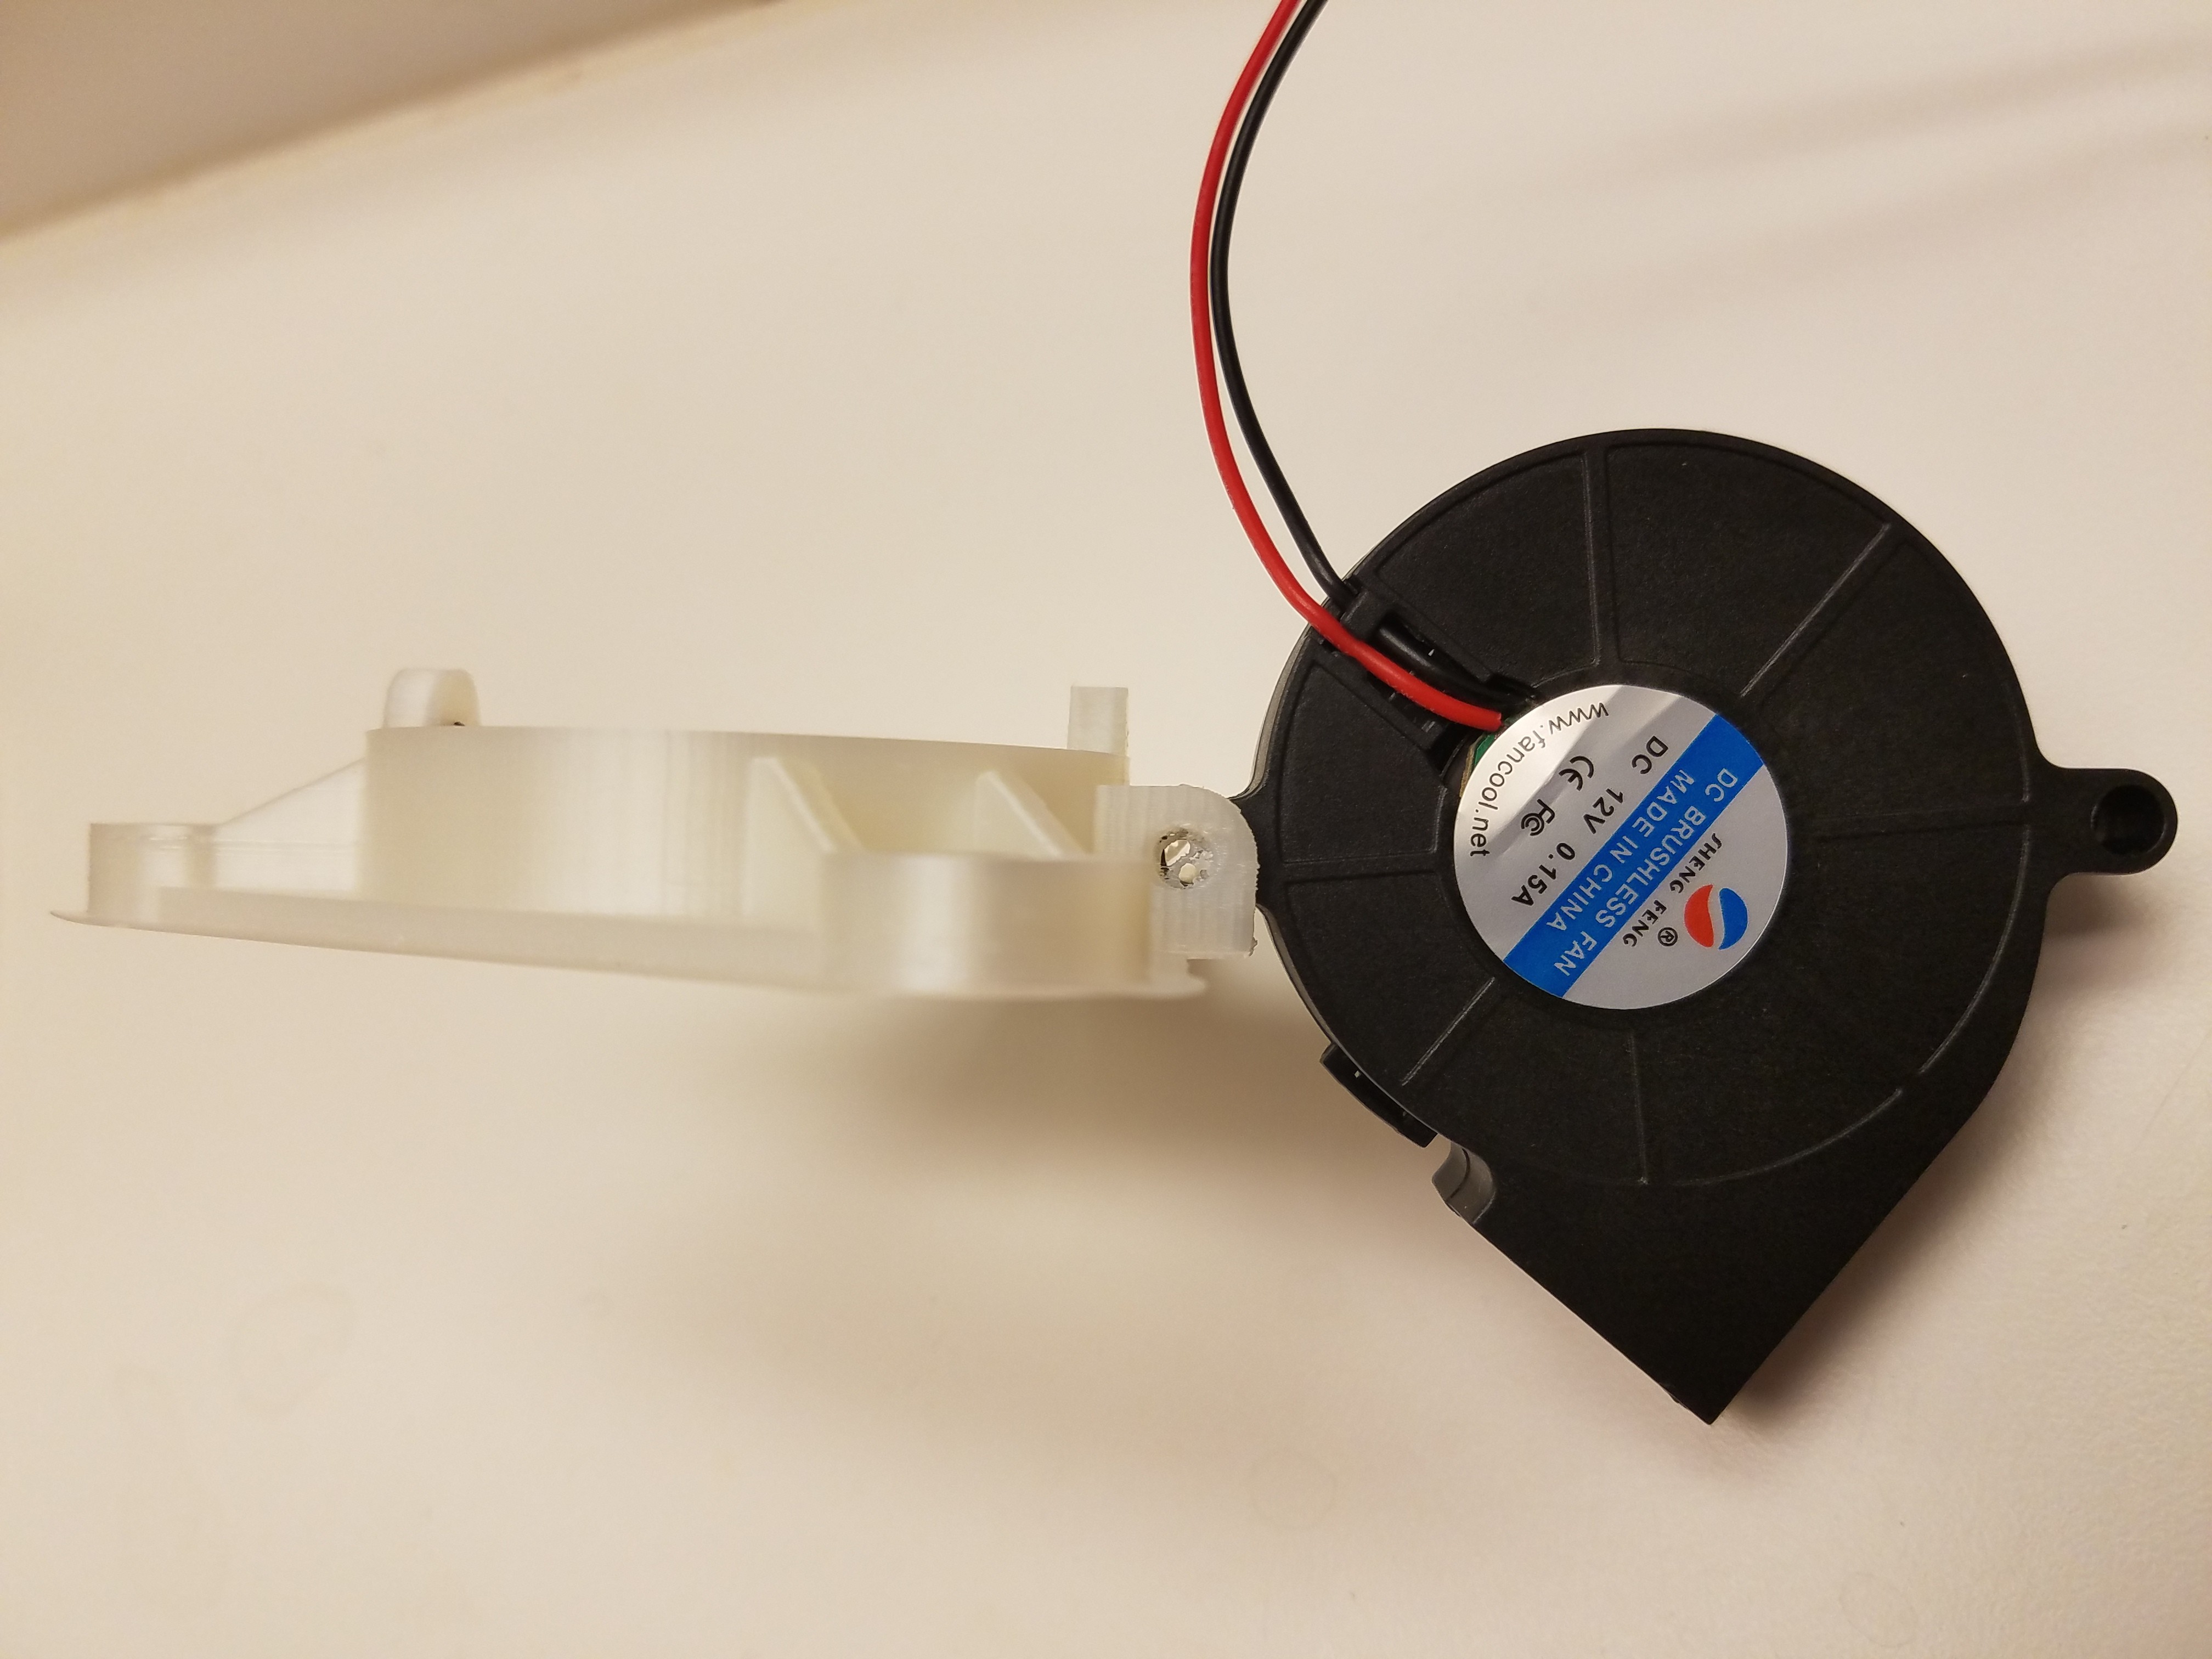
Also discovered my new 'Ball Bearing' blower has a sleeve bearing.
It basically doesn't match anything in the description other than the size and voltage. It looks like the company just Photoshop'd their logo on a Sheng Feng $2 blower and called it a day. It's going back.
After my complaint they have since removed the 'dual ball bearing bit' from the description, but the rest including 50000 hour life and high temperature plastic remain. I'm tempted to burn it and send it back to prove them wrong.
This was the blower and vendor who did this for public ridicule purposes. I hate companies that waste my time.
EDIT: The updated Amazon description now includes the following "Fourthly, please do not dismantle the product privately". LOL
</rant>
Updated the github source, and the other parts to support the changed dimensions are printing now.
-
Heated bed, or lack thereof.
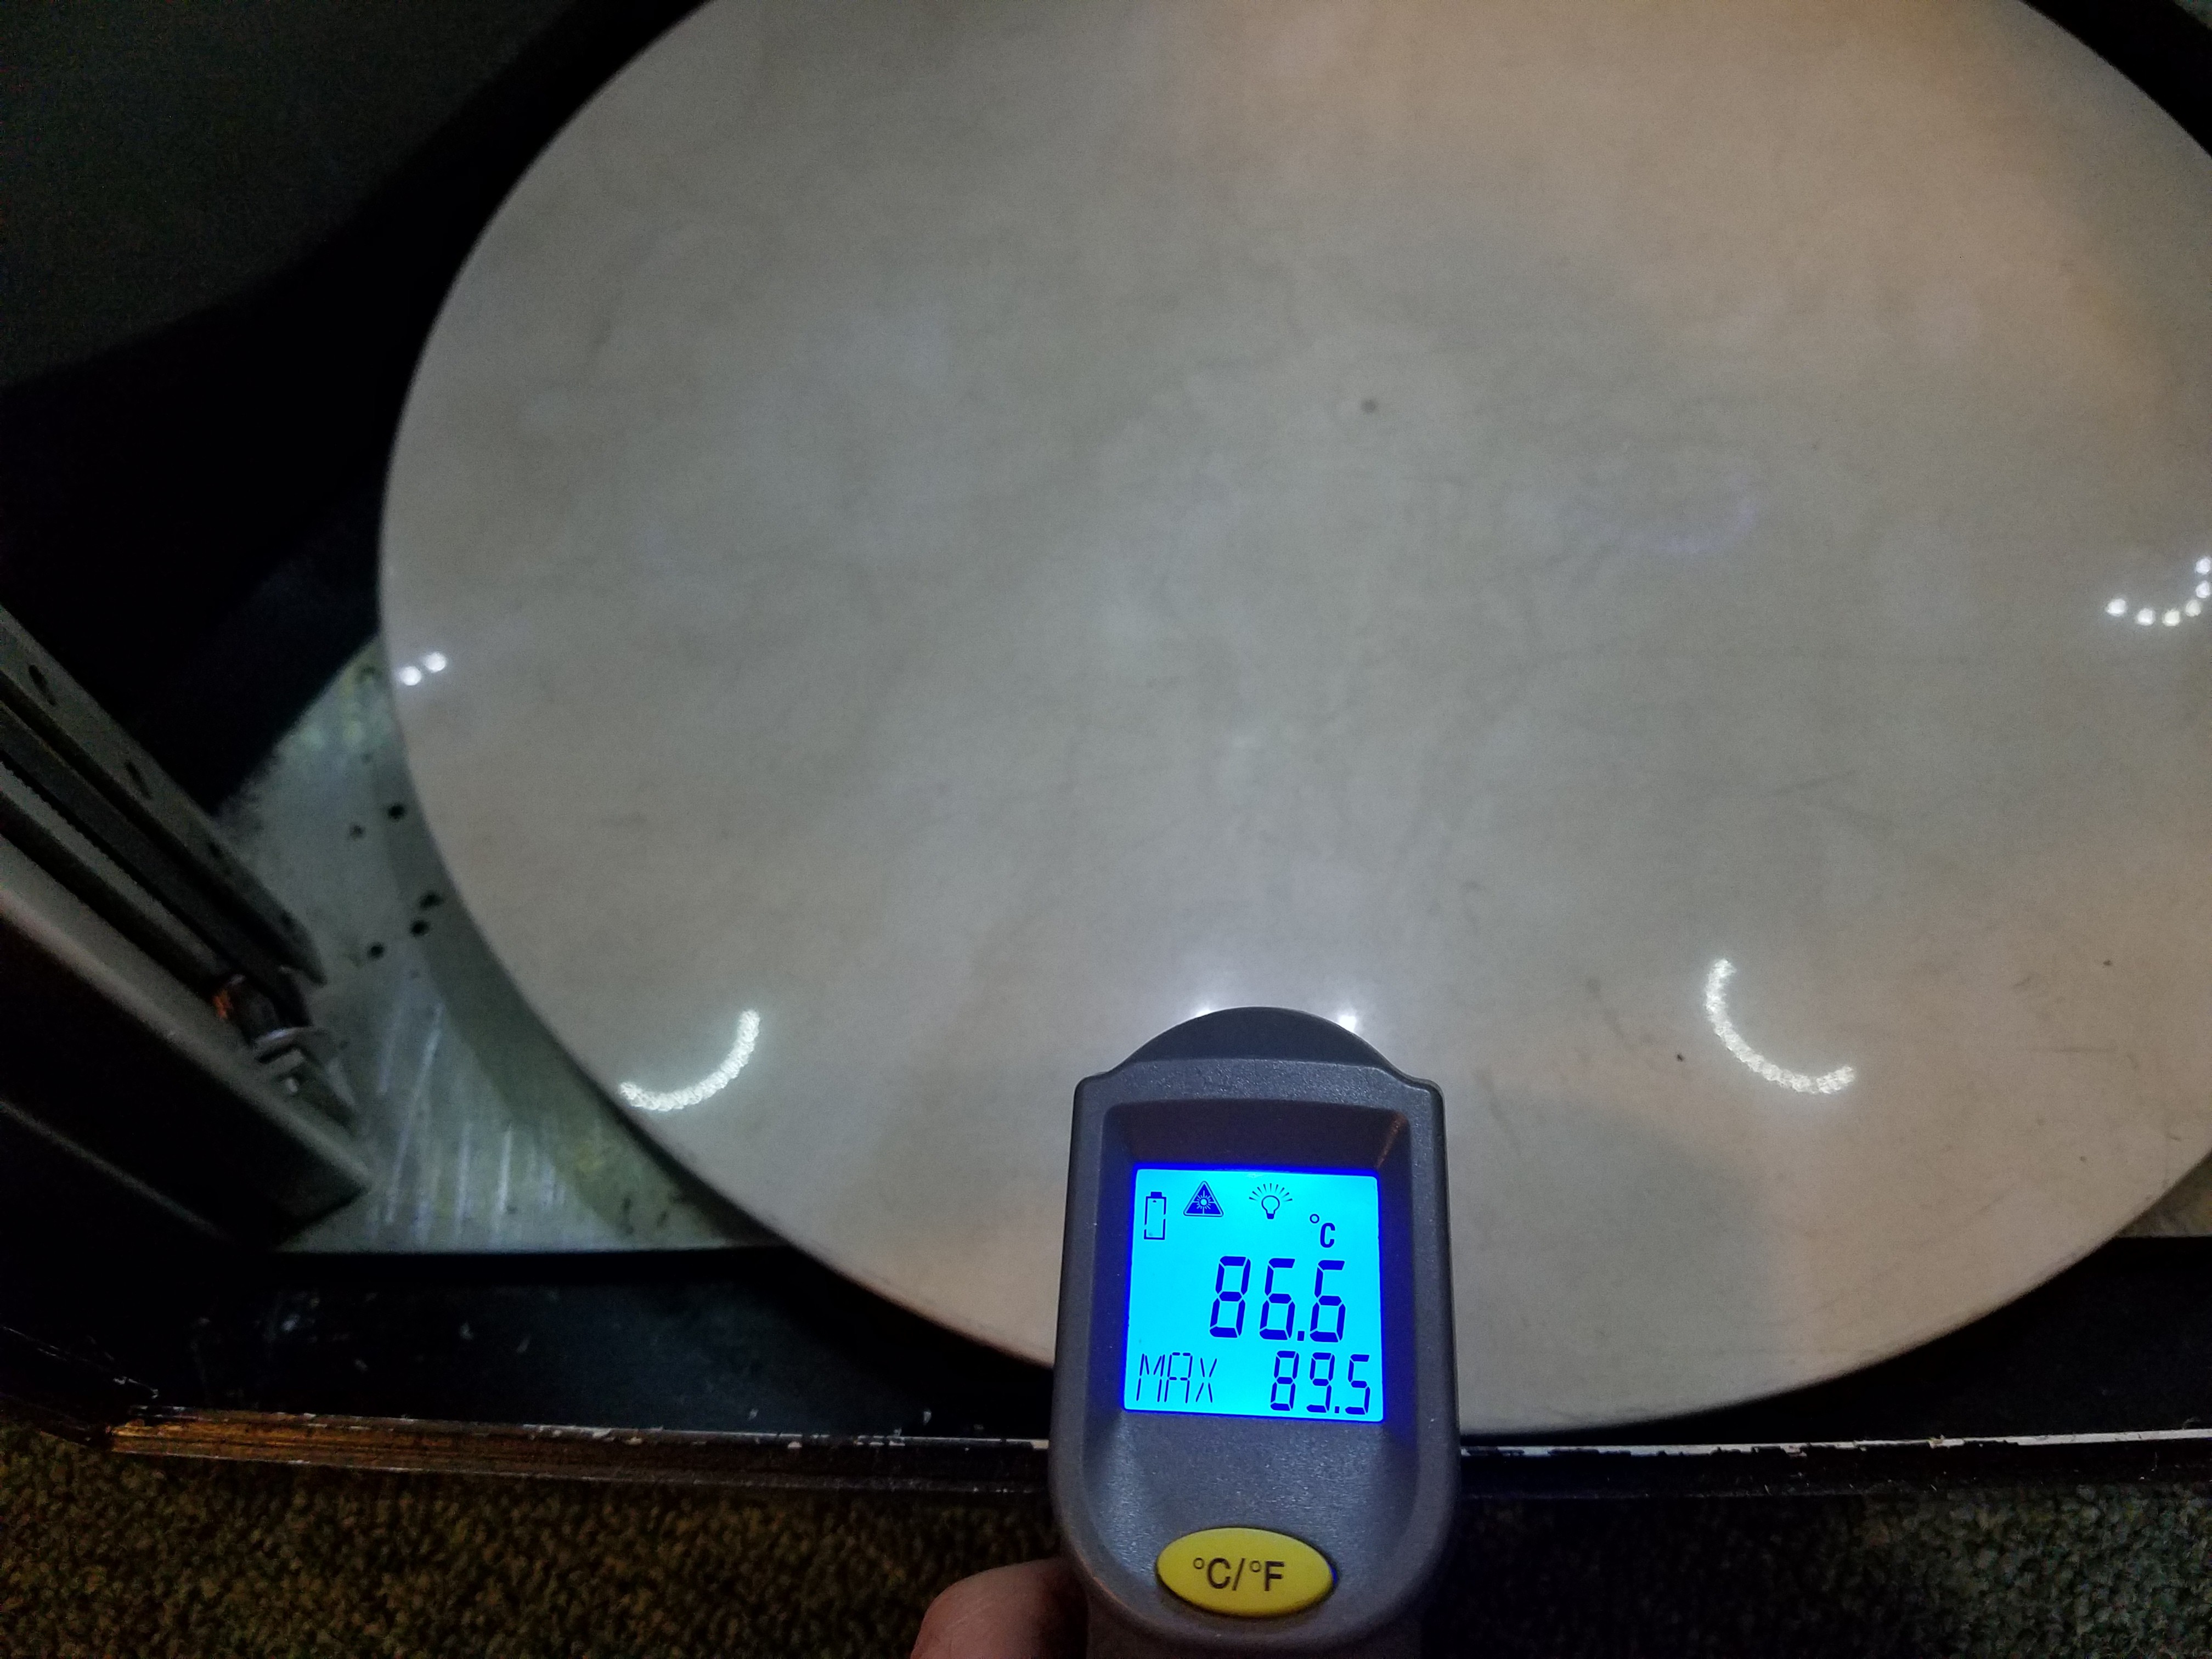
11/20/2017 at 17:54 • 0 commentsA couple months back I split the heated bed on my other printer. My fault. Nema23 steppers, machined aluminum/steel rails, and 9mm belts ensured I could supply enough force to split it.
![]()
Since my table saw is 1500 miles away currently, this makes creating a replacement difficult. That and the ceramic tiles I've found locally all suck. 'Polished' is apparently a relative thing as they have a nice wavy reflection, aka, not flat. Guess I got lucky with my first couple tiles.
So, I've been making do with a smaller granite floor tile as they are basically perfectly flat and in stock at Home Depot. I pre-heat it in the toaster oven, drop it in, give it a spray with Aquanet, and print.
That works pretty well for nylon, PLA, TPU, and small ABS parts. Large ABS parts warp off the bed when the tile starts to cool down so it's basically a matter of how fast I can print.
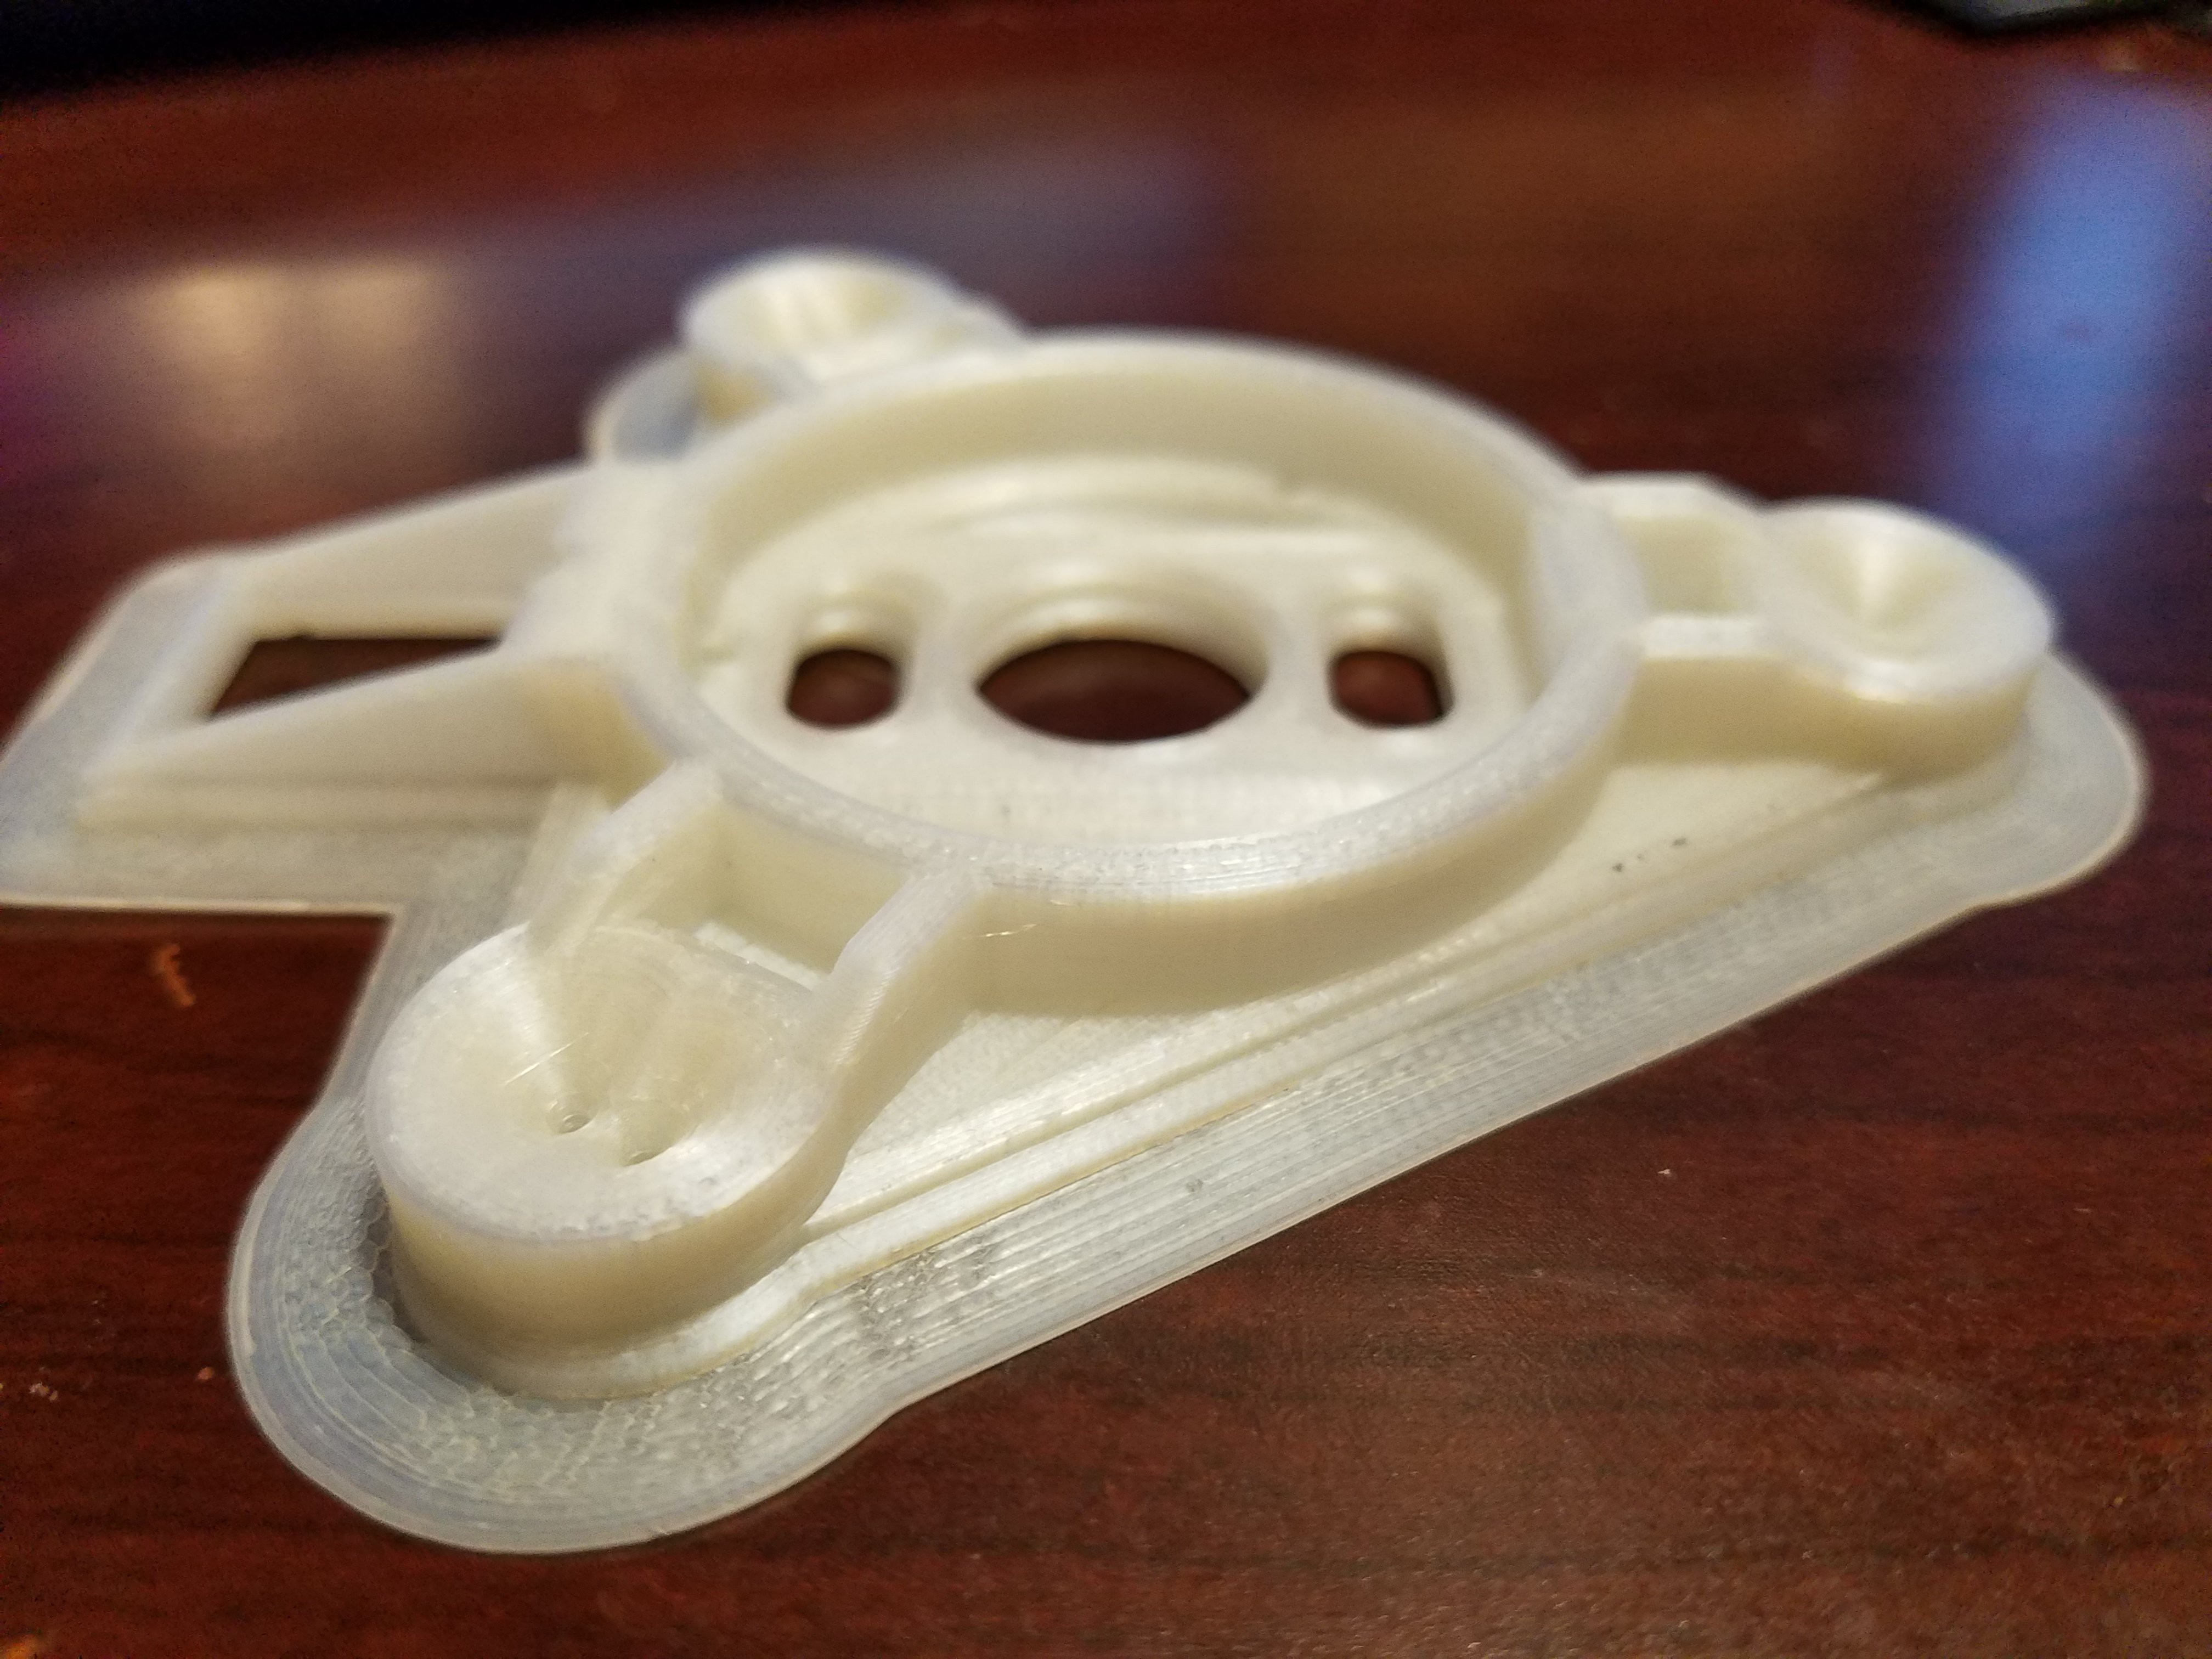
I increased the thickness of basically everything on the last version of the end effector, so now I can't print it fast enough in ABS.
Tried it in nylon.
![]()
The print head must have snagged on something (100% infill and a little over-extrusion for strength), so the tile moved during the print. This resulted in the ledge/offset you can see on the base. Good news is it feels stiff enough to work when printed in nylon now.
Trying again.
EDIT: and again... and again..
I had to turn on Z Seam Alignment: Random as Cura kept putting the seam in the same spot on an inside corner which was resulting in significant over-extrusion in that one area. So the material would build up there and eventually knock the print loose during a travel.
One more try.
-
Extruder v3, nope. Extruder v4.
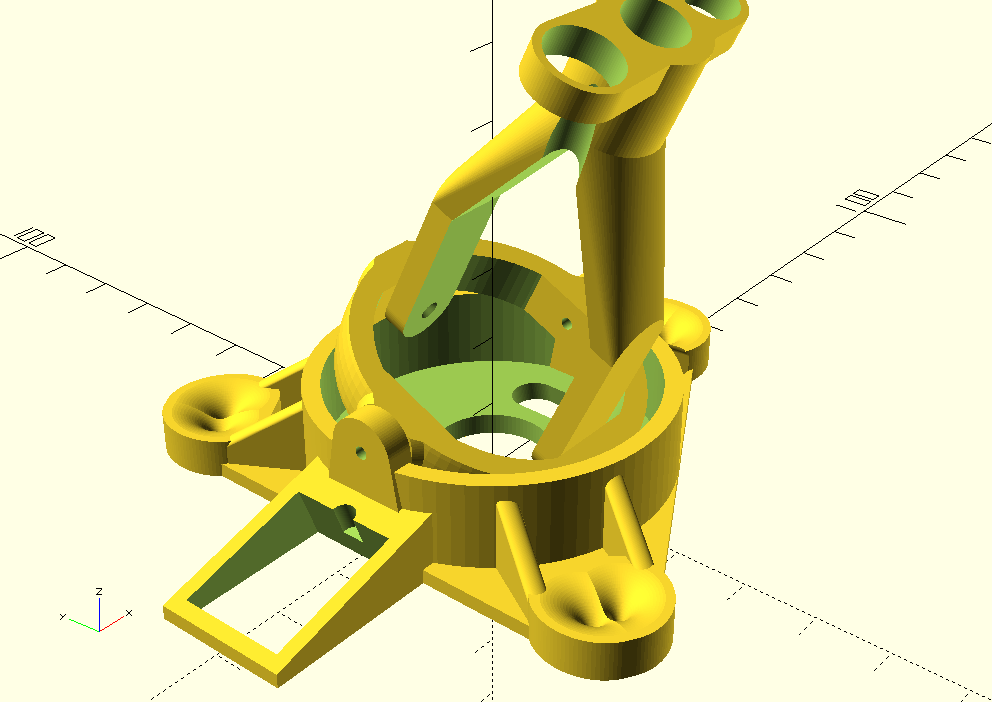
11/19/2017 at 22:45 • 0 commentsI've dropped moving the hotend inside the end effector for now.
Raising the pushrod joint to the top of the heatsink didn't work. No down-force on the inside edge when near the edge of the build area.. It has a new github branch if anyone wants to play around with it.
I was able to reduce the offset by about 1/3rd by moving it up so the hotend flange is up inside the U joint instead of being surface mounted on the bottom.
That was relatively easy. Added my part cooling fan mount while I was at it.
![]()
Printing the new parts.
Arcus-3D-C1 - Cable 3D printer
3D printable, Open Source Hardware, tripod kinematics, cable driven 3D printer