I finally have some time to cast the "head", that will connect the spindle to the Z-axis. This will be the last concrete cast.
I started by machining some steel stock to size and squareness.
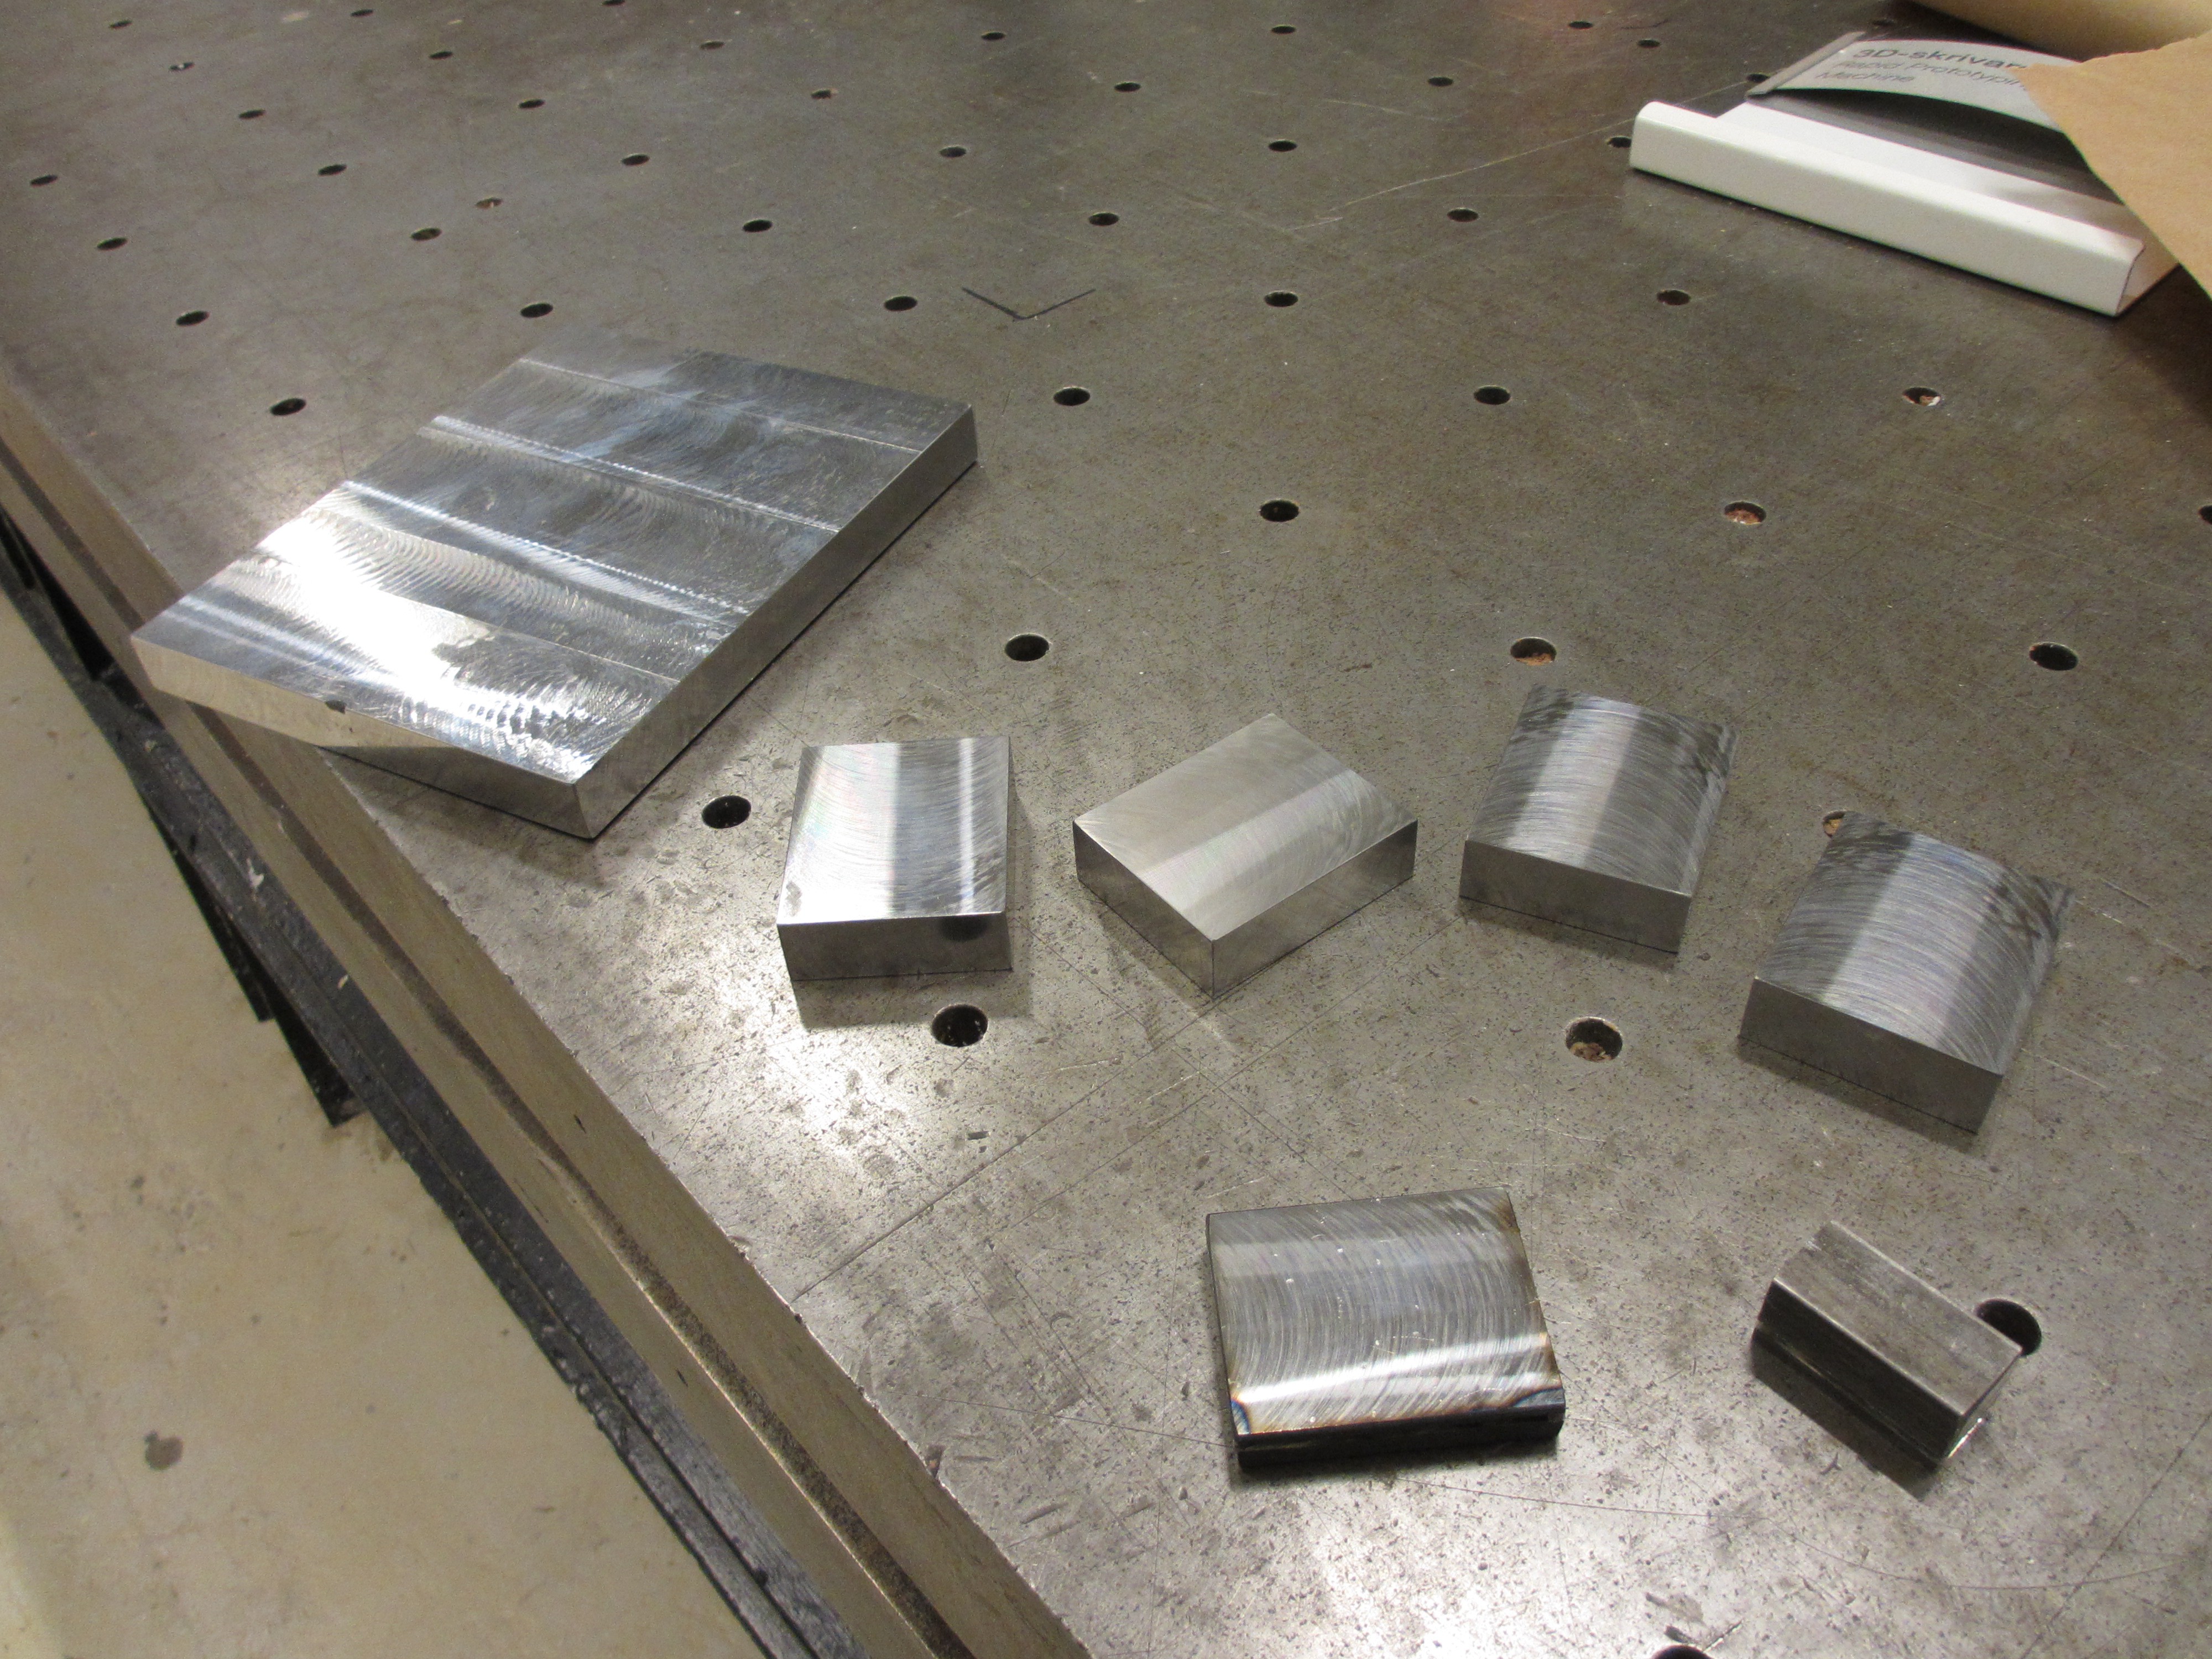
I then made a fixture (which I forgot to take a picture of) and tacked them together. Then I clamped it down firmly on the cast iron table before welding all the rebars, in an attempt to keep everything flat and straight. It didn't go as well as I had planned, but I'm glad I made an effort since I dread to think how it would have turned out otherwise. Since all the steel will be machined again after casting, It doesn't need to be perfect.

I then built a wooden box around this and poured the concrete. After pouring I covered it with plastic to keep it from drying out too quickly, and left it over night at room temperature for an initial cure. I then started heat treating it. My scheme goes as follows:
-Approx 72 hours in 60 degrees centigrade to quickly cure the concrete and gain full strength. Important to keep it covered so it doesn't dry out! The water is needed in the curing process.
-Let it cool before disassembling the mold, then let it dry for a few days in room temperature. Drying it carefully in the beginning should prevent cracking.
-After a few days, place it in the oven at 40-50 degrees centigrade for 48 hours to get the last moisture out. Some minor surface cracks may appear after this stage, but that's acceptable.
-Allow it to cool, then coat it with epoxy to seal it.
-Let it rest for a few days to allow the water still inside to distribute itself evenly.
-Ready for machining! The heat treatment process should prevent the concrete from shrinking and distorting as it ages.
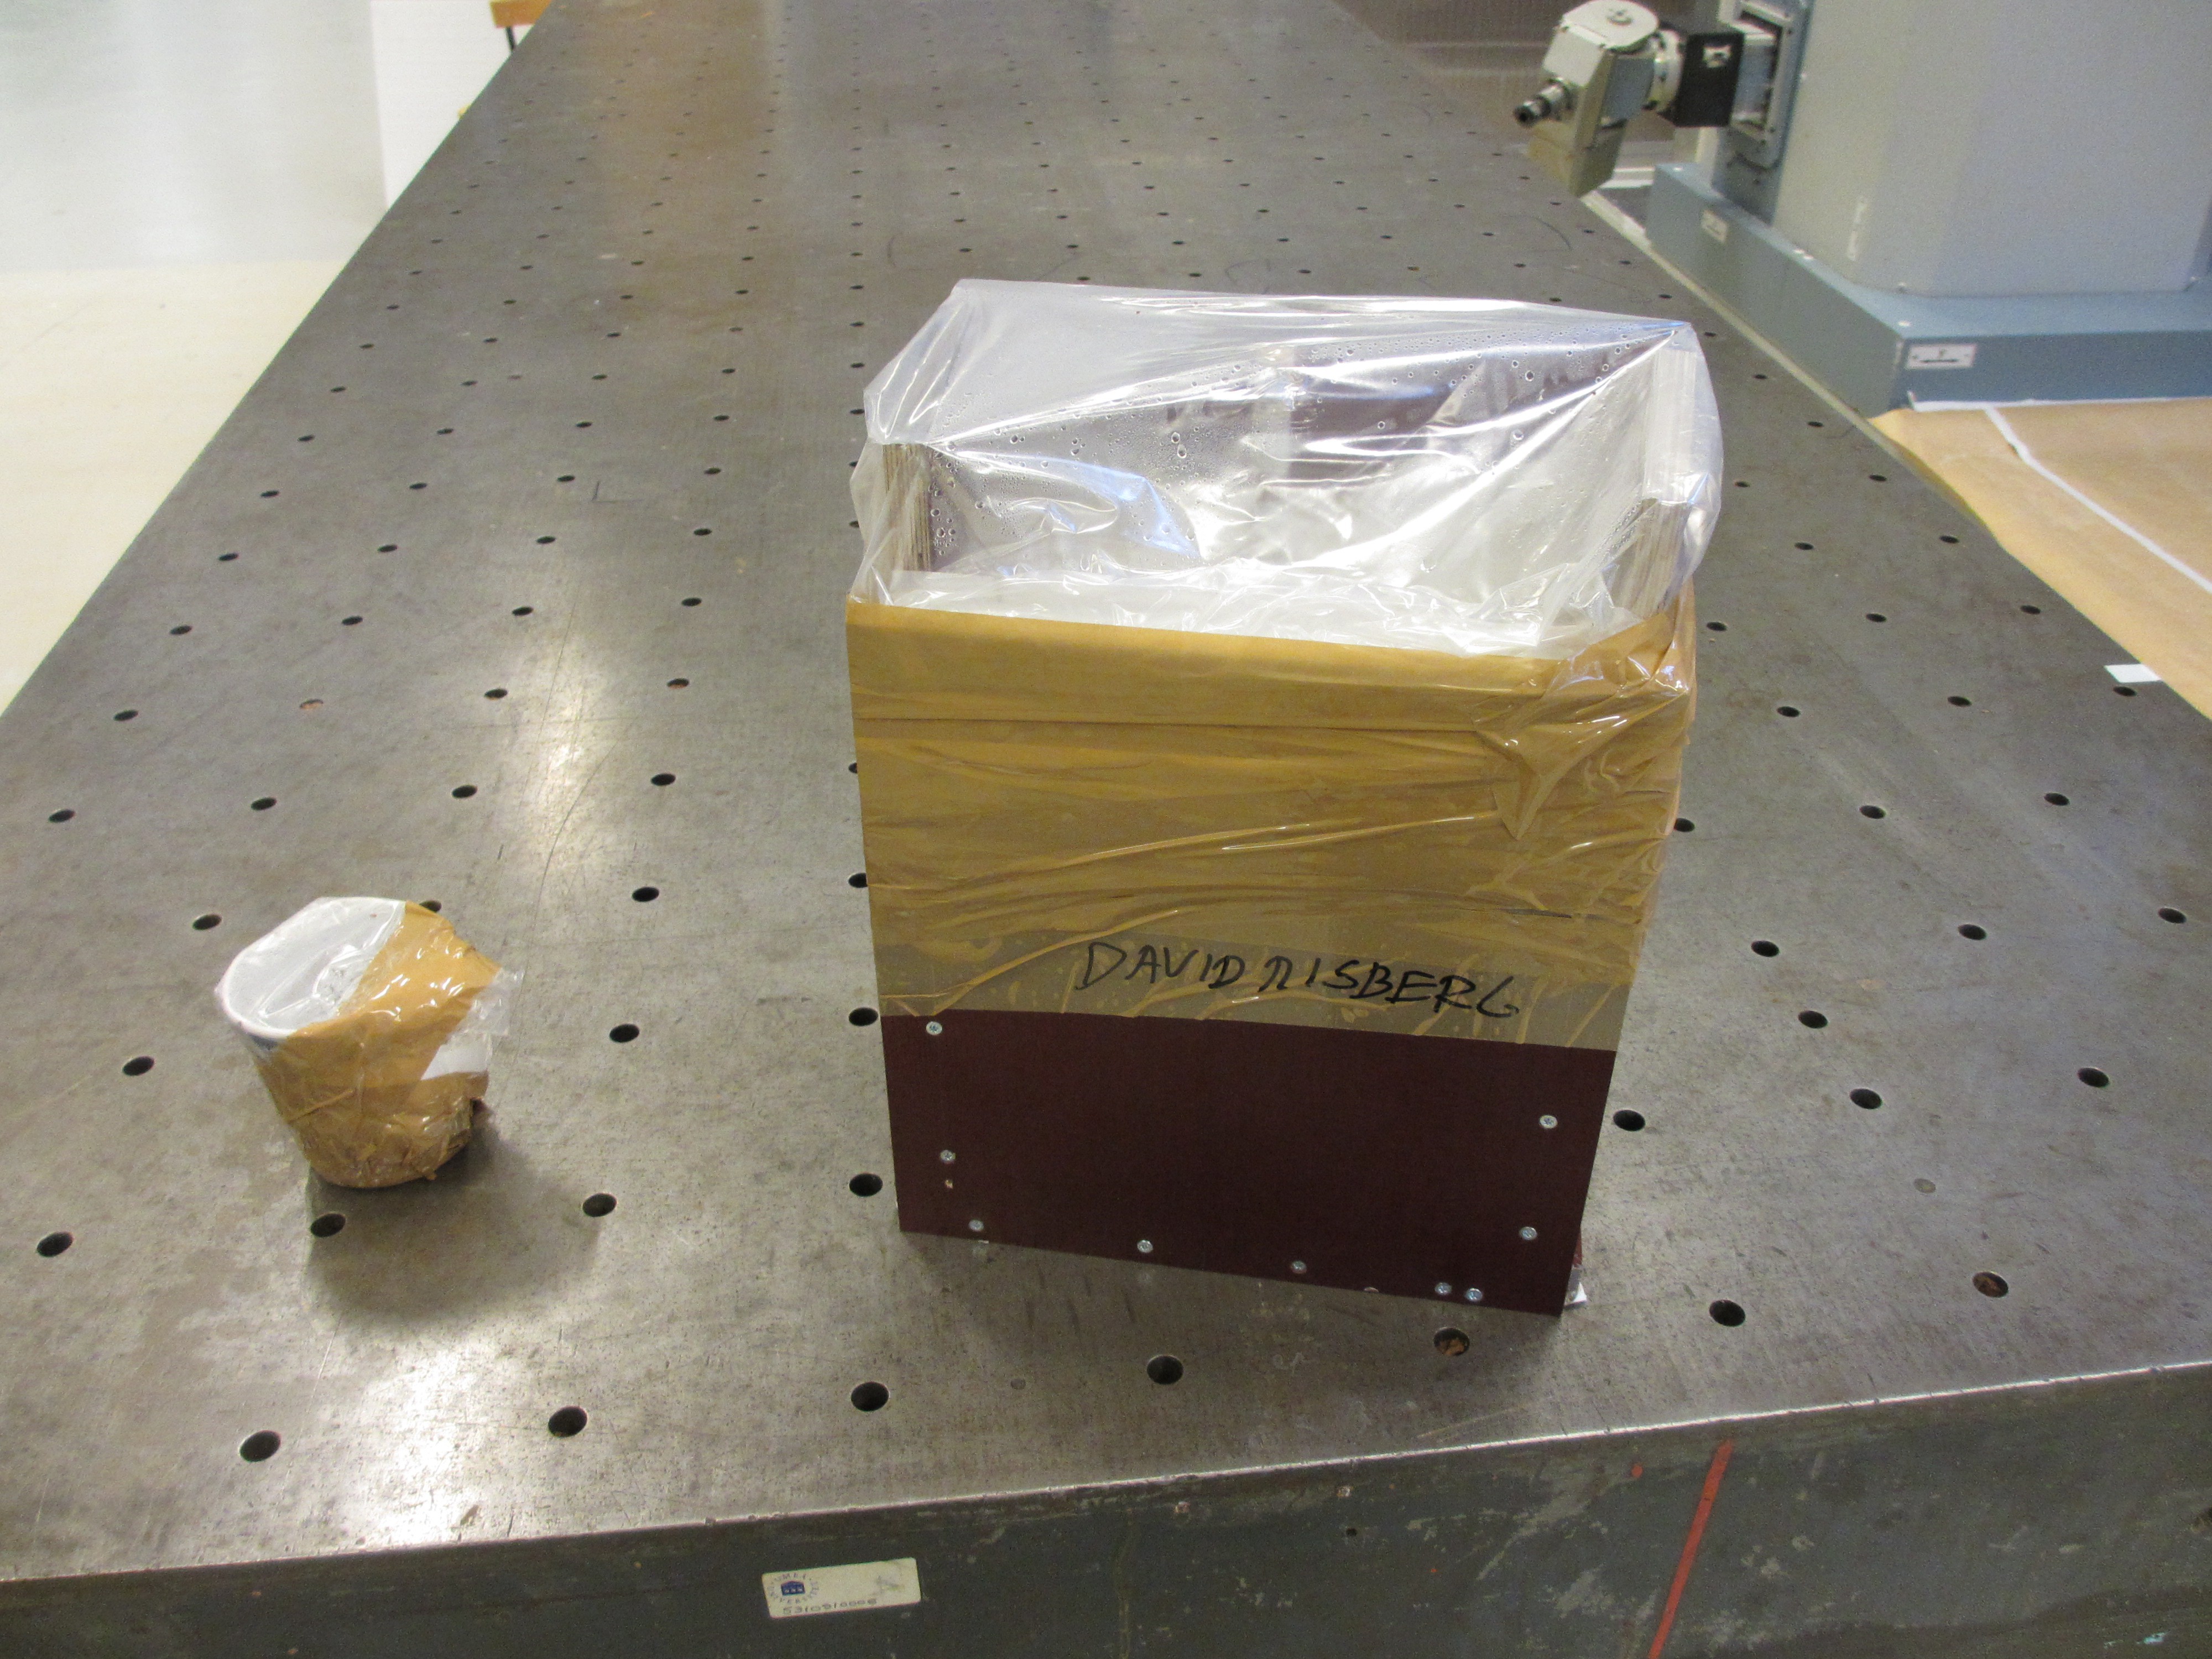
This picture is a fast forward to after the first heat treatment stage. On the left is a paper cup with concrete from the same batch. It will go through the same heat treatment and eventually be used for quality control (I'll crush it with a hydraulic press to test the strength and then inspect the internal structure).
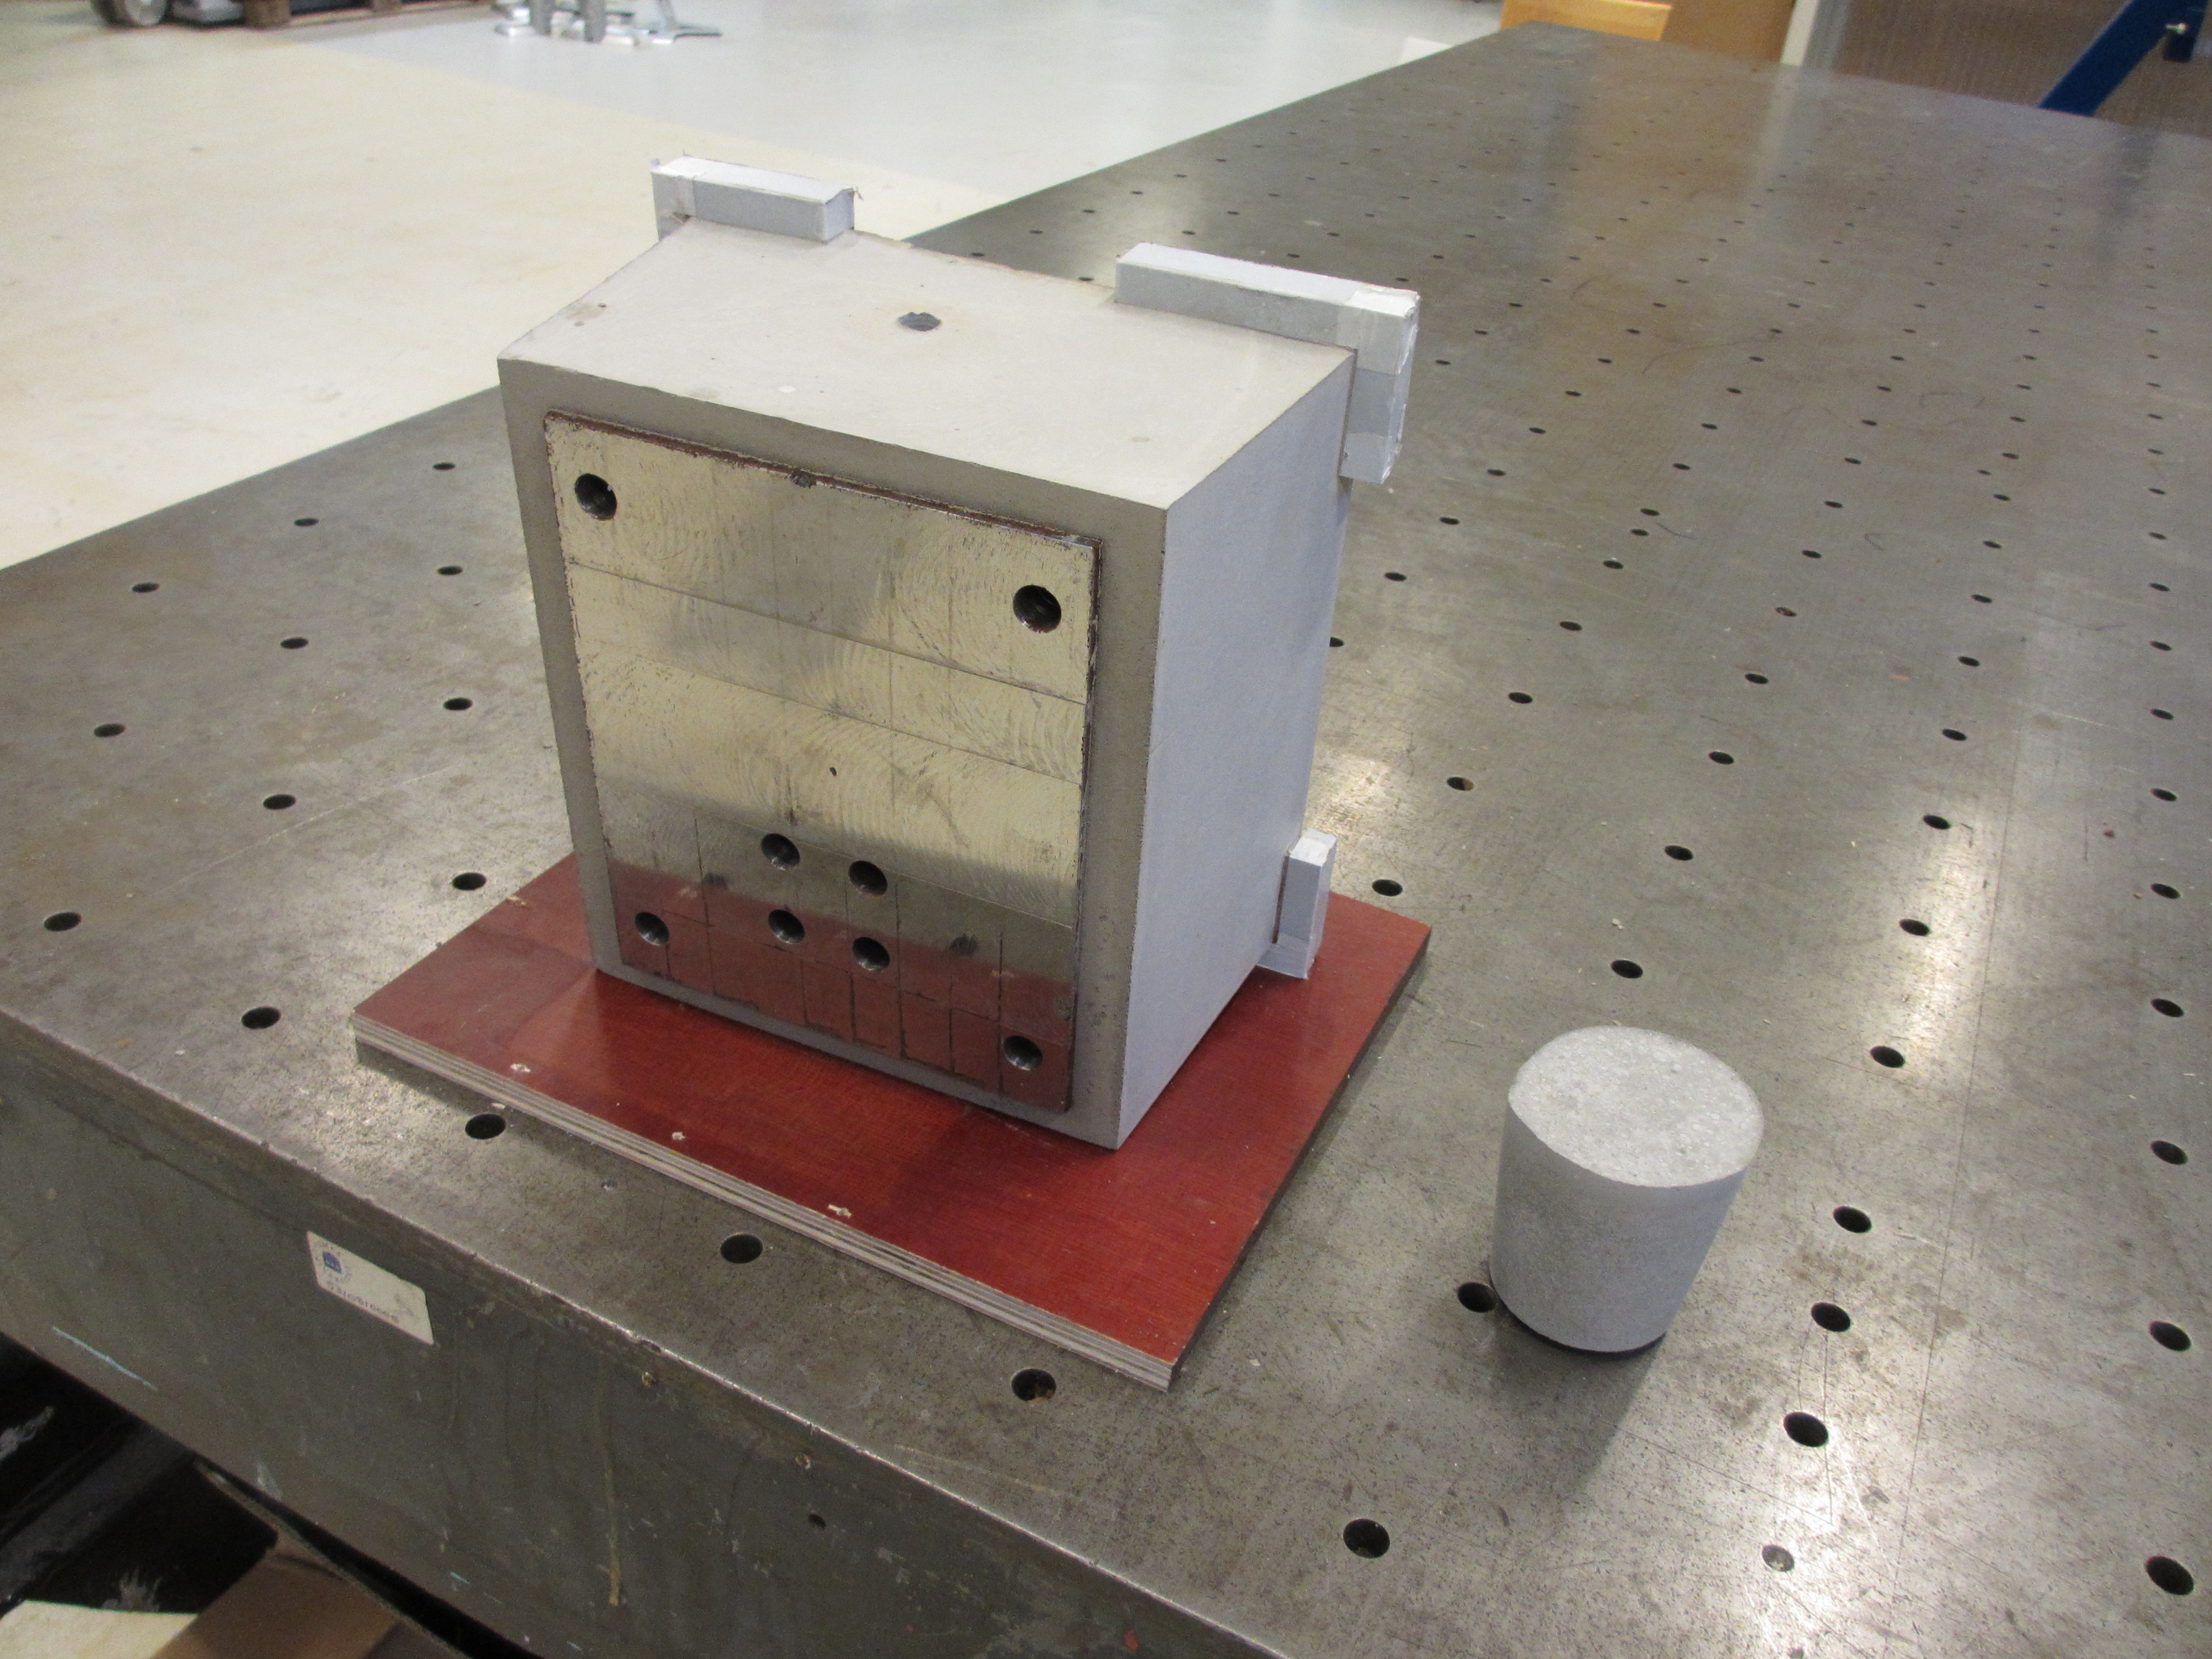
Right out of the mold. This was followed by a few days of drying in room temperature, and then a few days of accelerated drying at 40 degrees centigrade. Finally I painted it with a layer of epoxy and let it rest for another few days. After that it was time to start machining:
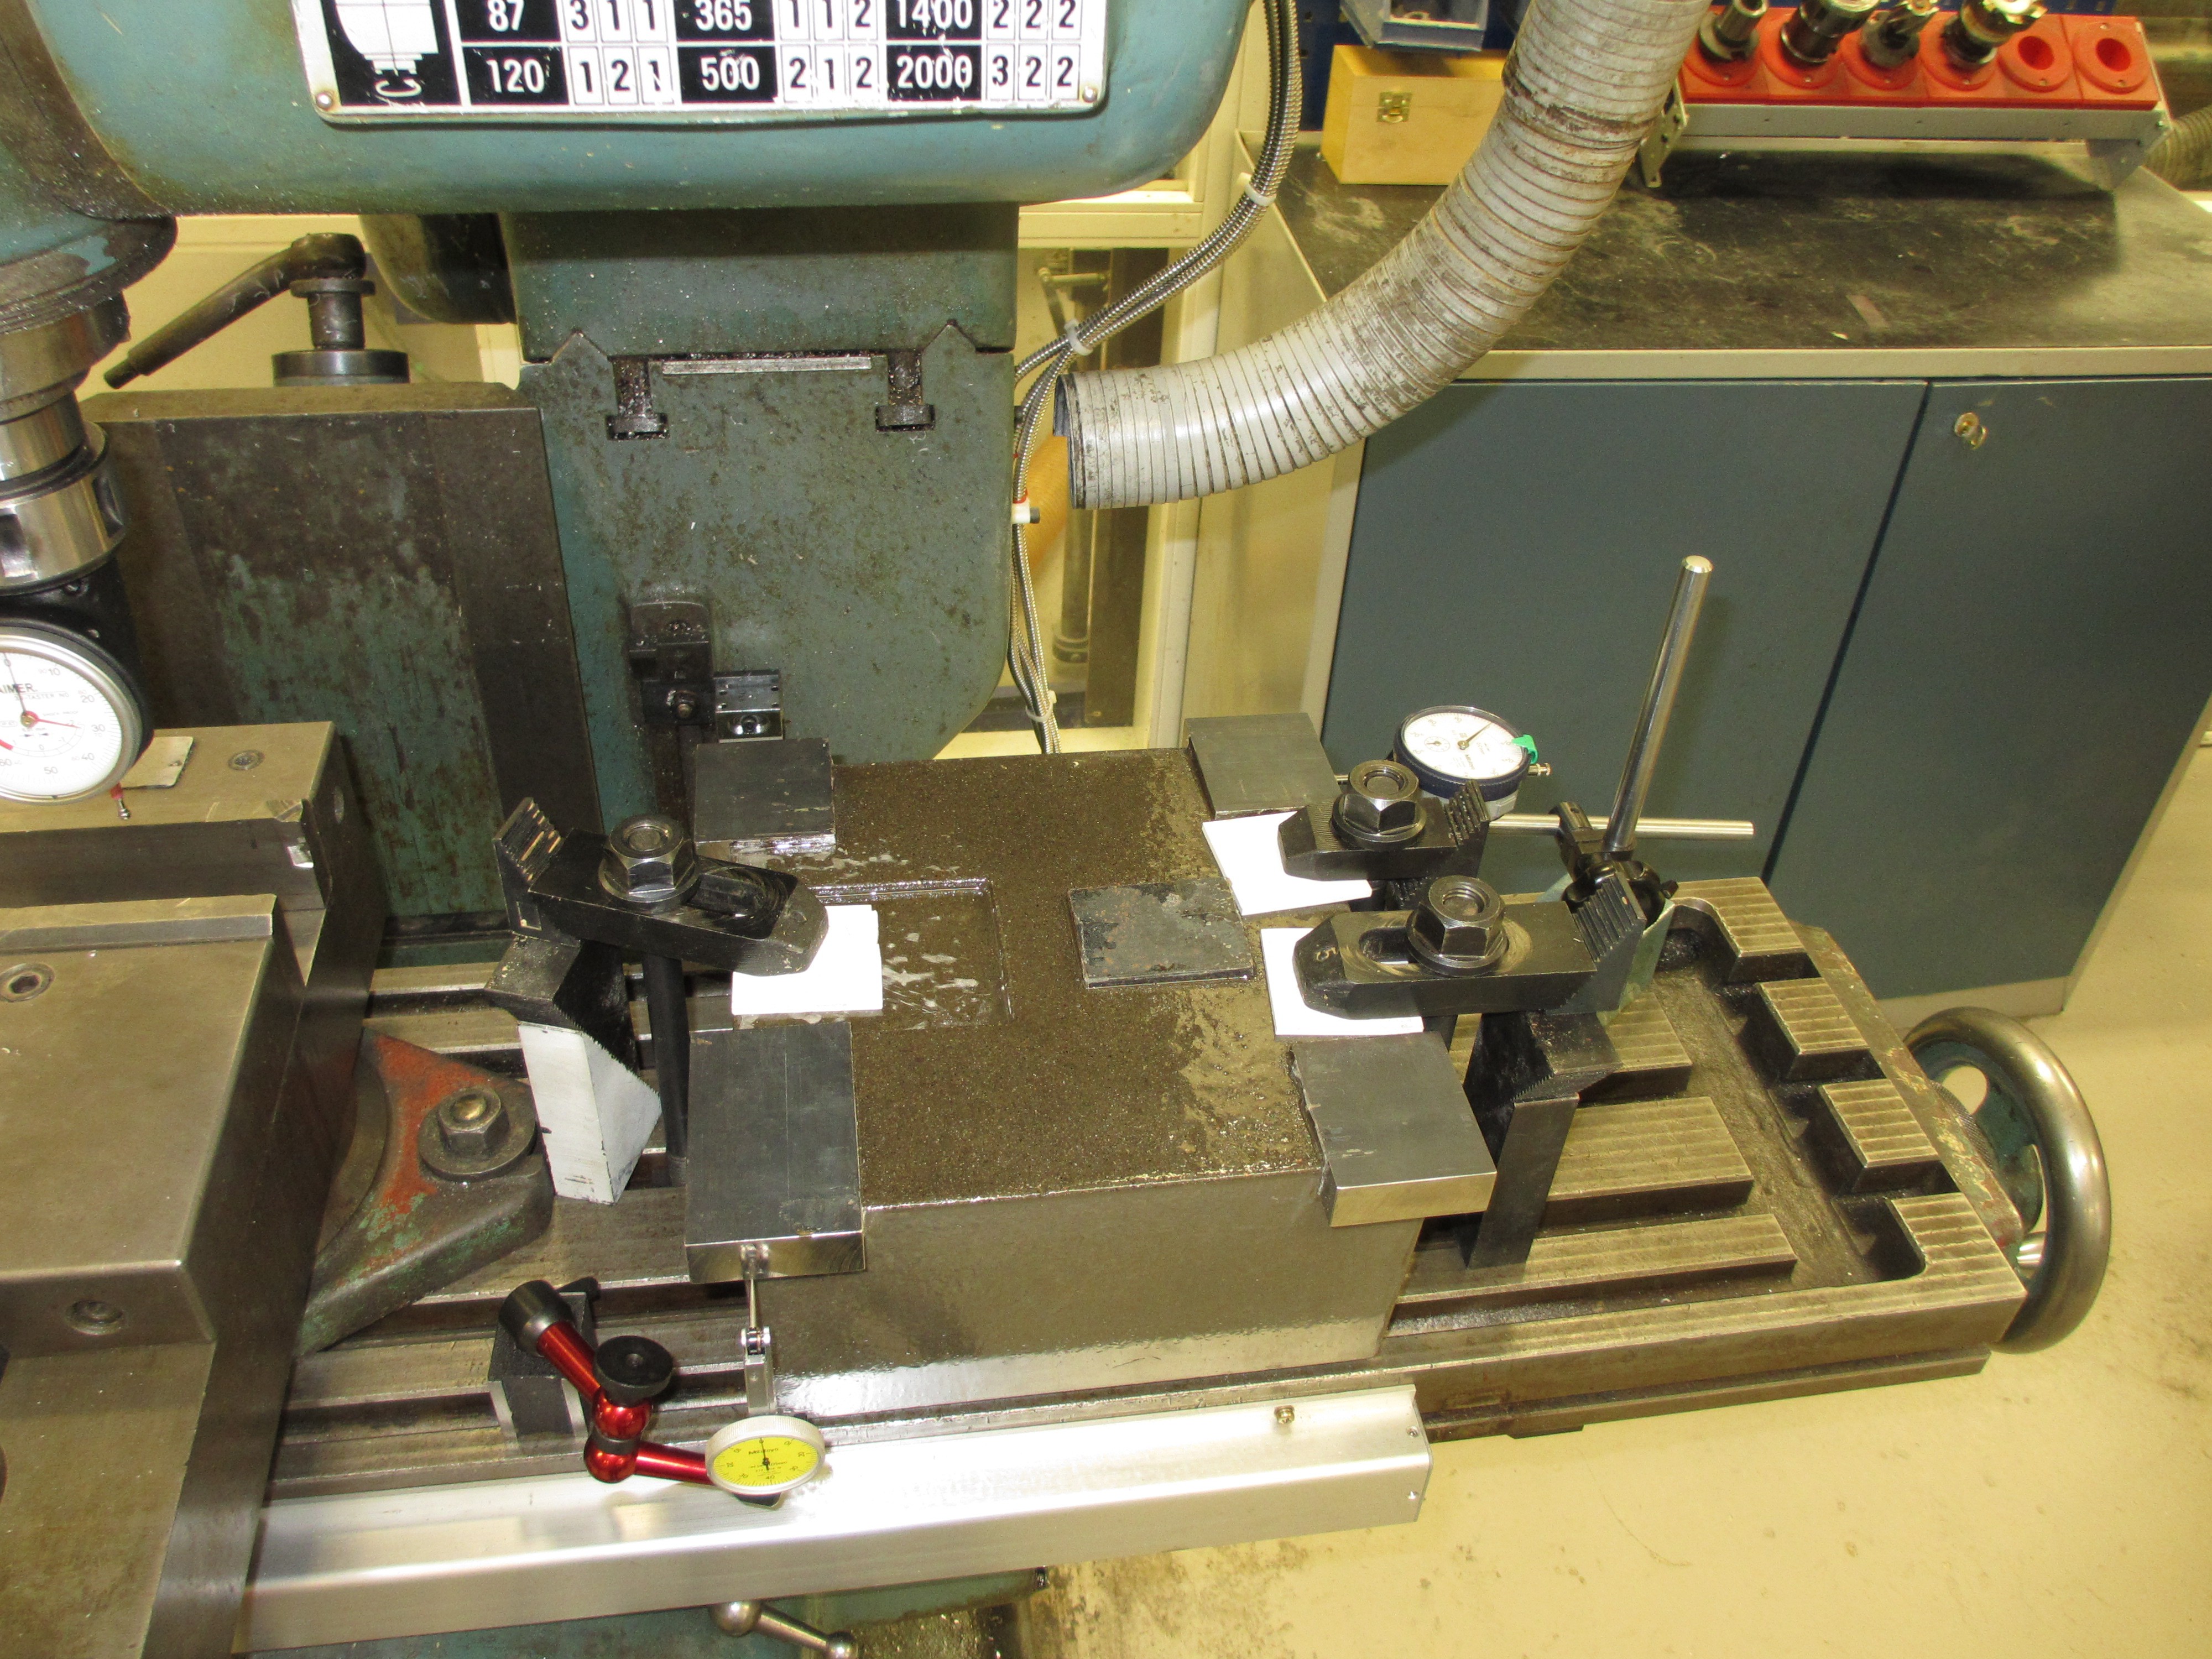
As usual I started by clamping it down on three points only to avoid twisting the block (there are three small patches of aluminium between the bottom face and the milling table). I then faced all the metal blocks on both sides. After facing I started drilling all the holes for mounting the rail carriages, ball nuts, and spindle. This was a bit of a hazzle since the milling machine I'm using did not have enough y-axis travel to drill all holes at once. So I had to release the workpiece, move it 50 mm, and realign it, which is not ideal... But here we are, the finished result:
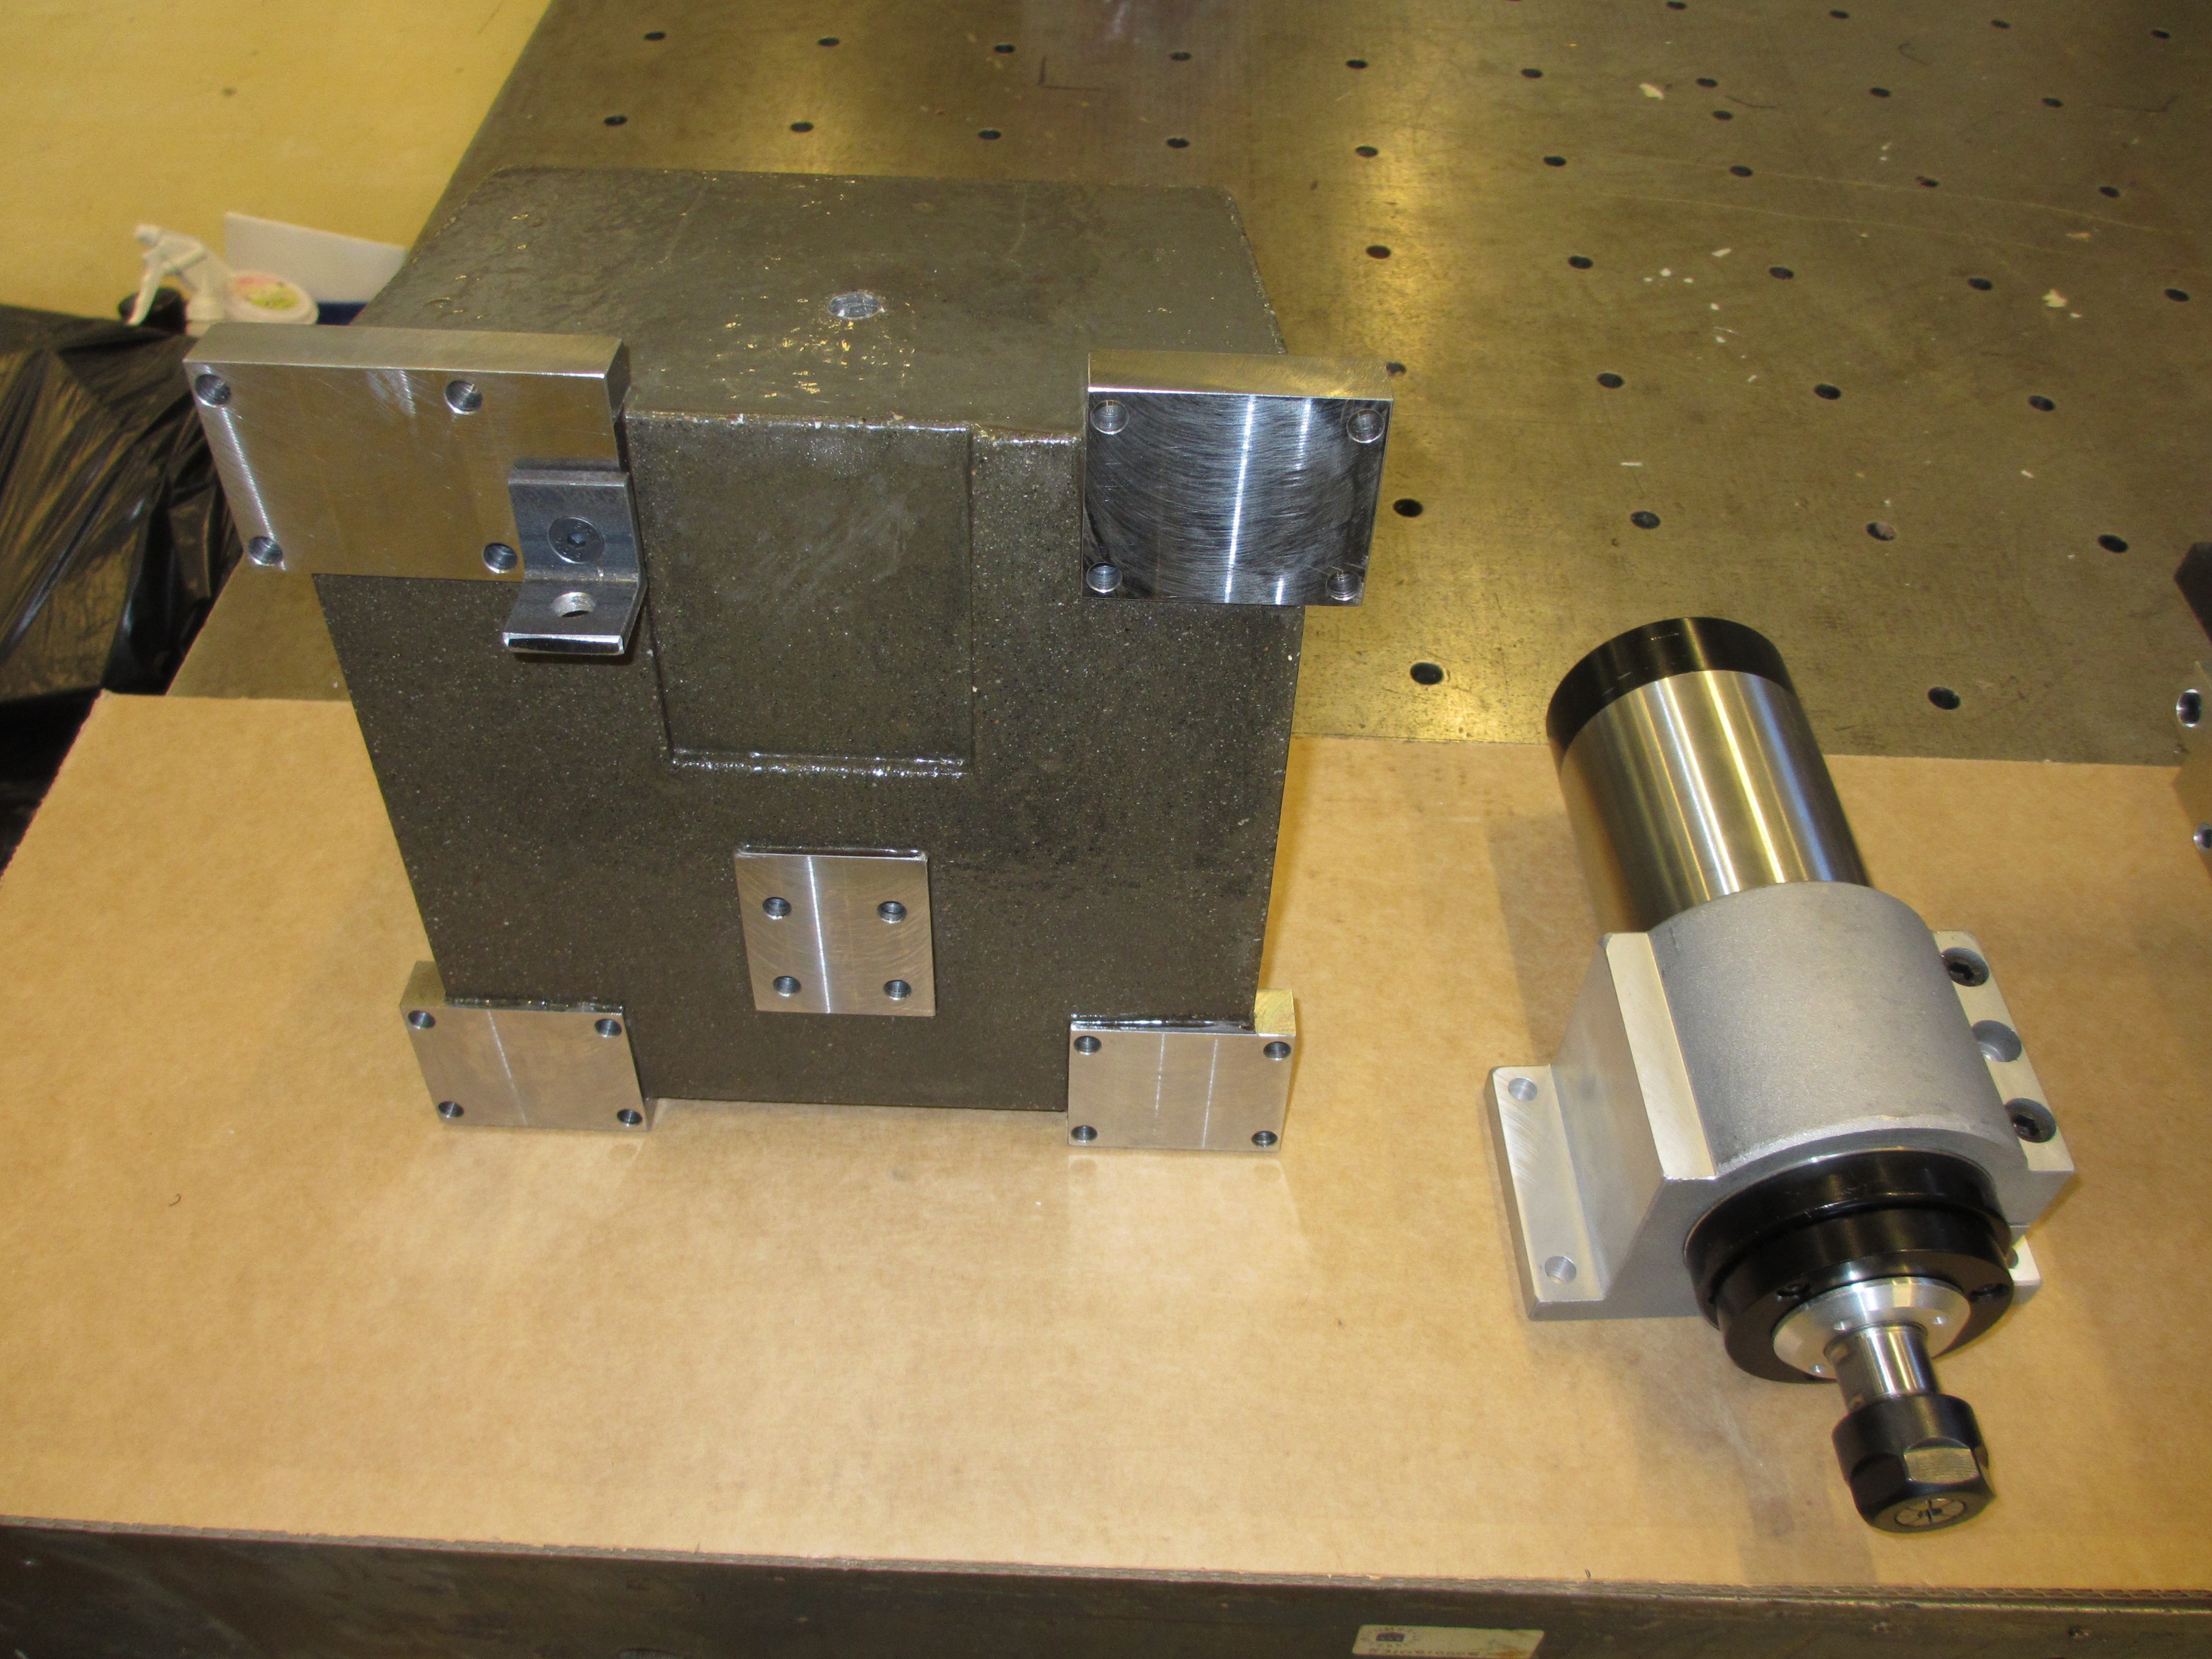
The small piece of angle iron is a mount for a gas spring. I intend to use one to counteract the weight of the concrete block and the spindle (which weighs about 24kg). But it's quite expensive, so I'll try without it first and evaluate the performance. If I find that acceleration and speed is suffering by the weight, or that the spindle drops by itself when the steppers motors are powered off, I'll buy the gas spring and mount it.
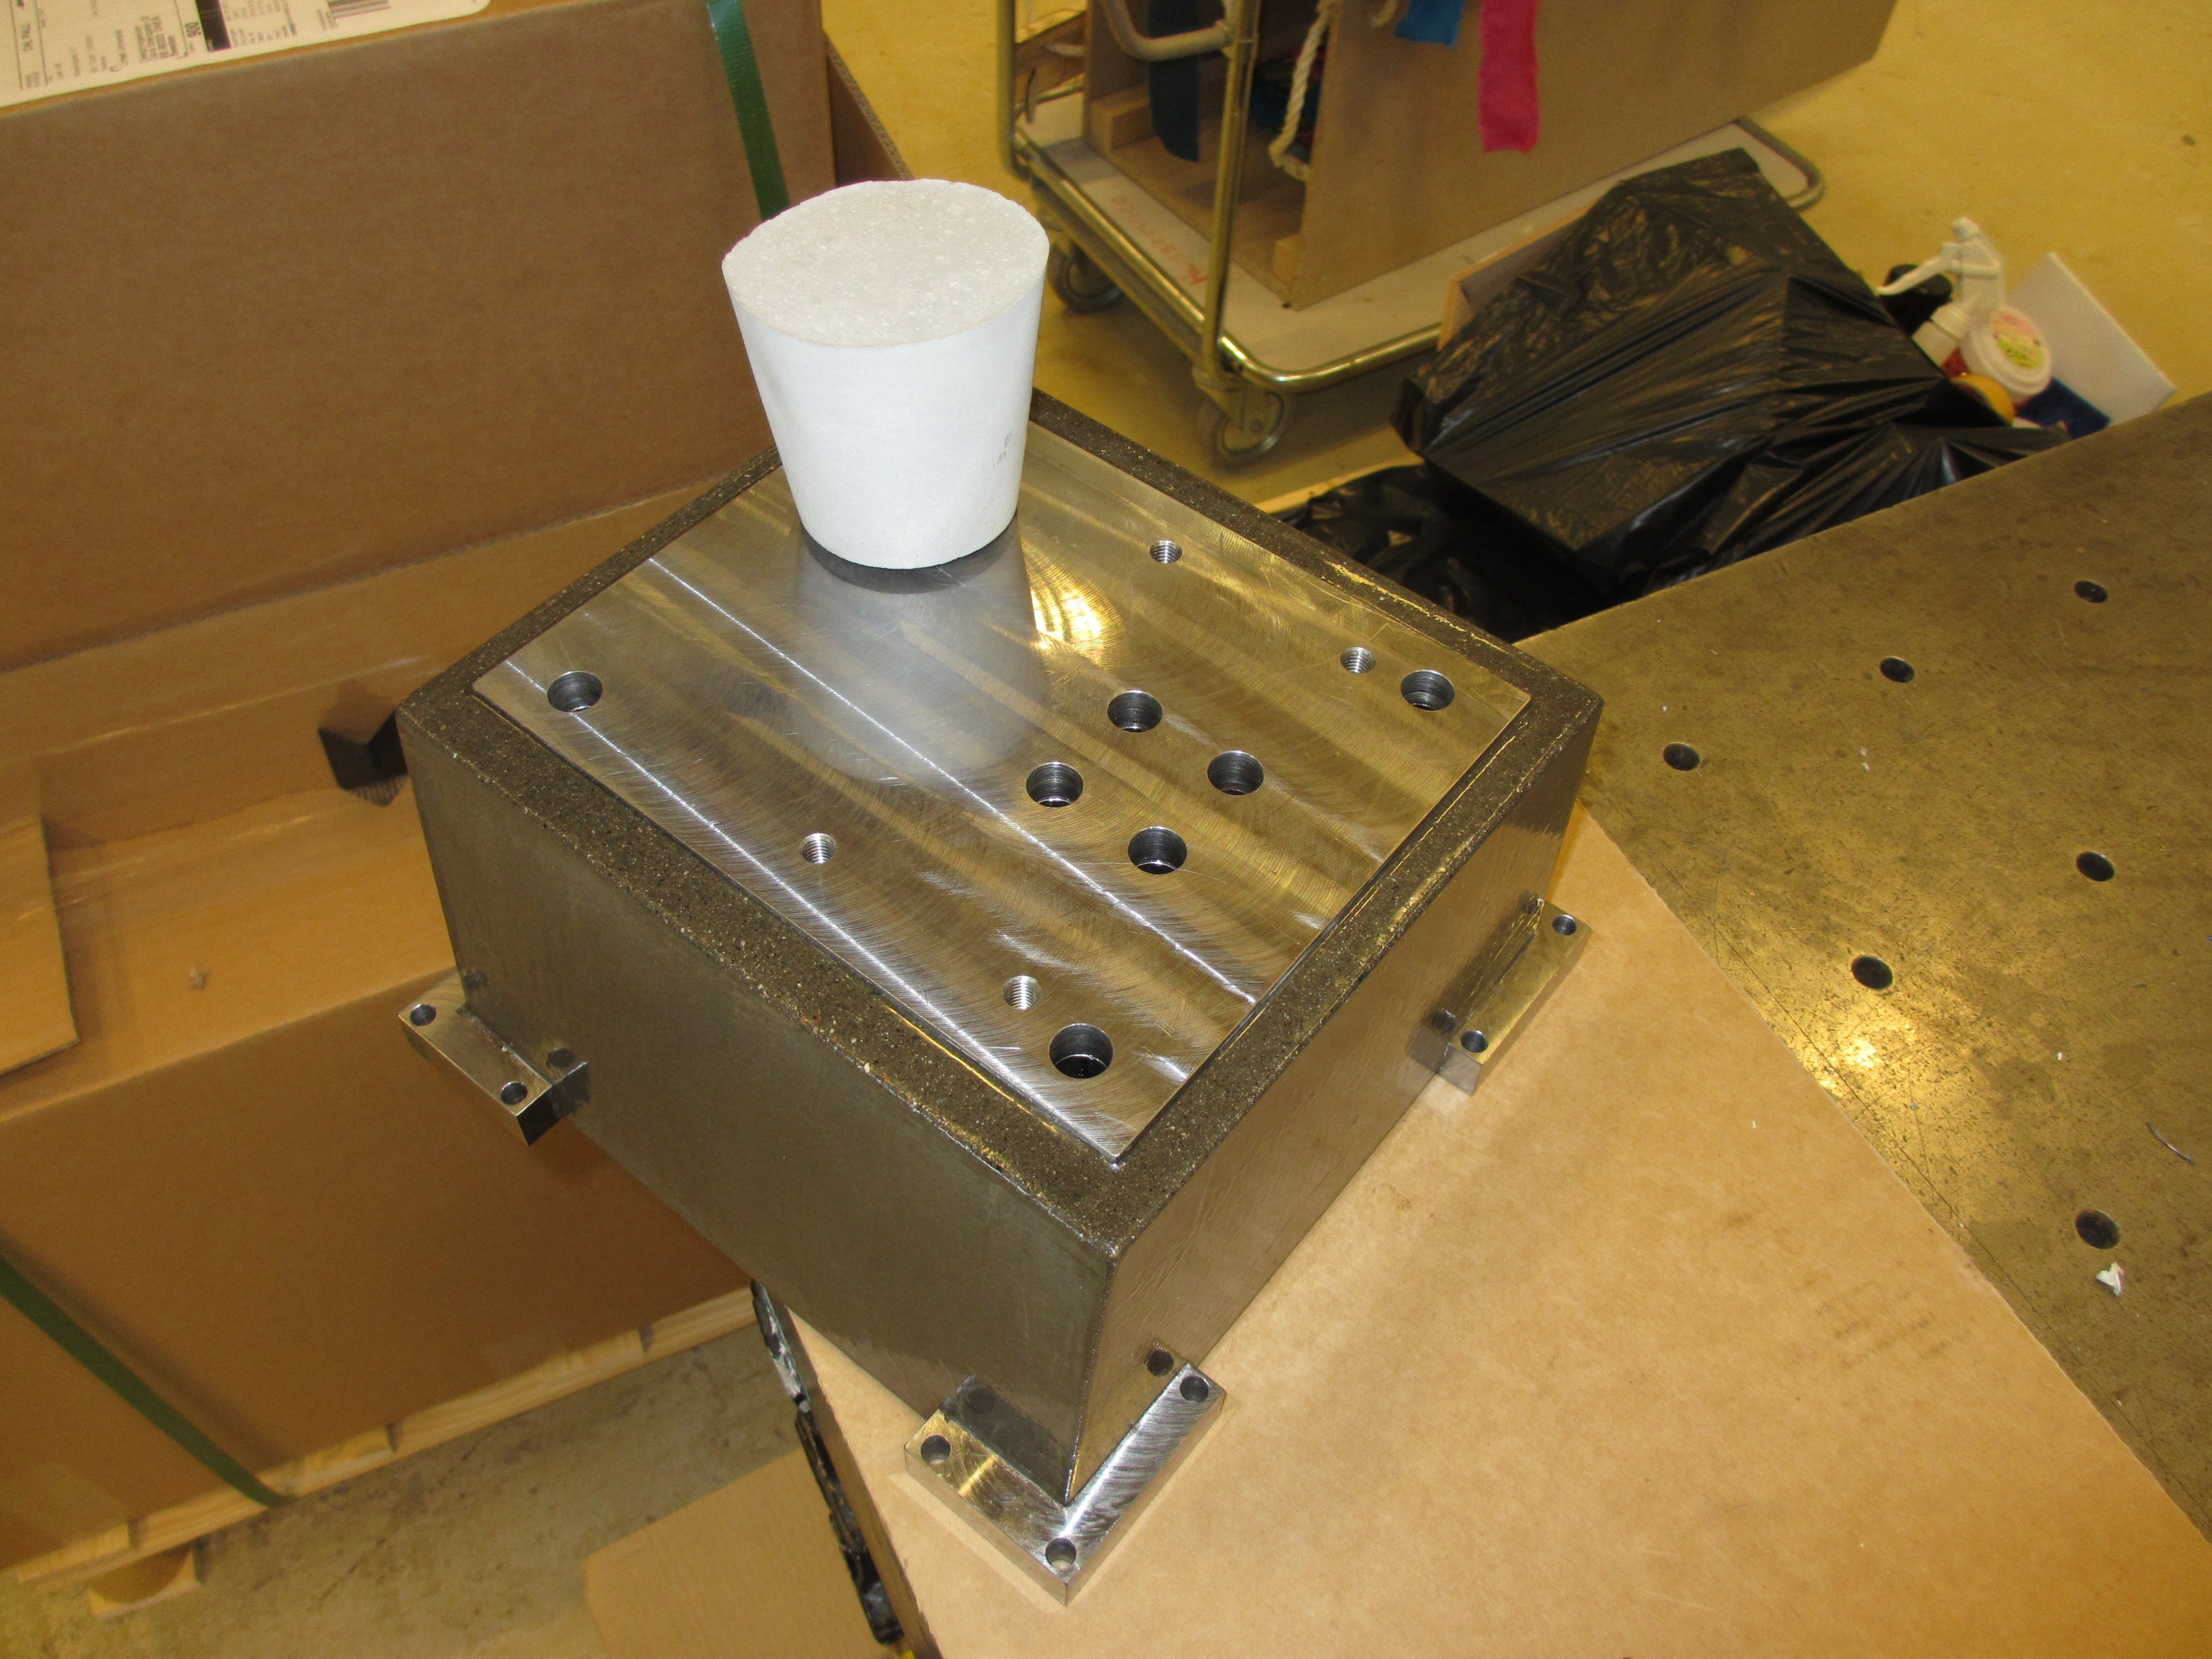
Last up is a picture of the other side. The reference cast is placed on top to illustrate the surface finish (notice how it is reflected in the mounting surface for the spindle).
Discussions
Become a Hackaday.io Member
Create an account to leave a comment. Already have an account? Log In.