This is a minor update with no big changes. But I've started assembling the machine a bit, mostly because it takes up so much space when spread in pieces.
First up is placing the base on the carriage, then lifting the tower in place. The tower weighs "only" 80 kg, so it could be done by hand. But a much safer way is to use some kind of lifting equipment. I used a forklift.
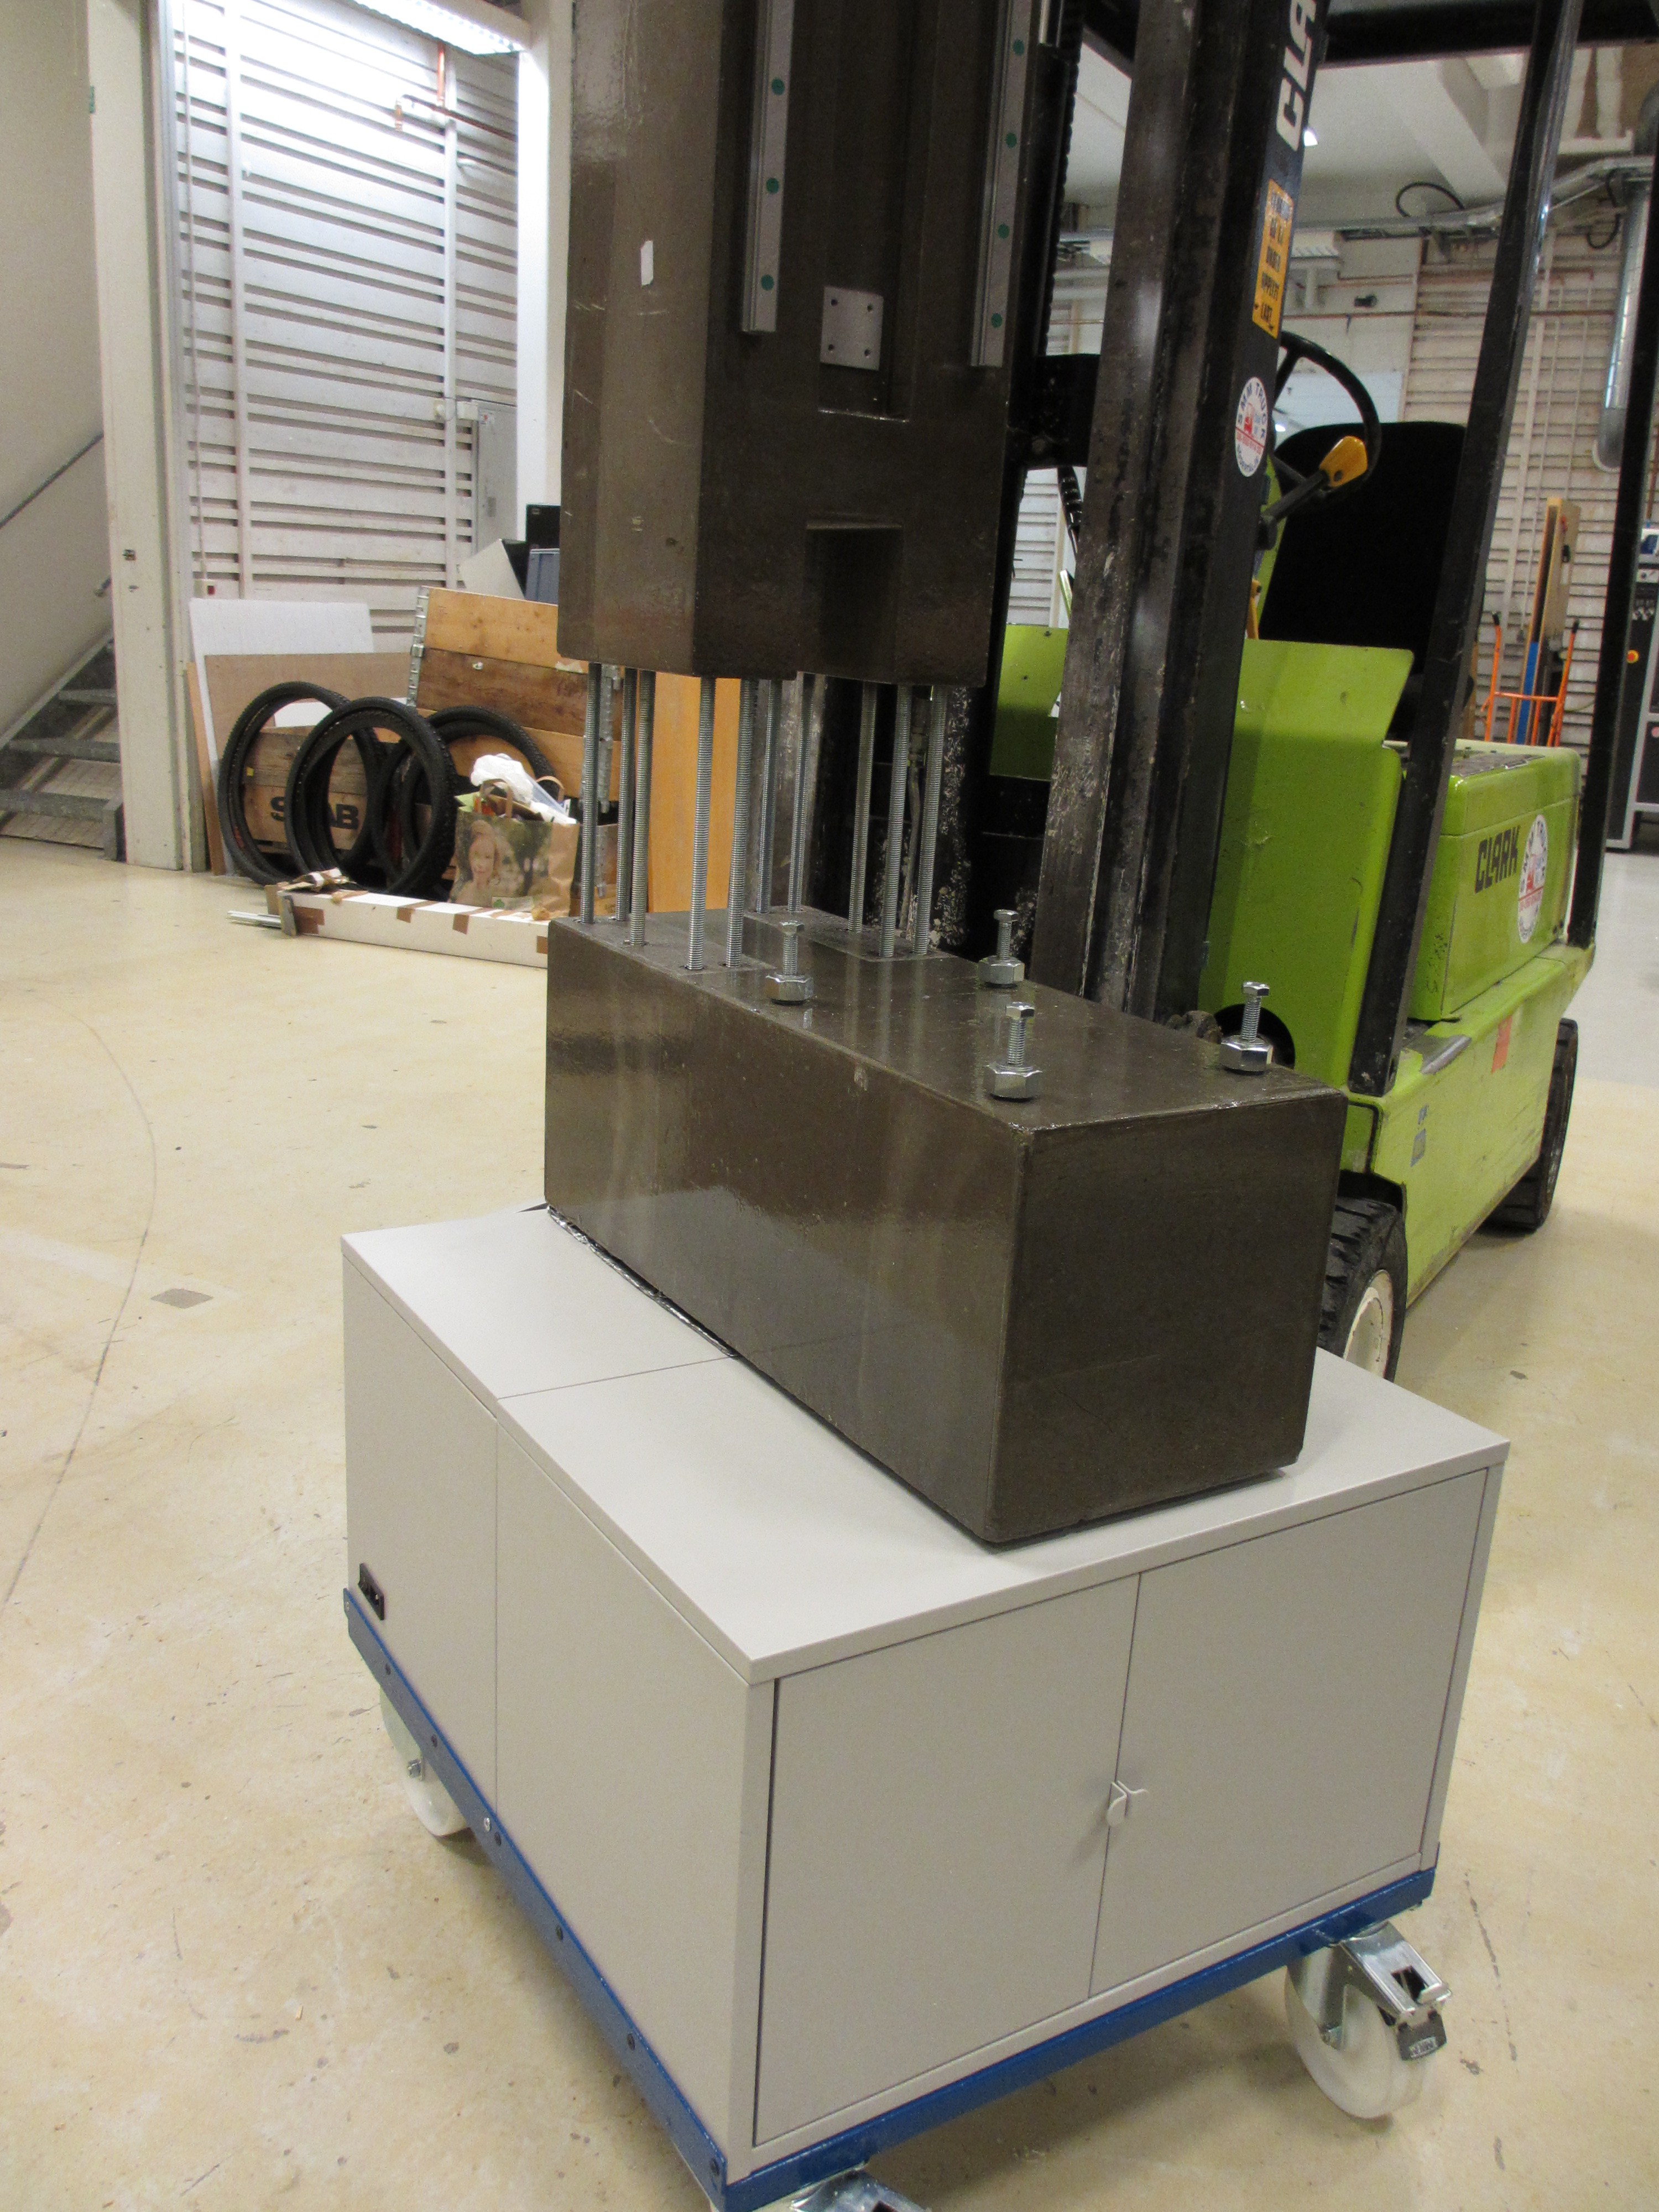
Next picture is a closeup from the back. Between the base and the carriage you'll see something silvery. This is a thin blanket with aluminium foil on both sides. It insulates the base from the electronics enclosure to prevent heat from affecting the base during machining. You may also notice that the base is "hovering" about 10mm above the carriage. It is actually standing on three plastic feet. Having only three support points prevents twisting of the machine base when the floor is not flat and the carriage is twisting. This is quite important since the machine is so heavy.
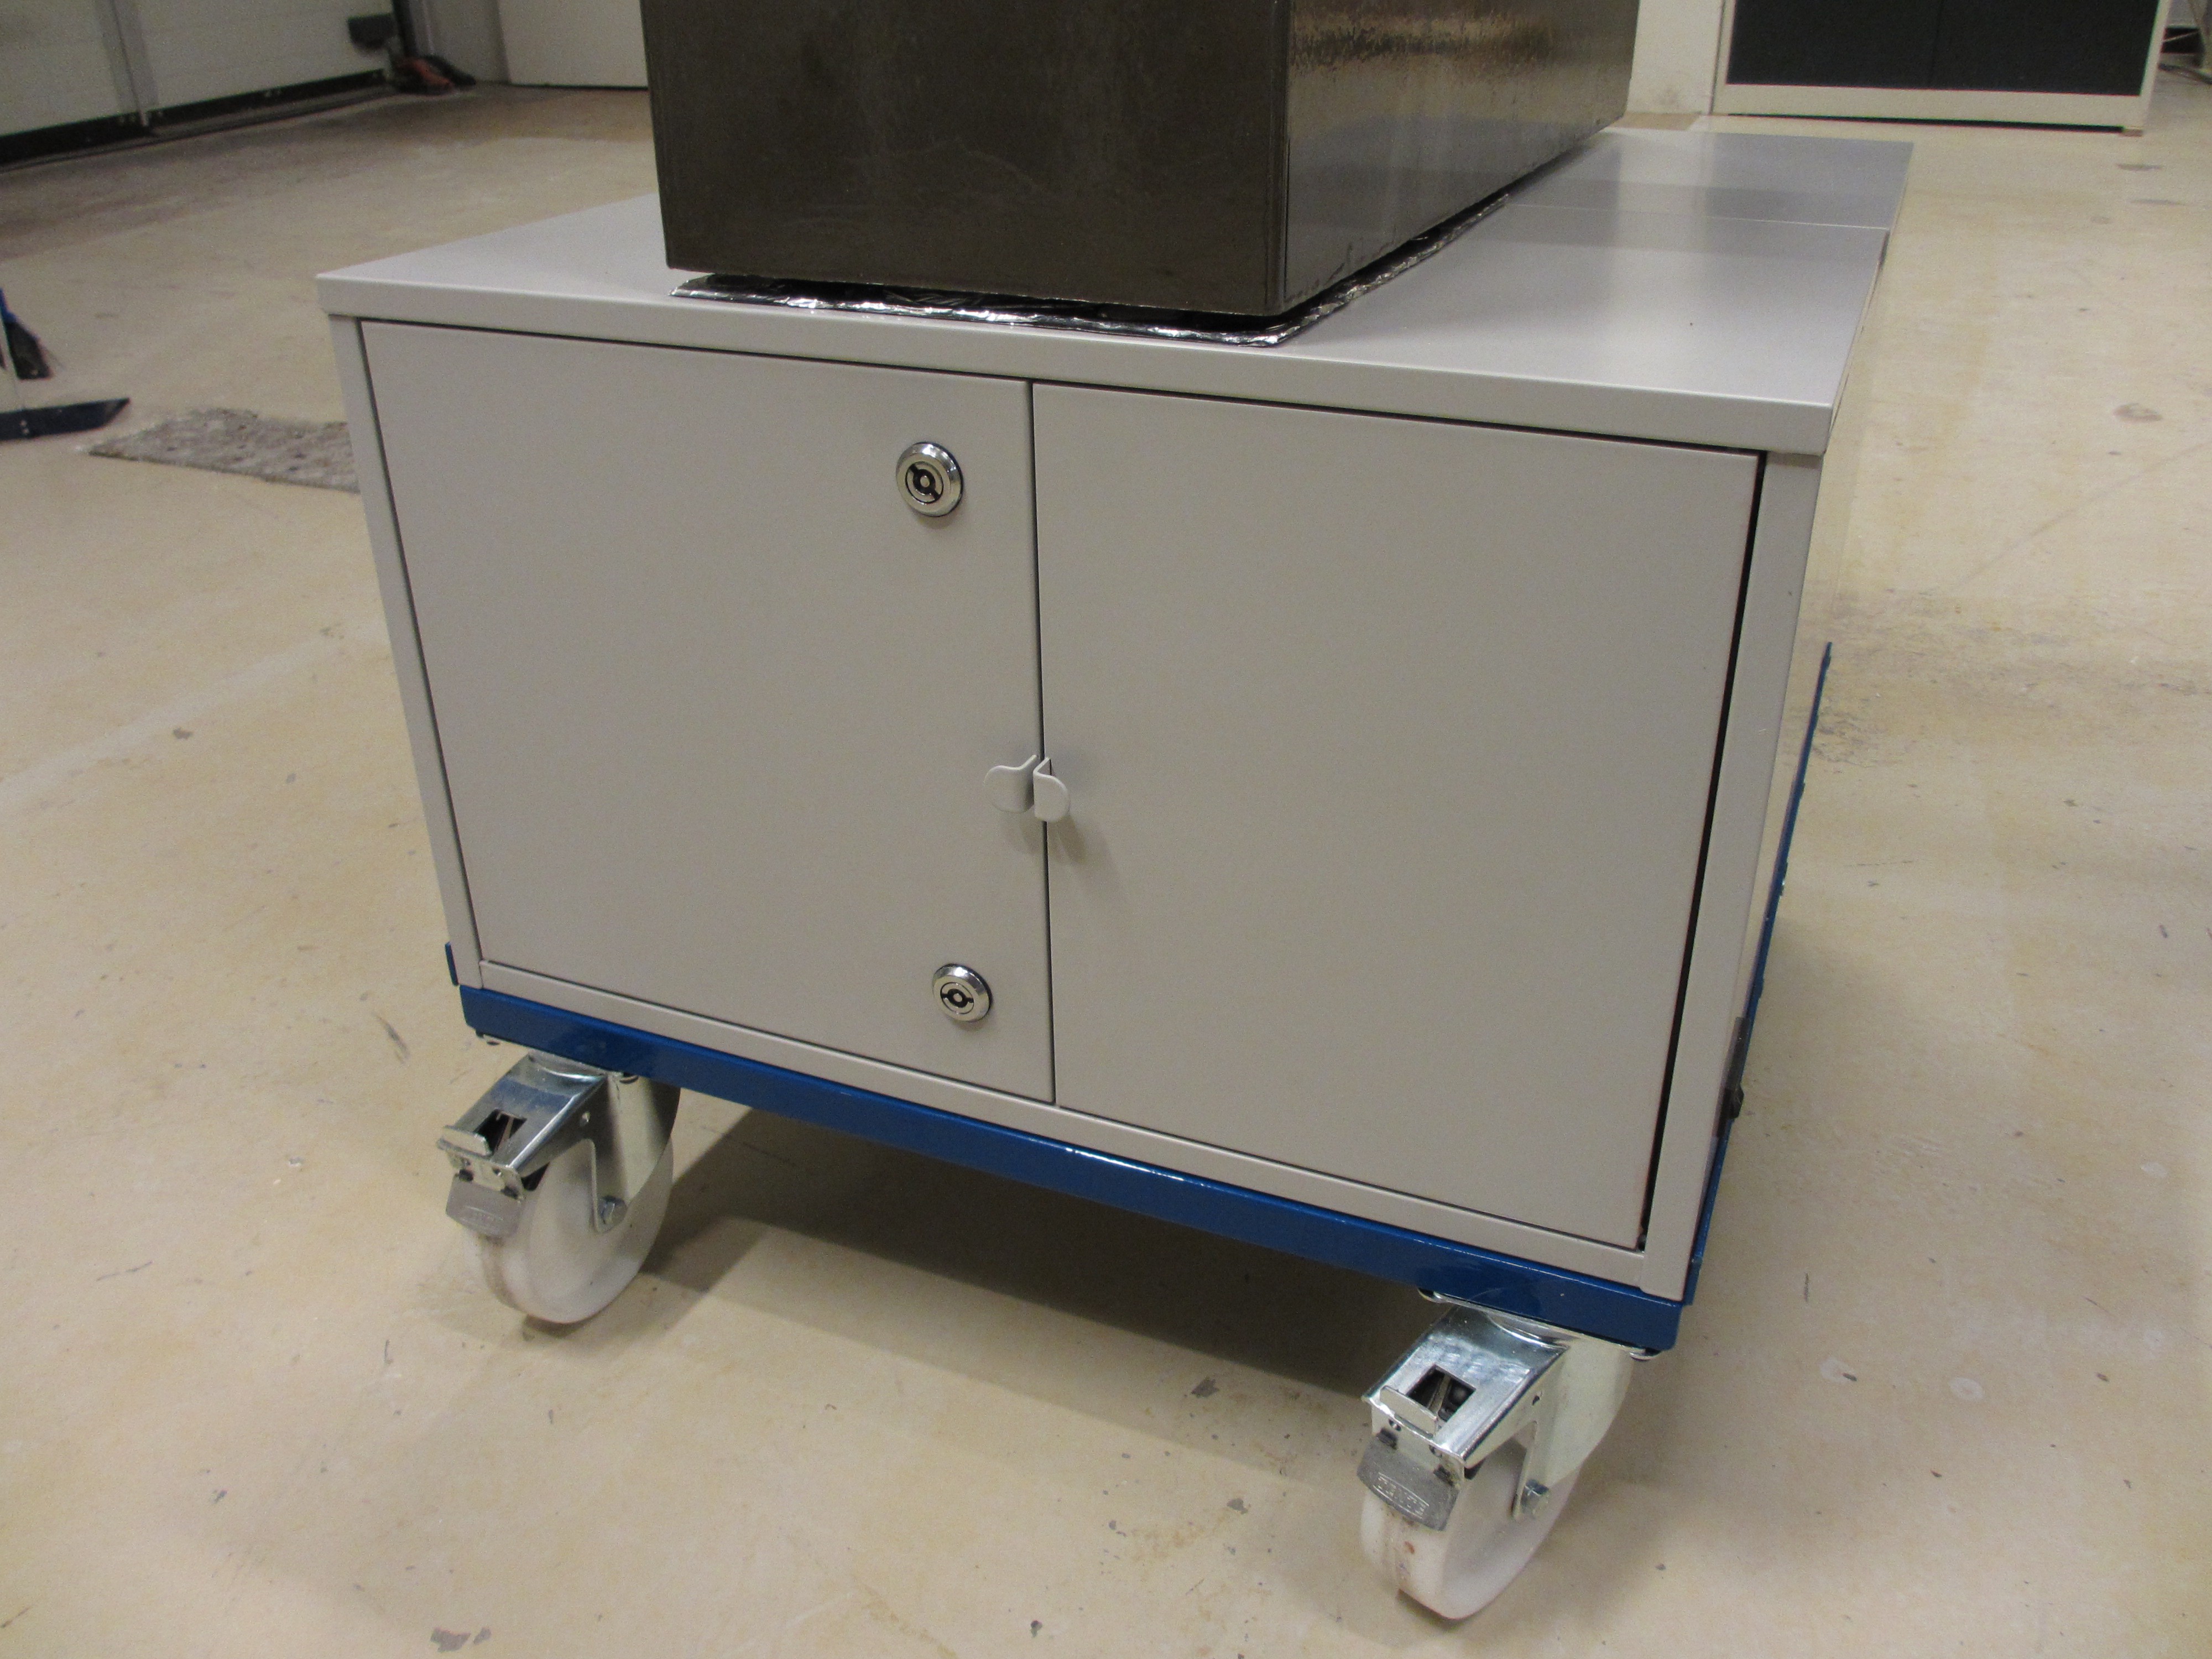
Finally you may notice that the locks for the electronics enclosure are now in place, which are needed for legal reasons (they also do a lot for the overall quality impression, don't you think?).
After some more assembly, this is how it looks:
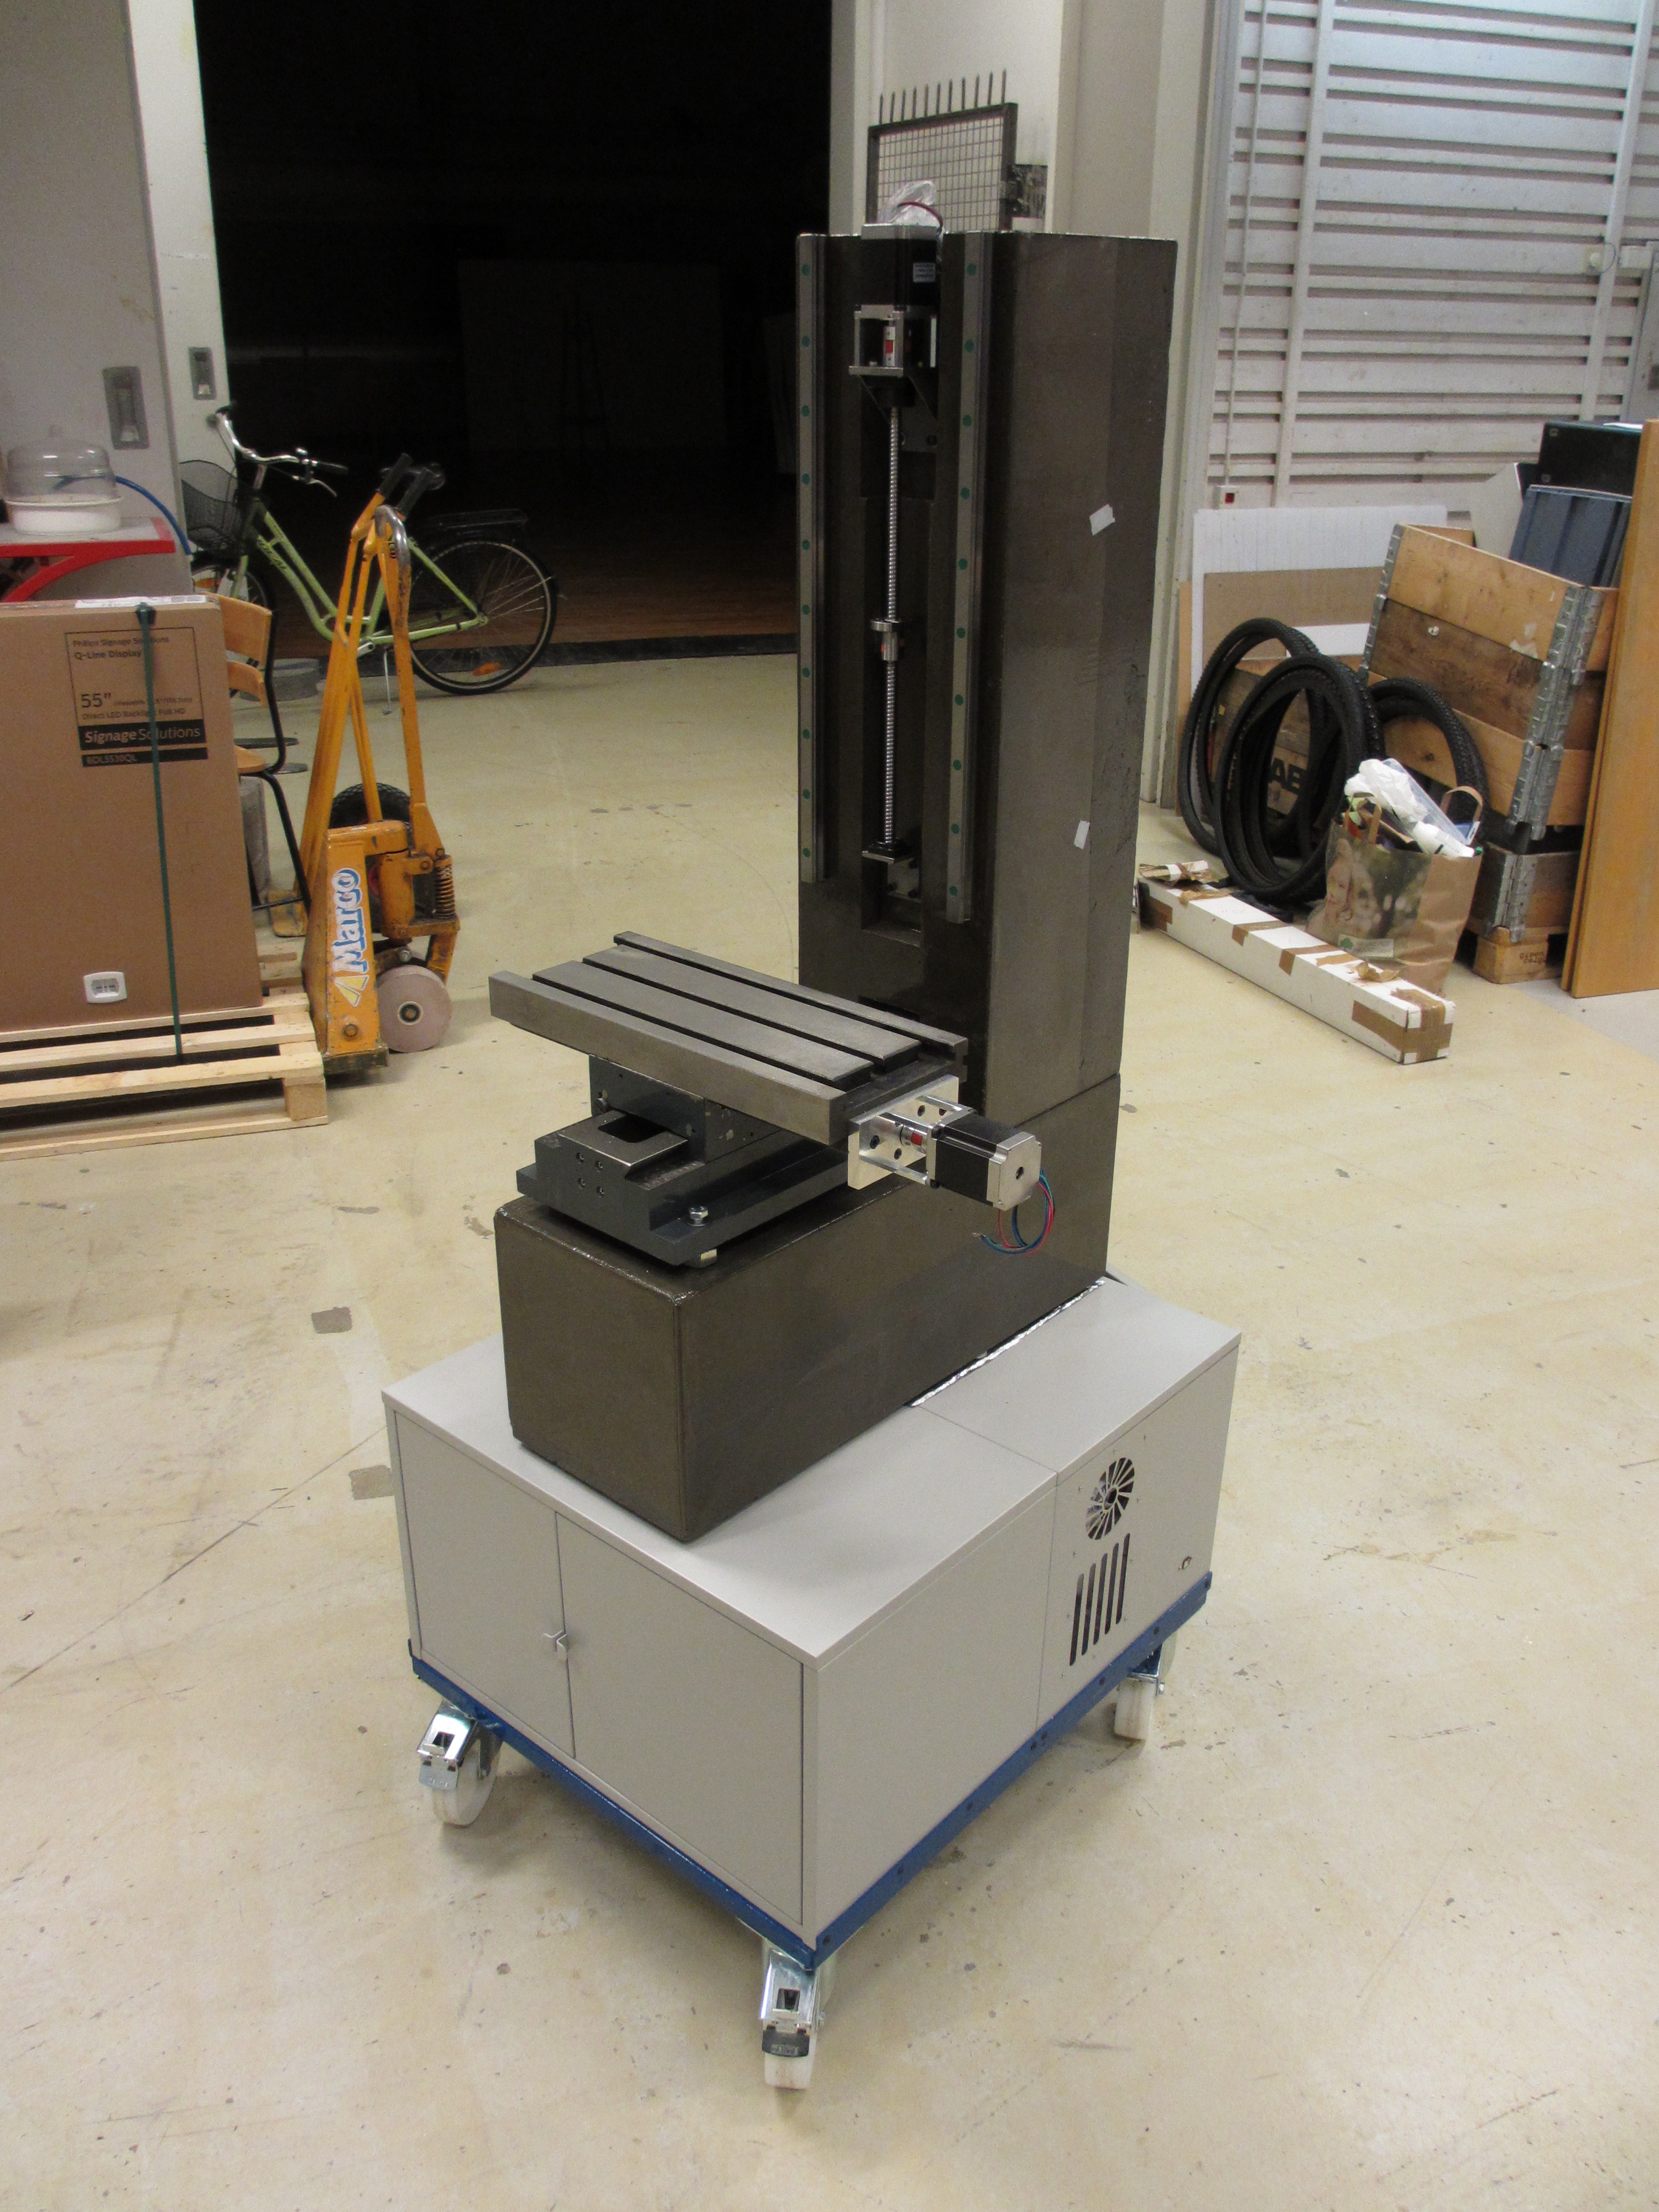
After putting it together, I did a rough check to see if the tower is perpendicular enough to the table (the table has adjustable feet for fine tuning, but I want to verify that the range of adjustment is enough).
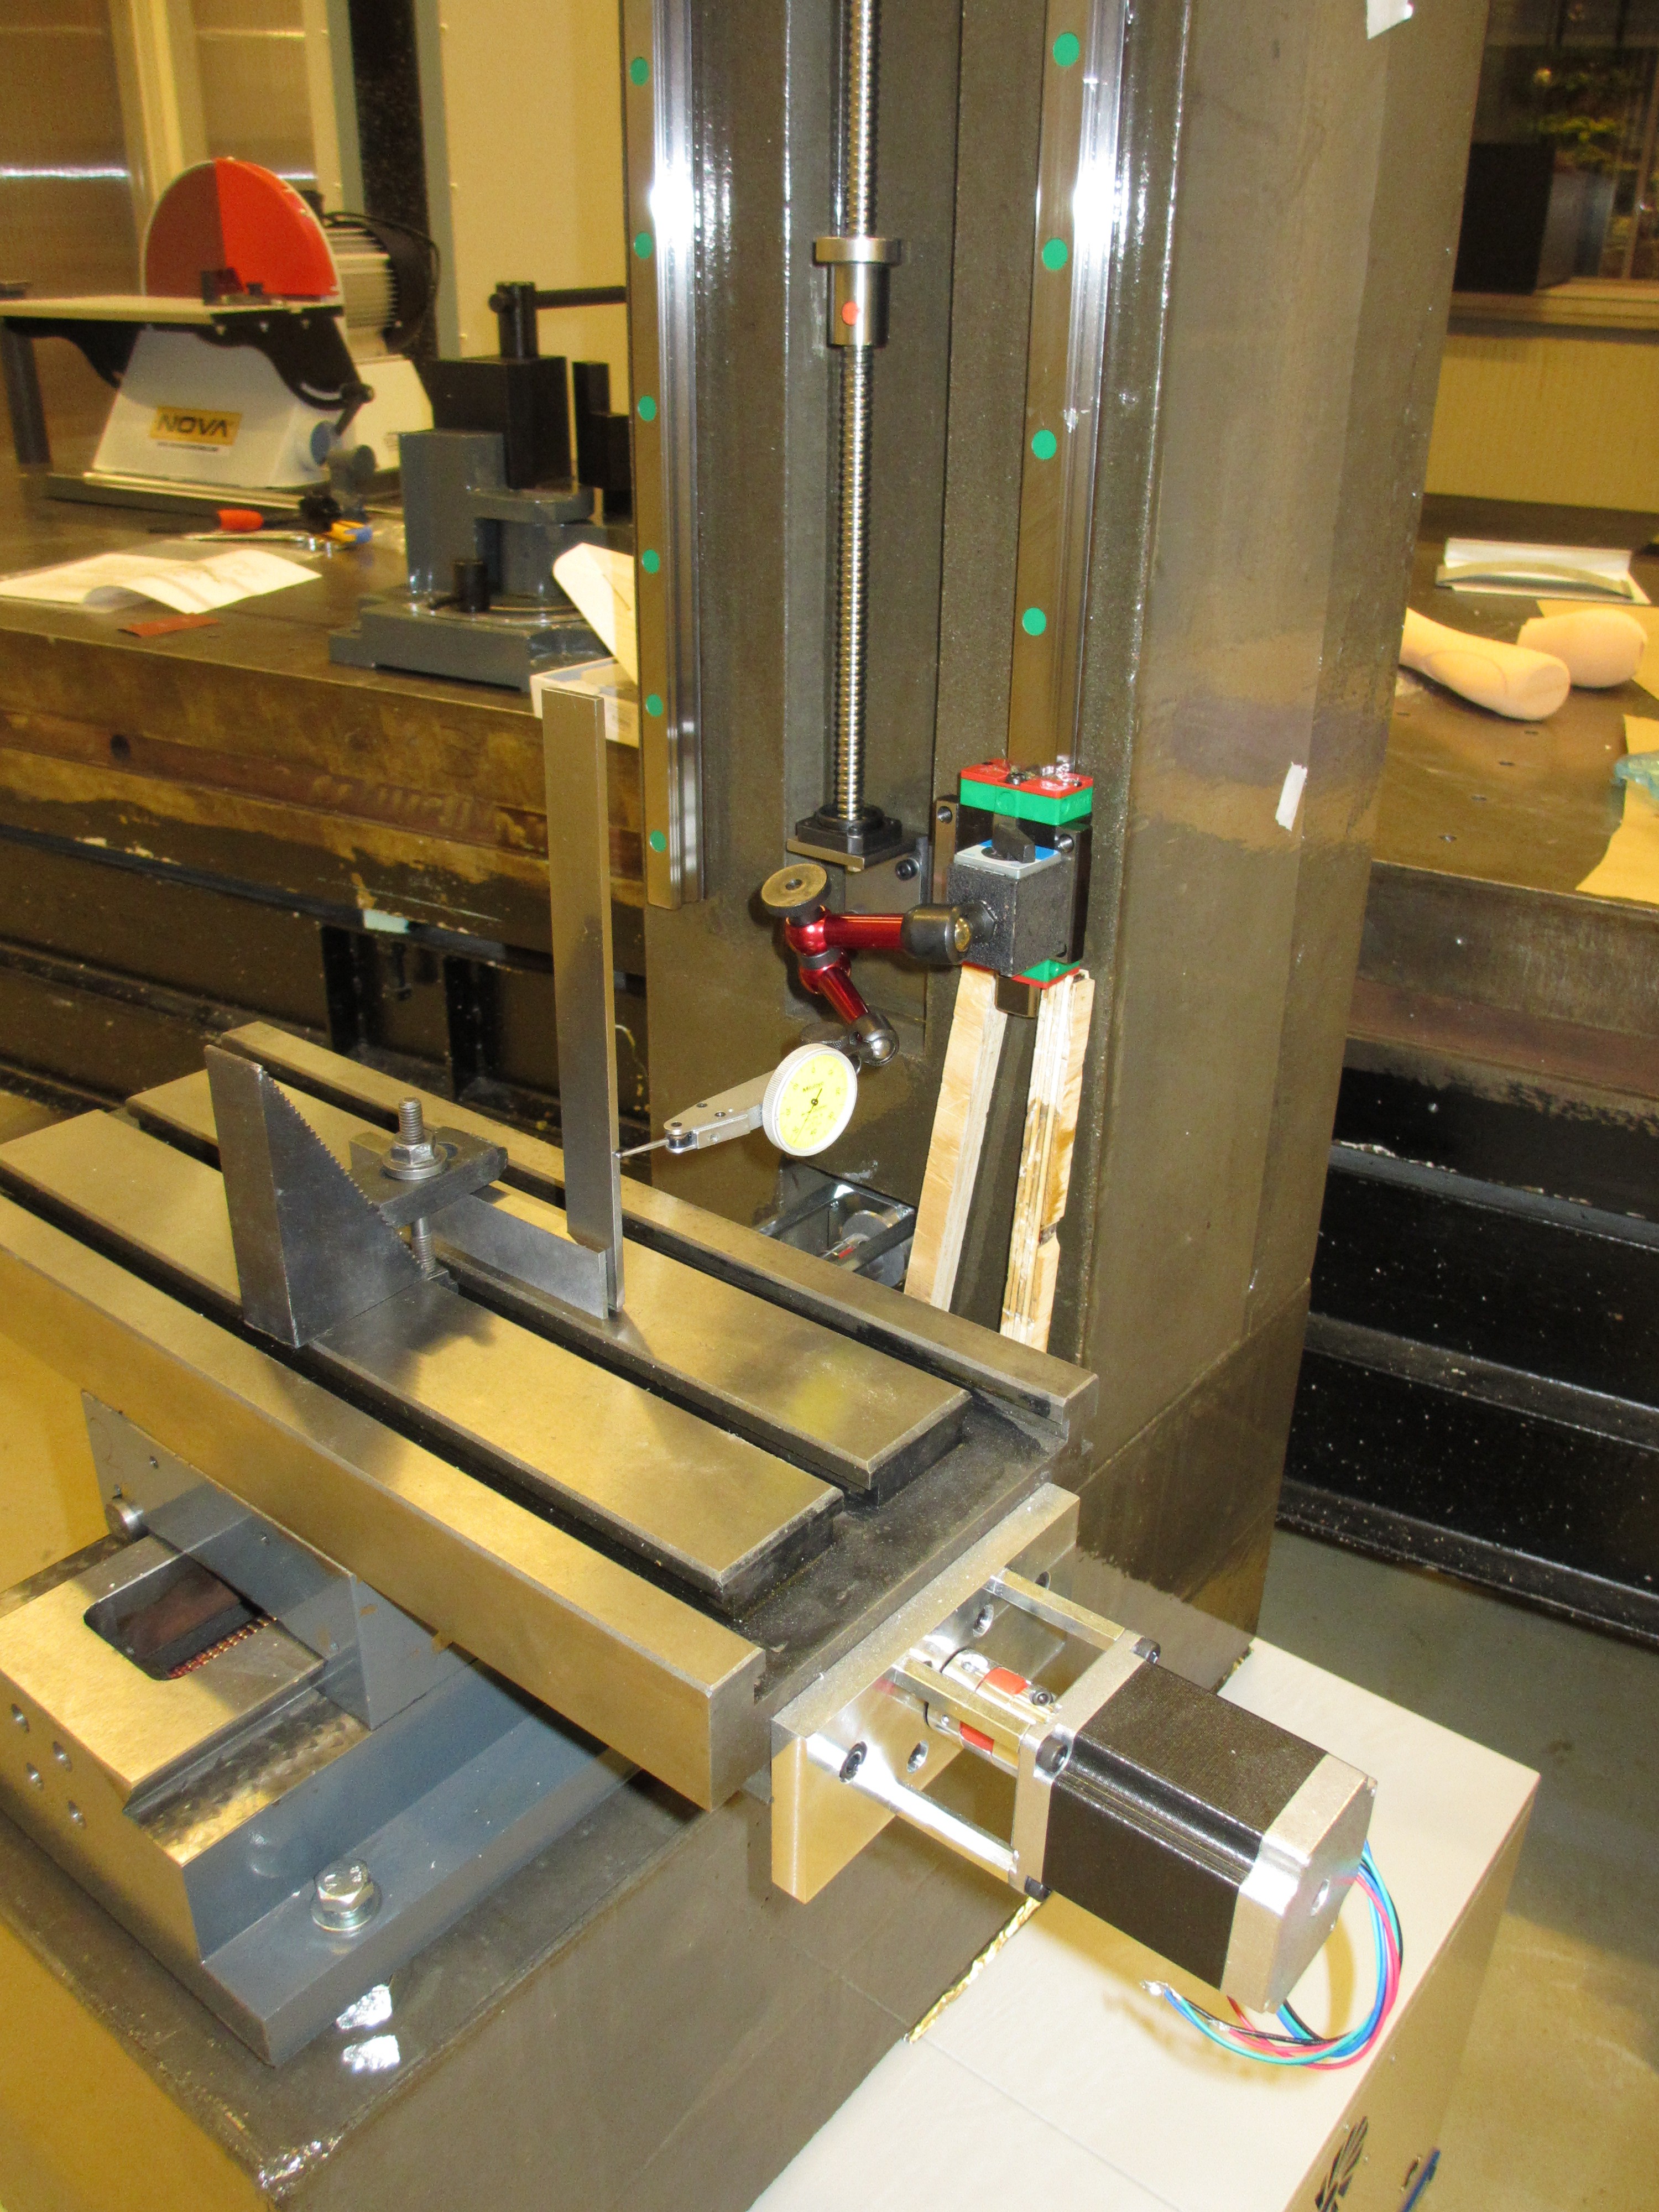
After checking perpendicularity in both directions, It's now ready for the next step. That is to lift the tower up again, add some polyester putty in between the tower and the base, then set it down again. This will ensure a perfect interface surface, which stiffens the structure and prevents twisting or bending the base or the tower when tightening the bolts that hold them together. Here goes:
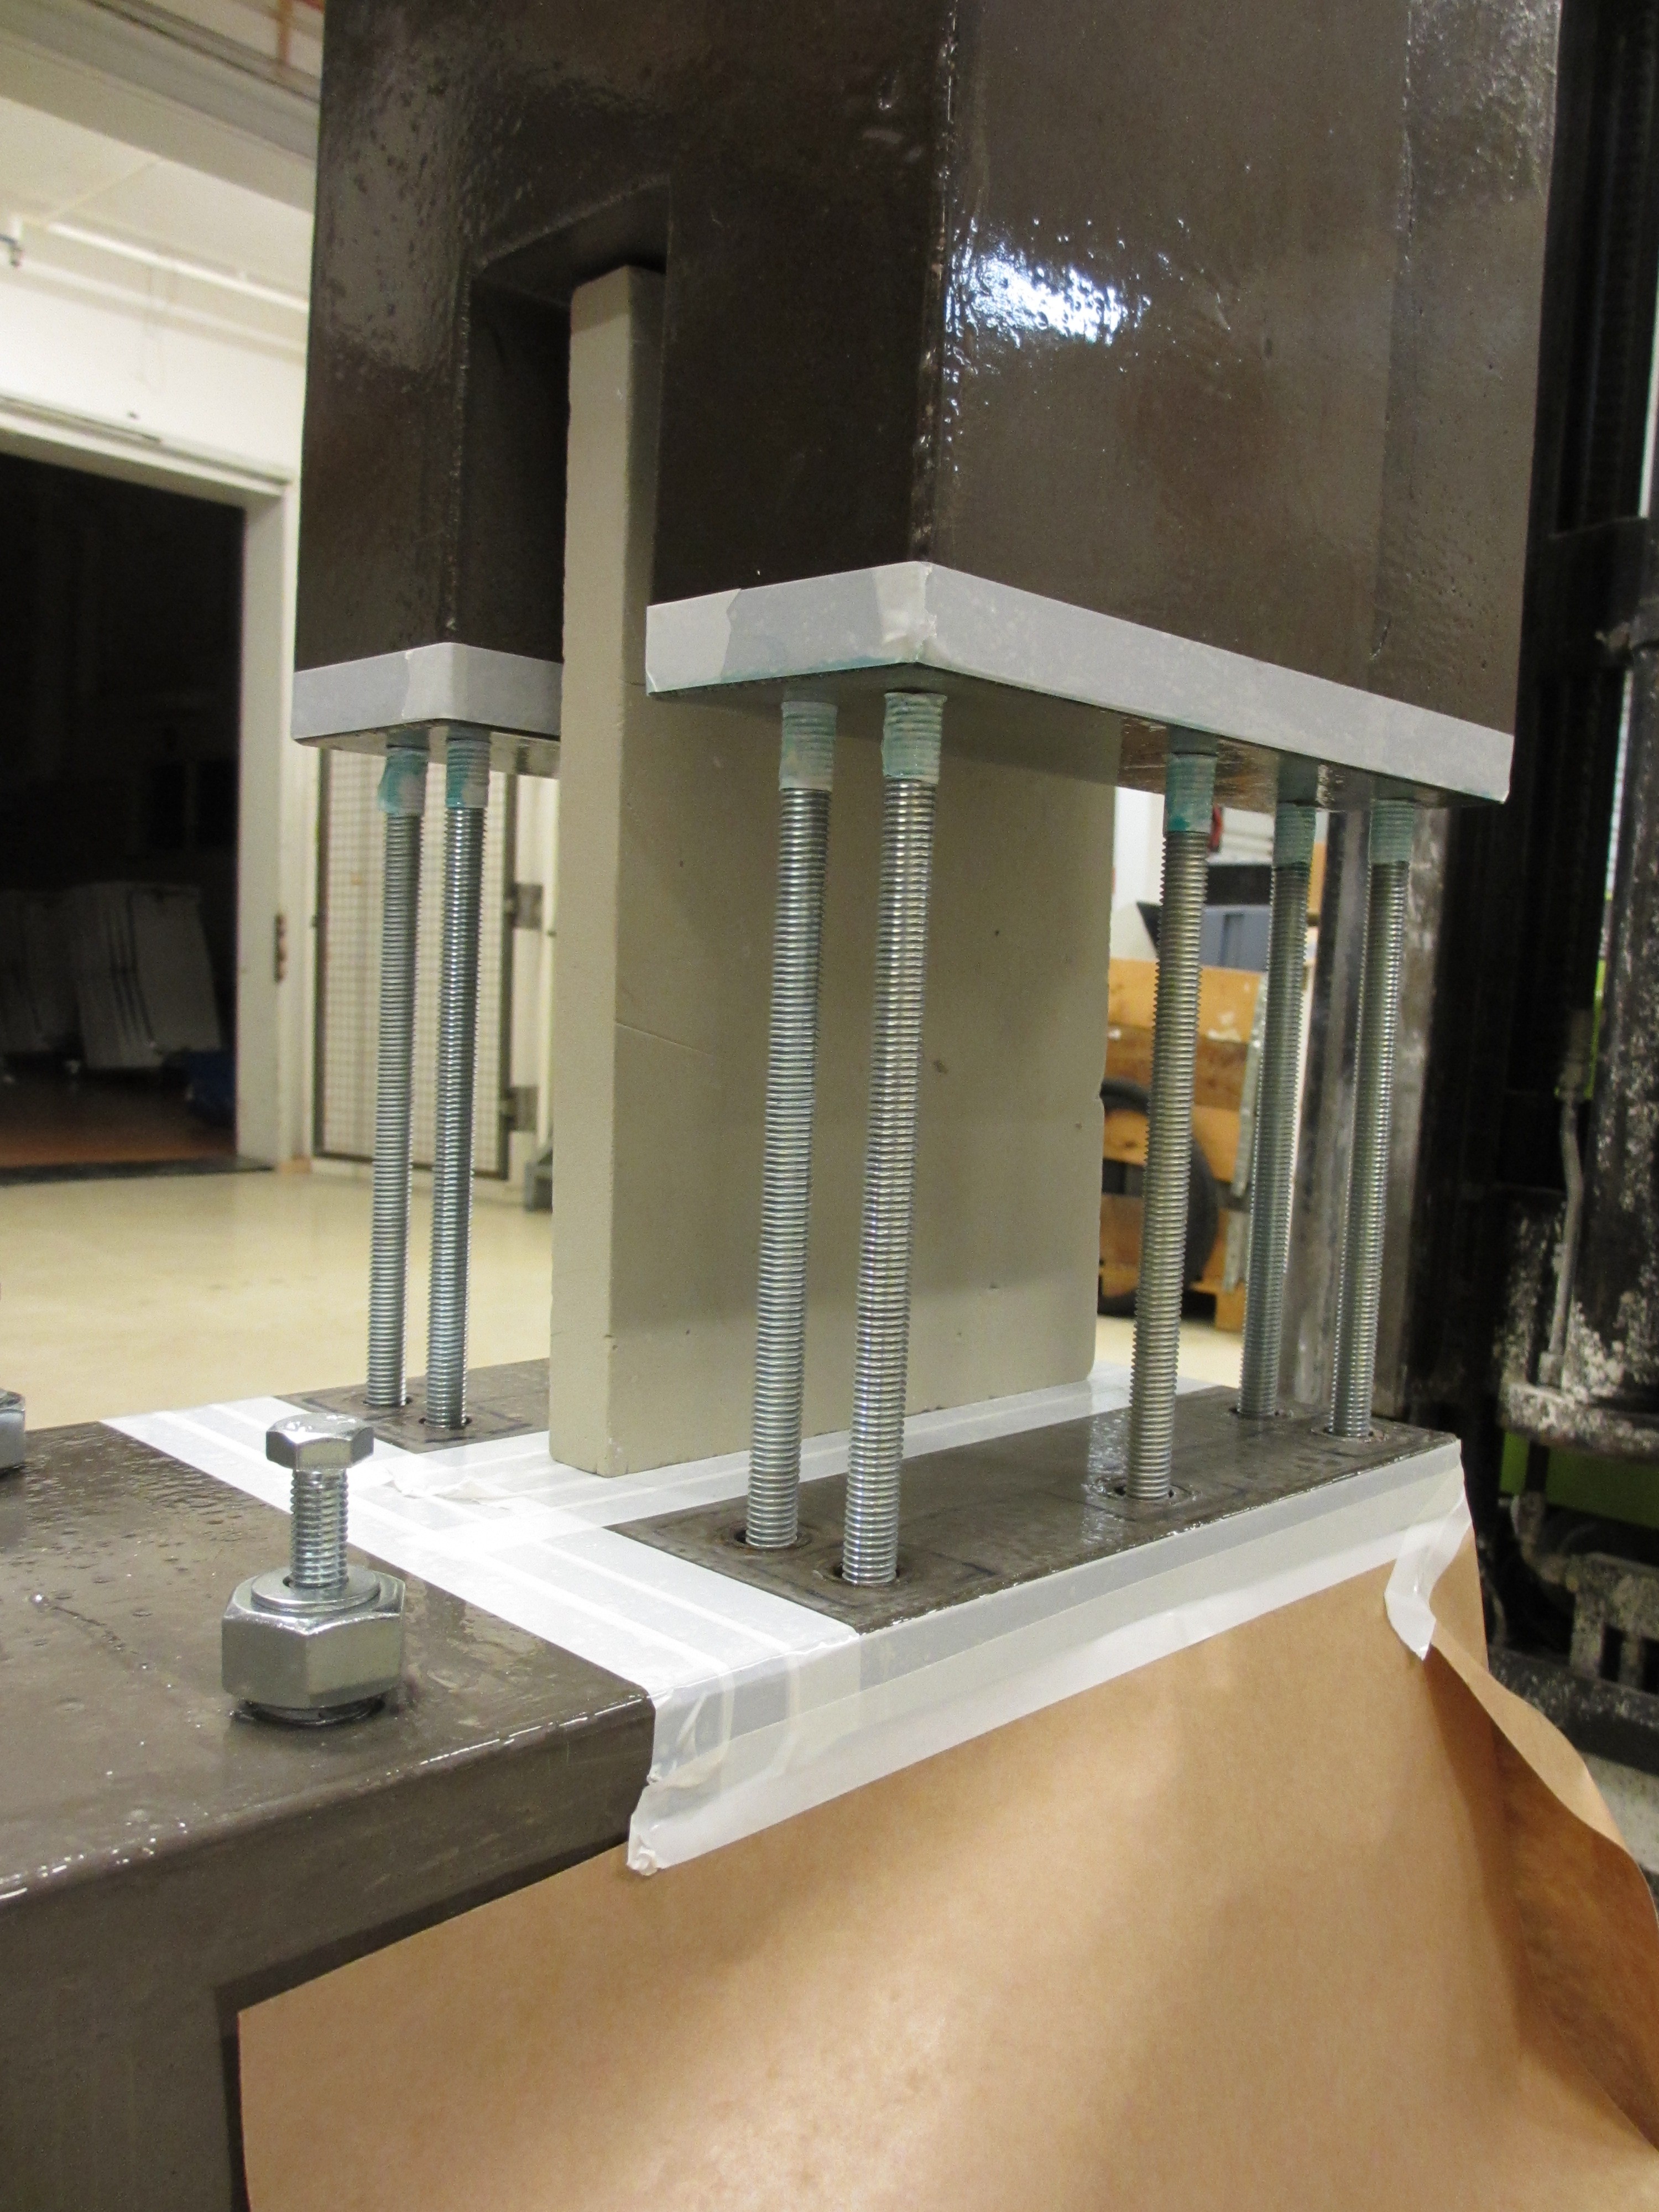
The top surface (the bottom of the tower) has been brushed with PVA release agent, to make sure it is still removable should I ever wish it. It's also a backup; if I should fail this step I still have another chance. I've also added masking around the mating surfaces and the rods. There is also a gray safetyblock in the center, this is to protect my fingers from getting crushed if the tower should drop while I'm doing this. It would still fall over, but that's not as dangerous.
I did some preliminary tests with the putty ("chemical metal" in this case), and found that the window of workability was impossibly short for such a critical step. It was supposed to cure in about 10 minutes, but before 5 minutes had passed it was already hard. So I cooled the putty to 0 degrees using icewater and reduced the amount of hardener to 1% by weight (recommendation was 2-4%). This gave me about an 8 minute window within which the putty was still soft enough.
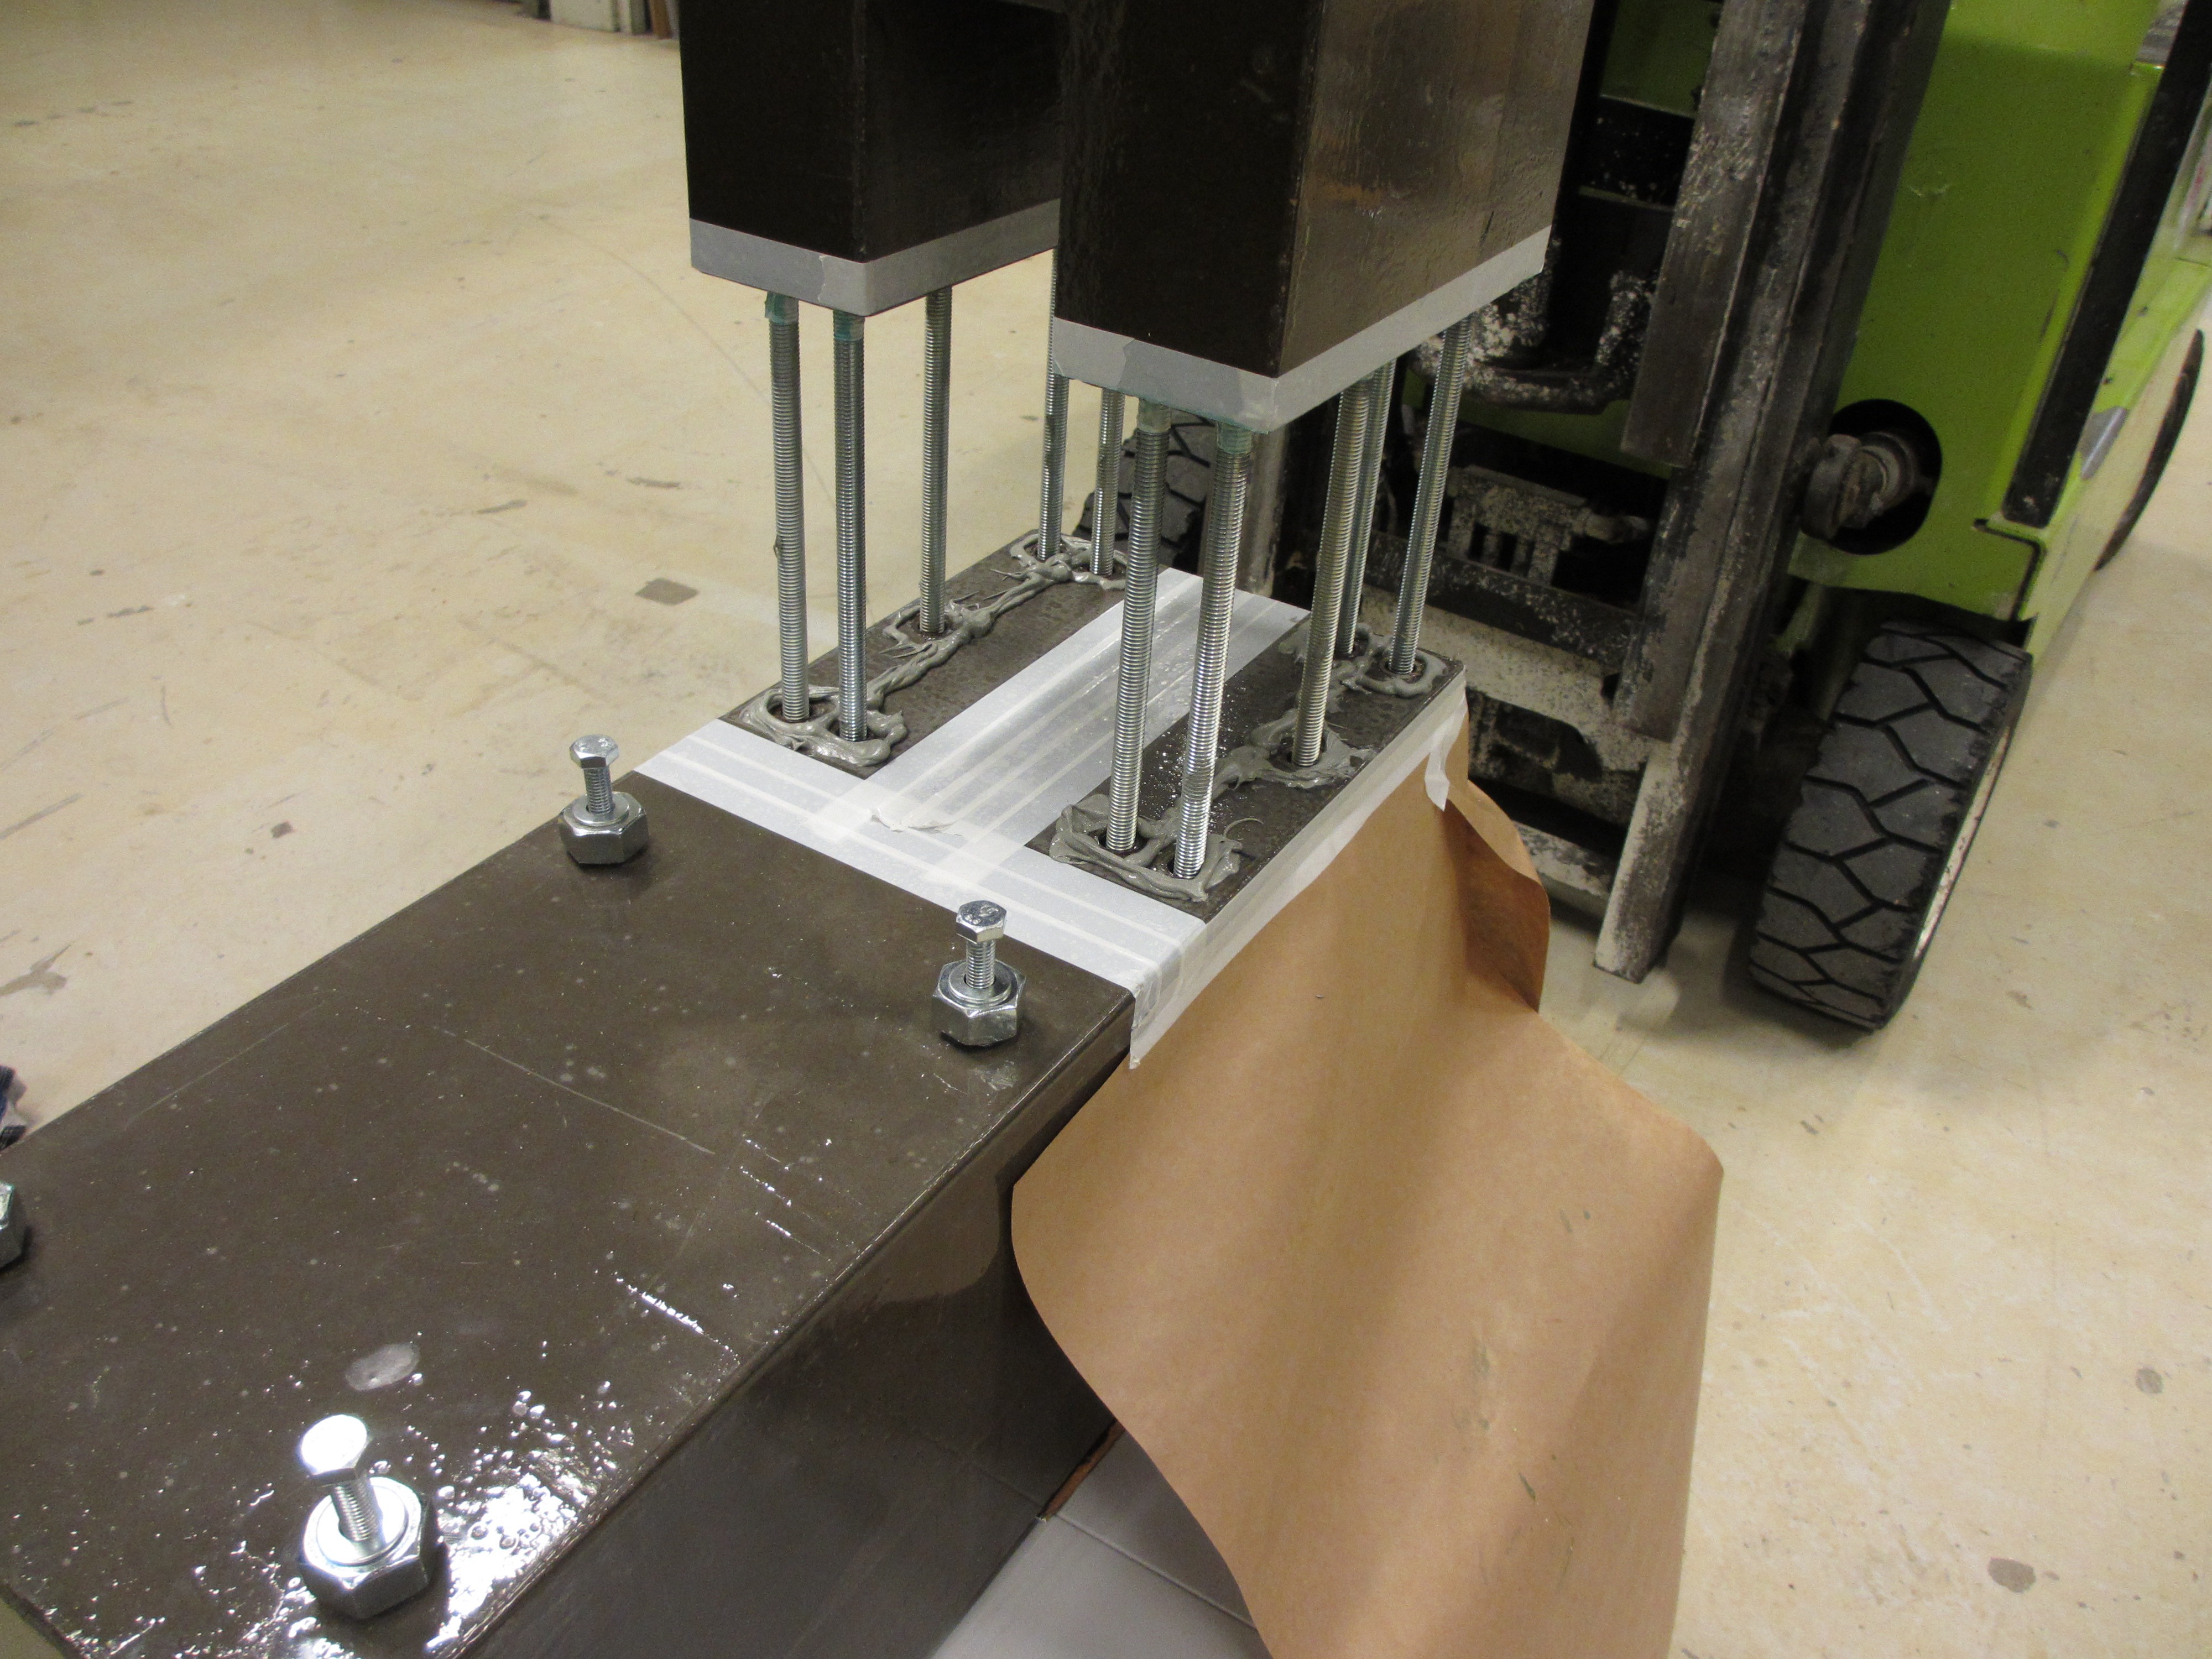
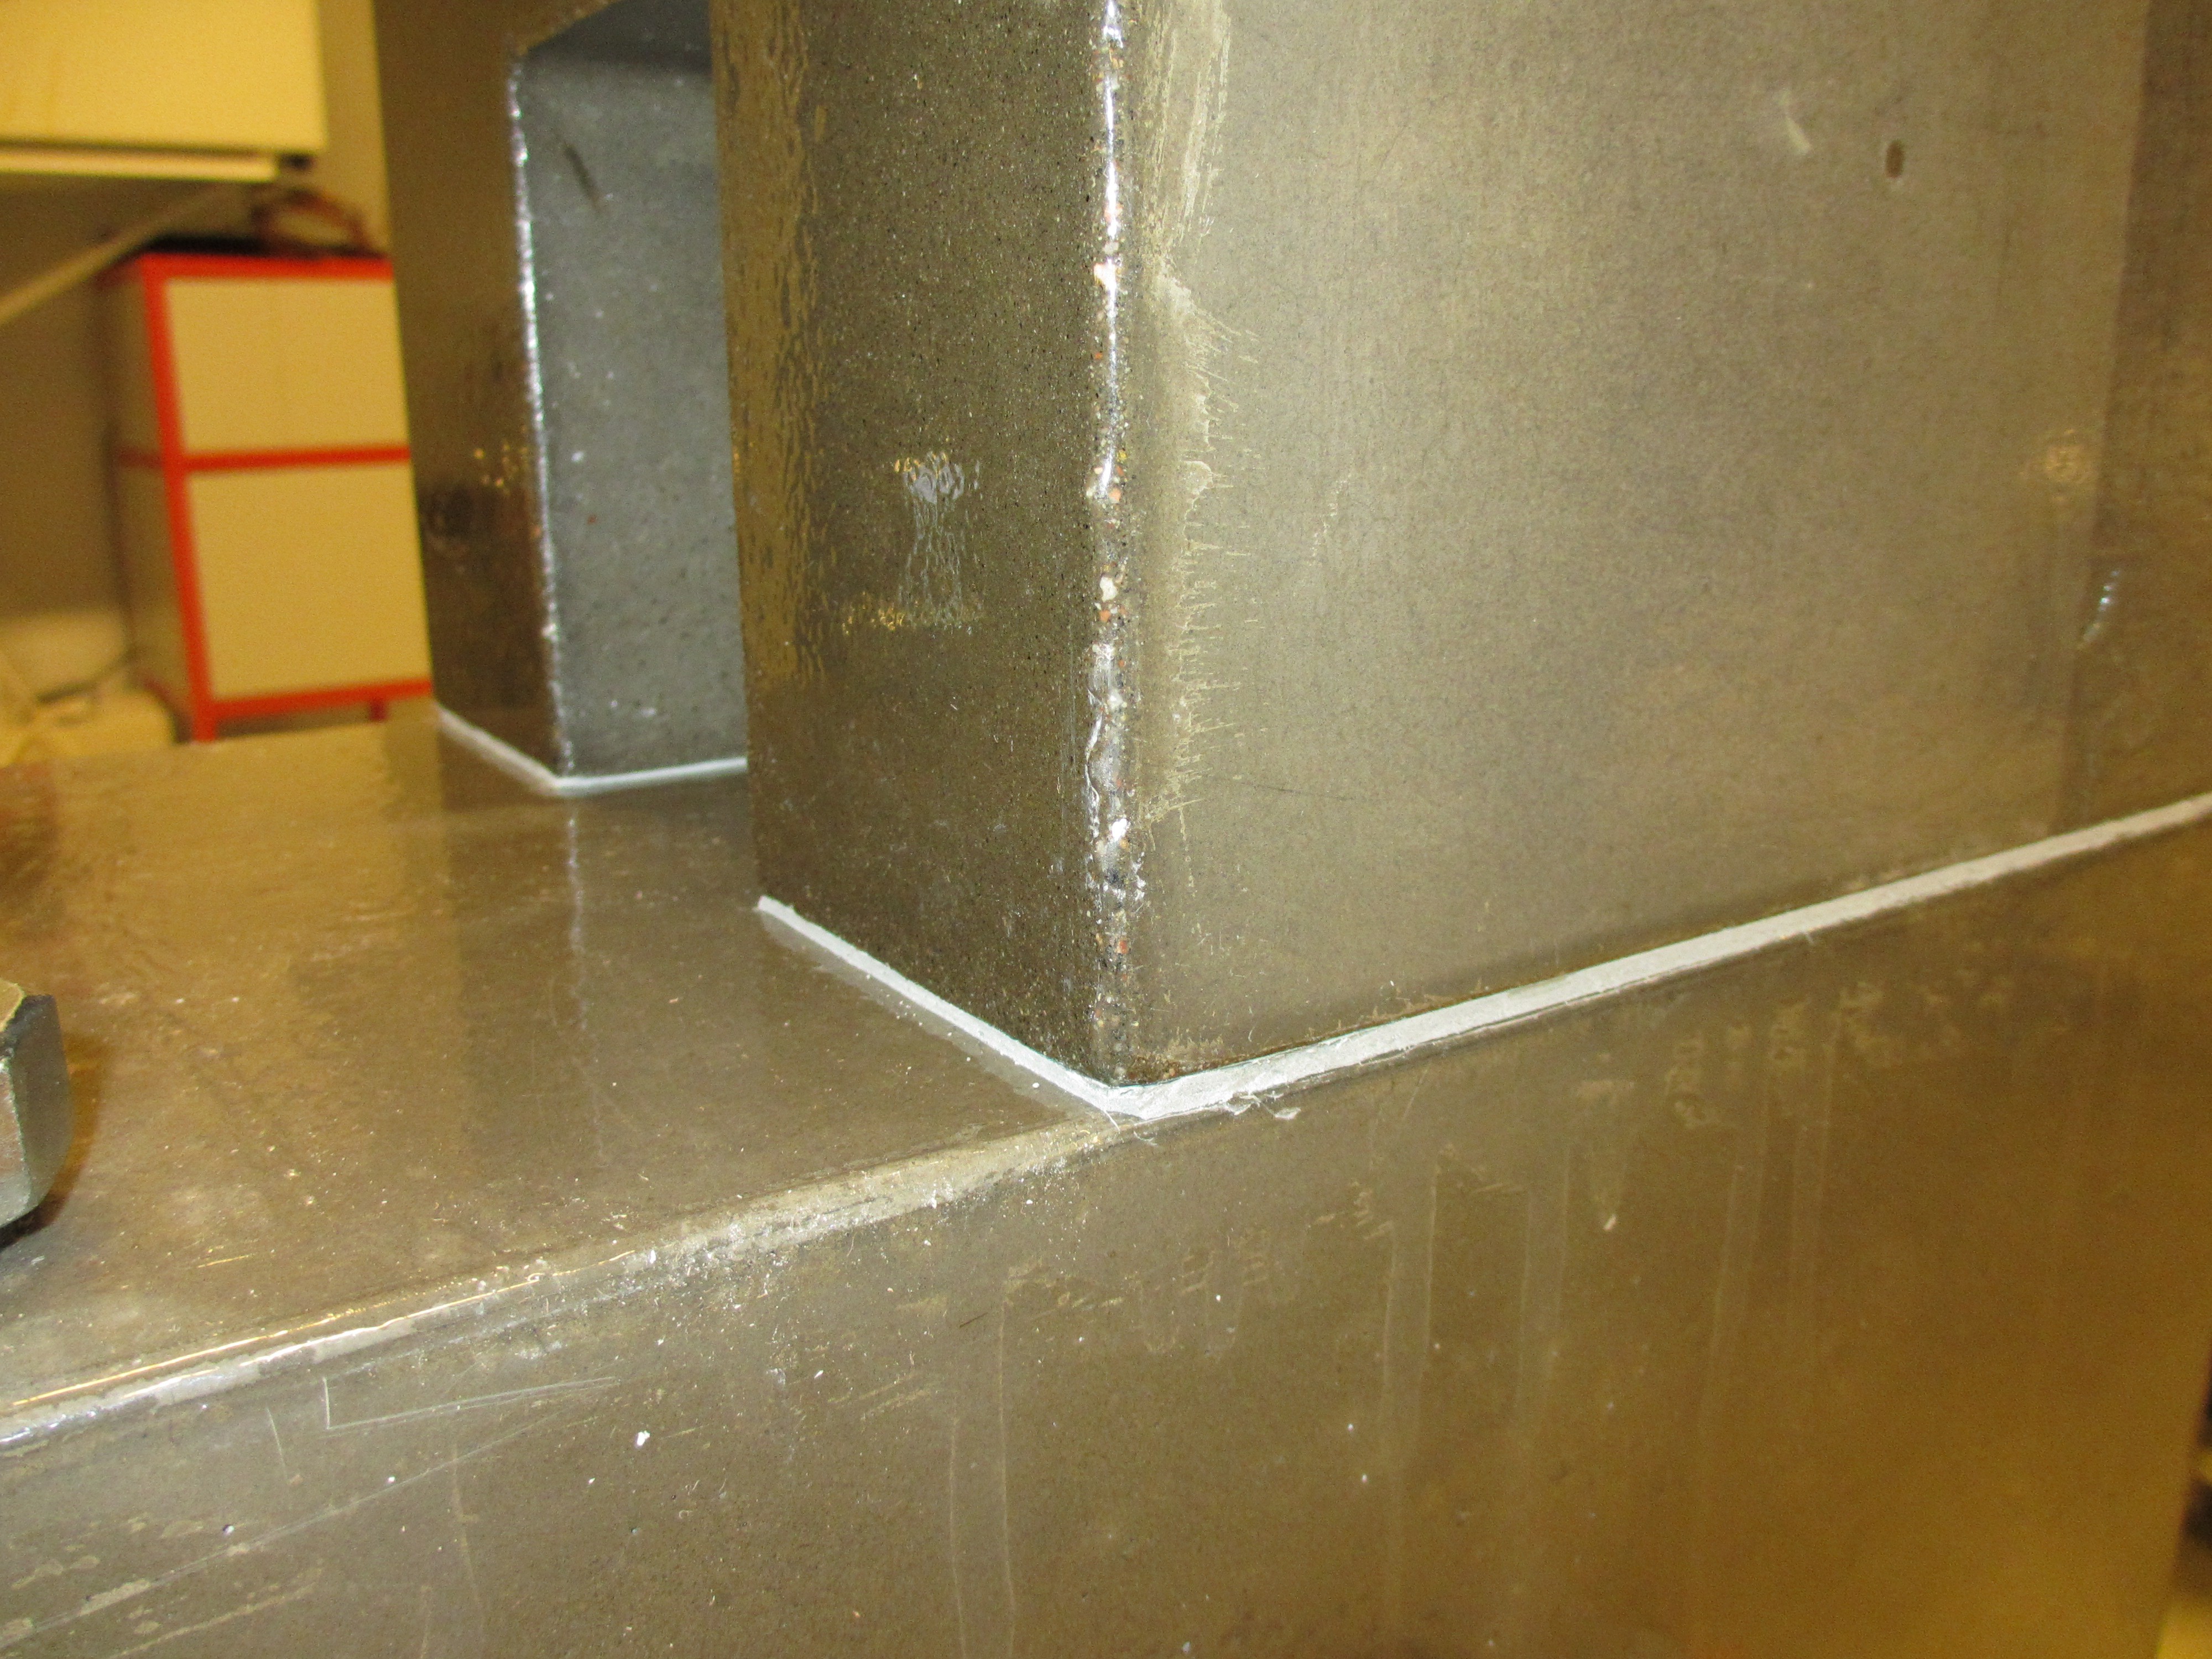
Putty is in place. Dropping the tower! After dropping it down i started shaking it around to make sure the putty would spread throughout. Eventually putty was flowing out around almost all edges, so I would call it a success. Once it cured to a clay-like consistency I cut the overflow with a knife and removed the masking tape. This is the result:
After letting it cure over night I started torquing the nuts. I had made holes in the roof of the electronics enclosure to allow me to assemble it while it is mounted to the carriage, but the hole pattern had a terrible mismatch. Only 5 out of 10 nuts could be fastened with a socket as intended. I can't make the holes any bigger since they need to match the rubber caps and keep the dust out. So instead I welded allen heads to five of the nuts:
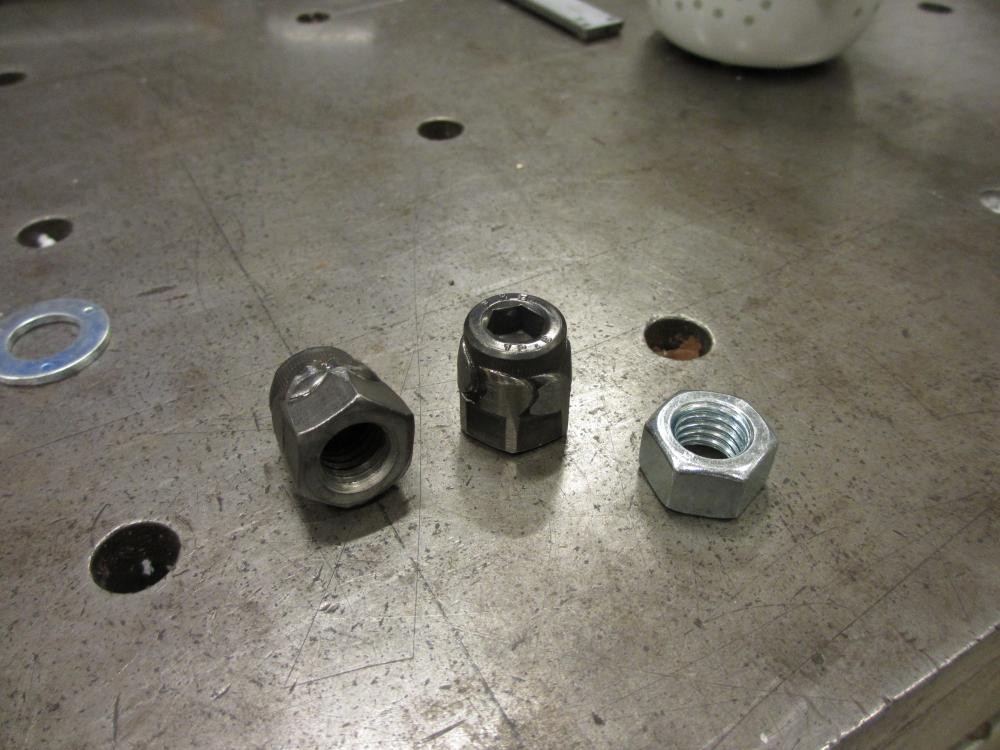
This presents a potential problem where the threaded rod could bottom out inside the nut, which would make it entirely useless. So after carefully verifying this for each of them, I added some thread locking agent and torqued all the bolts. Finally done!
Next up I'll start sketching the final concrete cast; the part that holds the spindle. Once that has been cast, heat-treaded and machined, only the electronics remain. And of course an enclosure around the milling area, but I won't start building that until after I get the machine up and running...
Discussions
Become a Hackaday.io Member
Create an account to leave a comment. Already have an account? Log In.